The Ultimate Red Velvet Cake Recipe for Special Occasions
Surprising fact: more than 60% of home bakers say a showstopping dessert wins the celebration before the first slice is served.
This Website contains affiliate links. That means I may earn a small commission if you purchase through my links, at no extra cost to you.
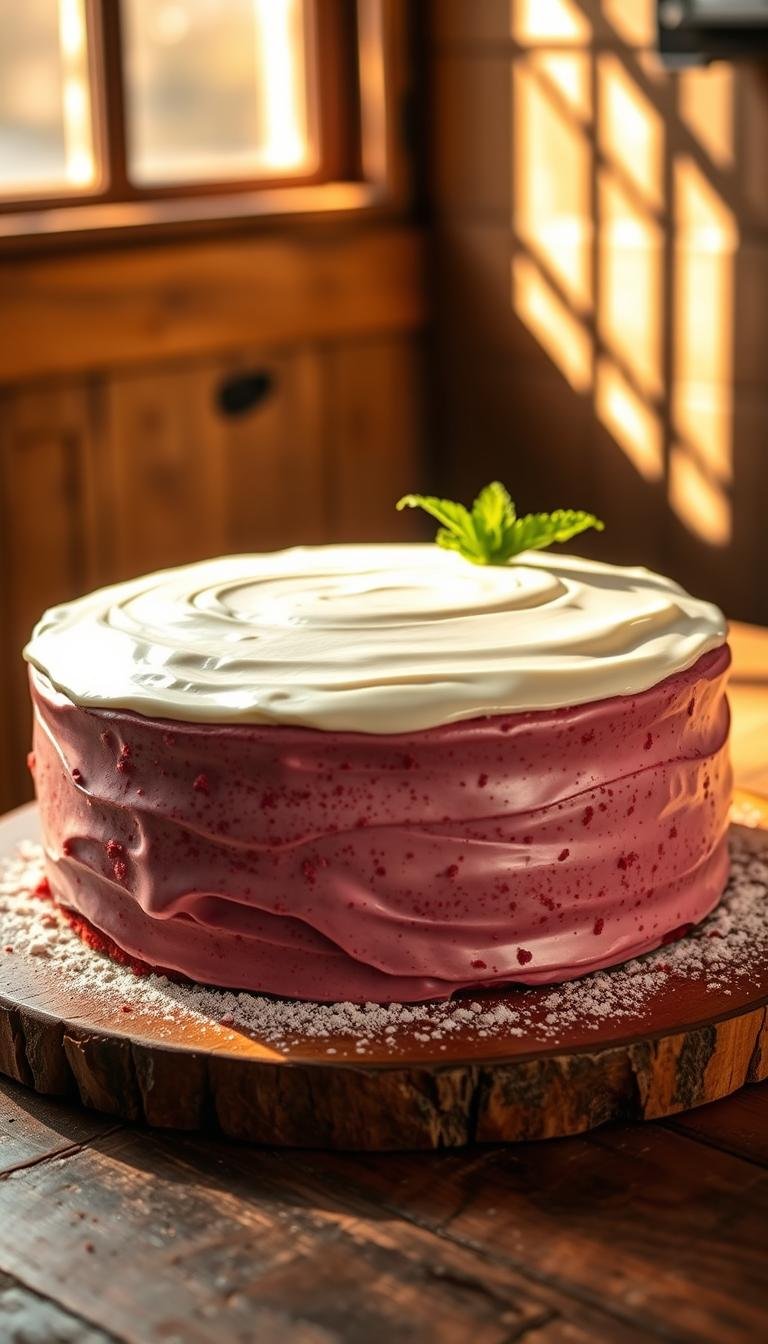
This recipe blends mild cocoa, tangy buttermilk, sweet vanilla, and a touch of butter to create a dense yet velvety crumb that feels plush in every bite.
Techniques like using cake flour and whipping egg whites separately lift the crumb without extra fat. Gel food coloring gives a vivid hue with less liquid, and beet powder works as a natural option.
Expect bakery-style results: smooth cream cheese frosting, clean layers, and precise bake times that fit a reliable workflow from mixing to chilling so slices cut cleanly for special-occasion plating.
Key Takeaways
- Not just tinted vanilla: cocoa and buttermilk create balanced flavor.
- Use cake flour and folded egg whites for a tender, airy crumb.
- Gel color or beet alternatives control hue without extra liquid.
- Follow exact oven temps, pan choices, and timing for consistent layers.
- Includes troubleshooting, storage, and variations for every occasion.
Why This Red Velvet Cake Belongs at Every Celebration
This recipe earns its place at gatherings by combining four simple pillars: mild cocoa, tangy buttermilk, warm vanilla, and buttery richness. These ingredients create a delicately chocolaty, tangy, and buttery profile that differs from a typical chocolate cake.
Buttermilk and a splash of vinegar activate baking soda to give a fine, velvety crumb that slices cleanly. That reaction helps the layers rise gently and keeps texture tender without excess heaviness.
Natural cocoa powder whispers chocolate rather than shouting it. This subtle approach enhances tenderness and lets frosting and decorations take center stage for parties and holidays.
Vanilla rounds the flavor, adding balanced sweetness that pleases most guests. The traditional cream cheese frosting provides silky richness and a slight tang that complements the batter without being cloying.
- Scales easily for tiered or simple formats.
- Uses accessible ingredients and standard kitchen tools.
- Consistent results come from quality ingredients, proper mixing, and precise baking.
In short: this method turns skeptics into fans by delivering reliable, celebration-ready slices every time.
Ingredients and What They Do in a Red Velvet Cake
A precise mix of acidic dairy and measured fats shapes the batter’s texture and flavor. Below are the key ingredients and the roles they play so you get predictable, tender layers every time.
Buttermilk and vinegar for tang and lift
Buttermilk provides acidity that activates baking soda for a gentle rise and the cake’s signature tang. A splash of white vinegar boosts that reaction and helps maintain color and crumb.
Natural cocoa powder for subtle chocolate notes
Use natural cocoa (about 2 tablespoons) so it reacts with acid and keeps the crumb tender. Avoid Dutch-processed cocoa here; it won’t interact the same way.
Fats: butter plus oil
Butter gives flavor and a slight aeration. A neutral oil preserves moisture so slices stay soft over several days.
Leavening, color, and room-temp mixing
A modest dose of baking soda balances the acids for even lift without giant holes. Choose gel red food coloring for deep hue or beet-based alternatives for natural tint. Bring eggs, dairy, and fats to room temperature so they emulsify smoothly in the bowl.
“Weighing flour and sugar and sifting cocoa avoids lumps and keeps the texture consistent.”
| Ingredient | Role | Pro tip |
|---|---|---|
| Buttermilk | Acid, tenderizes, reacts with soda | Measure; keep cold but add at room temperature |
| Natural cocoa powder | Subtle chocolate, interacts with acid | Sift before adding |
| Butter + oil | Flavor + lasting moisture | Use unsalted butter; weigh fats |
| Baking soda | Leavening with acid | Use exact amount to avoid over-rise |
| Gel or beet color | Color without excess liquid | Gel for intensity; beet for natural tint |
Essential Tools and Prep for Bakery-Style Results
Start with reliable gear and organized prep to turn a home kitchen into a mini bakery. Proper tools speed the process and reduce mistakes so your final layers look and slice like a pro’s.
Stand mixer or hand mixer setup
Use a stand mixer with a paddle attachment for the cleanest creaming and consistent batter development. If you rely on a hand mixer, increase mixing time slightly to match the same texture.
Prepare pans and release aids
Grease and line cake pans with parchment rounds for tidy edges and easy release. Trace and cut rounds a few minutes before you bake; it saves time while pans heat.
Mise en place and room readiness
Set up mise en place: weigh dry ingredients and pre-measure wet components into bowls so assembly flows without pause. Bring dairy, eggs, and butter to room temperature for an even emulsion and smooth batter.
“A clear workspace and a sturdy bowl keep you focused and prevent overmixing during crucial minutes.”
- Keep a scale, spatulas, and a sturdy bowl within reach.
- Consider cake strips or a DIY band to encourage flat tops.
- Preheat the oven and position racks for even air circulation.
- Plan chill time after frosting so slices hold clean edges for serving.
Step-by-Step: Make the Batter Like a Pro
Get a smooth start by whisking flour, cocoa powder, salt, and baking soda before any wet additions. This evens out leavening and prevents pockets of cocoa.
Use a clean bowl and sift or whisk the dry ingredients together so the mixture is uniform.
Creaming and combining
Beat butter and sugar until just combined. Add oil, then egg yolks and vanilla, mixing on low with a stand mixer and paddle attachment if available.
Build a silky batter
On low speed, alternate the dry ingredients with buttermilk. Start and finish with the dry mix to keep structure. Mix only until combined to avoid overdeveloping gluten.
Fold for loft
Whip the reserved egg whites to soft peaks in a separate mixer bowl. Gently fold them into the batter last for an ultra-velvety crumb.
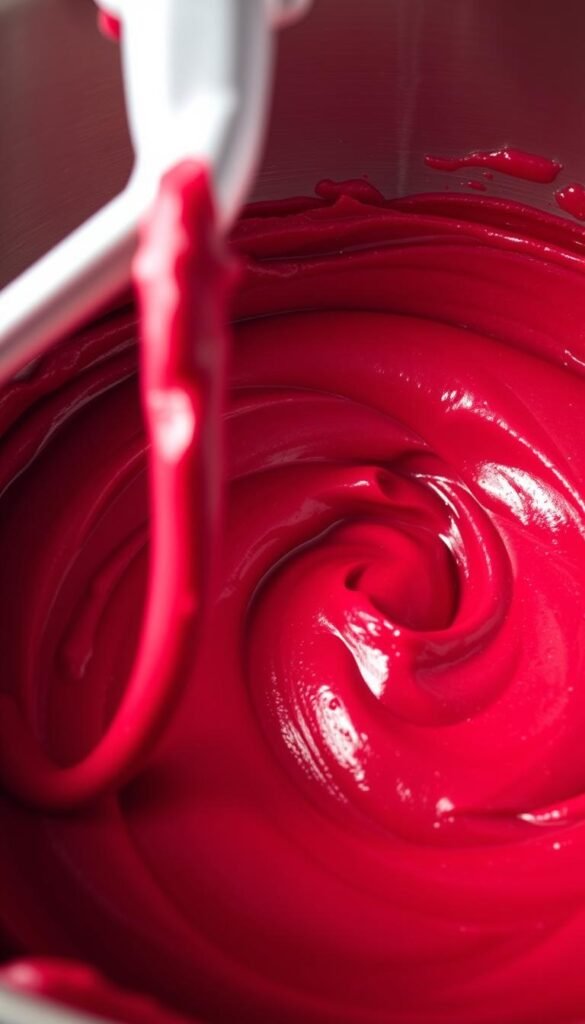
- Add gel color gradually until the hue is even without thinning the batter.
- Scrape the bowl to catch any unmixed flour or cocoa.
- Portion batter evenly into prepared cake pans—use a scale for identical layers.
- Smooth tops lightly and bake at 350°F. Check after the early end of the window; centers should spring back and a toothpick come out clean.
Tip: Cool in pans for a few minutes, then transfer to a rack to stop carryover baking.
| Step | Purpose | Tool | Timing |
|---|---|---|---|
| Whisk dry mix | Even leavening and cocoa | bowl | 2–3 minutes |
| Cream butter & sugar | Incorporate air and flavor | stand mixer / mixer with paddle attachment | 3–4 minutes |
| Alternate dry & buttermilk | Silky, stable batter | mixer (low speed) | 2–3 minutes total |
| Fold egg whites & color | Light crumb and even hue | spatula | 2–3 minutes |
Cream Cheese Frosting That’s Silky, Stable, and Pipe-Ready
Start with structure before style. Use full-fat brick cream cheese and softened unsalted butter for a firm base that still tastes lush. Brick-style cream cheese gives the body needed for clean piping; tub varieties can run thin.
Build and finish the frosting
Combine room temperature cream cheese and butter in a clean bowl. Beat on low in a mixer until completely smooth before adding sifted confectioners’ sugar.
Mix sugar in on low, then briefly increase speed to medium for a silky texture. Avoid overmixing after the sugar goes in; too much air loosens the frosting.
“Chill the frosting about 20 minutes to help it hold piping shapes and borders.”
- Balance sweetness with a pinch of salt and a splash of vanilla.
- If too thin, add a bit more cream cheese or a touch more sifted sugar.
- Reserve a portion in a piping bag for pearls, swirls, or rope borders.
| Step | Why it matters | Tool |
|---|---|---|
| Use brick cream cheese | Provides structure for piping and stable borders | — |
| Soften unsalted butter | Ensures smooth emulsion and rounded flavor | — |
| Sift sugar, mix low → medium | Silky finish without excess air | bowl, mixer |
| Chill ~20 minutes | Firms frosting for clean decoration | refrigerator |
This frosting pairs perfectly with the layered cake in this recipe, and it remains stable at typical room temperature unless the kitchen gets very warm.
Pro Tips for Moist, Even Layers Every Time
Small, consistent steps in prep and timing make the difference between a moist layer and a dry one. These tips help you turn a good bake into a predictable result for every celebration.

Weigh and sift
Weigh flour to avoid dense results. Sifting dry ingredients removes lumps and keeps the crumb soft.
Mix gently and monitor time
Mix only until combined after each addition to prevent overdeveloping gluten and tunneling. Use your mixer on low and watch batter texture rather than the clock.
Control domes and bake even
Wrap pans with cake strips so layers bake flatter and edges stay lighter. If domes form, level gently with a serrated knife for clean stacking.
Test doneness and chill before assembly
Test early: pull layers as soon as tops spring back and a toothpick comes out clean or with a few moist crumbs. Chill the layers briefly before stacking; a cooler surface resists crumbs and sliding.
- Give the crumb coat a short chill to lock in stray crumbs.
- Keep frosting just firm enough to hold detail; too soft can cause layers to shift.
- Work in a cool room and follow a measured, repeatable process so every bake yields the same moist, even layers.
“Weighing and chilling are the quiet steps that make bakery-style slices possible at home.”
| Tip | Why it matters | Quick action |
|---|---|---|
| Weigh flour & sift dry ingredients | Prevents dense crumb | Use a scale; sift before mixing |
| Use cake strips / level domes | Flatter tops; cleaner stacks | Wrap pans or trim domes |
| Test doneness early | Avoid overbake and dryness | Check springiness & toothpick |
| Chill layers & crumb coat | Stabilizes for neat slices | Cool 10–20 minutes before stacking |
Red Velvet Cake Variations and Pan Options
Pick the right pan and you control height, slice size, and serving speed for any gathering.
Two 9-inch rounds bake about 30–32 minutes. Use them for classic layered presentation and a stable surface for piping and decorations.
Three thin 9-inch layers bake roughly 22–25 minutes each. Thinner layers give dramatic height and more frosting between layers, which intensifies the frosting-to-crumb ratio.
Sheet, cupcakes, and Bundt options
A 9×13-inch sheet takes about 40–45 minutes; a 12×17-inch thin sheet 20–25 minutes. These pans convert the recipe into easy, uniform slices for events.
Cupcakes bake around 20–21 minutes. Fill liners two-thirds full for even domes and consistent batches.
A 10-cup Bundt pan needs about 60 minutes. Grease thoroughly and test doneness with a toothpick deep into the center.
“Use a scale to portion batter so every layer and cupcake bakes evenly.”
- Start checking early—ovens vary; rely on spring-back and toothpick tests as well as minutes on the clock.
- Rotate pans if your oven has hot spots to ensure uniform color and rise.
- Adjust frosting quantities to suit thinner layers or sheet formats; thinner layers often need less cake per serving but more frosting surface area.
| Format | Bake Time | Notes |
|---|---|---|
| Two 9-inch rounds | 30–32 minutes | Classic stacking; good for piping and tall presentation |
| Three 9-inch thin layers | 22–25 minutes | More height; higher frosting ratio between layers |
| 9×13-inch sheet | 40–45 minutes | Serves many; slice into uniform portions |
| 12×17-inch thin sheet | 20–25 minutes | Quick bake; great for catering trays |
| Cupcakes (standard) | 20–21 minutes | Fill liners 2/3 full for even domes |
| 10-cup Bundt | ~60 minutes | Longer bake; grease well and test center with a toothpick |
Storage, Make-Ahead, and Freezer-Friendly Strategies
Good planning extends freshness and keeps decorations safe. Simple steps let you prep layers or a finished cake ahead without losing flavor or structure. Follow timing and wrapping tips so slices look and taste their best on event day.
Refrigeration timelines and serving prep
Keep a frosted cake refrigerated up to five days if it is covered tightly. Chill the assembled cake for 30–60 minutes before slicing to set the frosting and cut clean edges.
When ready to serve, bring the cake to room temperature so flavors and texture open up. Let it sit for about 30–60 minutes depending on kitchen temperature.
Freezing, wrapping, and thawing
Freeze unfrosted or frosted layers for 2–3 months. Wrap layers tightly in plastic wrap, then foil, or use an airtight container to prevent freezer burn.
Thaw overnight in the refrigerator, then allow time at room temperature before serving. This gradual tempering reduces condensation and keeps the frosting from weeping.
“Label and date frozen portions so you can plan service without surprises.”
- Wrap warm layers: sealing slightly warm locks in moisture before freezing.
- Refrigerate frosting separately if making ahead; rewhip softened cream cheese briefly for a smooth finish.
- Note: oil-forward recipes feel moister when chilled; butter-forward cakes are best at room temperature.
- Use a sturdy cake carrier for transport and protect decorations during moves.
| Action | Why | Timing |
|---|---|---|
| Chill assembled cake | Sharper slices, fewer crumbs | 30–60 minutes |
| Refrigerate frosted cake | Safe fresh window | Up to 5 days |
| Freeze layers or cakes | Long-term storage | 2–3 months |
| Thaw | Protect texture, avoid condensation | Overnight in fridge, then room temperature before serving |
Final note: label frozen items and plan the thaw time into your prep schedule so the recipe performs reliably for any gathering.
Troubleshooting Texture, Color, and Frosting Consistency
A quick checklist clears most problems fast. Start with oven calibration, ingredient temperature, and mixing speed before changing the recipe.
Dry or dense crumb
Check for overbaking and excess flour. Use a clean toothpick test: if it comes out with moist crumbs, pull the layer early.
Avoid overmixing the batter. Combine until just mixed, use room-temperature eggs and fresh baking soda or soda to lift the crumb.
Muted color solutions
Choose concentrated gel red food dye and keep the acid balance with a splash of vinegar. Natural cocoa or cocoa powder can mute tones—adjust slightly or add more gel to compensate.
Runny frosting rescue
Use full-fat brick cream cheese, sift the sugar, and chill the bowl for 10–20 minutes if it is loose. If curdled, ensure butter and cream cheese were at an even room temperature then mix gently in a mixer.
- Scrape the bowl to fix streaky batter and re-emulsify without overworking gluten.
- Brush slightly overbaked layers with simple syrup to restore moisture, then chill before stacking.
- Balance butter and oil so the crumb stays moist but not greasy.
“Stabilize loose frosting with extra cream cheese or a short chill to keep clean piping.”
| Issue | Likely cause | Quick fix |
|---|---|---|
| Dry crumb | Overbake / too much flour | Weigh flour; check doneness earlier |
| Dull color | Low pigment / wrong acid | Use gel red food; maintain vinegar |
| Runny frosting | Soft fats / overmix | Chill, sift sugar, add brick cream cheese |
Conclusion
Followed step-by-step, this red velvet cake recipe turns home baking into repeatable, bakery-style success.
At its heart is a balance of buttermilk tang, mild cocoa, and buttery crumb, finished with silky cream cheese frosting. The method—whisking, creaming, folding, and tinting—keeps the process simple and reliable.
Mindful timing, oven temperature, and pan prep yield even, moist layers. The recipe adapts to rounds, sheets, cupcakes, or a Bundt so you can match any event and serving plan.
Make-ahead steps and freezing cut stress. Use the troubleshooting tips and weigh ingredients for consistent results. Now bake, slice, and celebrate with confidence—your guests will notice the difference in every delicious minute.
