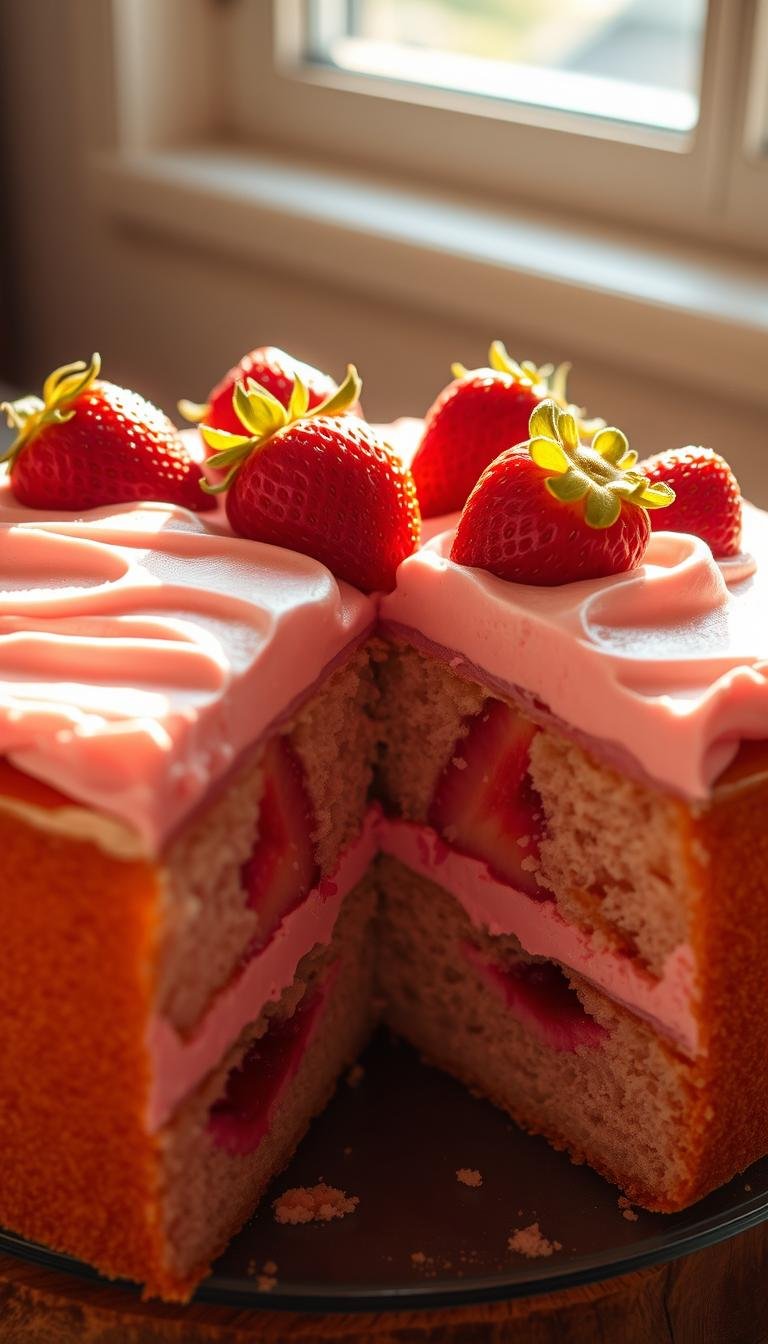
The Best Strawberry Cake Recipe for Any Occasion
Surprising fact: tests show a fruit reduction simmered 40–60 minutes yields about one cup of intense flavor and replaces gelatin for a more natural result.
This Website contains affiliate links. That means I may earn a small commission if you purchase through my links, at no extra cost to you.
This from-scratch approach puts real berries first. Start by reducing fresh or frozen fruit low and slow until thick, then use that reduction in the batter, filling, and frosting for consistent strawberry flavor.
Pro tips: whip egg whites for a lighter crumb, bring butter and milk to room temperature to avoid curdling, and weigh ingredients for reliable results.
Standard pans (2×8-inch) bake about 30–35 minutes at 350°F. Cool layers 10–20 minutes in the pan, then fully on a rack before wrapping and chilling to make assembly easier.
Key Takeaways
- Use a berry reduction (40–60 minutes) for true fruit intensity.
- Room-temp ingredients and egg whites give a tender, light crumb.
- Weigh ingredients and use cake strips for flat, even layers.
- Choose between strawberry cream cheese or buttercream depending on stability needs.
- Bake, cool, wrap, and chill layers to simplify stacking and finishing.
Why this fresh strawberry cake stands out right now
Real fruit, not shortcuts. A long, slow reduction of puree concentrates flavor so the finished dessert tastes like the fruit itself. This method replaces gelatin or boxed mixes with pure intensity.
Pure flavor without shortcuts
Reduce the puree until thick and spoonable; frozen berries work just as well but may need 5–10 more minutes to reach the same consistency. A touch of emulsion or extract can boost mild fruit, and gel color keeps a soft pink after baking.
Tender crumb and bakery finish
Precise mixing—whether reverse creaming or traditional creaming—creates a refined, airy crumb that slices cleanly. Use cake strips and steady oven heat for flat tops and fewer crumbs when frosting.
- Keep key ingredients at room temperature to avoid curdling.
- Weigh ingredients for consistent results across seasons and berry varieties.
- Properly reduced puree prevents soggy layers while keeping moisture.
Result: soft pink layers, smooth frosting, and a reliable, year-round dessert for birthdays, showers, or everyday treats.
strawberry cake recipe: ingredients, tools, and room temperature essentials
Organized prep—measured dry goods and warmed dairy—gives you reliable layers every bake.
Fresh vs frozen berries
Fresh strawberries give bright flavor and need less time to reduce. Frozen strawberries release extra liquid and can take 5–10 minutes longer to reach a thick, spoonable reduction.
Core dry ingredients
Use all-purpose flour with both baking powder and baking soda for balanced lift. A pinch of salt rounds out sweetness and keeps layers tasting clean.
Room temperature essentials
Separate cold egg whites for easy separation, then bring them to room temperature before folding for a smooth batter. Whole milk and butter should also sit at room temperature to emulsify without curdling.
Tools and prep
Use a stand mixer or reliable hand mixer, sturdy mixing bowls, 2×8″ or 2×9″ pans, parchment rounds, and optional cake strips. A scale beats cups for consistent flour measurement.
“Weigh ingredients when precision matters—cup conversions often add too much flour.”
| Item | Why | Tip |
|---|---|---|
| All-purpose flour | Tender structure | Weigh, don’t scoop |
| Baking powder | Primary lift | Sift with dry ingredients |
| Egg whites | Lightness when whipped | Separate cold, then warm to room |
| Stand mixer | Consistent creaming | Use paddle for batter, whisk for whites |
Make a concentrated fresh strawberry reduction
A slow, focused simmer turns plain puree into a glossy, intensely flavored fruit concentrate. Start by hulling 1–2 pounds of berries and blending them in a bowl until smooth. Transfer the puree to a saucepan with optional sugar, lemon zest, a splash of lemon juice, and a pinch of salt.
Blending, simmering, and reducing to intensify flavor
Set the pan over low heat and simmer gently. The goal is to evaporate excess water so the mixture thickens to a tomato-sauce consistency. Stir every few minutes to prevent scorching and keep the texture even.
Cooling, measuring, and how much to use
Timing varies: fresh puree usually needs about 25–45 minutes, while frozen can take 40–60 minutes to reach a glossy body. Watch for reduced volume, deeper color, and a spoonable thickness.
Measure after cooling: expect roughly one cup of reduction from 1–2 pounds of fruit. Split that cup between the batter, frosting, and a thin layer between layers. Let the reduction cool to room temperature before folding into ingredients or buttercream to avoid curdling.
“Taste as you go—add a bit more sugar if the fruit is tart, or a squeeze of lemon to brighten the flavor.”
Store extra reduction in the fridge up to a week or freeze for months. A proper reduction prevents runny frosting and keeps the crumb from becoming overly moist, so take your time—this step makes the most impact on final strawberry flavor in your baked food.
Mix the batter like a pro for fluffy cake layers
Start by preparing the dry mix so every rise and crumb is consistent. Whisk flour with baking powder and salt in a bowl to distribute leavening and prevent pockets of lift.
Make the milk-reduction blend
Combine milk, cooled fruit reduction, vanilla extract, and optional emulsion in a separate bowl. Stir until smooth so the liquid is ready to fold in without shocking the butter.
Cream, add egg whites, and build air
Cream room-temperature butter and sugar in a mixer for 3–5 minutes until pale and fluffy. Add egg whites one at a time, letting each incorporate to keep the mixture stable and airy.

Alternate dry and wet for a cohesive batter
On low speed, alternate adding the dry ingredients and the milk-reduction mixture. Scrape the bowl sides and bottom to keep everything cohesive and avoid overmixing.
- Visual cue: when the batter resembles soft ice cream, the emulsion is right and air is well incorporated.
- Use the paddle on a stand mixer for best results; a hand mixer works with slightly longer mixing.
- Keep mixing speed moderate and use timed beating to prevent tough crumbs.
“If the batter looks like ice cream when finished, it’s properly emulsified.”
Bake, cool, and prep your cake layers
Proper pan prep and oven timing set the stage for even, reliable layers.
Pan prep, oven temperature, and baking time cues
Preheat the oven to 350°F and grease pans with a thin layer of butter or shortening. Line the bottoms with parchment so layers release cleanly and edges stay intact.
Bake 2×8″ pans about 30–35 minutes. For 2×9″ pans, plan roughly 30 minutes. Look for springy centers and a tester that comes out with a few moist crumbs.
Rotate pans if your oven runs hot on one side. Use cake strips to reduce doming and keep tops even. Watch the top color and the gentle pull from the pan sides as additional doneness cues.
How to cool, wrap, and chill for easy assembly
Let layers rest in the pan 10–20 minutes to set the structure. Then invert onto wire racks to cool completely and stop carryover baking.
Once cool, wrap each layer snugly in plastic to lock in moisture and prevent fridge odors. Chill in the refrigerator for at least two hours; you can freeze layers up to a week to firm them for trimming and stacking.
Tip: Have a serrated knife, turntable, and offset spatula ready so you can level domes and assemble without delay.
Choose your frosting: strawberry cream cheese frosting or strawberry buttercream
Decide whether you want a tangy, silky finish or a firm, pipeable exterior before you frost.

Silky cream cheese option with powdered sugar
For a smooth cream cheese frosting, beat room-temperature cream cheese and butter until lump-free. Add powdered sugar gradually, alternating with spoonfuls of reduced fruit for flavor and color.
Adjust spreadability with a little milk or extra reduction. Consider adding freeze-dried powder for more fruit punch without thinning the mixture.
Stable buttercream using pasteurized egg whites
Whisk pasteurized egg whites with powdered sugar until glossy, about 5 minutes in a stand mixer. Add butter in chunks and whip 8–10 minutes until pale and fluffy.
If curdling occurs, melt about 1/2 cup briefly and whip it back in to restore silkiness. Finish with a touch of extract and a pinch of salt.
Color, consistency, and piping tips
- Use gel food color to deepen pink without thinning.
- Whip at moderate speed, then paddle on low to smooth bubbles.
- Plan ≈5 cups of frosting for a two-layer 8-inch cake.
| Frosting | Texture | Best use | Key tip |
|---|---|---|---|
| Cream cheese frosting | Silky, slightly tangy | Smoothing and soft fills | Use powdered sugar gradually; add freeze-dried powder |
| Swiss-style buttercream | White, glossy, pipeable | Sharp edges and piping | Whip egg whites then add butter; fix curdle by melting a small portion |
Assemble with confident technique
A calm, methodical approach during assembly keeps the structure stable and the flavor balanced. Level each cooled layer so the stack sits flat and steady. Use a serrated knife or a cake leveler for a clean cut.
Leveling, stacking, and filling with extra reduction
Brush a thin coat of reduced strawberry on each level to amplify fruit flavor without sogginess. Pipe a small frosting dam around the edge if your filling is soft to prevent seepage.
Spread an even layer of filling in the center, then place the next layer on top. Work quickly but deliberately so the layers stay aligned and the top is level.
Crumb coat and final coat for clean edges
Apply a thin crumb coat of frosting to lock stray crumbs. Chill briefly until the coat firms—this saves time at the final stage.
- Smooth the final coat with an offset spatula and bench scraper while turning the turntable for sharp edges.
- If the room is warm, chill the cake between steps to keep the frosting stable.
- Adjust the frosting consistency: chill if too soft; beat briefly if too stiff.
- Reserve a portion of frosting for borders or piping after the final coat sets.
Tip: Add a light brush of simple syrup (about 2–3 tablespoons or a few thin passes) if layers need extra moisture. Allow the assembled cake a short chill before slicing to get clean, impressive cuts.
Variations, pan sizes, and cupcakes
Changing pan sizes is an easy way to alter presentation without reworking the mixture. Pick the pan that fits your event and timeline, then follow simple timing cues to keep texture and rise consistent.
Standard paths: two 8-inch pans give classic two-layer cakes and bake about 30–35 minutes. Two 9-inch pans bake nearer 30 minutes and yield slightly shallower layers.
Smaller rounds and taller stacks
For a tall, elegant stack, use three 6-inch pans and check at 20–25 minutes. Smaller pans set faster, so test doneness early to avoid overbaking.
Cupcake conversion and timing
To make cupcakes, portion roughly 1/4 cup of batter per liner. Bake at 350°F for about 20 minutes and check for springy tops and a few moist crumbs.
Freeze-dried boost without extra moisture
Use freeze-dried strawberry powder to deepen flavor without thinning frosting or batter. Replace a portion of the reduction in the frosting with powder for a firmer, pipeable cream cheese finish.
- Keep flour and leavening ratios the same when switching pan sizes to preserve structure.
- Use cake strips and parchment rounds for even rise and clean release in all sizes.
- Mix gently before portioning so cupcakes stay light and layers bake evenly.
- Test a single cupcake for timing in your oven before baking all cups.
| Format | Typical bake time | Portioning | Notes |
|---|---|---|---|
| 2×8-inch | 30–35 minutes | Full layers | Classic layers, good for tall frosting |
| 2×9-inch | ~30 minutes | Full layers | Wider, slightly thinner layers |
| 3×6-inch | 20–25 minutes | Tall layers | Smaller pans set faster; trim and stack for height |
| Cupcakes (liners) | ~20 minutes | 1/4 cup batter each | Test one for timing; cool quickly before decorating |
Tip: Adjust cooling and chilling times for smaller formats—mini layers and cupcakes firm faster and are easier to trim and decorate.
Make-ahead, storage, and freezing guidance
Plan storage early so your dessert stays tender and flavorful for days. Covered at room temperature, a well-made cake can last up to five days depending on the frosting. Stable buttercream can sit under a cake dome at room temperature for a couple of days, while cream cheese-based frosting prefers refrigeration.
Room temperature vs refrigeration timelines
If using cream cheese frosting, refrigerate the whole cake. Store airtight to prevent drying and odor transfer. Refrigerated cakes keep up to one week; chill wrapped layers before assembly for easier trimming.
Freezing layers or a fully frosted cake
To freeze layers or a finished cake, wrap tightly in plastic, then a layer of foil. Label with date and type of frosting so you know what’s inside.
Frozen cakes or unfrosted layers last up to two months. Thaw overnight in the refrigerator, then allow extra time at room temperature—about 30–60 minutes—before slicing so the frosting softens for the best texture.
Tip: Save a small cup of extra frosting to touch up after thawing and keep transport steady by maintaining consistent temperature and a level box.
Serving and decoration ideas
Finish simply and with purpose. A few deliberate touches add polish without overwhelming flavor. Keep decorations food-safe and let the natural color and texture lead the design.
Garnish, syrup, and surface care. Top the layers with halved fresh strawberry pieces or whole berries for a seasonal look. Brush layers lightly with a strawberry simple syrup before assembly to add sheen and a hint of sweetness.
For clean edges and a glossy finish, smooth the frosting with a bench scraper. Warm an offset spatula under hot water, dry it, then use it to warm and even the top for a professional shine.
Practical finishing tips
- Pipe delicate shells or rosettes with a medium-stiff frosting for crisp detail.
- Add a whisper of vanilla extract or lemon zest to the final layer to lift the fruit notes.
- Build visual height by mounding berries at the center and scattering a few around the base.
- Keep cream cheese-frosted items chilled until just before serving; use a warm, thin knife for slicing and wipe between cuts.
- Serve slices on a platter with a small bowl of extra reduction so guests can add more fruit intensity.
| Finishing move | Why it helps | Quick tip |
|---|---|---|
| Fresh berry garnish | Bright color and fresh texture | Use whole or halved fruit for contrast |
| Strawberry simple syrup | Adds sheen and subtle sweetness | Brush sparingly to avoid soggy layers |
| Smoothing with warm spatula | Creates glossy, bubble-free surface | Dip spatula in hot water, dry, then smooth |
| Whipped cream or reduction on plate | Restaurant-style presentation | Serve extra in a small bowl at the side |
“Keep decorations simple and functional—let flavor and texture shine.”
Conclusion
Finish with confidence, and rely on three steady steps: reduce fruit until glossy, mix at room temperature, and follow precise bake minutes for even layers.
Tip: reserve the cooled reduction for the batter, the frosting, and a thin layer between tiers to keep fruit notes consistent without sogginess.
Both a tangy cream cheese or a stable buttercream yield great results; pick based on storage needs. Try two 8-inch, two 9-inch, three 6-inch pans, or cupcakes to match the event.
Use freeze-dried powder to boost flavor without adding moisture. Weigh flour and follow clear cues so each batch of this cake recipe looks bakery-ready and tastes authentically fruity.