Strawberry Cake Filling Recipe: Homemade & Delicious
Surprising fact: a quick 5-minute prep and a 12-hour chill can change a spread from runny to perfectly sliceable — small steps, huge payoff.
This Website contains affiliate links. That means I may earn a small commission if you purchase through my links, at no extra cost to you.
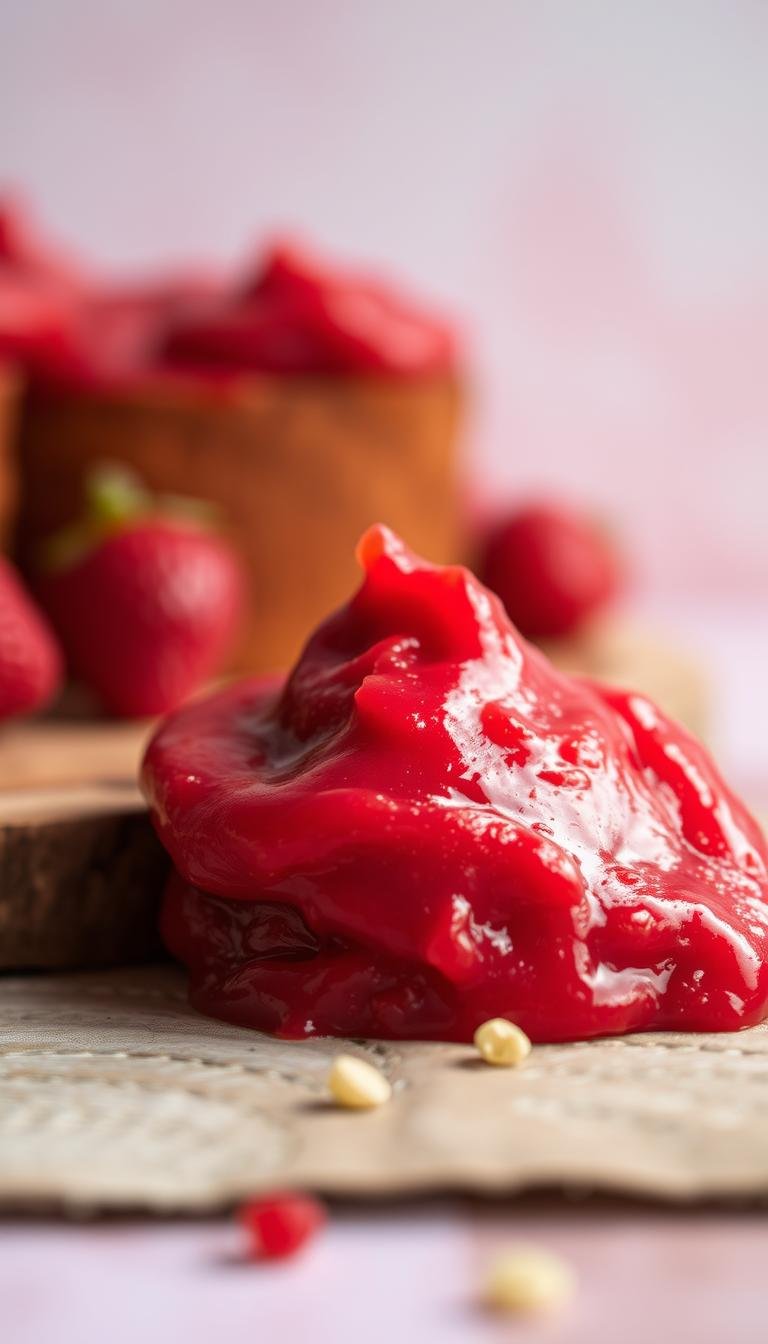
This simple, from-scratch strawberry cake filling uses just a few core ingredients: 3 cups strawberries, 1/2 cup granulated sugar, a splash of lemon, and a cornstarch slurry. A brief simmer and a quick slurry make the mixture glossy and thick enough to coat the back of a spoon.
Why go homemade? Fresh flavor, control over sweetness, and the option to make it chunky or smooth beat jarred preserves every time. Expect about 2.5 cups — enough for a standard three-layer cake — or use it as a topping for ice cream, pancakes, or cheesecake.
Storage tip: cool completely, press plastic on the surface, transfer to an airtight container, and refrigerate up to a week; freeze up to 2–3 months (use arrowroot for best thawed texture).
Key Takeaways
- Prep: 5 minutes; cook: ~10 minutes; chill at least 12 hours for best texture.
- Yields about 2.5 cups — enough for a 3-layer cake or multiple dessert uses.
- Core ingredients are few: strawberries, sugar, lemon, and cornstarch slurry.
- Homemade gives brighter flavor and control over sweetness and texture.
- Store chilled in an airtight container; freeze if needed and use arrowroot for thawed quality.
Why This Strawberry Cake Filling Belongs in Your Baking Repertoire
With just five pantry staples and ten minutes at the stove, you can craft a bakery-style filling.
Control the taste and sweetness: this recipe lets you dial sweetness and add a splash of lemon juice to brighten the fruit flavor. Use fresh for peak character or frozen strawberries when out of season; frozen fruit may need a bit more simmer time to reduce extra water.
Fast, reliable results: about ten minutes of stove time and a cornstarch slurry yield a glossy, stable mixture that chills to a spreadable consistency. A simple buttercream “cake dam” keeps layers neat and prevents bleed-through.
- Easy to make with common pantry items: sugar, lemon, cornstarch, water, and fruit.
- Works year-round and fits busy schedules.
- Economical and additive-free—better taste than jars.
| Feature | Why it matters | Tip |
|---|---|---|
| Five ingredients | Simple to source and adjust | Use real sugar and fresh lemon |
| Quick cook time | Great for weeknight baking | Simmer until glossy and thick |
| Fresh or frozen | Seasonal flexibility | Longer simmer for frozen fruit |
| Chill stability | Spreads cleanly between layers | Chill 12+ hours before assembly |
Ingredients for a Simple, Flavor-Packed Strawberry Filling
Start with a tight list of pantry essentials to build flavor and texture without fuss.
Fresh vs. frozen berries: what to use and when
Use 3 cups of berries — fresh strawberries for peak aroma and color, or frozen for convenience.
If you choose frozen strawberries, thaw and strain excess liquid before you apply heat. Frozen fruit often needs a longer simmer to reach the right body.
Sugar and lemon: balancing sweetness and brightness
Measure 1/2 cup granulated sugar and 1 tablespoon lemon juice. Sugar draws juices and sweetens; lemon brightens the flavor. Taste and adjust if your frozen fruit is already sweetened.
Cornstarch and water: the slurry that creates the perfect texture
Make a slurry of 1–3 tablespoons cornstarch mixed with 1–2 tablespoons cold water in a small bowl. Whisk until smooth, then stir into the hot fruit mixture to thicken without lumps.
| Ingredient | Amount | Why it matters |
|---|---|---|
| Strawberries | 3 cups | Fresh for color; frozen for convenience |
| Granulated sugar | 1/2 cup | Sweetens and helps draw juices |
| Lemon juice | 1 tbsp | Balances sweetness and brightens flavor |
| Cornstarch + water | 1–3 tbsp cornstarch + 1–2 tbsp water | Creates a glossy, spreadable gel when added correctly |
Essential Tools: From Small Bowl to Airtight Container
The right kitchen gear turns a quick stove-top recipe into reliable results every time.
Start with a medium saucepan that gives even heat and a sturdy whisk to blend the cornstarch slurry without lumps.
Prepare a small bowl to dissolve cornstarch in cold water before it meets the hot mixture. This step stops clumps and helps the final texture come together fast.
Keep a mesh strainer handy to drain excess liquid from thawed berries or to refine the texture if you want a smoother finish.
- Reliable measuring cups and spoons keep sugar and water in balance.
- A heat-safe spatula protects pans and makes the “coats the back of a spoon” check easy.
- Use a cutting board and sharp knife for even pieces so the fruit cooks uniformly.
Press food-safe plastic wrap directly on the warm surface to prevent a skin as the mixture cools. Transfer the fully cooled filling into an airtight container to keep it fresh and free from fridge odors.
Keep all tools clean and dry—especially the bowl for the slurry—so the cornstarch hydrates correctly and your homemade strawberry cake filling turns out consistent batch after batch.
How to Make Strawberry Cake Filling Step by Step
With simple steps and steady heat, you can make a bright, jam-like mixture that holds between layers.
Prep the berries and strain excess juice
Finely chop 3 cups of strawberries so they cook evenly. If using frozen strawberries, thaw fully and strain off extra liquid to avoid a runny result.
Simmer with sugar and lemon until saucy
Combine the chopped fruit with 1/2 cup granulated sugar and 1 tablespoon lemon juice in a saucepan. Bring to a light simmer over medium to medium-low heat, stirring often for 6–8 minutes until the mixture looks saucy.
Whisk in the cornstarch slurry
In a small bowl, dissolve 1–3 tablespoons cornstarch in 1–2 tablespoons cold water. Whisk the slurry into the hot fruit and return to a gentle simmer for 1–2 minutes until the cornstarch activates and the sauce coats the back of a spoon.
Cool, cover, and chill
Remove from heat as soon as the glossy sheen appears. Cool completely, press plastic directly on the surface to prevent a skin, and refrigerate for at least 12 hours so the spread sets.
- Tip: Do not overcook after adding cornstarch; too much time or heat can make the texture gluey.
- Use the chilled spread for clean layers in cakes and cupcakes, or store in an airtight container for make-ahead use.
Timing and Texture: The Science of Thick, Spreadable Filling
Timing is everything when you want a glossy, spreadable fruit layer between cake tiers.
Activate starch correctly by fully dissolving cornstarch in cold water before adding it to the hot fruit. This step prevents clumps and ensures the starch hydrates evenly.
How to know it’s done
Watch for two clear signs: the filling turns glossy and it coats the back of a spoon. These cues show proper starch activation and a stable gel that sets after chill.
Fixes for thin or thick results
If the mixture is thin, simmer a few more minutes to evaporate excess water and concentrate flavor. Still thin? Whisk in a small second slurry (1 tbsp cornstarch + 1/4 cup cold water) and simmer briefly.
If it’s too firm, add water 1 tablespoon at a time and stir until spreadable. Remember it will thicken as it cools, so stop when it’s just shy of your target.
Chunky or smooth
Leave soft chunks for texture, mash lightly for small bits, or press through a sieve for a silky result. A quick pulse in a food processor gives control without losing fresh fruit taste.
“Proper starch activation shows as a glossy look and the ability to coat a spoon.”
Pro tip: Limit simmer time after adding the slurry to 1–2 minutes on gentle heat to avoid a starchy taste. Adjust sugar and lemon a bit before the final simmer to lock in the right sweetness and taste.
Fresh Strawberries vs. Frozen Strawberries
Choosing fresh or frozen fruit changes how you manage liquid and how long the pot should simmer.
Liquid management and simmer time differences
Fresh berries usually release less water and need fewer minutes on the stove to reach a glossy, spoon-coating texture.
Frozen berries often unload extra water as they thaw. Thaw fully and strain excess water before cooking. This prevents a soupy result and cuts unnecessary simmer time.
When using frozen, plan for a few extra minutes to evaporate moisture and concentrate flavor. Add water sparingly; the slurry will handle most thickening.
Flavor, seasonality, and budget considerations
Fresh fruit delivers a brighter aroma at peak season, so many bakers prefer to use fresh when available and affordable.
Frozen packs are picked ripe and can be sweeter. Check labels—pre-sweetened brands mean you should cut back on sugar.
“Strain, simmer, slurry, and chill — the same technique yields consistent results whether you choose fresh or frozen.”
| Choice | Liquid notes | Cook time | Tip |
|---|---|---|---|
| Fresh strawberries | Less extra water | Shorter simmer (fewer minutes) | Use fresh for vivid flavor |
| Frozen strawberries | More released water | Extra simmer to reduce moisture | Thaw and strain; check sugar |
| Both | Respond to slurry | Adjust simmer time | Brighten with a dash of lemon juice |
Flavor Variations and Add-Ins
Small additions make a big difference. Add a touch of extract or swap thickeners to change aroma, freeze stability, and appearance without altering the core technique.
Extracts for aroma: Stir in 1/2 to 1 teaspoon vanilla extract for warm sweetness. A few drops of almond extract give a bakery-style twist that pairs well with berries. Add extracts after the heat step so the aroma stays bright.
Freeze-friendly thickener: If you plan to freeze the batch, replace cornstarch with arrowroot. Use about twice the arrowroot amount compared to cornstarch and test for desired set. Arrowroot keeps a clearer, glossy finish and reduces separation on thaw.
- Start with a tiny amount of food coloring to boost the hue—one or two drops is usually enough.
- Use the same method for other fruit preserves—blueberries, raspberries, or a mixed-berry blend work great.
- For a smoother result, press the warm sauce through a fine sieve before chilling.
“A little extract goes a long way—add it after thickening for the best aroma.”
Always taste and tweak warm. A touch more lemon can sharpen sweetness if needed. These tweaks keep your strawberry cake filling versatile and ready for many desserts.
Ways to Use Strawberry Cake Filling
A well-set fruit gel makes assembly neater and gives each slice a clean, professional look. Use it straight from the fridge for tidy layers or thin it with a splash of water for a pourable sauce. Store any leftovers in a covered container in the refrigerator for up to a week.
Layer cakes with a buttercream “cake dam”
Level each layer before assembly. Pipe a ring of buttercream to form a dam around the edge, spoon the spread into the center, then smooth to the barrier.
Chill the assembled cake at least one hour to set the layers for cleaner slicing.
Filled cupcakes and cake rolls
Core cupcakes and add a spoonful of the chilled mixture for a surprise center. For a rolled sponge, spread a thin layer, chill, then roll tightly to keep neat spirals.
Cheesecake topping and trifle layers
Spoon generously over plain cheesecake as a glossy topping. Layer cubes of sponge, chilled spread, and whipped cream for a showy trifle that feeds a crowd.
Ice cream, pancakes, waffles, and French toast
Warm briefly and whisk in a teaspoon of water to make a loose sauce for pancakes, waffles, French toast, or ice cream. Swirl into brownie batter or drizzle over slices for a bright contrast to chocolate.
| Use | Prep tip | Benefit |
|---|---|---|
| Layer dessert | Pipe buttercream dam; chill 1 hour | Clean slices and stable layers |
| Cupcakes & rolls | Core cupcakes; chill spread before rolling | Neat centers and tight spirals |
| Breakfast & ice cream | Thin with water for pourable sauce | Versatile serving—hot or cold |
Best Cake Pairings and Complementary Flavors

Classic vanilla cake and whipped cream
Vanilla cake offers a neutral, tender crumb that lets the fruit note stand out.
Finish with lightly sweetened whipped cream to keep the profile airy and fresh.
Rich chocolate and white chocolate cakes
Use the spread to cut through dense chocolate layers. The bright fruit tone provides contrast and color.
White chocolate pairs equally well, adding a creamy echo that feels decadent without clashing.
Bright partners: lemon cake and pound cake
Lemon or a sturdy pound base balances sugar and boosts perceived freshness.
For neat slices, use a modest smear of filling, add a crumb coat, and chill about an hour before final frosting.
- Garnish with fresh strawberries for instant appeal.
- Adjust sugar or a splash of juice if your base is very sweet.
- Spoon a thin sauce alongside plated slices for a professional touch.
- Cheesecake benefits from a glossy, spooned-on layer rather than a thick spread.
- A hint of vanilla in the spread or frosting helps knit all flavors together.
| Pairing | Why it works | Serving tip |
|---|---|---|
| Vanilla cake | Neutral crumb highlights fruit | Top with whipped cream and fresh berries |
| Chocolate / White chocolate | Contrast in richness and color | Use thin layers to avoid sliding |
| Lemon / Pound cake | Citrus or dense base balances sweetness | Reduce sugar slightly in the spread if cake is sweet |
Storage, Freezing, and Make-Ahead Tips
Proper storage keeps the bright flavor and texture of homemade fruit layers for use all week.
Refrigeration: Cool completely, press plastic wrap directly on the surface, then transfer into an airtight container. Keep chilled and plan on up to one week for home use; many bakers use a conservative 3–4 day window for peak quality.
Freezing guidance
For longer storage freeze the spread up to 2–3 months. Use arrowroot instead of cornstarch in the recipe if you know you’ll freeze; arrowroot gives a clearer set and reduces separation after thaw.
Quick cool-down and gentle rewarming
To cool fast, pour the warm mixture into a shallow pan to increase surface area and set in the fridge once steam eases.
If the gel firms too much, rewarm gently: microwave 5–10 seconds or place over low heat and stir until loosened. This restores spreadability without adding water.
“Label containers with the date and remove only what you need to avoid repeated temperature swings.”
- Label the container with date and contents to track time accurately.
- Thaw frozen batches overnight in the fridge; stir well before using as a topping or between layers.
- Keep assembled desserts refrigerated and chill at least one hour for clean slices.
| Storage method | How long | Key tip |
|---|---|---|
| Refrigerate in an airtight container | Up to 1 week (3–4 days conservative) | Press plastic on surface to prevent skin |
| Freeze | 2–3 months | Use arrowroot for best thawed texture |
| Quick cool | Minutes: spread on a shallow pan | Increase surface area, then chill |
| Rewarm for use | 5–10 minutes total handling | Microwave briefly or warm gently while stirring |
Troubleshooting Common Issues
Troubleshooting common issues takes a few quick checks: simmer time, starch prep, and assembly technique.
Runny filling: simmer time and slurry ratios
If the filling is runny, return the pot to gentle heat and simmer until the mixture coats a spoon and looks glossy.
If needed, whisk in a second slurry: 1 tbsp cornstarch dissolved in 1/4 cup cold water, then simmer about one minute.
Clumps or starchy taste
Never add dry starch to hot fruit — it clumps instantly. Always dissolve cornstarch first in cold liquid.
Simmer just 1 minute after adding the slurry. Overcooking makes the mixture taste chalky.
Bleeding between layers
Pipe a buttercream dam and stop the spread short of the edge. That barrier prevents the filling from oozing into frosting.
Soggy layers and assembly tips
Use fully cooled cakes and a chilled filling. A thin crumb coat and a short chill give structure and clean slices.
- Avoid thick layers that squeeze out under weight.
- If sweetness is too high, cut sugar next time or add a splash of lemon juice to balance taste.
- For very moist fruit, allow extra simmer time to cook off excess juice.
| Problem | Quick Fix | Why it works |
|---|---|---|
| Runny | Simmer longer or add slurry | Evaporates water; activates starch |
| Clumpy | Dissolve starch first; short simmer | Prevents lumps; avoids starchy taste |
| Bleeding | Pipe dam; stop short of edge | Contains spread and keeps layers neat |
strawberry cake filling: Time, Yield, and Serving Notes
Make the fruit component a day ahead so it firms up and trims assembly stress.
Hands-on minutes, chill time, and yield for a 3-layer cake
Prep and cook time: expect about 5 minutes of hands-on prep and roughly 10 minutes on the stove. Allow at least 12 hours of chill time so the mixture sets firmly.

Yield: the batch makes about 2.5 cups — enough for two even layers inside a standard 3-layer cake.
Taste adjustments and serving tips
Adjust sweetness while the recipe is warm: reduce sugar if fruit is very ripe, or add sugar sparingly if tart.
Add a splash of lemon juice to brighten the profile and a pinch of salt to round flavors. If the chilled spread is too firm, stir in a teaspoon of water at a time until easy to spread.
- Plan ahead: make the mixture the day before assembling for best results.
- Use thin, even layers to prevent squeezing and bleeding when you slice the cake.
- Leftover cups of spread work well on breakfast bakes or parfaits.
“Chill, then stir gently to reach the perfect spreadable texture before assembly.”
Conclusion
,Wrap up your prep with a quick checklist: simmer fruit with sugar and lemon, whisk in a fully dissolved slurry, cook to a glossy spoon-coating, then cool and chill at least 12 hours.
This simple method makes a reliable strawberry cake filling that gives clean slices and bright flavor.
For neat layers, pipe a frosting dam, use thin even spreads, and chill briefly before slicing. Store the batch in an airtight container for up to a week or freeze up to 2–3 months using arrowroot for best texture.
Adjust sugar or add a touch of vanilla to suit the season, and repurpose leftovers as a topping for breakfasts and desserts. Keep this recipe on hand—fresh or frozen berries deliver consistent, bakery-level results every time.