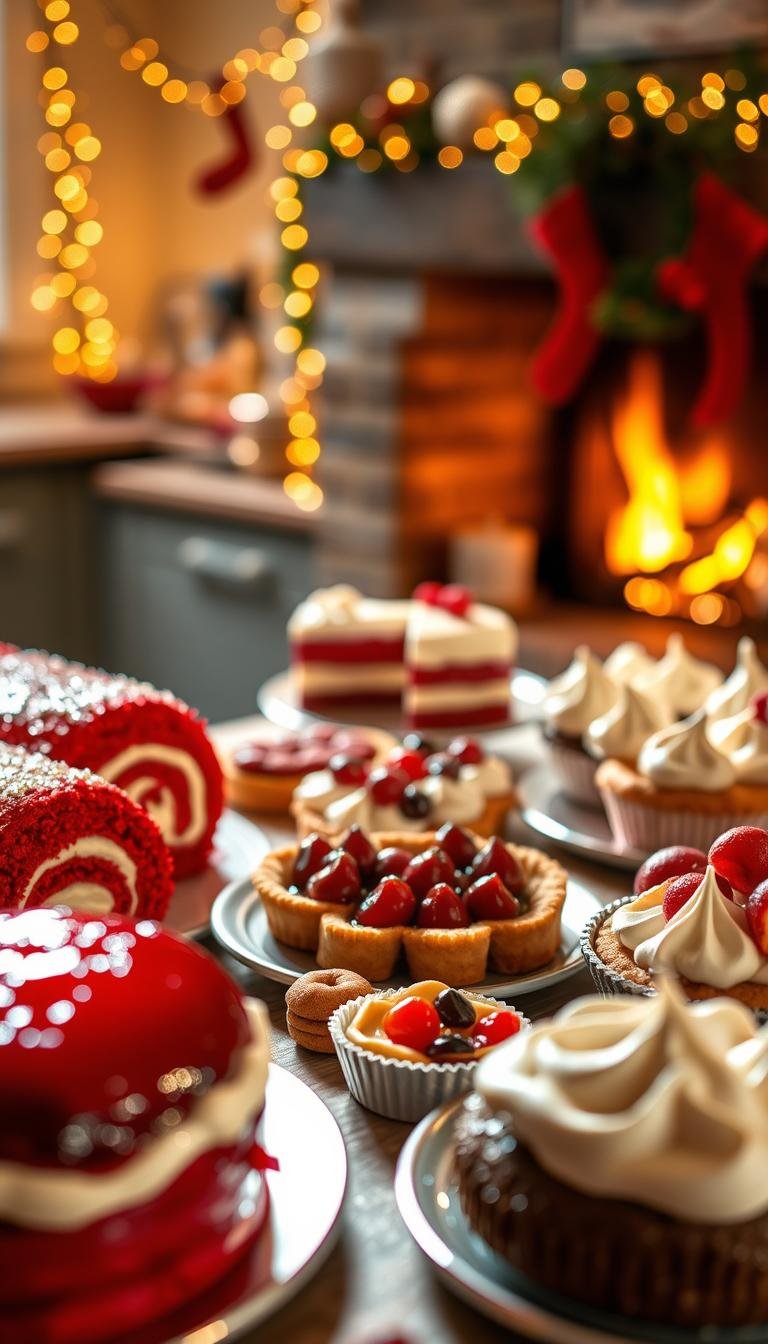
Strawberry Birthday Cake Recipe: Moist and Delicious
Surprising fact: using a slow-cooked berry reduction can boost real fruit flavor by up to 40% compared with canned mixes, giving a naturally vibrant pink and deeper taste.
This Website contains affiliate links. That means I may earn a small commission if you purchase through my links, at no extra cost to you.
This recipe relies on real berries—fresh or frozen—and a concentrated strawberry reduction simmered until thick like tomato sauce. The reduction concentrates flavor and prevents a soggy crumb, so layers bake up tender and moist.
Use room-temperature butter and egg whites, weigh your ingredients with a food scale, and bake at 350°F in parchment-lined pans for even results. The reduction gets used in the batter, in the frosting, and optionally as a thin layer between tiers.
Choose between a silky buttercream made with pasteurized egg whites and reduction or a tangy cream cheese frosting that uses the same reduction for color and flavor. Freeze-dried berries can intensify flavor without extra moisture.
Key Takeaways
- Real berries plus a slow reduction deliver authentic fruit flavor without mixes.
- Weigh ingredients and use room-temp butter and egg whites for an even batter.
- Simmer reduction 40–60 minutes to a tomato-sauce thickness to avoid wet layers.
- Pick a strawberry buttercream or a tangy cream cheese frosting to match the texture you want.
- Cool and wrap layers before assembly; refrigerate if using cream cheese frosting or freeze layers for long storage.
Why this is the best strawberry cake recipe right now
Real-fruit reduction concentrates natural taste while removing excess water that makes layers gummy or gray. Simmering fresh strawberries into a syrup-like reduction produces bold, authentic strawberry flavor and a stable batter.
Shortcuts like gelatin mixes or boxed mixes often yield an artificial taste. Tests show that reduced puree plus an optional emulsion (LorAnn or Amoretti) outperforms those shortcuts in both taste and texture.
Ingredient strategy matters: use egg whites for lift and pale color, AP flour for a tender crumb, and balanced leavening to avoid collapse. A drop of gel food color restores pink hue without changing texture.
| Approach | Flavor | Texture |
|---|---|---|
| Reduced puree + emulsion | High, natural | Light, moist |
| Chopped raw berries | Muted, risky | Can be soggy |
| Gelatin/boxed mixes | Artificial | Consistent but less real |
Weigh ingredients and follow room-temperature cues to repeat success across seasons. Alternate dry and wet additions or use reverse-creaming for an ultra-fine crumb. Finally, make sure you time the reduction and mixing—those cues lock in both structure and flavor.
Ingredients that deliver real strawberry flavor
Choose smart ingredients to make the flavor sing. Use a food scale and gather fresh strawberry or frozen fruit, AP flour, sugar, butter, egg whites, milk, and a cooled reduction before you start.
Fresh vs. frozen: picking and prepping for puree
Select sweet, ripe fresh strawberries in season or reliable frozen packs for consistency. Hull and blend to a smooth strawberry puree, then simmer low and slow until reduced by about half.
Plan 25–45 minutes for fresh fruit and 40–60 minutes for frozen to reach a tomato-sauce consistency. Add a pinch of salt and adjust sugar to taste.
Room temperature essentials
Bring butter, egg whites, milk, and the cooled reduction to room temperature before mixing. This helps the batter emulsify and prevents a greasy or curdled texture.
Flavor boosters
Layer flavor: use the reduction as the core, then add a dash of strawberry extract and a splash of vanilla extract. Brighten with lemon zest or juice. For color, egg whites keep the crumb paler; gel color is optional.
Tools and prep: set up your kitchen for success
Set up your workspace before you start so every step moves quickly and the batter never waits. Gather tools, measure ingredients, and stage bowls and spatulas for a smooth flow.
Stand mixer, pans, and parchment lining
Use a stand mixer fitted with the paddle for reliable creaming; a sturdy hand mixer works with a bit more mixing time. Prepare two 8-inch or two 9-inch round pans: grease, line with parchment, and add cake strips if you want flat tops.
Preheat, weigh, and stage
Preheat oven to oven 350 with a rack in the middle so layers bake evenly. Verify temperature with an oven thermometer if your range runs hot or cool; preheat for at least 10 minutes.
Weigh flour, sugar, and the reduced strawberry puree on a food scale for consistent results. Organize measuring cups, a silicone spatula, and extra bowls to alternate dry and wet additions without losing time.
“Good mise en place saves minutes and preserves rise.”
- Non-negotiable: parchment-lined bottoms for easy release.
- Optional: offset spatula, bench scraper, and a wire rack for cooling.
Make a concentrated strawberry reduction
Start by pulsing hulled berries into a smooth strawberry puree. Measure 32 ounces (about 2 pounds) of fresh or frozen fruit into a blender and process until silky.
How to puree and simmer to a thick, tomato-sauce consistency
Combine the puree in a heavy-bottomed saucepan with an optional 4 ounces of sugar, the zest and juice of one lemon, and a pinch of salt.
Bring to a medium simmer, then turn the heat to medium-low. Stir occasionally and cook 40–60 minutes until the mixture halves in volume and clings to a spoon like tomato sauce.
Cooling, storing, and using the reduction
Transfer the hot reduction to a clean bowl and cool to room temperature. Cool fully before folding into batter or buttercream to avoid broken emulsions.
Yield is roughly 1 cup. Refrigerate up to one week or freeze portions up to six months. Reserve measured portions for batter, frosting, and a thin swipe between layers to boost flavor.
Time-saving notes and preventing scorching
- Anti-scorch tip: use a heavy pan, keep heat low after the first simmer, and stir every few minutes.
- Taste-calibrate: adjust sugar if berries are very sweet or tart before finishing.
- Batch prep: double the reduction and freeze extras to save time when you make the next cake.
Batter, mixing method, and that moist crumb
Begin by sifting the dry mix so your leaveners distribute evenly and the crumb stays light.
- Whisk together 2 cups AP flour, 1 teaspoon baking powder, 1/2 teaspoon baking soda, and 1/2 teaspoon salt in a clean bowl.
Beat room-temperature butter until smooth. Gradually add sugar and whip until light and fluffy, about 3–5 minutes.
Add room temperature egg whites one at a time, mixing ~15 seconds after each to keep the emulsion stable and the crumb pale.
In a separate bowl, combine milk, neutral oil, concentrated strawberry reduction, optional emulsion, vanilla, and a touch of lemon.
Alternate adding the dry mix and the wet mix in thirds on low speed. Finish each addition just before fully incorporated. Scrape the paddle and bowl often so no pockets of flour remain.
The finished batter should be thick and silky—think soft ice cream. If it looks greasy or separated, chill components and remix briefly.
Pan sizes, bake time, and flat cake layers
Start by deciding whether you want taller or thinner layers — that choice guides pan size and minutes in the oven. Choose between two 8-inch pans for taller profile or two 9-inch pans for thinner layers. Grease and line pans with parchment for an easy release.

Simple setup for even baking
Preheat oven to oven 350 and place racks in the middle for steady heat. Divide batter by weight so every pan bakes the same amount of time.
Practical tips to get flat layers
- Bake at 350°F about 30–35 minutes; check for a springy center and a toothpick with a few moist crumbs.
- Use cake strips to keep edges cooler. This helps prevent domes and overbrowned rims.
- Try the “divot trick”: press a shallow depression in the center of each batter-filled pan to discourage doming.
- Avoid overfilling pans. Follow manufacturer guidelines and stop at the recommended cup capacity so minutes stay predictable.
- After baking, rest cakes in pans 10–20 minutes before inverting to wire racks to cool completely.
“Let the layers cool fully before wrapping or frosting — warm layers soften the crumb.”
Frosting options: strawberry buttercream or cream cheese
Decide whether you want a silky, stable buttercream or a tangy, spreadable finish. Both approaches take the concentrated fruit syrup and turn it into a bright, balanced topping that holds up during assembly and service.
Silky strawberry buttercream with pasteurized egg whites
Whisk pasteurized egg whites with powdered sugar for 5 minutes until thick and glossy in a clean bowl. Add softened butter in chunks and whip 8–10 minutes until light and shiny.
Fold in strawberry reduction, a pinch of salt, and a dash of vanilla extract. If the mixture looks curdled from cold butter, microwave 1/2 cup briefly (10–15 seconds) and beat it back in to restore silkiness.
Luscious cream cheese frosting for a tangy finish
Beat cool cream cheese with softened butter until smooth. Gradually add powdered sugar, alternating with strawberry reduction or a small amount of puree to tint and flavor.
Adjust thickness with a teaspoon of milk or a pinch more sugar. For bold flavor without extra moisture, add freeze-dried powder when you beat the cream.
Troubleshooting curdled or runny frosting
If buttercream breaks, warm a small portion and re-emulsify by beating. If cream cheese frosting runs, chill components briefly and re-whip.
“Cold components and overmixing are the usual culprits; correct temperature and short, controlled whipping fix most issues.”
Yield & storage: Plan about five cups for a standard two-layer 8-inch cake. Refrigerate leftovers up to a week or freeze for months; rewhip after thawing for best texture.
Assemble and decorate your strawberry cake
Plan your assembly on a clean turntable and a flat board. Work with chilled, leveled layers to make stacking simple and keep edges neat. Place the first layer on the board and use a small dab of frosting to anchor it.
Leveling, filling with reduction, and smooth frosting
Trim domes only if needed so the cake layers sit flat. Brush a thin swipe of strawberry puree or reduction on each layer to amplify fruit flavor before adding filling.
Spread frosting evenly with an offset spatula. Use a bench scraper while rotating the turntable for clean, bakery-style sides. Apply a thin crumb coat, chill briefly, then add the final coat for a pristine finish.
Simple finishes: fresh strawberries, pink hue, and clean edges
Accent the top with fresh strawberries just before serving to keep fruit bright and juicy. Keep a small cup of extra frosting in a bowl for touch-ups after chilling or transport.
“A thin reduction layer boosts real fruit flavor without soggy crumbs.”
Avoid covering cream-based frostings with fondant; pick buttercream under fondant instead. Finish with a tiny drop of gel color if you need a soft pink hue.
Pro tips for the best strawberry cake
Taking a few extra minutes to prep ingredients and tools prevents common texture problems. Make sure dairy and liquids—especially butter, egg whites, milk, and the cooled reduction—are at room temperature before mixing.

Weigh ingredients with a food scale for reliable structure and sweetness. Pre-soak and wrap cake strips to keep layers flat and reduce trimming.
Give the batter the time it needs: cream butter and sugar fully, then alternate additions slowly so the emulsion stays stable. Let cooled layers sit on wire racks until completely room temperature before frosting; this prevents sliding and melting.
- If buttercream curdles, warm a small portion briefly and beat it back in.
- Keep bowls dry and free of grease when you make meringue-based frostings.
- Use gel food coloring sparingly to hold a soft pink after baking.
| Tip | Why it matters | Quick action |
|---|---|---|
| Room temperature | Prevents broken batter and curdled frosting | Bring to room temp 30–60 minutes |
| Weigh ingredients | Consistent crumb and rise | Use a digital scale |
| Wrap cake strips | Flat layers, less waste | Soak strips and wrap pans before baking |
“Plan ahead: make the reduction a day before and chill layers for easier decorating.”
birthday cake strawberry
A show-ready, berry-forward layer relies on concentrated reduction, egg-white lift, and a short chill before slicing.
Make it festive: aim for a moist crumb with a soft pink finish and fresh fruit for visual impact.
Flavor integrity comes from reduced puree, not gelatin mixes. The reduction gives true fruit character and avoids added moisture that ruins texture.
Pick frosting by mood: silky buttercream for a classic look or tangy cream cheese for contrast. Both pair well with the intense reduction and fresh garnish.
- Size for servings: two 8-inch layers = tall presentation; two 9-inch layers = wider slices.
- Timing tip: make the reduction ahead, bake layers at 350°F, cool fully, then assemble the day of serving.
- Serving note: chilled slices hold shape; let pieces warm 20–30 minutes for peak flavor.
“A quick candle-and-berries finish lets the fruit story shine without fussy piping.”
| Element | Benefit | Quick action |
|---|---|---|
| Reduction | Intense real fruit flavor | Simmer until thick, make ahead |
| Egg-white crumb | Light, pale texture | Use room-temp whites, whip gently |
| Frosting choice | Style vs. tang balance | Buttercream or cream cheese, chill before slicing |
Variations and swaps to make strawberry cake your way
Small ingredient changes can transform this layered dessert into cupcakes or taller tiers with minimal fuss. These swaps let you keep true berry flavor while preserving texture.
Freeze-dried powder: Grind freeze-dried strawberries to a fine powder and fold into batter or cream cheese frosting. This adds bold fruit notes without extra liquid that can weigh down the crumb.
Jam and sugar swaps
When fresh strawberries aren’t ideal, replace the puree with 1/3 cup strawberry jam in the batter and reduce granulated sugar by 1/3 cup. For frosting, stir in 1/4 cup jam gradually and adjust powdered sugar until the texture is pipeable.
Pan sizes and format flexibility
To convert to cupcakes, portion 1/4 cup batter per liner and bake at 350°F for about 20 minutes, checking early for doneness.
For a taller presentation, make three 6-inch layers and bake at 350°F for 20–25 minutes with cake strips for flat tops. Or choose two thicker layers for a simpler build.
- Add up to 1 teaspoon strawberry extract or extract if berries are mild; taste as you go.
- Keep AP flour consistent and tweak bake minutes slightly when changing pan size.
- Use a stand mixer for consistent mixing whether you scale up or down to maintain the same fine crumb across cake layers.
| Variation | Swap | Key action |
|---|---|---|
| Freeze-dried powder | Powdered fruit | Add to batter or frosting—no extra liquid |
| Jam swap | 1/3 cup jam in batter | Reduce granulated sugar by 1/3 cup |
| Cupcakes | 1/4 cup per liner | Bake 350°F ~20 minutes |
| Three 6-inch layers | Smaller pans | Bake 350°F 20–25 minutes; use cake pans strips |
“Small swaps keep flavor vibrant while protecting texture.”
Storage, serving, and make-ahead timeline
A clear make-ahead timeline keeps your layers moist and reduces last-minute stress. Plan when to make the reduction, bake, chill, and assemble so each component is at the right point when you need it.
Refrigeration and room-temperature windows
Make the reduction a day ahead. Bake layers, cool, wrap tightly, and refrigerate at least 2 hours or overnight before assembly. This step firms crumb and makes trimming easier.
Buttercream-frosted cakes can sit under a dome at cool room temperature for short periods (up to 2–5 days depending on humidity and sugar content). Keep cream cheese frostings refrigerated and return leftovers promptly.
Freezing layers or a finished cake, then bringing to temperature
Freeze unfrosted layers by double-wrapping in plastic and foil for up to 2 months. Thaw overnight in the refrigerator to protect structure and moisture.
For a fully frosted cake, chill until firm, wrap well, then freeze. Thaw in the fridge and only unwrap after surface condensation subsides. Serve slices slightly cool for cleaner cuts; allow 20–30 minutes at room temperature for flavors to bloom.
- Keep cut surfaces covered with plastic or press parchment to prevent drying.
- Add fresh strawberry garnish just before serving to avoid bleeding on the frosting.
- Refresh the exterior with a thin swipe of reserved frosting after chilling to erase minor marks.
- Plan portions: a two-layer 8–9-inch cake feeds about 12–24 depending on slice size.
“Chill, wrap, and plan your thaw—timing is the best tool for texture and flavor.”
Troubleshooting texture, color, and flavor
If the batter curdles, it usually means ingredients were too cold. Let components reach room temperature and remix gently on low until smooth. Avoid overmixing; that can toughen the crumb.
If layers bake dense or gummy, the strawberry reduction may be undercooked or too much liquid was added. Simmer longer to a tomato-sauce thickness and recheck your liquid measures before baking.
Natural pigments fade in the oven. Add a small amount of gel or a teaspoon of extract if color or flavor seems muted. A spoonful of freeze-dried powder also boosts fruit notes without extra moisture.
- Fix curdled buttercream by warming 10–15 seconds and whipping back in.
- Add powdered sugar slowly for structure; too much mutes taste.
- Weigh batter into pans and bake on the center rack for even layers.
| Problem | Likely cause | Quick fix (minutes) |
|---|---|---|
| Curdled batter | Cold ingredients | Warm 10–20 minutes |
| Gummy layers | Underreduced puree | Simmer 20–40 minutes |
| Pale color | Pigment loss | Add gel color 1–2 minutes mixing |
| Soft frosting | Too warm | Chill 10 minutes, rebeat |
“Small temperature and timing fixes save a full remake.”
Conclusion
Conclusion
This strawberry cake recipe pairs a concentrated reduction, tempered ingredients, and a steady mixing method to deliver reliably moist layers and true fruit flavor.
Prep smart: make the reduction ahead, weigh ingredients, preheat to 350°F, and use cake strips and parchment for flat, even layers.
Choose between silky buttercream or tangy cream cheese to suit sweetness and texture. Convert the format easily—from cupcakes to three 6-inch tiers—or swap freeze-dried powder or jam when season or schedule calls for it.
Store cream cheese–frosted cakes chilled and freeze layers for make-ahead ease. Small fixes handle pale color or curdled frosting so time and technique keep you confident.
Follow these steps and you’ll have the best strawberry cake and a dependable cake recipe that shines in flavor and presentation.