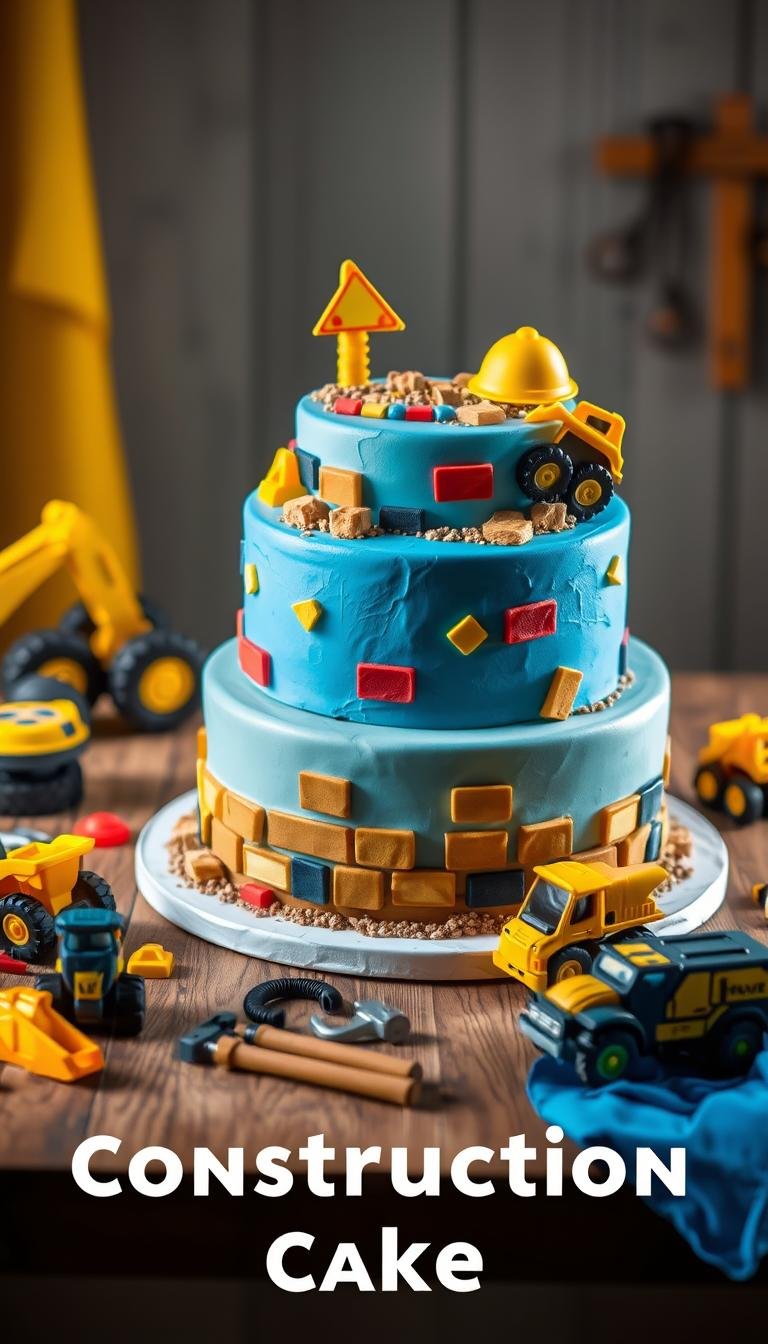
Step-by-Step Guide to Making a Construction Birthday Cake
Surprising fact: nearly half of parents say a themed dessert steals the show at a kid’s party — and a simple sheet can do that work.
This Website contains affiliate links. That means I may earn a small commission if you purchase through my links, at no extra cost to you.
This guide shows how to make a winning construction birthday cake that looks like activity on a work site. You can bake a moist 9×13-inch chocolate base or start from a store-bought sheet to save time. A reliable recipe uses sour cream for moisture and brewed coffee to deepen cocoa flavor.
Decorating is approachable: the number cut-out method creates a dig site filled with Oreo “dirt,” chocolate rocks, and toy trucks. Use basic tools — a 9×13 pan, mixing bowls, a sharp knife, piping tips like 1M, and a foil-covered board for transport.
Plan your day: bake, cool, chill, and assemble with short breaks. Keep non-edible toys off slices when serving kids and chill frosting for cleaner borders and sharper details.
Key Takeaways
- Choose scratch or store-bought bases to fit your time and skill.
- Bake a 9×13 chocolate sheet and test with a toothpick; cool fully before frosting.
- Use the number cut-out and Oreo crumbs for an instant dig-site effect.
- Essential tools: 9×13 pan, bowls, sharp knife, basic piping tips, washable toys.
- Prep across the day and chill layers for sharper frosting edges.
- Keep non-edible toys off plates and shade the dessert if the party is outdoors.
What Makes This Construction Site Cake Work Right Now
A simple sheet and a few props deliver big impact. A 9×13 base topped with Oreo “dirt,” chocolate rocks, and small trucks instantly looks like an active site that kids—especially boys—recognize and love.
You don’t need specialty tools. A pan, a sharp knife, and a basic piping tip for the border are enough to get a polished result. The number cut-out adds depth so toy trucks can “work” the dug-out area without sculpting skills.
Flexibility is key: use a homemade recipe or a store-bought sheet for crowds. Either way, frosting, crumbs, and candy boulders create strong visual texture and a fun contrast between crunchy and creamy bites.
Follow the compact steps—frost, chill, cut, fill, border—for consistent results. Chill the frosted layer briefly; it firms the surface and makes clean cuts easier. For larger parties, scale up with a wholesale sheet and repeat the same process.
- Time-saver tip: mini shovel spoons and toy signs double as favors.
- The method is forgiving: crumbs and candy hide small flaws while keeping frosting neat.
Materials, Ingredients, and Tools You’ll Need
Gathering the right ingredients and tools up front keeps the build smooth and stress-free. Lay items out before you bake so assembly flows without pauses.
Cake essentials and swaps
From-scratch: granulated sugar, all-purpose flour, cocoa (Hershey’s Special Dark), eggs, oil, vanilla extract, sour cream, baking powder, baking soda, salt, and hot brewed coffee for depth.
For speed, pick two boxed mixes and two tubs of frosting. You can also use a vanilla cake or gluten-free and vegan mixes so everyone can enjoy a slice.
Frosting, crumbs, and candies
Use butter-based chocolate frosting for smooth piping. Oreos turn into crumb “dirt,” chocolate rocks add boulders, and Kit Kats or wafer bars make beams.
Hardware and decorating tools
You’ll need a 9×13 pan, one small and one large oven-safe bowl for mounds, mixing bowls, a sharp paring knife, a measuring cup, spatula, and a foil-covered sturdy base.
A 1M or French star piping tip and a basic piping bag finish borders with minimal practice.
Toys and safety
Wash any construction toys and remove non-edible parts before placing them on the frosted surface. Keep tiny pieces away from toddlers and remove all toys before serving slices.
“Staging ingredients and tools first reduces stress and keeps the final steps clean.”

| Category | Core Items | Quick Options | Notes |
|---|---|---|---|
| Base | Sugar, flour, cocoa, eggs, oil, sour cream, coffee | Two boxed mixes | Use 9×13 pan; bake bowls for mounds |
| Frosting | Butter, cocoa, powdered sugar, cream, vanilla | Two tubs store-bought | Butter-based pipes cleaner edges |
| Decor | Oreos, chocolate rocks, Kit Kats, M&Ms | Pre-made candies | Green-tinted frosting for grass |
| Tools & Safety | Pan, bowls, paring knife, tip, foil base | Disposable piping bags | Wash toys; avoid small parts |
Bake the Base: From Mixing Bowl to Cooling Rack
Start by deciding whether you’ll mix a from‑scratch chocolate base or use a boxed mix to save time. This choice affects flavor, prep time, and how many pans you’ll bake.
Scratch chocolate vs. box mix
Scratch: combine sugar, oil, eggs, vanilla, and sour cream. Sift flour, cocoa, baking powder, baking soda, and salt, then alternate dry mix with hot brewed coffee. Pour into a greased 9×13 pan.
Boxed: bake one mix as a 9×13 and split a second mix into a 6‑cup and a 3‑cup oven‑safe bowl to form mounds for terrain.
Pans, temperature, and timing
Preheat the oven to 350°F. For the 9×13 base, plan about 26–28 minutes. The larger 6‑cup dome needs roughly 45 minutes, and the 3‑cup dome about 40 minutes.
Doneness test and cooling
Check the toothpick center; when it comes out clean and the cake springs back, carefully remove from oven. Set pans on a rack and let them cool completely.
“Cooling fully makes carving easier and keeps frosting from melting.”
- Grease and flour pans or line with parchment for clean release.
- Use a light hand when mixing to keep the crumb tender.
- Trim domes level before stacking; reserve trimmings as edible “rubble.”
Step-by-Step construction birthday cake decorating
A chilled top and a steady hand make the number cut-out look crisp and pro-grade.
Frost the cake top and chill until the surface firms. Place a printed number template, then use a sharp paring knife to cut around the shape for clean edges.
Lift off only the top layer of frosting inside the outline. Spread a thin fresh coat and press crushed Oreo cookies into the new frosting so the filling stays put.

Build mounds and ramps
Stack the large and small bowl-baked rounds on the base. Carve a shallow scoop to stage toy trucks and ramps. Sprinkle extra crumbs and chocolate rocks where trucks would dump debris.
Texture, borders, and finishing
Use chocolate frosting to drag short spatula strokes for a turned-earth effect. Pipe a neat edge with a 1M or French star tip for a polished border in minutes.
“Chill briefly between steps; a cold surface makes it easier remove frosting cleanly.”
- Keep cuts swift with a sharp knife for straighter lines.
- If you over-carve, add back trimmed cake pieces or more frosting; crumbs hide fixes well.
- Allow a few minutes of chill time after assembly before moving the finished piece.
| Step | Action | Why it helps |
|---|---|---|
| Trace & cut | Place template and cut around with a paring knife | Creates crisp edges and easier remove of the top layer |
| Fill | Add thin fresh frosting, press in Oreo crumbs | Seals moisture and keeps crumbs set |
| Terrain | Stack rounds, carve ramp, add rocks and crumbs | Makes scene look like active work and hides small flaws |
Top It Like a Construction Site: Toys, Candy, and Creative Add-Ons
Small details—toy loaders, candy boulders, and grass piping—bring the scene to life. Place a few sturdy CAT-branded toy trucks or similar excavators, dump trucks, and loaders so they appear to be working the dig. Wash all toys before contact with frosting and remove small parts for safety.
Toys, signs, and mini shovels that double as favors
Set mini shovel spoons near the pit to reinforce the theme and to hand out as favors. Add plastic road signs or cones to frame the number cut-out, but remove them before serving slices.
Edible rocks and beams: chocolate rocks, M&Ms, Kit Kats, wafers
Pack edible toppers close to the action. Use chocolate rocks for stone piles and cluster M&Ms or Reese’s Pieces as colorful rubble.
Kit Kats and wafer bars make quick beams. Press heavier candies gently into frosting so they stay put during transport.
Grass and terrain: simple green buttercream and texture ideas
Create patches of grass with green-tinted buttercream and a grass piping tip for fast texture. No tip? Stipple with a small spatula for the same effect.
- Sprinkle crushed cookies as extra dirt around tire paths.
- Balance clusters where trucks would realistically dump or haul to avoid clutter.
- Use a vanilla accent frosting for small highlights so dark chocolate elements pop on camera.
Tip: stage photos before moving the finished piece to a warm area so chocolate elements keep their shape.
| Element | Use | Why it helps |
|---|---|---|
| Toys | Excavators, dump trucks | Creates action and scale |
| Edible toppers | Chocolate rocks, M&Ms, Kit Kats | Adds texture and realism |
| Green buttercream | Grass patches | Color contrast and quick texture |
Make-Ahead, Storage, and Party-Day Logistics
A sensible make-ahead plan keeps frosting smooth and details sharp when guests arrive. Follow simple storage rules to protect texture, color, and flavor so the final reveal looks as good as the recipe promised.
Keep it fresh: cover, room temperature vs. refrigerate
Store a frosted cake covered and airtight at room temperature up to 3 days if the day is moderate. Butter-based frosting holds well, so keep it wrapped to retain moisture.
If it’s hot or humid, refrigerate but plan time to bring the dessert back to room temperature before serving. Allow at least 30–60 minutes so frosting softens and flavors open up.
Freezing frosted or unfrosted cakes and thawing tips
For longer make-ahead, leave the cake in the pan and wrap it tightly in two layers of plastic. Freeze up to one month.
Thaw fully at room temperature before you remove any wrapping or add delicate decorations. Chilling before carving also makes frosting easier to control and reduces crumbs.
Outdoor parties: shade, cooler storage, and when to add decorations
Keep the dessert out of direct sun and set up in the shade. Use a cooler or insulated carrier for transport and short-term storage to protect chocolate details and edges.
Add toys and fragile candies close to serving time so heat or condensation won’t affect finishes. Give yourself a few extra minutes to chill the completed piece before departure.
“Bake and cool completely a day in advance to spread out work and keep the final steps calm.”
- Prep tip: bake and cool completely the day before for easier carving and a relaxed decorating window.
- Keep a small kit with extra frosting, a knife, and napkins for quick fixes on setup day.
- If you remove oven-baked domes for terrain, wrap any spare pieces so they do not dry out before assembly.
| Scenario | Storage | When to Add Decorations |
|---|---|---|
| Indoor, moderate day | Cover airtight; room temperature up to 3 days | Decorate fully 1–2 hours before serve |
| Hot or humid | Refrigerate; bring to room temperature 30–60 minutes before serve | Add delicate toppings after temperature evens out |
| Freezing for later | Leave in pan, wrap twice, freeze up to 1 month | Thaw fully at room temperature, then finish decorating |
| Outdoor party | Keep in shade or cooler during transport | Place toys and fragile candy close to serving time |
Conclusion
Close the build with simple, practical steps to keep the final result impressive and safe.
Test doneness with a toothpick center, then cool the 9×13 base fully before frosting. Chill the frosted top so cuts are clean and use a steady knife for the number cut-out filled with Oreo crumbs.
Use a single piping tip for a star border and press chocolate rocks or candy bars as beams for detail. Keep toy trucks washed and add them only at the last moment; remove non-edible parts before serving.
Store covered at room temperature up to three days or refrigerate if warm. For longer storage, wrap the pan and freeze up to one month. A small extra cup of frosting helps with touch-ups and keeps sugar balanced between candy clusters and open areas.