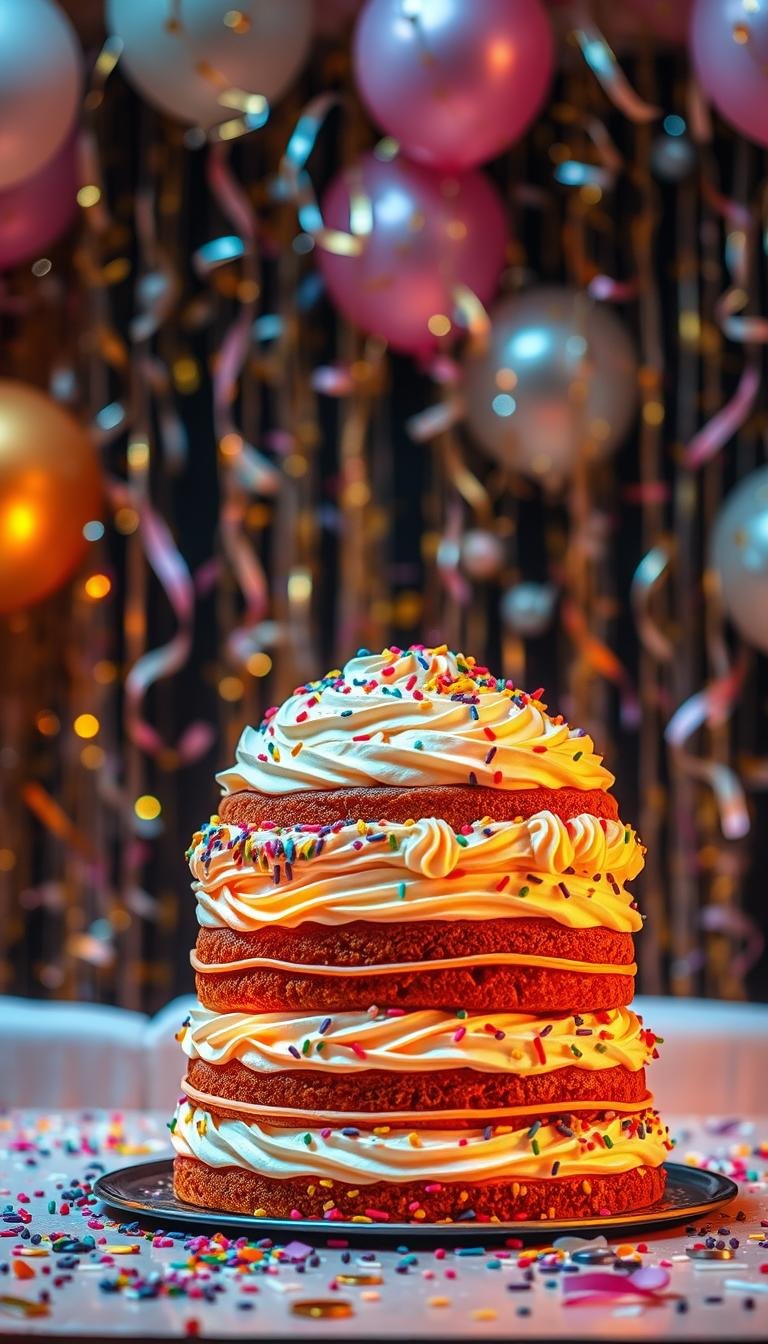
Retro Halloween Cakes Ideas: A List of Classics
Surprising fact: more than one in three Americans serve a themed dessert at fall gatherings, proving that nostalgic treats still rule the table.
This Website contains affiliate links. That means I may earn a small commission if you purchase through my links, at no extra cost to you.
This curated roundup collects retro-inspired dessert recipes that use familiar ingredients and home-oven methods. Expect easy techniques and recognizable flavors that work for parties and quiet nights in.
Each entry points out what makes the bake memorable — dramatic cherry “blood,” rich pumpkin cheesecake swirls, or fudgy brownie bases. That way you can pick the version that fits your skill level and party plan.
Practical perks: most bakes favor grocery-store staples, simple frosting, and basic tools. Shapes range from Bundt and sheet to roll and handheld treats, so there’s a classic for every crowd and serving style.
Look for make-ahead tips and kid-friendly options alongside show-stopping centerpieces. The list balances spooky looks with tried-and-true textures like creamy, fudgy, and fluffy to please all ages.
Key Takeaways
- Recipes focus on approachable techniques and grocery-store ingredients.
- Variety of shapes—Bundt, sheet, roll, and single-layer pans—suits any gathering.
- Each cake highlights one memorable feature to guide your recipe pick.
- Includes make-ahead and kid-friendly options to ease party day prep.
- Combines theatrical presentation with classic fall and chocolate flavors.
Vampire Poke Cake “Blood” Effect
A moist almond-buttermilk slab becomes the perfect canvas for bright cherry streaks. This retro-style cake recipe uses a tender batter that soaks up a tart cherry sauce for dramatic, slice-through color without heavy fuss.
Almond buttermilk base and cherry sauce infusion
Start with a soft almond batter in a standard 9×13 pan so the cake bakes evenly and the crumbs stay tender.
Poke warm holes with the handle of a wooden spoon. Simmer cherries until slightly thick, then pour the syrup into the channels so the sauce streaks through the crumb.
Whipped cream topping and easy poke technique
Cool the cake completely before adding a light whipped frosting to keep the texture airy. Spread gently so the topping doesn’t collapse into the syrup lines.
- Timing: poke while warm for fast absorption; cool fully before topping to avoid melting.
- Look for doneness when edges pull from the pan and a toothpick shows a few moist crumbs.
- Add a few drops of red gel if you want a deeper hue without changing flavor.
- Finish with a restrained sprinkle of sugar or cocoa and an optional chocolate drizzle for depth.
- Serve slightly chilled to set the sauce and give clean, party-ready squares.
Classic Pumpkin Cheesecake for Spooky Season
A thick, toasted cookie crumb bottom creates a welcome crunch beneath a super-creamy pumpkin center. This simplified approach focuses on a robust crust and a silky, spice-forward filling for consistent, impressive slices at any holiday table.
Thick crust, super-pumpkiny filling
Use crushed spiced cookies or graham crumbs for a dense crust that supports the filling and gives a contrasting texture. Blind-bake the crust briefly in the oven to lock in crunch and prevent sogginess while the filling bakes low and slow.
For a true bakery-style profile, fold pumpkin puree into tangy cream cheese with warm cinnamon, nutmeg, and a touch of cloves. Taste and adjust the sugar before baking so the spices and pumpkin shine through without being too sweet.
Make-ahead dessert tips for the holiday
Bake the cheesecake a day ahead, cool completely, then chill overnight to let flavors meld and the custard set. Use a simple water bath or steam-pan method to cut surface cracking and ensure even baking.
For clean slices, warm a thin-bladed knife under hot water, wipe dry, and slice between cuts. Serve slightly chilled—not icy—with a light dollop of sour cream or whipped topping only if desired, and finish with a dusting of spice.
Dracula-Inspired Vampire Cupcakes
Give classic chocolate cupcakes a theatrical twist. These moist chocolate cakes hide a warm strawberry jelly center that oozes a touch of “blood” when bitten. A marshmallow-style frosting is whipped to hold sharp peaks so the look stays crisp on top.
Strawberry “blood” centers and marshmallow frosting
Core and fill: use a small corer or teaspoon to remove a 1-inch plug from each cooled cupcake. Spoon in chilled strawberry jelly so it sits just below the crumb surface—this helps it ooze without soaking the cake.
Whip the frosting: beat a marshmallow-inspired frosting until it forms glossy, stiff peaks. Pipe clean shapes that hold a widow’s peak and resist drooping.
- Choose a deep chocolate base to contrast the white top and vivid red interior.
- Use a tiny amount of red gel and food coloring to intensify the “blood” and avoid tinting the frosting.
- Outline the hairline with a piping bag and round tip, then press cookie crumbs into a widow’s peak to frame a simple spooky face.
| Step | Time | Tip |
|---|---|---|
| Bake cupcakes | 20–22 min | Cool fully to prevent melting the filling |
| Core & fill | 10–15 min | Fill slightly below the top for controlled ooze |
| Frost & decorate | 15–20 min | Pipe peaks, then add crumbs for the hairline |
| Chill | 30–60 min | Keep chilled to set filling and stabilize frosting |
Storage & serving: refrigerate finished cupcakes to keep the filling set and the frosting stable until service. A light dusting of crumbs at the edge reduces stickiness for transport and sharpens the face detail.
It’s the Great Bundt-kin: Pumpkin Patch Showstopper
A paired-Bundt approach yields a perfect pumpkin silhouette that’s both retro and surprisingly simple to assemble. Level the domes from two Bundt pans and trim a thin crumb from each edge so the halves meet cleanly. Press them together with a little frosting to form a tight seam that won’t separate during decorating.
Bundt pan shaping for a retro pumpkin cake
Use a thin crumb coat first. This seals crumbs and gives a smooth base for the final layer. Chill briefly so the coat sets before adding the main buttercream frosting.
Buttercream frosting, piping, and stem details
After the smooth buttercream layer, pipe vertical grooves with a round tip to mimic pumpkin ribs. For the stem, mold a small piece of frosting, use a frosted mini ice cream cone, or shape tempered chocolate for structure.
Food coloring and coating tips for a smooth finish
Blend warm-toned food color into the buttercream for vivid orange depth. Add a touch of green at the top for leaves or a vine accent.
- Chill briefly between layers to avoid smudges and keep edges sharp.
- Dust lightly with sugar or pearlized shimmer for a vintage gleam that won’t overpower the silhouette.
- Support taller toppers with small dowels or chill the cake to firm the frosting before moving.
- Serve on a cookie-crumb “soil” base for a nostalgic pumpkin patch presentation.
- Make-ahead: bake a day early; assemble and pipe on party day for the best finish.
Brownie Bottom Pumpkin Cheesecake Mash-Up
Layering a rich brownie under a spiced pumpkin cheesecake gives each slice a dramatic two-tone reveal.
Start by baking a thin, fudgy brownie bottom so it sets firm enough to support the cheesecake top without merging.
Layered textures: fudgy bottom meets creamy top
Pour the pumpkin filling over the cooled brownie; this creates a clean layer separation and striking slices. Calibrate sugar so the chocolate retains its depth and the pumpkin stays balanced.
Use a springform or tall-sided pan for easy release and neat edges. Bake each part to the right doneness: the brownie should be set at the edges but slightly soft inside; the cheesecake top should jiggle only gently in the center.
- Chill briefly to firm layers for buffet service.
- Rest at room temperature a few minutes before slicing for clean cuts.
- Garnish with lightly sweetened whipped cream or a dusting of cocoa to highlight the top.
- Store leftovers chilled to keep the creamy top and fudgy bottom intact.
Pumpkin Chocolate Chip Breakfast Cake Nostalgia
This breakfast-style pumpkin chocolate chip cake brings warm spice and soft crumbs to the table. It’s not too sweet and slices easily for morning coffee or a casual snack.
Keep chips suspended by folding them gently into the batter so they don’t sink. Use mini chips for more even distribution if you prefer consistent bites.
Bake in a greased 8×8 or 9×9 pan at 350°F in a preheated oven. Aim for 28–35 minutes so the center sets but edges stay tender; test with a toothpick for a few moist crumbs.
Finish simply: a light glaze or a quick cinnamon-sugar sprinkle keeps the pumpkin flavor front and center without overpowering it. Serve slightly warm to enjoy melty chips and the aroma of spice.
- Cool before slicing for clean edges and neat squares.
- Batch-bake and freeze portions for grab-and-go treats.
- This recipe doubles well for potlucks or school events.
Hocus Pocus Cupcakes, Retro Movie Night Edition
Recreate the film’s iconic hairstyles using crisp white chocolate toppers and simple decorating tricks for a retro watch-party treat.
White chocolate hair toppers with food coloring
Gently melt good-quality white chocolate. Stir in a small pinch of food coloring until the shade is even.
Pipe hair silhouettes onto parchment with a piping bag. Let them cool until firm, then lift carefully. These toppers add height and nostalgia without weight.
Party-ready decorating shortcuts
Pair toppers with smooth buttercream swirls on sturdy, level cupcake tops for instant character recognition.
Use boxed batter if you need to save time. Stage a decorating bar with pre-colored chocolate, sprinkles, and a hint of green food accents for crowd fun.
| Step | Time | Quick Tip |
|---|---|---|
| Melt & tint | 10 min | Use a dry bowl to avoid seizing |
| Pipe & set | 15–20 min | Chill toppers separately for snap |
| Assemble | 10 min per dozen | Place toppers just before serving |
Storage & transport: box cupcakes with height clearance. Chill toppers and add them to the top at the last minute to keep shine and snap intact.
Zombie Brains Cupcakes Throwback
These retro cupcakes get their eerie look from careful tinting and deliberate piping strokes that mimic real brain folds. The effect relies on a gray-pink base, then deeper tones of gel to carve believable creases. Keep each step simple for consistent results.

Piping brainy swirls with gel coloring
Mix a soft gray-pink hue by blending red and a touch of blue into pale buttercream. Use gel to deepen the veining so folds read on the surface.
Fit a round tip and pipe slowly in continuous lines to build two symmetrical lobes. A slightly chilled cupcake top helps the frosting hold clean edges and keeps the shape firm.
For a two-tone look, streak darker coloring inside the bag before loading the main shade. This gives natural veining without extra painting.
- Frosting consistency: firm enough to stack but soft enough to pipe smooth curves.
- Serve on dark liners for contrast and visual drama.
- Quick flow: bake, cool, tint, pipe, chill briefly to set.
- Optional: dilute a drop of red gel and flick for a subtle splatter effect.
“Focus on the piping—minimal add-ons keep the brainwork the star.”
Store chilled and transport in a single layer with shallow lids to protect the 3-D piping. This recipe suits retro party trays and pairs well with a simple chocolate cake base for classic throwback appeal this halloween.
Chocolate Polka Dot Sheet Cake Classic
This sheet-pan favorite pairs a fudgy chocolate base with creamy cheesecake “polka dots” for a nostalgic party tray.
Cheesecake dots and chocolate chip crunch
Make a quick cheesecake mix: cream cheese, a touch of sugar, egg, and vanilla. Dollop tablespoon-sized portions across the prepared chocolate batter so they remain distinct as they bake.
Sprinkle mini chocolate chips over the top for nostalgic crunch and contrast. Use a half-sheet or 9×13 pan; keep the batter fairly thick so the dollops suspend instead of sinking.
- Underbake slightly for a fudgy crumb that offsets the tangy dots.
- Cut into neat squares with a warm, wiped knife to showcase the pattern.
- Serve at room temperature to enhance chocolate aroma and cheesecake creaminess.
- Double the recipe for larger party trays; it scales predictably.
“This one was my grandmother’s go-to for school bake sales—simple, transportable, and always gone fast.”
| Pan | Bake cue | Topping |
|---|---|---|
| 9×13 or half-sheet | Remove when center is set but still slightly jiggly | Mini chocolate chips; light cocoa dust or thin glaze |
| Thicker batter | Helps dots stay intact | Room temp serve for best texture |
| Doubled in full sheet | Adjust time +10–15 min | Store covered to preserve moisture |
Pumpkin Cheesecake Roll, Old-School Swirls
A reliable roll technique turns a single pumpkin sheet into elegant slices that highlight a creamy center.
Start by baking a thin pumpkin sponge. Use a well-greased rimmed sheet pan so the cake bakes evenly and stays flexible.
Even layers, clean roll, and cream cheese filling
Invert the warm sponge onto a clean dish towel dusted with powdered sugar. Remove parchment, then roll the towel and cake together while still warm to “train” the layer for a tight spiral.
Unroll gently, spread a not-too-sweet cream cheese frosting evenly, and re-roll without the towel. An even spread prevents gaps and keeps the swirl tidy.
Chilling time and sugar dusting tips
Chill the assembled roll for at least 1–2 hours so the filling firms and cuts cleanly into pinwheels. For a classic finish, dust the exterior with a light coating of powdered sugar just before serving.
- Repair tip: hide small cracks with extra frosting or a thin crumb coat around the outside.
- Let slices rest at room temperature 10 minutes for the best texture before serving.
- Warm a thin-bladed knife under hot water, wipe dry, and slice for professional-looking rounds.
- Wrap tightly and refrigerate overnight to hold shape and freshness.
“Train the sponge while warm and chill after filling — that two-step routine makes the difference between a messy roll and neat pinwheels.”
Apple Cider Donut Cake, No-Fry Vintage Treat
A super-sized apple cider donut captured in a single ring gives you classic spice without deep frying. Start by reducing apple cider on the stove until syrupy; this concentrates flavor and keeps the batter bright and apple-forward.
Use a lightly greased tube or Bundt pan and bake in a preheated oven for even heat and that signature donut silhouette. The pan choice helps the center cook at the same rate as the outer ring so the crumb stays tender.
For the finish, unmold while the cake is warm and toss it gently in a warm butter-sugar-cinnamon coating so the mixture clings. That quick step recreates the donut-shop texture and is much easier than frying.
- Timing: bake 35–45 minutes depending on pan size; check when a toothpick shows moist crumbs but not wet batter.
- Serve slightly warm to unlock the spice aroma and pair with hot cider for a full fall experience.
- Cool completely before covering to keep the coating from dissolving; glaze stripes add a donut-shop look.
- Double the batch for brunch—this recipe scales smoothly and makes a great shareable cake recipe.
| Pan | Bake time | Quick tip |
|---|---|---|
| 10–12-cup Bundt | 40–45 min | Rotate halfway for even color |
| 9-inch tube | 35–40 min | Cool 10 min before unmolding |
| Glaze option | Apply in 5–10 min | Pipe stripes once coating sets |
“Reducing the cider gives the real donut depth without extra fuss.”
Pumpkin Whoopie Pies, Handheld Little Cakes
Tiny pumpkin rounds bake up tender and pillowy, making them perfect for handheld sandwich treats. Mix a soft pumpkin batter that yields plush, cakey discs—lightly spiced, with enough moisture to stay soft after cooling.

Soft cake “sandwich” and creamy filling
Scoop for uniform rounds: use a small cookie scoop so pairs match and the filling reaches the edge evenly. Bake on parchment and rotate the pan for consistent color.
Stable filling: choose a light frosting or stabilized cream filling that holds up to handling. Add a touch of butter for flavor and structure without heaviness.
- Chill components separately if making ahead; assemble day-of for freshest texture.
- Roll edges in sprinkles or chopped nuts for a festive finish and extra grip.
- Wrap each sandwich individually to keep them moist and portable for school or parties.
- Make minis for portion control—perfect for trays and kid-friendly servings.
- When sandwiching, press gently to avoid squeeze-out and serve slightly chilled for the neatest bites.
“Uniform scoops and a touch of butter in the filling turn soft rounds into reliable, portable treats.”
Apple Cider Donut Pound Cake with Cinnamon Sugar
Skip the fryer: a tight-crumb pound loaf captures apple-cider donut flavor in a straightforward cake recipe that serves a crowd.
The batter folds reduced cider and warm spices into a classic, buttery base for dense slices with real autumnal depth. Butter and brown sugar boost richness so each bite feels indulgent without fuss.
Use a loaf or tube pan and bake low and slow. Aim for 50–65 minutes depending on pan size; test with a skewer so the center is set but not dry.
Right out of the oven, brush with melted butter and blanketing the warm top in a cinnamon-sugar mix seals in flavor and gives that donut-shop finish. A thin optional glaze adds shine while keeping the donut inspiration obvious.
- Rest 20–30 minutes before slicing to let the crumb settle for cleaner cuts.
- Slice into sturdy pieces perfect for coffee breaks, bake swaps, and travel to fall events.
- Freeze well-wrapped portions for later—thaw at room time for best texture.
“A loaf pan takes the same flavors and makes serving and storage much easier.”
Halloween Layer Cake with Ghosts and Gravestones
Build a stacked centerpiece that balances playful toppers with a sturdy internal support system. Level and stack first so the look stays neat and the servings hold their shape on a buffet.
Layer structure, crumb coat, and final coating
Trim domes from each round so layers sit flat. Use a small dab of buttercream between tiers and insert thin dowels for taller stacks to prevent shifting.
Apply a thin crumb coat to lock in stray crumbs. Chill 20–30 minutes before the final frosting to get a smooth surface for the next layer.
Buttercream colorways and piping
Tint buttercream frosting into complementary colorways: deep purple, classic orange, and a matte black accent. Use the orange for sides, black for a thin top band, and purple for piping highlights.
Pipe simple shells or rosettes around the base and top edge. Small ghostly swirls with a round tip create instant figures that frame the top.
Cookie tombstones and candy board presentation
Turn Milano cookies into mini headstones by writing “RIP” with a thin black gel pen or melted chocolate. Press them into a candy “board” made of crushed cookies and candy gravel for texture.
Arrange Ghost Peeps on the top as instant figures—no sculpting needed. Chill between steps so details stay crisp and transport safely in a box with supports for tall tombstones.
- Assembly order: level, stack, crumb coat, chill, final coat, tint & pipe, add toppers.
- Slice stability tip: chill 30 minutes before slicing and use a warmed knife for clean cuts.
“A little chill between coats goes a long way toward a clean, professional finish.”
Ouija Board Cake and Chocolate-Filled Pumpkins
Create a spooky showpiece by turning a frosted sheet into an edible spirit board and pairing it with mini chocolate-filled pumpkins for contrast. A neutral, light buttercream base keeps lettering crisp and makes the board read well from a distance.
Edible toppers: letters, planchette, and gel details
Cut fondant or pipe small letter tiles and a planchette. Arrange them evenly across the board so spacing stays readable and centered.
Tinting tips: use deep black gel for letters and keep a few green food accents for vines or planchette highlights. Thin black lines need firm frosting underneath to avoid bleeding.
White batter and chocolate-hazelnut surprise
Start with a white cake batter for mini pumpkins. Bake in shaped molds or liners, cool, then inject a chocolate hazelnut center for a rich, surprising bite.
Keep frosting thin so toppers sit flat and the board design remains crisp. Store the display at cool room temperature; refrigerate only if it gets warm.
| Element | Timing | Quick tip |
|---|---|---|
| Prepare board base | 30–45 min | Chill crumb coat before lettering |
| Make toppers | 20–30 min | Dry fondant tiles overnight for firmness |
| Bake mini pumpkins | 12–18 min | Use white batter for contrast |
| Fill & finish | 10–15 min | Inject chocolate center after cooling |
Conclusion
These recipes mix showstopping presentation with pantry-friendly batter tricks so you can host without last-minute stress.
From stacked layer cake centerpieces to nostalgic pumpkin treats and playful cupcakes, the roundup covers small and grand versions for any guest list. Classic chocolate flavors meet butter-forward textures for crowd-pleasing results.
Keep finishes simple: tidy buttercream and clean piping make graves, faces, or a lettered board read well. A few gel accents or selective coloring add big impact without complicated tools.
Plan chilling, assembly, and slicing so each layer holds and every slice looks polished. Many recipes can be prepped ahead, freeing you to focus on holiday hospitality.
Bookmark favorites, try one small tweak, and share photos of your lineup to inspire others—retro charm and reliable frosting techniques make great party wins.