Red Velvet Cake Aesthetic: Beautiful Designs and Ideas
Surprising fact: more than one in four specialty bakers report clients ask specifically for a visible deep red interior when ordering layered desserts.
This Website contains affiliate links. That means I may earn a small commission if you purchase through my links, at no extra cost to you.
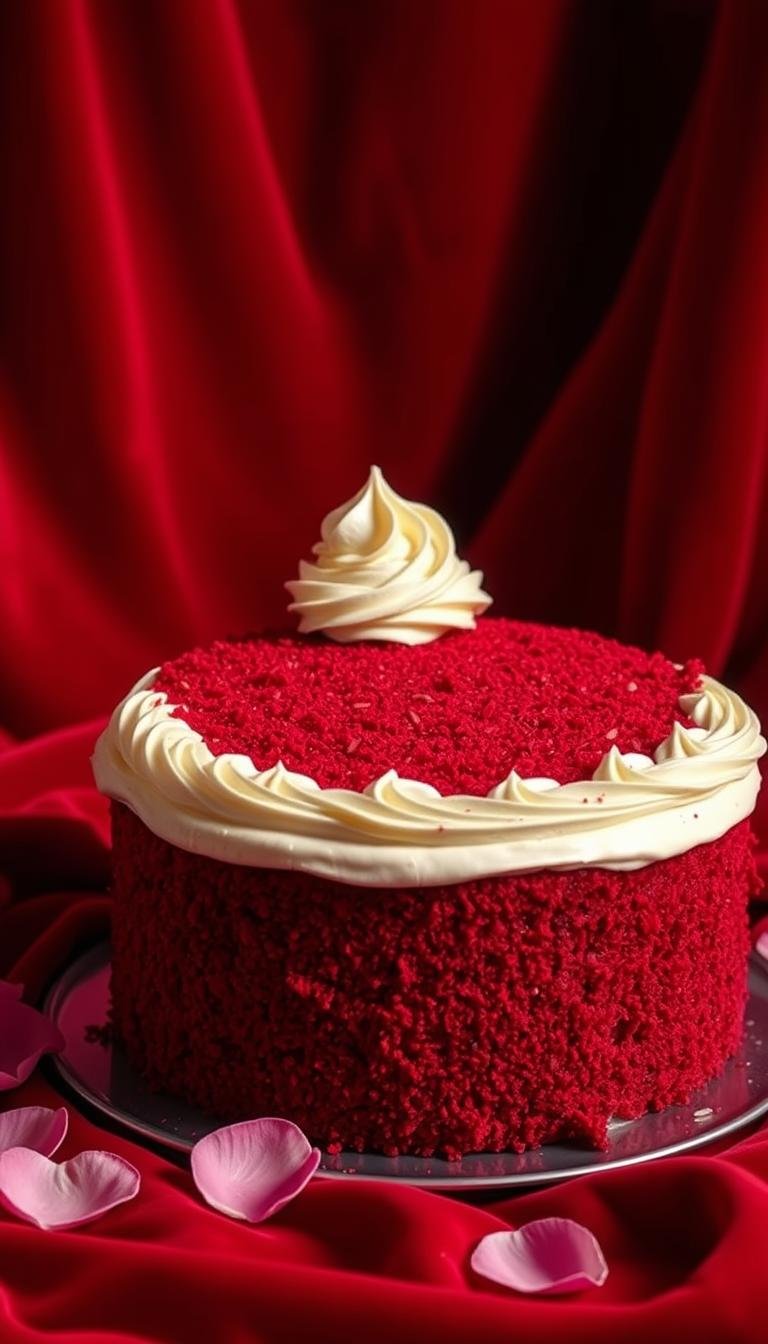
The modern red velvet cake aesthetic blends artistry and technique: a deep red crumb, a hint of cocoa, and tangy cream cheese or stabilized buttercream create a striking, shareable centerpiece.
Classic tips matter: add color before flour to avoid overmixing, use buttermilk and vinegar for tender texture, and choose non-Dutched cocoa for true hue. Brands like Americolor Super Red and Enco Naturals are common picks for consistent color.
Design trends range from minimalist smooth frosting with a crumb halo to luxe gold leaf, ganache drips, macarons, and rustic naked finishes. Practical steps—stabilize cream cheese buttercream, chill before smoothing, and use cake combs—help bakers get clean edges and level layers every time.
Key Takeaways
- The aesthetic pairs a rich red interior with silky frosting for visual and flavor balance.
- Simple technique rules—when to add color, choosing cocoa, and avoiding overmixing—drive reliable results.
- Stabilized cream cheese or buttercream gives smooth lines and piping control.
- Trends include gold leaf, drips, ombré ruffles, and themed reveals that showcase the red interior.
- This guide focuses on practical U.S. sourcing and room-temperature prep tips for consistent baking time and finish.
What “red velvet cake aesthetic” means today
Bakers now aim for a saturated crumb that reads well on camera while keeping flavors subtle. This look blends precise technique with deliberate presentation.
Signature elements include a deep interior hue achieved by pairing non-Dutched cocoa with a concentrated color gel. The result is a tender crumb and a muted cocoa background that lets the frosting sing.
Signature elements: deep crumb, subtle cocoa, cream cheese frosting
The hallmark is a delicate chocolate note under a tangy, silky cream cheese frosting. Use Americolor Super Red for reliable saturation, or choose natural gels such as Enco Naturals to avoid artificial red food dyes.
Present-day trends in the United States
- Smooth white buttercream with visible cake crumbs at the edge.
- Ombre ruffles fading from intense to blush tones.
- Glossy ganache drips, gold leaf accents, and themed interiors that match the exterior.
Pro tip: balance color, crumb tone, and pipeable cheese frosting for clean edges and professional finishes in less time.
Red velvet cake aesthetic ideas
Visual impact begins with simple choices: clean lines, crisp crumbs, and balanced frosting guide every design. These ideas pair familiar flavors with finishes that photograph well.
Classic layers with tangy cream cheese and cake crumbs
Two or three layers cloaked in tangy cream cheese deliver a timeless silhouette. Finish with a controlled ring of cake crumbs at the top for an editorial, textured edge.
Smooth white buttercream with red crumb halo
A smooth white exterior acts as a minimalist backdrop and lets a precise red crumb halo pop. Chill after a crumb coat so crumbs adhere cleanly without smearing.
Ombre ruffles from rich red to blush pink
Build ruffles using petal tips, graduating from rich red at the base to blush near the top. Steady pressure gives even frills that read luxe but stay wearable.
Glossy red ganache drip with gold leaf accents
Use a glossy red ganache for controlled drips and place micro gold leaf sparingly along the rim. Add a thin inner layer of chocolate ganache for depth without masking the tangy cream cheese core.
- Pro tip: mix color gel into the wet phase and check saturation before flour to lock in an even deep red tone.
- Modern plating—matte white stands or geometric gold boards—keeps focus on crumbs and textures at the top.
Romantic & Valentine aesthetics that wow
Simple contrasts—smooth white surfaces with a glossy script or a tidy drip—create a refined romantic statement.
Heart-shaped options work best with a glossy chocolate ganache finish, piped borders, and a short ganache inscription like “I love you.” Practice the script on parchment first to keep lines legible on curved surfaces.
Use smooth white frosting as a canvas for fondant hearts or a gradient of pink-to-rose buttercream roses. Group delicate rosettes asymmetrically near the top to add movement without clutter.
“Choose flavor-consistent fillings—cream cheese or stabilized buttercream—to keep cuts clean and preserve the silhouette.”
- Top a white-frosted cake with a measured chocolate drip and chocolate-covered strawberries for a classic Valentine’s nod.
- Add edible pearls or micro gold leaf sparingly so accents enhance, not distract.
- Scale heart tiers for servings: single-tier for small gatherings, stacked heart above round for larger events.
| Design | Top Choice | Finish Tip |
|---|---|---|
| Heart ganache | Ganache script | Practice on parchment; pipe in one steady pass |
| Buttercream roses | Pink‑red gradient | Chill after crumb coat for clean petals |
| Strawberry crown | Chocolate-covered berries | Apply drip at chill temp for controlled runs |
Wedding-worthy elegance and modern minimalism
For modern ceremonies, pristine tiers with a subtle floral cascade read as understated luxury.
Pristine fondant tiers framed with thin ribbons create a calm, refined silhouette. Add a cascade of sugar flowers that hints at the rich red interior for a cohesive reveal.
Vintage lace textures impressed into fondant pair beautifully with delicate sugar florals for an heirloom look that still feels current.
Stack tiers precisely and keep level layers so the sides stay clean and the top lines stay sharp. Chill crumb coats before covering to improve stability.
“Allow time for gradual tempering of chilled fillings to avoid condensation under fondant.”
- Use pinpoint gold leaf or fine dragees for jewelry-like accents.
- Choose a slim floral crescent or offset cascade to preserve negative space.
- Stabilized cream cheese fillings work under fondant if kept chilled and tempered.
| Element | Tip | When to use |
|---|---|---|
| Fondant tiers | Chill crumb coat; level layers | Formal receptions |
| Thin ribbon trim | Defines base without clutter | Modern loft or minimalist venue |
| Lace texture | Impress before drying | Garden or vintage weddings |
Luxury chocolate & macaron statements
High‑gloss ganaches and precise toppers turn familiar layered desserts into showstopping centerpieces.
Pair luxe finishes with restraint so the interior and flavor stay recognizable. Use bittersweet chocolate for contrast and a smooth buttercream base to keep edges clean.
Dark chocolate drip paired with rich layers
Choose a dark chocolate drip that balances the sweetness of the filling. Test drip viscosity and cooling time on a scrap before the front-facing run.
Macarons, truffles, and gold leaf for a high-end finish
Top the rim with a crown of macarons and truffles. Add flecks of gold leaf to catch light and signal premium service.
Chocolate bar collars and strawberry piles for drama
Consider a chocolate bar collar to add vertical texture and crunch. For maximum impact, cluster chocolate‑covered strawberries at the top center like a bouquet.
- Keep buttercream finishes smooth so drips and toppers read cleanly.
- Match chocolate intensity to respect the signature red velvet flavor.
- Use sturdy boards and supports when heavy toppers increase load and time on display.
Rustic, minimalist & naked looks
A stripped-back presentation puts the crumb center stage, letting texture and seasonal fruit tell the story. This look works well for casual weddings, showers, and backyard parties where charm matters more than fuss.
Naked cakes topped with fresh berries and a light veil of powdered sugar spotlight the interior without heavy decor. Use berries that hold up at room temperature and pat them dry to avoid streaking on the sides.
Naked cakes with fresh berries and powdered sugar
Keep layers thin and fillings restrained. A stabilized cream cheese or light buttercream prevents bulging and keeps slices tidy.
Simple crumb-dusted sides with subtle chocolate swirls
For a homemade feel, dust crumbs onto the sides and add faint chocolate swirls that complement the core flavor. Less is more—use chocolate sparingly so it enhances, not overpowers.
Log/bark texture with a novelty topper for outdoorsy vibes
Mimic a log with bark-textured frosting and add a fondant axe or small topper for a playful, outdoorsy statement. Choose wood rounds or slate bases and tidy board edges to keep the presentation intentional.
- Use dowels for stacked naked tiers; minimal frosting reduces lateral support.
- Add small clusters of greenery or edible flowers for a refined natural touch.
- Plan serving time so berries stay vibrant and the sugar keeps a fresh finish.
Themed & novelty showstoppers
Smart sculpting and saturated interiors give novelty desserts a cinematic reveal that photographs well.
Superhero emblem toppers
Place a flush emblem on a smooth surface so the first slice exposes a matching red velvet interior for instant payoff. Use a template and turntable to center the emblem and keep alignment exact.
Princess castle tiers
Stacked tiers with sculpted windows and a tiara topper read whimsical and refined. Plan internal boards and dowels for weight distribution and choose fondant or modeling chocolate for crisp details.
Engagement ring box illusion
Create sharp edges and a satin‑finish exterior with a sugar paste cushion to cradle a sugar or real ring. Support tall shapes with tiered boards and chill between steps for clean lines.
Milestone numbers with gold leaf
Use numeric toppers accented with selective gold leaf to lift anniversaries without clutter. Keep surfaces saturated so color holds under party lighting and slices stay tidy with stabilized fillings.
- Balance décor and proportion; avoid overcrowding the top.
- Use a smooth buttercream undercoat for stability when adding crisp elements.
- Coordinate flavors and fillings that hold shape for clean service.
Cupcakes & alternatives for shareable style
Shareable sweets translate the layered dessert look into gifts and easy portions. Small-format treats let hosts echo signature colors and textures without a carving station.
Rose‑swirled buttercream bouquet
A cupcake bouquet uses rosette piping in graded pink-to-red tones for instant visual impact. Pipe uniform rosettes on each muffin to keep tops consistent.
Use stabilized cream cheese frosting for hold during transport. Arrange on a board with greenery or wrap like a floral bouquet for a giftable presentation.
Marbled cream cheese swirl loaves
For casual gatherings, marble two batters and bake in loaf pans. Lightly dust the top with powdered sugar for a homestyle finish.
Ribbon extra red batter near the center to create a mini layers illusion on each slice. Start checking cupcakes at 15 minutes to avoid overbaking and keep moist flavor.
“A bouquet or loaf keeps portions easy while still delivering the dramatic interior reveal guests expect.”
- Choose white, gold, or matte black liners to make rosettes and crumbs pop.
- Use a family‑friendly natural red food gel to preserve crumb taste.
- Package in clear boxes or bouquet wraps to protect decoration and show the top.
| Format | Best use | Finish tip |
|---|---|---|
| Cupcake bouquet | Gifts, showers | Pipe uniform rosettes; stabilize frosting |
| Marbled loaf | Casual brunch | Light powdered sugar; ribbon red batter center |
| Packaged sets | Party favors | Clear boxes or wraps; secure with tissue |
Mastering the red velvet color: gels, liquids, and natural options
A reliable, show-stopping crumb begins with the right dye and a short, careful mixing window. Choose a concentrated gel for precision or a natural beet‑based gel to avoid synthetic dyes while keeping flavor neutral. Many bakers who have used Americolor Super Red praise its intensity and minimal aftertaste, but natural gels (for example, Enco Naturals) are a good alternative for those avoiding Red 3.

Americolor Super Red vs. natural gels
Americolor Super Red is highly concentrated and delivers deep saturation with small amounts. Natural gels can be slightly less intense, so add them slowly to reach the target deep red without off-notes. Both can produce strong results when matched to the recipe and cocoa choice.
When to add color for best results
Add color after eggs and before flour or milk. This timing reduces mixing after dry ingredients hit the batter and protects crumb tenderness. One practical method: dissolve gel into buttermilk for even distribution, then alternate wet and dry additions and stop mixing as soon as the batter is combined.
Cocoa powder and final tone
Use non‑Dutched cocoa powder to keep a slightly acidic, maroon base. Dutch‑processed cocoa neutralizes acidity and can mute the red color, making it harder to reach a deep tone without extra dye.
| Choice | Pros | Practical cue |
|---|---|---|
| Americolor Super Red | Very concentrated; minimal flavor impact | Use drops or grams; document ratio per batch |
| Natural beet‑based gels | No Red 3; neutral taste | Add incrementally; may need more for intensity |
| Liquid food coloring | Accessible; blends easily | Often requires 1–2 oz for bold color; adds extra liquid |
| Non‑Dutched cocoa | Supports maroon base hue | Choose this for truer deep tones |
- Gels need far less volume than liquids; start small and build.
- Check batter color under natural light—indoors can mislead.
- Record exact grams or drops used for repeatability.
- Keep total mixing time low to protect rise and crumb.
Frosting styles that elevate the aesthetic
A considered frosting plan balances taste, structure, and photo-ready lines. Start with a clear order: stabilize, chill, then shape. This keeps slices neat and prevents soft tops during service.
Cream cheese frosting: tangy, stable, and pipeable tips
Beat butter and cream cheese until lump-free, then add powdered sugar slowly. Season with vanilla and a pinch of salt for a bright, tangy cream cheese finish that lifts the layers.
Use a mixer fitted paddle to cut air and make a dense, smooth cheese frosting. Chill a thin crumb coat before final smoothing; rewhip briefly after chilling to restore spreadability.
“For pipeable borders and rosettes, add 1–2 tbsp cornstarch or a tablespoon of meringue powder to stiffen without over-sweetening.”
Buttercream finishes: ultra-smooth, textured, and rustic
For sharp edges, pair an inner layer of cream cheese with a thin buttercream shell. Room temperature butter and cream cheese blend into a cohesive emulsion—too cold makes lumps, too warm makes slack frosting.
Choose finishes to match the event: ultra-smooth shells for minimalist looks, gentle comb textures for motion, or semi-rustic swirls for casual charm. Use consistent tips (1M and 4B) for tops so rosettes and stars are uniform.
- Workflow: beat butter + cream cheese → add sugar → season → chill crumb coat → final smooth or texture.
- Stability tricks: brief chilling, optional cornstarch or meringue powder, rewhip after chill.
- Taste: moderate sugar, add a pinch of salt to keep cream balanced and avoid cloying sweetness.
Texture, crumbs & finishes: pro decorator moves
Small surface details make the difference between a pro finish and a hobby bake. Thoughtful sequence and temperature control keep lines sharp and textures crisp.
Using cake crumbs artfully on tops and sides
Reserve leveled tops and trimmed crumbs for accents. Crumble them fine and press onto a chilled crumb coat to build clean bands or a neat ring at the top.
Tip: press with a flat spatula so crumbs adhere without smudging the frosting.
Cake comb textures, swirls, and clean edges
Use a cake comb on a well-chilled shell to create repeating grooves. Rotate the turntable smoothly for continuous textures that photograph evenly.
Alternate smooth panels with gentle swirls to avoid a busy look. Keep frosting thickness even so edges stay crisp and support any top work.
Ganache drips: white, chocolate, and glossy red
Aim for a pourable ganache that holds shape. Test several drips at the back, then finish the rim in one steady pass for consistent results.
Choose contrast: white for pop, chocolate for classic depth, or glossy red to echo a deep red interior theme. Control viscosity—too thin will run; too thick won’t drip.
- Save leveled tops for cake crumbs; press onto chilled frosting.
- Use combs on chilled shells; rotate for uniform grooves.
- Test ganache viscosity and drip length before the rim pass.
- Balance a crescent of piped rosettes with crumb accents to keep negative space.
- Keep tools cool to set edges; warm spatulas can over-polish ridges.
“Pick two or three complementary finishes and apply them with restraint for a professional, edited look.”
| Finish | When to use | Practical cue |
|---|---|---|
| Pressed cake crumbs | Top ring or side band | Use fine crumbs on chilled crumb coat; press flat |
| Cake comb grooves | Photo-ready vertical sides | Chill shell; rotate turntable steadily |
| Ganache drips | Contrast and edge detail | Test viscosity; apply one steady rim pass |
| Piped rosette crescent | Top focal point | Place off-center to balance crumbs and negative space |
Baking and assembly tips for picture-perfect layers
Small adjustments in prep and timing make the difference between moist, even layers and a lopsided bake. Start with room temperature butter, eggs, and buttermilk so the batter emulsifies and rises evenly.
Cream butter and sugar until pale and fluffy. Then add eggs one at a time to keep the emulsion stable and avoid dense spots in the crumb.
Tools and mixing technique
Use a stand mixer fitted with a paddle or a fitted paddle attachment to control aeration. Scrape the bowl between additions so no pockets of butter or sugar remain.
Order and timing
Mix cocoa powder and color into the wet phase before adding flour and milk. Alternate dry and wet additions and stop mixing as soon as the batter looks cohesive.
Bake and finish three 8-inch pans for about 25–35 minutes depending on your oven. Cool briefly in pans, then remove to racks to cool fully. Level, torte, and apply a thin crumb coat; chill before the final frosting pass.
“Patience during mixing and a clean crumb coat are the quickest ways to make professional-looking layers.”

| Step | Quick tip | Why it matters |
|---|---|---|
| Room temperature ingredients | Set out 1 hour before bake | Improves emulsion and even rise |
| Add eggs one at a time | Beat fully between additions | Prevents curdling and dense spots |
| Mixer fitted paddle | Use paddle, not whisk | Controls air and protects crumb |
| Mix color with cocoa | Fold into wet phase first | Shortens post-flour mixing time |
Make-ahead, storage, and U.S. ingredient sourcing
Plan your timeline so chilled layers and fillings meet the table at peak freshness. Proper staging saves time and keeps texture and flavor intact. Cool baked layers completely and wrap them tightly before freezing.
Freezing and thawing: Double-wrap cooled cake layers in plastic and foil. Freeze up to several months. Thaw on the counter for 2–3 hours, then bring to room temperature before filling and frosting.
Storing frostings and finished builds
Refrigerate cream cheese buttercream in an airtight container for about a week. Rewhip briefly to restore spreadability before use.
Finished whole cakes can be frozen airtight for extended time. Thaw under refrigeration, then allow time at room temperature before serving so the texture returns.
Where to find color gel and cocoa in the U.S.
For red color and reliable gels, look at national craft chains and specialty baking suppliers. Many U.S. bakers use Americolor Super Red or natural alternatives like Enco Naturals labeled RED 3‑free.
Choose regular non‑Dutched cocoa powder to support the acid reaction with buttermilk and vinegar for classic tone. DIY buttermilk: add 1 tbsp vinegar to 1 cup milk and rest 10–15 minutes.
- Stage assembly: bake and freeze layers early, make frosting a day ahead, decorate day of event.
- Keep a checklist for cake layers, fillings, and décor to avoid last-minute runs.
- Use insulated carriers and chilled cake cream cheese fillings for safe transport.
- Balance sugar and salt in frostings; slightly less sugar often pleases crowds.
- Check room temperature and humidity at the venue—high humidity affects drying time and set time.
| Where | Product | Practical cue |
|---|---|---|
| National craft chains | Americolor Super Red, natural gels | Look for concentrated gel; document grams per batch |
| Grocery baking aisle | Non‑Dutched cocoa powder | Choose standard cocoa for truer tone with buttermilk |
| Specialty suppliers | High‑concentration red color gel | Buy small tubes for consistency and less waste |
Conclusion
This style thrives when texture, hue, and restraint meet in one confident design.
The red velvet cake remains beloved for its tender crumb, gentle chocolate note, and how well it pairs with cream cheese finishes. Choose one direction—romantic rosettes, wedding-minimalist tiers, luxe chocolate drips, rustic naked builds, or playful themed work—and follow the technical sections on color, frosting, and assembly for reliable results.
Small steps matter: time your color additions, pick non‑Dutched cocoa, and mix gently to protect crumb. Use crumb coats, cake combs, and tested drips to get professional textures that hold from tabletop to top-down photos.
Start with a classic cream cheese finish, document gel amounts and bake times, then iterate. With focused practice and the right ingredients, any baker in the U.S. can bring a beautiful red velvet cake to the table with confidence.