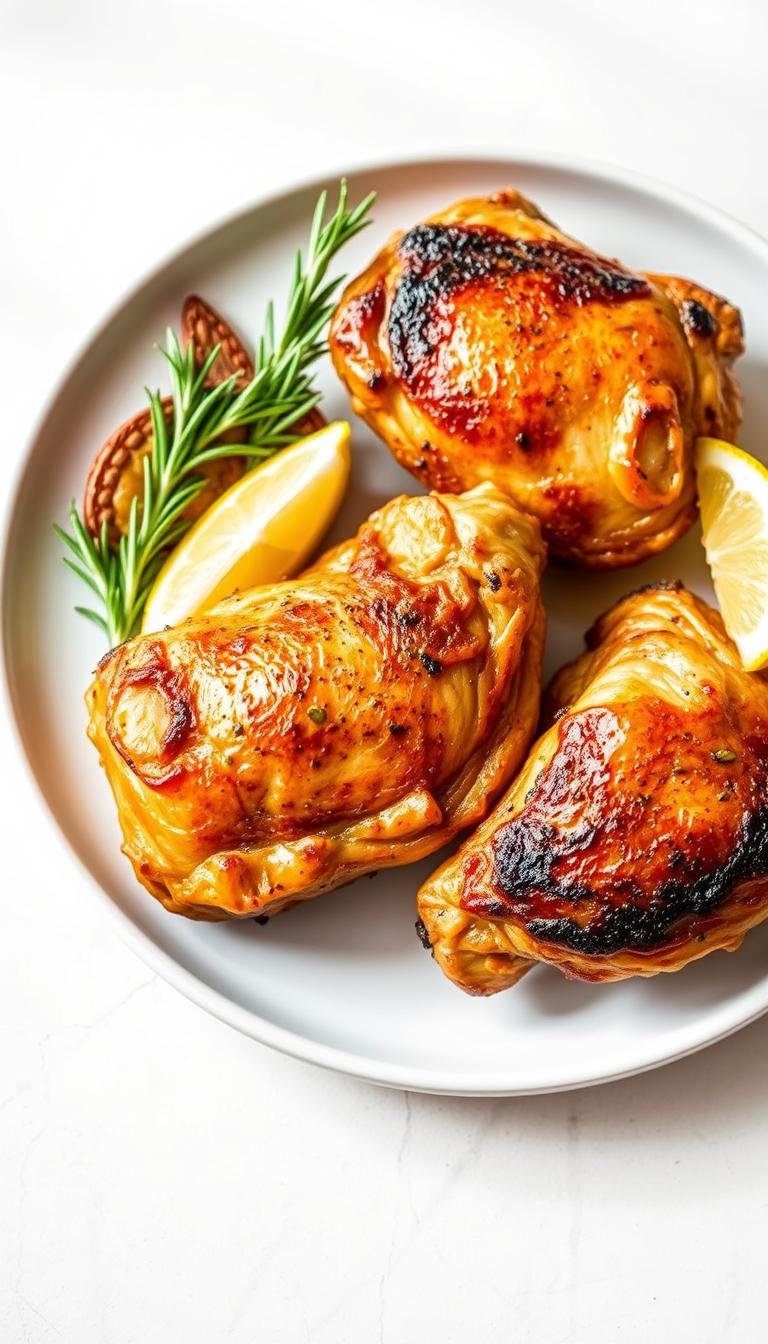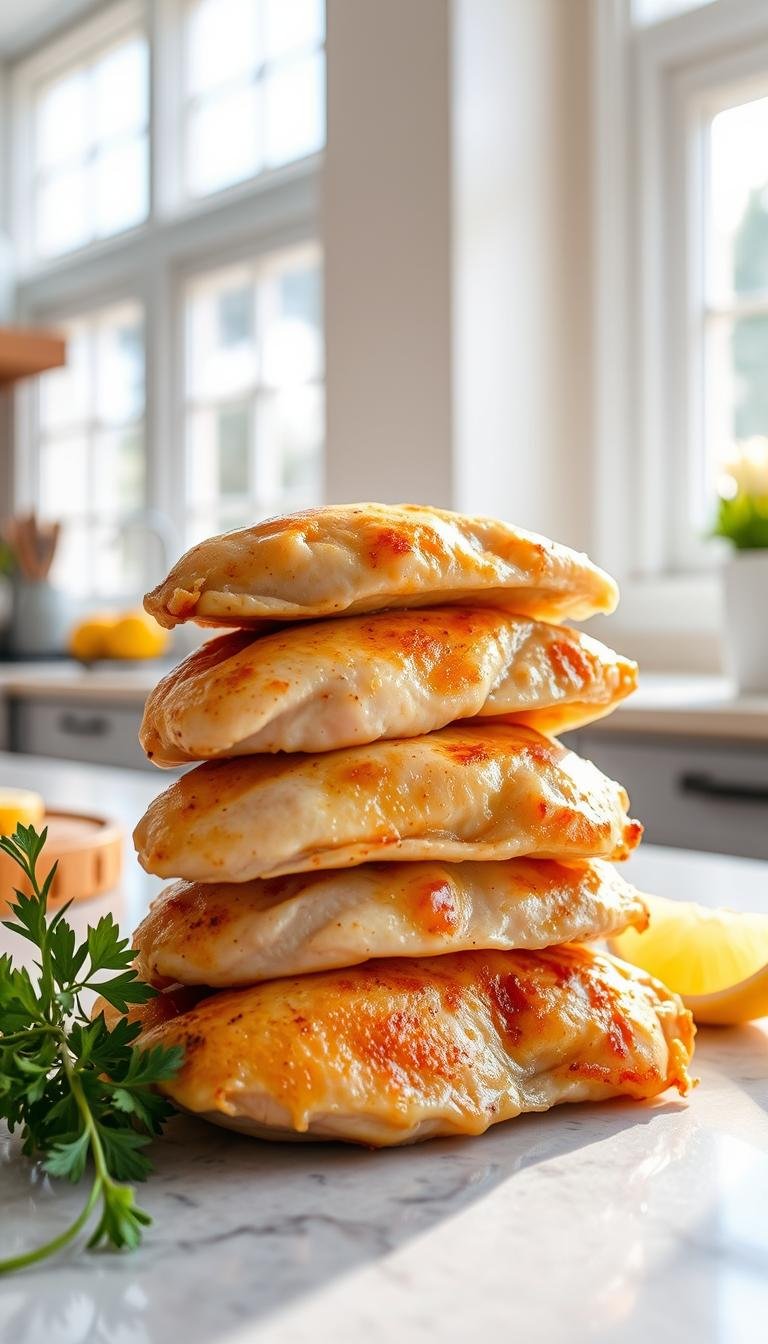
Oven Baked Chicken Breast Recipes: Easy Meals
Surprising fact: nearly half of home cooks report dry results when roasting poultry, yet a simple high-heat method fixes that every time.
This Website contains affiliate links. That means I may earn a small commission if you purchase through my links, at no extra cost to you.
This guide shows a reliable, high-heat approach to produce juicy, tender results with minimal fuss. I outline a five-step process — brine, brush, rub, roast, rest — that many cooks trust for fast weeknight dinners.
Expect clear time and temperature targets, and learn how to use a quick-read thermometer to hit safe doneness without drying meat. Even thickness and a brief rest are the real keys to locking in moisture and flavor.
Why this works: a light brine and a neutral fat like olive oil help develop color and taste. The method scales well for boneless skinless chicken and supports meal prep, freezing, and flexible seasoning for salads, wraps, or casseroles.
Key Takeaways
- Use a five-step system: brine, brush, rub, roast, rest.
- High heat plus even thickness = consistent juiciness.
- Quick-read thermometer prevents overcooking.
- Neutral oil and simple spice blend build color and flavor.
- Method scales for family meals and batch cooking.
- Plan to store or freeze portions to stretch one bake into several meals.
Why This Oven Method Works for Juicy, Tender Chicken
High-heat roasting at 450°F quickly creates a light crust and keeps the interior moist. Shorter cooking time limits moisture loss and protects tenderness.
Brining for 15 minutes gives the meat added ability to hold juices during the roast. A brief soak is simple and boosts juiciness without extra steps.
- The five-step flow — brine, brush, rub, roast, rest — simplifies choices and makes results repeatable for any home cook.
- High heat promotes browning and a pleasant exterior crust while the center stays tender.
- Remove the pieces at 160°F so carryover heat brings them safely to 165°F without overcooking the breast.
- Rest 5–10 minutes so juices redistribute instead of running out on the cutting board.
| Factor | Key Value | Why it matters | Quick tip |
|---|---|---|---|
| Roast Temperature | 450°F | Fast browning, less total time | Preheat fully before adding pan |
| Brine | 15 minutes | Improves moisture retention | Use cool salted water |
| Pull Temp | 160°F | Carryover to safe doneness | Check thickest part |
| Rest | 5–10 minutes | Allows juices to settle | Tent loosely with foil |
Seasoning can be simple or bold. The technique adapts to different blends and is ideal for fast weeknight meals where quality matters.
Quick Facts: Time, Temperature, and Doneness
Quick timing and the right thermometer are the secret to consistent, juicy results every time. Follow a few clear rules and you’ll avoid guessing at doneness.
Preheat to 450°F. That heat gives fast browning and keeps total baking time short. For average, slightly pounded chicken breasts expect roughly 15–25 minutes.
Use an instant-read thermometer at the thickest end to check the internal temperature. Pull pieces at about 160°F; carryover heat raises them to a safe 165°F by the end of resting.
| Item | Target | Why it matters | Quick tip |
|---|---|---|---|
| Preheat | 450°F | Fast browning, even cooking | Preheat fully before placing pan |
| Bake time | 15–25 minutes | Depends on thickness and pan | Check at 15 minutes for thin pieces |
| Pull temp | 160°F (carryover to 165°F) | Prevents overcooking while reaching safe doneness | Measure at the thickest end with a thermometer |
| Seasoning | Salt, pepper, paprika, garlic powder | Simple blend works for many dishes | Season just before baking |
Note: Small variations in time come from oven calibration and pan material. Rest briefly before slicing to keep juices in the meat.
The B.B.R.R.R. Method: Brine, Brush, Rub, Roast, Rest
Follow a clear five-step routine to lock in moisture and build reliable flavor every time.
Brine — Mix lukewarm water with salt and soak for about 15 minutes. Rinse and pat completely dry so the seasoning will stick.
Brush
Brush both sides with melted butter or olive oil to promote browning. The fat helps the rub cling and improves mouthfeel.
Rub
Use a simple blend: paprika, garlic powder, salt, and pepper. This basic seasoning suits many meals and keeps the process quick.
Roast
Place chicken breasts in a baking or roasting pan and roast at 450°F. High heat forms a light crust while keeping the interior tender.
Rest
Let chicken rest 5–10 minutes under a loose foil tent. This step lets juices redistribute so slices stay moist. Pull at 160°F to allow carryover to 165°F.
| Step | Action | Why it matters |
|---|---|---|
| Brine | 15 minutes in salted cool water | Improves moisture retention |
| Brush | Melted butter or olive oil | Promotes browning and rub adhesion |
| Rub | Paprika, garlic powder, salt, pepper | Balanced, versatile seasoning |
| Roast | 450°F in baking/roasting pan | Fast browning, shorter cook time |
| Rest | 5–10 minutes under foil | Juices redistribute; slice without loss |
Prep for Success: Pound, Season, and Place Chicken Right
Even thickness is the simplest trick for consistent cooking and reliable texture.
Lightly pound the thicker end to level the cut so the meat cooks uniformly. Avoid over-pounding; you want even thickness, not thin cutlets.
Pound for uniform doneness
Use a meat mallet or rolling pin and work gently on the thick end. Aim for similar sizes so your cooking time matches across pieces.
Seasoning ideas
Assemble a flexible seasoning blend: paprika, garlic powder, onion powder, salt, pepper, and thyme or oregano. Use a light hand with paprika and garlic so the profile stays versatile.
Place in the right pan
Pat the pieces dry for better browning, then brush with a little oil so the seasoning adheres and the surface colors evenly.
- Place chicken breasts in a baking dish to trap moisture and collect flavorful drippings.
- Keep prep quick: pounding and seasoning take minutes but pay off in texture and taste.
“A few smart prep steps beat guesswork—consistent thickness and proper placement make the rest easy.”
Step-by-Step: Baked Chicken Breast Recipe Walkthrough
A full 450°F preheat sets up fast browning and cuts total minutes needed for reliable doneness. This short walkthrough walks you through prep, seasoning, and the final rest so slices stay juicy.
Preheat and prepare the pan
Preheat oven to 450°F and choose a metal baking dish or roasting pan that handles high heat. Use a pan that lets air circulate and holds drippings for flavor.
Coat with oil and apply the seasoning blend
Pat the pieces dry for better browning. Coat both sides with olive oil or melted butter so the rub sticks and colors evenly.
Sprinkle a balanced blend: paprika, garlic powder, onion powder, oregano or thyme, salt, and pepper. Apply seasoning on all sides for a uniform crust.
Roast, monitor internal temperature, then rest
Place chicken breasts in the baking dish without crowding. Roast 15–25 minutes depending on thickness; check the thickest point with an instant-read thermometer.
Pull at about 160°F internal temperature. Let chicken rest 5–10 minutes under a loose foil tent so carryover heat reaches 165°F and juices redistribute.
| Step | Action | Target |
|---|---|---|
| Preheat | Set oven to 450°F; choose metal pan | 450°F |
| Season | Olive oil + paprika, garlic powder, onion powder, oregano, salt, pepper | Even coating on both sides |
| Roast | Place chicken breasts in dish; bake by thickness | 15–25 minutes (check temp) |
| Rest | Loose foil tent, slice after resting | 5–10 minutes |
“Use an instant-read thermometer rather than guessing by time to avoid overcooking.”
How to Check Doneness Without Overcooking
The easiest way to avoid overcooking is to measure temperature, not time. Relying on a quick probe gives a true read of doneness and protects moisture in the meat.

Use an instant-read thermometer at the thickest part
Insert an instant-read thermometer into the thickest end of the breast for the most accurate internal temperature reading. Aim the probe toward the center without touching bone or the pan.
Pull at 160°F; carryover brings it to 165°F
Remove the chicken when the probe reads about 160°F. Carryover heat will raise the internal temperature to the safe 165°F during the short rest.
- Avoid cutting into the meat to check doneness — that releases juices and dries slices.
- Track time as a guide, but always confirm with a thermometer because thickness and pan type change results.
- Let pieces rest 5–10 minutes under a loose tent so juices redistribute before slicing.
- If one piece finishes early, pull it and keep it tented while the rest finish.
Tip: Use the thermometer at the thickest point every time — it saves time and stops guesswork.
Seasoning Variations for Baked Chicken Breasts
A few small tweaks to the dry rub transform the same pan-roasted protein into three distinct flavor profiles. Below are compact, reliable blends that work across salads, grain bowls, pasta, and tacos.
All-purpose garlic-paprika blend
What to mix: paprika, garlic powder, onion powder, oregano, salt, and pepper.
How to use: Lightly coat with olive oil first so the seasoning adheres and browns evenly. Use about a teaspoon per side as a starting point.
Herby oregano and thyme option
What to mix: oregano, thyme, garlic powder, onion powder, salt, and a touch of lemon zest if desired.
This herb-forward blend is ideal when you plan to slice over salads or pair with roasted vegetables.
Smoky paprika and pepper combo
What to mix: smoked paprika, freshly ground pepper, garlic powder, onion powder, and reduced salt.
Tip: Add a pinch of cayenne for heat or citrus zest for brightness without masking the smoky notes.
| Variation | Key spices | Use case |
|---|---|---|
| All-purpose garlic-paprika | Paprika, garlic powder, onion powder, oregano, pepper, salt | Everyday meals, salads, pasta |
| Herby oregano/thyme | Oregano, thyme, garlic powder, lemon zest, salt | Sliced over greens, roasted veg sides |
| Smoky paprika & pepper | Smoked paprika, black pepper, garlic powder, cayenne (optional) | Bold sandwiches, tacos, grain bowls |
Pro tip: If you brine first, cut the salt in the rub. Make extra blend to save time on busy nights and keep results consistent.
Serving Ideas and Easy Sides
A single baking session can supply slices or shreds that transform many plates fast.

Slice over salads and grain bowls — Add thin slices to a Caesar or mixed green salad for quick lunch options. Toss over warm grains with roasted vegetables and a splash of vinaigrette for an easy bowl meal.
Shred for tacos, soups, and casseroles
Shredding makes assembly fast: fold into tacos, enchiladas, or burritos. Stir into chilis, soups, or casseroles to boost protein without extra cooking time.
Roasted vegetables that cook alongside the protein
Roast broccoli, Brussels sprouts, asparagus, or potatoes on a separate rack so everything finishes within minutes. Time the veg so tender items join later and heartier roots go in earlier.
- Serve sliced breast over bowls or salads for quick, high-protein lunches.
- Toss into pasta dishes—Alfredo, marinara, or peanut noodles—for fast dinners.
- Shred for tacos, enchiladas, wraps, or burritos to add lean protein instantly.
- Stir into soups and chilis to make them more filling while keeping prep streamlined.
- Drizzle a touch of oil or vinaigrette after slicing to enhance moisture and flavor.
“Keep plating simple; the baking method yields versatile, tender pieces that fit countless meals.”
| Serving | Best Pairings | Timing tip |
|---|---|---|
| Sliced over salads | Caesar, mixed greens, grain bowls | Slice after 5–10 minute rest to retain juices |
| Shredded | Tacos, enchiladas, soups, casseroles | Shred while warm for easy mixing into sauces |
| With roasted veg | Broccoli, Brussels sprouts, asparagus, potatoes | Stagger roast times so all components finish together |
Storage, Meal Prep, and Freezing Tips
Smart storage stretches one bake into several easy meals. Cool cooked pieces quickly and move them into sealed containers to preserve texture and food safety.
Refrigerate for simple short-term use
Place cooled meat in an airtight container and refrigerate up to 3-4 days. Label with the date so you rotate stock and avoid waste.
Freeze for longer meal planning
Slice, dice, or shred before freezing for faster thawing. Store portions in a sealed container or freezer bag for up to 2-3 months. This makes weekday meals simple and reliable.
Reheat without drying
Reheat gently in a skillet with a splash of broth or covered briefly in the microwave. A little liquid and low heat keep slices moist; avoid long, high-heat reheats that dry the meat.
- Plan a larger batch of baked chicken breasts to cover lunches and dinners for several days.
- Keep skinless chicken breasts neutrally seasoned if you intend to repurpose across cuisines.
- Portion single servings for grab-and-go convenience and label each with date and portion size.
Tip: Cool promptly, seal tightly, and reheat gently — those three steps protect flavor and texture.
chicken breast recipes oven: Optimization Tips for Consistent Results
Letting meats temper briefly at room temperature evens cooking from edge to center.
Bring pieces out of the fridge for about 15 minutes so the interior warms slightly. This reduces cold spots and helps the center reach doneness at the same time as the edges.
Let chicken rest out of the fridge before baking
A short resting period shortens total bake time and promotes uniform results. Keep the pieces covered on the counter while you preheat the oven.
Avoid glass bakeware over 425°F; choose metal or roasting pan
Preheat oven fully and use a metal baking dish or roasting pan at 450°F for best browning. Glass can overheat or slow cooking at high temperatures, so avoid it above 425°F.
Adjust time for size and thickness; monitor with a thermometer
Account for size chicken breasts by adding minutes for thicker pieces and checking sooner for thin ones. An instant-read thermometer is the most reliable way to verify doneness without drying the meat.
- Place chicken breasts with space between pieces for airflow and even browning.
- Brush lightly with olive oil and season evenly for color and flavor without overpowering the protein.
- When using boneless skinless chicken expect faster finish times; stay attentive near the end of cooking.
- Keep a short note on pan type, temperature, and timing to refine your chicken breast recipe over repeats.
| Tip | Action | Why it matters |
|---|---|---|
| Room temp | 15 minutes before baking | Reduces cold center; evens cook time |
| Pan choice | Metal or roasting pan at 450°F | Better browning; glass not recommended above 425°F |
| Doneness check | Use instant-read thermometer | Prevents overcooking; accurate internal read |
| Spacing & seasoning | Leave gap; brush with olive oil; season evenly | Encourages airflow, color, and balanced flavor |
Quick tip: Test one piece early with a thermometer, then adjust remaining time for size and pan differences.
Conclusion
Strong, thermometer-first routine makes weeknight cooking predictable. Use high heat, a roasting pan, and even thickness to speed browning and protect moisture.
Pull pieces at about 160°F so carryover finishes them to 165°F, then let chicken rest 5–10 minutes before slicing. That pause saves juices and improves texture every time.
Track time and temperature rather than guessing. Slice, shred, or dice to turn one bake into many meals for lunches and dinners. Note personal tweaks—seasoning levels and final rest—so you refine results by the next cook.
Apply this method to future baked chicken breasts cooks, from quick salads to cozy casseroles, and stay attentive near the end to avoid overcooking the meat at the very end.