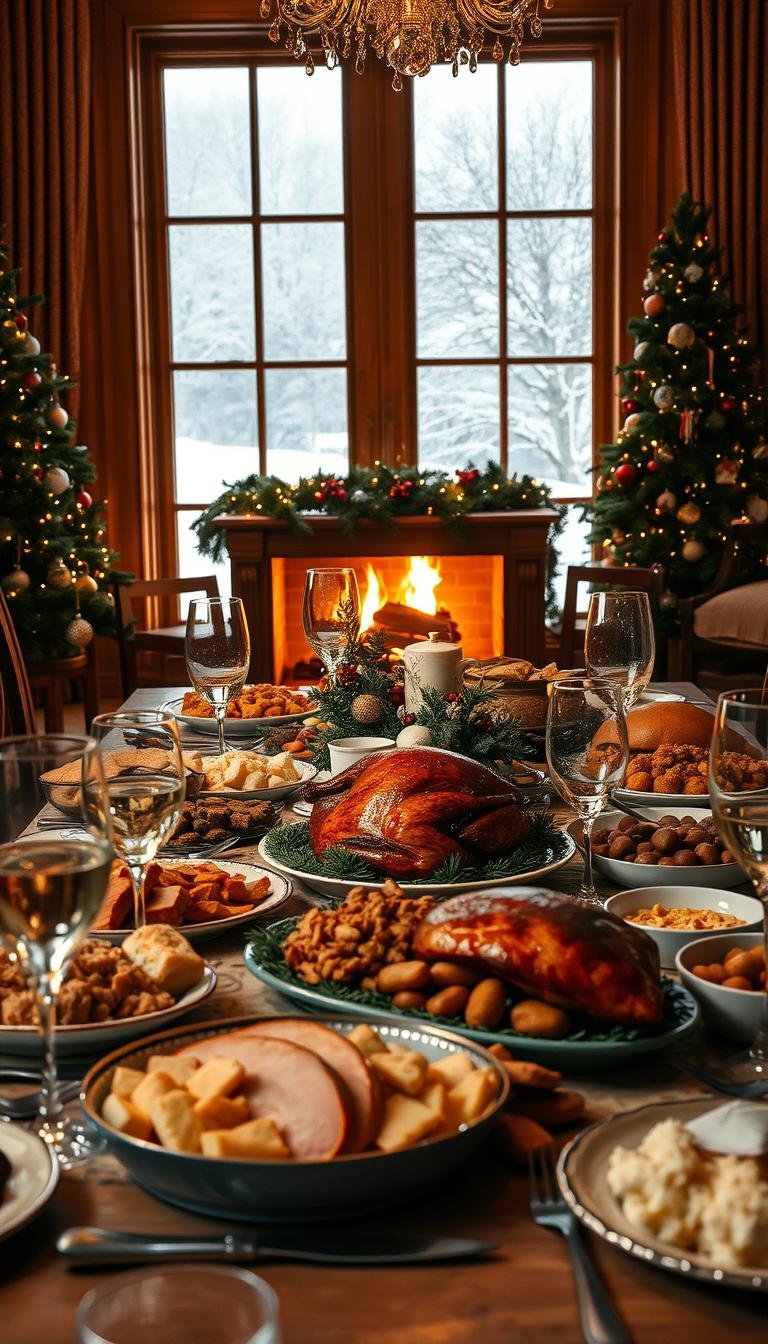
Naked Cake Birthday: A Step-by-Step Guide
Surprising fact: after Christina Tosi highlighted exposed layers in 2013, searches for this style surged over 300% across the United States.
This Website contains affiliate links. That means I may earn a small commission if you purchase through my links, at no extra cost to you.
This guide shows how a stylish, rustic layer dessert can look modern yet stay simple enough for home bakers. You will learn the core differences between a semi-naked finish and a true bare-side look, plus why chilling assembled layers makes slicing cleaner.
Follow a clear sequence: plan, mix, bake, level, assemble, chill, and decorate. The tutorial pairs practical recipe notes—like weighing batter and using cups for measures—with styling tips so your wedding cake or party centerpiece holds steady and looks intentional.
Quick promise: this brief intro sets expectations for time, tools, and flavors, from classic vanilla buttercream to seasonal fruit, and shares pro tips for even layers and sturdy assembly.
Key Takeaways
- Defines what a naked-style project entails for home bakers.
- Explains the step-by-step tutorial flow to save time and avoid mistakes.
- Notes the trend’s roots with Christina Tosi and its rise beyond weddings.
- Clarifies semi-naked vs. true bare-side finishes and chilling benefits.
- Covers practical baking tips: weighing batter, leveling layers, and simple frosting choices.
What Is a Naked Cake Birthday and Why It’s Trending Now
Exposed layers let the filling and crumb take center stage, giving a relaxed, intentional look.
Naked vs. semi‑naked: exposed layers, rustic style, and modern occasions
A true naked cake is a filled layer dessert with bare sides. Bakers often brush exposed sides with a clear glaze to stop drying.
A semi‑naked finish uses a thin, uneven veil of buttercream so parts of the crumb show through. That thin coat still helps protect layers and speeds up finishing time.
- Design choice: visible layers and the top highlight fillings, berries, or florals.
- Practical: these finishes are forgiving and quicker than full frosting for busy timelines.
- Dryness: use glaze for true bare sides; semi‑naked gives minimal protection.
- Portion planning: taller layers need more filling — later the recipe section shows cups of frosting and fill amounts.
- Beginner friendly: smoothing for a few minutes is forgiving, so you can make naked looks with confidence.
Plan Your Cake: Flavors, Frosting, and Decorations
Deciding on flavors and finish early makes assembly smoother and keeps your design cohesive. Start with a flavor map and a practical finish. Pick a sturdy base and choose a frosting that suits texture and taste.
Best cake layers for structure
Choose sturdy layers: vanilla buttermilk, chocolate, and red velvet hold clean edges and stack well. Aim for three layers to get height and presence.
Buttercream or cream cheese frosting
Use buttercream for a smooth semi‑veil and easy smoothing. Vanilla buttercream pairs with most recipes and highlights vanilla notes.
Cream cheese frosting (or cheese frosting) is classic for red velvet and adds mild tang. Add a teaspoon of vanilla to adjust flavor and taste; watch sugar to control sweetness.
Flowers, berries, and sweet toppers
Plan decorations that suit bare sides: unsprayed or edible flowers, and fresh berries added close to serving to avoid juice. Keep a small bowl of extras and estimate cups of frosting so you never run out during assembly.
Ingredients and Tools Check: From Dry Ingredients to Cake Turntable
A quick inventory of pantry staples and tools saves time and prevents mistakes mid‑bake.
Dry ingredients first: measure sifted all‑purpose flour, baking powder, baking soda, salt, and granulated sugar. Add vanilla or vanilla extract and note cups or grams for each so the recipe performs predictably at bake temperature.
Typical ratios for a three‑layer vanilla cake use room‑temperature butter, eggs, buttermilk (or milk), flour, sugar, and leaveners. Plan three 8–9 inch pans and preheat the oven to 350°F.
Essential tools
- Three matching round pans with parchment rounds for clean release.
- A large bowl for mixing and a separate bowl for whisking dry ingredients.
- Straight spatula and bench scraper for applying and smoothing frosting.
- Sturdy cake turntable to rotate while you level and swipe a semi‑veil.
- Measuring cups, teaspoons, and a scale if you have one — weigh batter for even layers.
Prep tip: label and group ingredients, set out teaspoons and measuring spoons, and grease pans now. This saves time when you pour batter and speeds transition to assembly.
Room Temperature Matters: Mixing for a Tender, Even Crumb
Taking a few minutes to temper ingredients makes a big difference in texture.
Why it works: Room temperature butter, eggs, and buttermilk blend into a stable emulsion with milk and vanilla. That emulsion traps air during creaming, so the batter bakes into a fine, even crumb.
The cue in the bowl is simple: stop when the batter is smooth, slightly thick, and free of streaks. If you still see curdled bits, give ingredients more time at room before mixing.
Practical timing and results
Set dairy and eggs out about 30–60 minutes ahead, depending on kitchen temperature. This small time investment reduces tunneling and domed tops, so each layer has neat edges for an exposed finish.
- DIY soured milk works in a pinch, but whole‑milk buttermilk gives better moisture and flavor.
- Consistent batter consistency leads to even pour, steady rise, and a center that more reliably comes clean on a toothpick.
| Ingredient | Room Cue | Why It Matters |
|---|---|---|
| Butter | Soft but cool to touch | Creams with sugar for lift |
| Eggs | No chill, yolks blend easily | Helps stable emulsion in the bowl |
| Buttermilk | Just off chill | Improves tenderness and flavor |
Mix, Fill, and Bake: Building Reliable Cake Layers
Start by measuring and portioning batter so every round bakes evenly and stacks without guesswork. For three 9‑inch pans at 350°F, plan about 25–26 minutes; for three 8‑inch pans expect 25–30 minutes. Total batter runs near eight cups, so weigh filled pans for uniform height.
Weighing batter for even pans and consistent layers
Cream butter and sugar until light. Add eggs one at a time and a teaspoon of vanilla extract. Alternate flour and milk, starting and ending with dry to protect structure.
Doneness cues: when a toothpick comes clean and edges set
Track minutes but trust visual cues: edges set, top springs back, and a toothpick in the center comes clean. Avoid overmixing after flour additions—stop when streaks disappear.
- Weigh batter into each pan to match rise and height.
- Rotate pans only for known hot spots; don’t open the oven early to keep oven spring.
- Cool briefly in pans, then turn out and cool completely before leveling domes and stacking.
- Use a bowl scraper to move batter cleanly and note your minutes for future runs.
Naked Cake Birthday Assembly: Level, Stack, and Stabilize
Start assembly with small, steady moves so each layer sits true and the finish looks intentional. Trim each cake layer with a serrated knife so stacked tiers sit evenly. Place the first round on a turntable or stand to keep the top flat as you work.

Leveling each cake layer for stability and clean sides
Use a serrated knife or leveler to remove domes. Check that each layer sits flush on the one below. A flat surface keeps the sides vertical and the top ready for decoration.
Filling between layers: buttercream swipes, piping gaps, and adding berries
Measure about 1.5 cups of frosting between layers for predictable thickness. Pipe extra frosting into any gaps, then swipe the excess with a straight spatula for a semi‑veiled look.
- Add berries sparingly between layers for a pop of color; press them gently so the top layer stays stable.
- Keep a cup of extra frosting nearby to patch lines or air pockets after chilling.
Chill time for clean slices and a set crumb coat
Chill the assembled tier for 2–3 hours to lock layers in place and let the frosting set. Cover loosely if the chill extends beyond an hour. A firm set makes slicing neater and prevents the filling from shifting.
Semi‑Naked vs. True Naked: Frosting Techniques for Every Style
Deciding between a thin buttercream veil and fully exposed sides starts with how and when you will serve the dessert. Choose a technique that protects the crumb, highlights filling, and matches your finishing time.
Semi‑veiled swipe for a rustic finish
Apply a light coat of buttercream and hold a bench scraper upright. Sweep steadily until the sides show through intentionally.
Tip: Keep pressure even so you reveal crumb on purpose, not by accident. If the kitchen is warm, chill briefly between passes.
True exposed sides with a frosted top
Leave the sides bare and brush exposed layers with a clear glaze to slow drying. Add more frosting on the top to anchor decorations and satisfy frosting lovers.
| Technique | Protection | Top finish |
|---|---|---|
| Semi‑veiled | Light moisture barrier; easy to repair | Thin to medium buttercream layer for contrast |
| Fully exposed | Needs glaze or prompt serving | Thicker frosting to secure berries or flowers |
| Notes | Use cream or cheese frosting for tang where desired | Plan cups of frosting so you have enough without overloading the look |
Cake Decorating Ideas: Top Cake Designs with Flowers, Berries, and More
A well-balanced top arrangement turns simple layers into a striking centerpiece. Use a small group of elements at the center so the exposed sides stay minimal and intentional.

Birthday‑ready toppers: candles, chocolate sails, and sprinkles
Place candles among flowers and berries so the top cake feels full but not crowded. For drama, tuck a white chocolate sail in the center and secure it with a slightly thicker patch of frosting.
Safe use of fresh flowers and fruit
Choose pesticide‑free or edible flowers. Use short, sturdy stems and insert at a shallow angle so petals fan across the top instead of puncturing layers.
- Add berries within an hour of serving to avoid juice stains on exposed sides.
- Create a barrier where stems touch frosting to keep food safe.
- Keep a few extra cups of frosting on hand to anchor larger toppers or patch spots after chilling.
“Edible flowers and seasonal fruit are the quickest way to lift a simple design into something photo‑ready.”
| Element | When to Add | Why |
|---|---|---|
| Flowers | Just before photos/serving | Prevents wilting and keeps stems from staining |
| Berries | Within 60 minutes of serving | Fresh color, minimal juice leakage |
| Chocolate sail | During final assembly | Height and drama; secure with extra frosting |
Refrigerate the decorated dessert and bring it to room for 20–30 minutes before cutting. This step helps frosting set and keeps flowers and toppers looking their best for photos and serving.
Conclusion
, Close by focusing on simple, repeatable habits: plan flavors, follow a reliable recipe, and prep tools and pans before you mix. Level each layer, weigh batter for even rise, and watch doneness by minutes and visual cues for consistent results.
Practice the semi‑veiled swipe on parchment so your sides look intentional. Chill the finished dessert 2–3 hours so slices hold shape and decorations stay put. Add fresh berries near serving and use safe flowers to protect flavor and safety.
Quick tip: save notes on oven behavior, cups of frosting, timing, and pan sizes. With practice — and a few vanilla or chocolate experiments — your next tutorial or baking session will be smoother and more confident.