Moist Chocolate Cake Recipe: A Simple Guide
Surprising fact: nearly half of home bakers report better results when they use one-bowl methods and room-temperature ingredients, cutting mistakes and time. That simple change makes a big difference for busy weeknights and parties.
This Website contains affiliate links. That means I may earn a small commission if you purchase through my links, at no extra cost to you.
This friendly, step-by-step guide shows how a one-bowl method, hot coffee to bloom cocoa, and the right wet-to-dry balance yield a thin, pourable batter and a tender crumb. Bake at 350°F; two 9-inch rounds usually take about 23–35 minutes, while a 9×13-inch pan needs roughly 35–40 minutes. Oil keeps the crumb moist better than butter, and adding buttermilk or sour cream improves structure without weight.
Expect clear cues for doneness, options for pans and frostings, and tips on freezing layers for 2–3 months. Espresso powder is optional but deepens flavor. Follow the ingredient order and keep items at room temperature for even mixing and reliable results.
Key Takeaways
- One-bowl method + room-temp ingredients = fewer errors and better texture.
- Hot coffee blooms cocoa for deeper flavor and a thin, pourable batter.
- Bake at 350°F; times depend on pan size—watch final doneness cues.
- Use oil for moisture; buttermilk or sour cream improves tenderness.
- Layers and frosting freeze well for 2–3 months to save time before events.
Why This Chocolate Cake Is a Keeper
You get bakery-level moisture and flavor using just a whisk, a single bowl, and a splash of hot liquid. That simple play—blooming cocoa with hot coffee or water—pushes the cocoa into full, deep flavor without harshness.
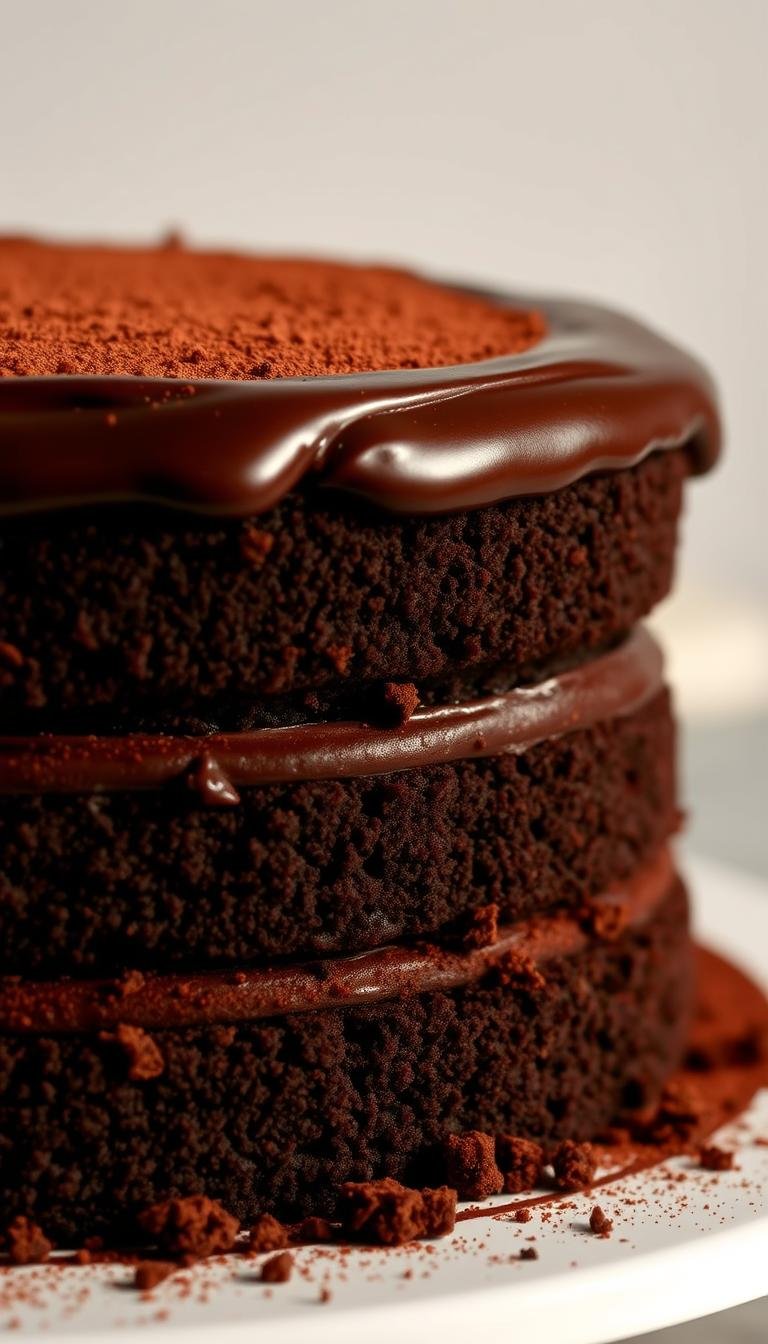
Deep flavor with a super moist crumb
The batter looks thin after you add the hot liquid; that’s normal. It bakes into a fudgy, plush slice with a tender crumb. Adding a touch of espresso powder quietly lifts the notes without tasting like coffee.
Beginner-friendly, one-bowl mixing
No stand mixer required. Combine dry, whisk the wet in, and add hot liquid last for even cocoa dispersion. Using oil and buttermilk keeps the crumb soft for days and helps the layers stay level.
- Texture: fudgy yet light
- Tools: whisk and one bowl
- Tips: room-temp liquids, whisk dry ingredients, add hot liquid last
| Feature | Why it matters | Practical tip |
|---|---|---|
| Bloomed cocoa | Richer, balanced flavor | Use hot coffee or water |
| Oil-based batter | Retains moisture | Choose neutral vegetable oil |
| Buttermilk | Tender crumb, slight tang | Room-temp for even mixing |
Ingredients You’ll Need for the Best Results
Start by gathering simple pantry staples that directly affect texture and flavor. A clear ingredient list keeps mixing fast and consistent.
Dry ingredients
All-purpose flour provides structure. Use granulated sugar for sweetness and tenderness. Add natural unsweetened cocoa powder for classic flavor, plus baking powder, baking soda, and salt for lift and balance.
Wet ingredients
Use room-temperature eggs, vegetable oil (or canola / melted coconut oil) for lasting moisture, and vanilla for aroma. Choose whole milk or buttermilk; for a slightly denser crumb, swap in sour cream.
Flavor boosters & frosting essentials
Espresso powder is optional but recommended to deepen the cocoa notes without adding a coffee taste. Bloom the cocoa with hot coffee or boiling water to dissolve lumps and thin the batter.
- Frosting basics: unsalted butter, confectioners’ sugar, extra cocoa powder, heavy cream or milk, vanilla, and a pinch of salt.
- No buttermilk? Mix 1 cup milk with 2 tsp vinegar and wait 5 minutes.
- Weigh flour and powder where possible to avoid a dry or collapsed bake.
Recommended Tools and Cake Pans
A small set of reliable gear keeps the process fast and predictable.
Choose two 9-inch round cake pans for a classic layer finish or a 9×13-inch metal pan for a simple sheet. Line each with parchment rounds and lightly grease so moist layers release cleanly.
All you need for mixing is a large mixing bowl and a sturdy whisk. The batter will be thin and pourable after you add the hot water or coffee, which helps bloom the cocoa.
Preheat the oven to 350°F and position racks center‑level. Use a wire cooling rack to cool pans briefly before turning out. An offset icing spatula and bench scraper make smooth frosting easy.
- Cupcake pan: fill liners 3/4 full; bake 18–20 minutes.
- Heat-resistant measuring cup handles hot liquid safely.
- Metal conducts heat more evenly than glass; watch glass pans closely.
| Tool | Why it matters | Tip |
|---|---|---|
| Two 9-inch pans | Even layers for stacking | Use parchment rounds |
| Large mixing bowl | Allows one-bowl method | Whisk, no mixer needed |
| Wire cooling rack | Prevents soggy bottoms | Cool in pan 10 minutes, then turn out |
Ready the tools before you start and this part of the recipe becomes the easiest step.
Step-by-Step: One-Bowl Chocolate Cake Method
Start with dry ingredients whisked well, and you’ll set the stage for an even rise and tender crumb.
Whisk the dry ingredients until evenly combined
Whisk flour, cocoa, sugar, baking soda, baking powder, salt, and optional espresso powder until blended. This prevents pockets of powder and helps the layers rise evenly.
Mix in the wet ingredients at room temperature
Add oil, eggs, vanilla, and buttermilk (room temperature) and stir until smooth. Using room-temp liquids lets the batter emulsify quickly without overmixing.
Bloom cocoa with hot coffee or water; expect a thin batter
Pour in hot coffee or hot water to bloom the cocoa and thin the batter to a silky, pourable consistency. Resist adding flour—thin batter yields a moist, tender crumb.
Bake at 350°F until a toothpick inserted in the center comes clean
- Divide batter between two 9-inch pans or a 9×13 pan and tap to release large bubbles.
- Bake in a preheated oven: two 9-inch layers ~23–26 minutes, 9×13 ~35–40 minutes.
- The top should spring back and a tester inserted center should come clean or show a few moist crumbs.
| Step | Timing | Tip |
|---|---|---|
| Mix dry | 2–3 minutes | Whisk thoroughly for even rise |
| Add wet | 1–2 minutes | Room-temp ingredients blend faster |
| Bake & cool | 23–40 minutes | Cool 10–15 minutes in pans before turning out |
Choosing Cocoa Powder, Oil, and Dairy for Perfect Texture
Choose cocoa, fats, and cultured dairy carefully to shape both flavor and crumb. Your picks control lift, moisture, and the final mouthfeel.
Natural vs Dutch-process
Natural unsweetened cocoa powder is acidic and pairs with baking soda for lift and the subtle red tint of classic devil’s food.
Dutch-process cocoa is alkalized and won’t react with baking soda, so save it for frostings or mixes that use baking powder.
Why oil beats butter
Oil retains moisture better in cocoa-rich batters. Use a neutral vegetable or canola oil to let the chocolate flavor shine.
Melted coconut oil works if you like a light coconut note.
Buttermilk vs sour cream
Buttermilk adds acidity and tender crumbs. If you don’t have it, mix milk with lemon juice or vinegar and wait 5 minutes.
For slightly sturdier, taller slices, replace some buttermilk and hot liquid with full-fat sour cream.
| Ingredient | Effect | Quick tip |
|---|---|---|
| Natural unsweetened cocoa | Acidity + lift, reddish tint | Pairs with baking soda |
| Dutch-process cocoa | Smoother flavor, no leavening aid | Use in frosting |
| Vegetable oil | Superior moisture retention | Use neutral oil for clean flavor |
| Buttermilk | Tender crumb, aids rise | Room temperature for best mix |
Pan Sizes, Bake Times, and Conversions
Match pan size to batter volume so each layer bakes evenly and finishes on schedule.

Two 9-inch rounds usually bake about 23–26 minutes at 350°F; start checking at 23 minutes. A 9×13-inch sheet will need roughly 35–40 minutes.
Three-layer builds using three 8- or 9-inch pans bake in about 22–25 minutes per layer. Cupcakes take 18–20 minutes—fill liners about 3/4 full for nice domes.
Expect roughly 6 cups of cake batter total. That helps you divide evenly among pans or change sizes without guessing.
- Line and grease: use parchment rounds and a light grease to ensure clean release.
- Rotate only if needed: rotate near the end if your oven has hot spots; don’t open the door in the first two-thirds of the time.
- Cool then release: let pans rest briefly, run a thin knife around the sides, invert, and remove parchment immediately to avoid sogginess.
| Pan | Typical minutes | Tip |
|---|---|---|
| Two 9-inch rounds | 23–26 | Check at 23 minutes |
| 9×13 sheet | 35–40 | Keep center tester friendly |
| Cupcakes | 18–20 | Fill liners 3/4 full |
Chocolate Frosting Options and Finishes
Choose a finishing frosting that matches the cake’s rich crumb and the occasion. A silky buttercream gives spreadable richness, while a ganache-style finish adds glossy depth. You can also pick a bright contrast like vanilla or strawberry for a lighter counterpoint.
Silky buttercream: Beat unsalted butter until pale. Add confectioners’ sugar, sifted cocoa powder, a pinch of salt, vanilla, and a little heavy cream or milk. Whip until smooth and spreadable. To thicken, add more sugar or cocoa. To thin, add a tablespoon or two of cream.
Ganache-style finish: Make a ganache base with chopped melted chocolate and warm cream, then fold into buttercream for a truffle-like texture. For extra drama, press a halo of small chocolate chips over the top and sides for a triple layer of chocolate flavor.
Alternate pairings: Classic vanilla or a strawberry buttercream brightens each bite and balances a fudgy center. Level and crumb-coat chilled layers, then apply a final coat. Chill 30–60 minutes after frosting so slices cut cleanly.
| Frosting Type | Key Ingredients | Best Use |
|---|---|---|
| Silky buttercream | Unsalted butter, confectioners’ sugar, cocoa powder, cream | Spreadable, classic layered finish |
| Ganache-style buttercream | Melted chocolate, butter, cream | Glossy, truffle-like exterior |
| Vanilla or strawberry buttercream | Butter, sugar, vanilla or fruit puree, cream | Bright contrast to rich crumb |
Pro Tips for Bakery-Level Texture and Flavor
Simple checkpoints—accurate measuring, warmed ingredients, and steady bake time—deliver a reliably tender result. These small moves cut mistakes and boost texture for every home baker.

Room temperature ingredients and measuring
Bring eggs, milk, and any cultured dairy to room temperature so the batter emulsifies quickly. This reduces tunneling and gives an even crumb.
Measure flour and cocoa by weight when possible. If using a cup, spoon and level to avoid packed flour that dries the batter.
Doneness cues
Watch for a gently springing top and edges that pull from the pan. A tester should come out clean or with a few moist crumbs.
Avoid opening the oven door early; that sudden drop in heat can collapse this moist, cocoa-rich mix.
Cooling, leveling, and frosting
Cool in pans 10 minutes, then turn out and let layers cool completely before frosting. Trim domes with a serrated knife for neat stacks.
Use a thin crumb coat, chill briefly, then finish with a final layer for clean sides and better sliceability.
High-altitude and timing tweaks
At altitude, reduce leaveners slightly and watch bake time closely—items may finish sooner due to faster evaporation.
| Focus | Why it matters | Quick action |
|---|---|---|
| Room temperature | Smoother batter, even rise | Warm eggs and dairy 30–60 minutes |
| Measure accurately | Prevents dry or dense results | Weigh ingredients or spoon & level a cup |
| Cooling | Prevents melting frosting | Cool 10 min in pan, then cool completely |
| High altitude | Affects rise and moisture | Reduce leaveners, shorten bake time |
Variations, Dietary Swaps, and Make-Ahead
Want to adapt this classic to fit any crowd or timeline? Small swaps and timing hacks let you turn the same batter into party-friendly pans, allergy-safe versions, or freezer-ready layers without losing the moist texture you want.
Pan and format options:
- Turn this chocolate cake recipe into cupcakes: bake at 350°F for about 18–20 minutes for tender, even domes.
- Make a 9×13-inch sheet for easy slicing and serving; plan on ~35–40 minutes at 350°F.
- For a showstopper, adapt the batter to three 8- or 9-inch layers or a Bundt pan—reduce or extend time and check doneness with a tester.
Dietary swaps that work:
- Dairy-free: use almond, oat, or coconut milk in place of milk; texture stays moist though flavors vary slightly.
- Egg-free: replace two eggs with 2/3 cup unsweetened applesauce or a commercial egg replacer; add a few extra minutes if needed.
- Gluten-free: substitute a 1:1 gluten-free all-purpose blend; weigh flour and avoid overmixing to keep structure.
Make-ahead and freezing tips: Bake layers, cool, and wrap tightly in plastic and foil; freeze up to 1–3 months. Thaw in the refrigerator before assembling for best results. Buttercream can be kept chilled for 2–3 days—bring it to room temperature and rewhip briefly for a silky finish.
“Bake midweek, frost the day before serving, and let the flavors settle for cleaner slices and better flavor.”
Conclusion
Master the one-bowl method and you gain a fast path to reliably moist layers. Blooming the cocoa with hot coffee or water, then using oil plus buttermilk or sour cream, gives a tender crumb and full flavor every time.
Use room temperature ingredients, measure carefully, and watch simple doneness cues to remove the guesswork. This approach works for two 9-inch rounds, a 9×13 sheet, or cupcakes with the same success.
Frost with a silky buttercream, a glossy ganache, or a bright vanilla—then chill briefly for clean slices. Make ahead by freezing wrapped layers and thawing before assembly. This is an unfussy, flexible chocolate cake recipe that delivers bakery-level results with minimal gear.