How to Cook Chicken Wings in the Oven Perfectly
Surprising fact: backyard cooks report up to a 70% boost in crispness when they switch from deep-frying to a rack-baked method with proper spacing.
This Website contains affiliate links. That means I may earn a small commission if you purchase through my links, at no extra cost to you.
If you want shatteringly crisp results without the mess, this guide shows two reliable routes: rack-baked at 400°F for 30–40 minutes with a flip, or a high-heat method at 425°F using aluminum-free baking powder for extra browning.
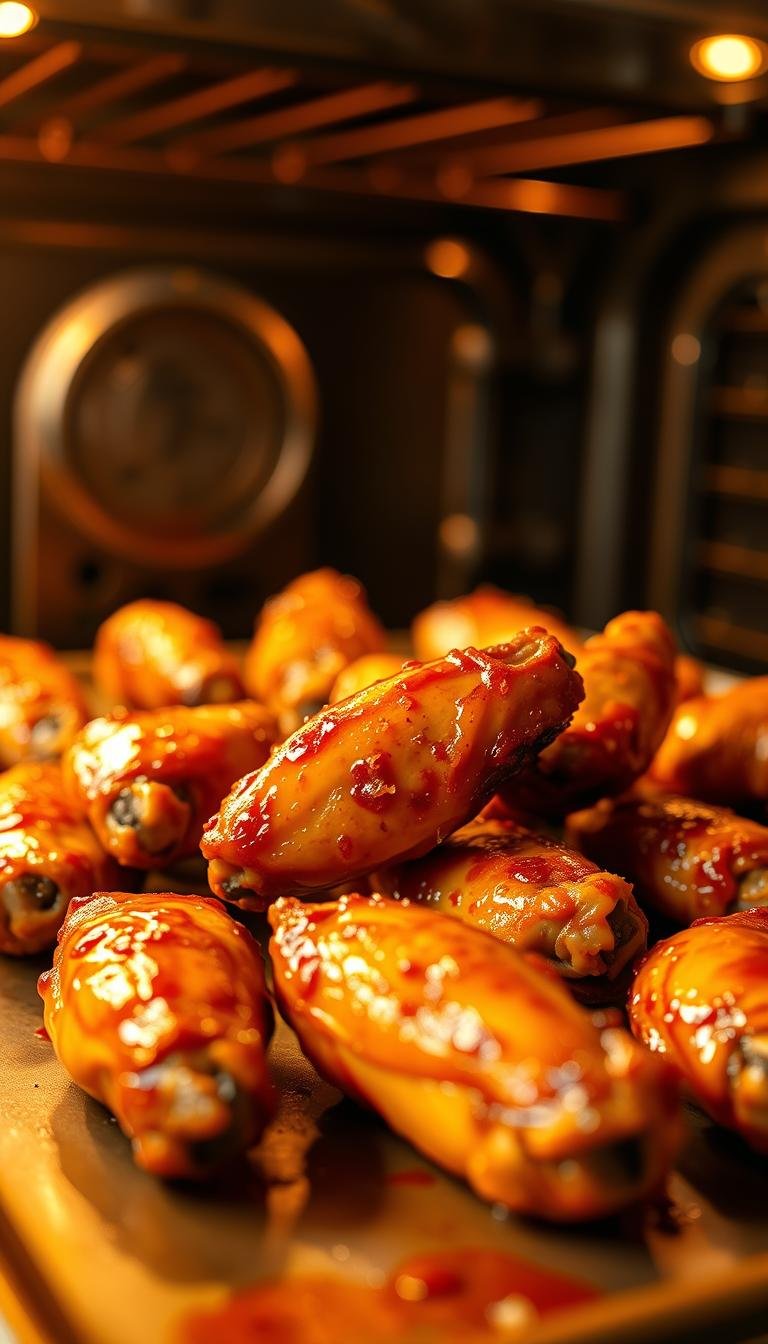
Space pieces on a wire rack over a parchment-lined sheet to let hot air do the work. Check doneness with an instant-read thermometer at 165°F. Toss hot results with melted butter, minced garlic, and Frank’s RedHot for classic Buffalo flavor, or keep a dry rub for max crunch.
Expect a total time of about 30–50 minutes depending on size and temperature. Small tips — pat very dry, avoid overcrowding, and rest five minutes — keep juices in while you get that perfect texture.
Key Takeaways
- Two proven methods: rack at 400°F (flip halfway) or 425°F with baking powder for deeper browning.
- Use a wire rack or well-lined sheet and leave space for airflow to avoid sogginess.
- Target internal temp: 165°F; total cook time about 30–50 minutes.
- Toss with melted butter, garlic, and Frank’s RedHot for classic sauce, or choose a dry rub for crunch.
- Pat dry, don’t crowd, and rest five minutes to lock in juices and crisp the skin.
Why bake chicken wings in the oven? Benefits, texture, and what to expect today
A hot, dry oven turns fatty skin into a golden, crackly shell without deep-frying. That makes it a top pick for home cooks who want reliable results with less mess. Baking on a rack at 400°F for 30–40 minutes gives evenly crisp skin that holds up when sauced.
For deeper browning, a higher bake at 425°F for about 45 minutes (flip at 30) renders more fat and creates a darker crust. Use a wire rack and leave space between pieces to avoid steaming and to let hot air circulate.
When to pick the air fryer: use it for small batches or quick reheats. Leftovers re-crisp in 5–8 minutes at 375–390°F. Oven reheats take about 10–17 minutes at 350–375°F on a rack and work best for larger quantities.
“Baking delivers crisp results with less oil, less splatter, and simpler cleanup—perfect for game day or weeknight dinners.”
- Oven baking scales easily for parties and keeps texture consistent.
- Dry-heat methods let rubs and spices shine; toss with sauce after baking to keep crust crunchy.
- Flip once for even color and rest briefly so juices settle without softening the crust.
Essential ingredients and tools for crispy baked chicken wings
A few focused ingredients and the correct tools are what separate soggy results from golden, crackly skin.
Choose party pieces (drumettes and flats) for even cook times. If you buy whole cuts, break them into tips, flats, and drums and save tips for stock. Party pieces cook faster and crisp more uniformly.
Seasoning basics
Build a simple, reliable rub: salt, black pepper, garlic powder, onion powder, and smoked paprika. Add Cajun or a mix of chipotle, cumin, and ginger for heat and depth.
Crunch boosters
Aluminum-free baking powder dries the skin and uplifts browning—use it sparingly in your dry rub. Do not substitute baking soda or any powder with aluminum; that can leave a metallic taste. A single tablespoon of butter dotted over a sheet helps finish color and moisture at high temps.
Gear checklist
- Sturdy baking sheet lined with parchment (avoid overhang that blocks airflow)
- Oven-safe wire rack to lift pieces so hot air circulates under the skin
- Tongs for flipping and an instant-read thermometer to verify 165°F
- Neutral oil to lightly grease racks when not using parchment
“With a short ingredient list and the right gear, crisp results become repeatable and simple.”
Prep the wings the right way for maximum crisp
Prepare your pieces so each bite ends up crisp and evenly cooked.
Option A — Pat dry and season: Use paper towels to blot surface moisture. This helps rubs stick and the skin render on a wings wire rack at 400–425°F. Patting very dry prevents steaming and boosts crispness.
Option B — Bag toss for even coating: For fresh/wet pieces, add baking powder and spices to a gallon zipper bag. Inflate the bag, seal, and shake until coated. Rest 15–20 minutes so the mix clings, then bake at 425°F and dot 1 tablespoon butter across the pan for extra browning.
Break down whole pieces: Separate at the joints into flats, drums, and tips. Freeze tips for stock to cut waste. Make sure pieces are similar size so they cook evenly. Limit to 16 pieces per half-sheet for best airflow.
- Lightly oil a rack or use parchment to reduce sticking if skin is thin.
- Mix seasonings ahead in a bowl for tidy, uniform coverage.
- Season liberally and add pepper to taste so flavor survives baking.
| Prep Method | Key Step | Best Temp & Notes |
|---|---|---|
| Pat dry & rack | Blot with paper towels; season | 400–425°F; uses wings wire rack; max 16 pieces/half-sheet |
| Bag toss | Baking powder + spices in bag; rest 15–20 min | 425°F; dot 1 tbsp butter for browning |
| Break down whole | Separate flats, drums, tips; freeze tips | Even sizes cook evenly; divide large batches |
chicken wings in the oven: the core method at a glance
Preheat oven to 400°F for steady rendering and even browning. Line a baking sheet with parchment, then set a wire rack on top so hot air reaches all surfaces.
Arrange pieces in a single layer with about 1–2 inches between each to avoid steaming. This spacing lets heat circulate and helps skin crisp uniformly.
Setup and timing
Place the sheet on a center rack and slide it into the hot oven. Bake for 30–40 minutes and flip once at the midpoint so both sides color evenly.
Doneness and serving
Begin checking internal temperature around 30 minutes. Pull pieces when an instant-read thermometer reads 165°F at the thickest part.
- Preheat oven to 400°F (or 425°F for deeper color; add a few extra minutes).
- Use a parchment-lined baking sheet with a rack and space items 1–2 inches apart.
- Flip once halfway; expect 30–40 minutes depending on size and calibration.
- Serve immediately for best texture; sauce while hot or keep dry for max crunch.
| Step | What to do | Timing / Notes |
|---|---|---|
| Preheat | Set to 400°F | Ensures steady rendering and even browning |
| Setup | Parchment-lined baking sheet + wire rack | Space items 1–2 inches apart for airflow |
| Bake & Flip | Bake 30–40 minutes; flip once at midpoint | Check internal temperature; pull at 165°F |
Time and temperature: dialing in doneness and crispiness
Timing and heat are the simplest levers to dial crisp skin and safe doneness every time.
Use two common approaches for reliable results. At 400°F, plan for about 30–40 minutes, flipping once midway. This gentler baking keeps meat juicy while letting fat render and skin tighten.
At 425°F, start with ~30 minutes, flip, then finish for another 15 minutes—about 45 minutes total. That higher time and heat combo produces deeper browning and a firmer crust.
When to broil briefly for extra-crisp
If pieces read 165°F but look pale, a brief 1–2 minute broil can blister skin and boost color. Watch constantly to avoid burning spices or drying meat.
“Start checking early—rely on visual cues and spot-temp checks rather than strict minutes alone.”
- Use 400°F for a juicier finish within 30–40 minutes.
- Choose 425°F for a deeper brown that typically finishes near 45 minutes with a flip.
- Center rack placement promotes even air circulation and reduces hot-spot scorching.
- Let pieces rest 4–5 minutes before saucing so steam escapes and crusts stay crisp.
Pro tips to make sure your wings get crispy, not soggy
Small adjustments yield big crisp. Give each piece room on the pan so hot air can crisp every surface evenly.
Give them space
Leave at least 1 inch between pieces. Crowding traps steam and softens crusts. Use a parchment-lined sheet and keep pieces single-layered for best results.
Use a wire rack
Elevate items on a wire rack to expose undersides to hot air. This speeds fat rendering and prevents soggy bottoms.
Lightly grease the wire so skin won’t stick when you flip once for even color.

Baking powder vs. baking soda
Use aluminum-free baking powder to dry skin and boost browning. Avoid baking soda or powders with sodium aluminum sulfate; those give a metallic taste.
Butter or oil?
A dot of about 1 tablespoon of butter or a thin film of oil helps browning without sogging the crust. Grease racks lightly to prevent tearing at the flip.
- Trim parchment so it does not block air around the rack.
- Flip once to redistribute rendered fat for even color.
- Season boldly so flavor survives baking and finishing sauce.
Flavor routes: dry rubs, buffalo, and garlic butter sauces
Choose a flavor route before you finish cooking so every bite matches your plan. A clear finish keeps texture consistent and helps you decide whether to sauce or keep pieces dry for crunch.
Classic dry rub blends
Base mix: salt, ground black pepper, garlic powder, onion powder, and smoked paprika.
Add small amounts of chipotle, cumin, and ground ginger for smoky heat and warm spice. Keep a portion unsauced if you want maximal crisp.
Making a classic Buffalo toss
For a classic sauce, melt butter and sauté minced garlic briefly. Whisk in Frank’s RedHot and simmer a few minutes until glossy.
Toss hot pieces immediately so the sauce clings. Warm sauce preserves crispness and boosts flavor.
Garlic butter finish with chives and parmesan
Melt butter with fresh garlic, then toss while hot. Garnish with chopped chives and a light sprinkle of grated cheese for brightness and umami.
- Build a versatile rub from pantry staples; layer in chipotle, cumin, and ginger for depth.
- Warm sauces before tossing to avoid cooling the crust.
- Keep dry-rubbed pieces unsauced for maximum crunch and serve sauce on the side if desired.
- Adjust pepper heat to taste so flavor stands out after baking.
Serving ideas and sides for game day and dinner
Finish your platter with warm, simple sides that make every bite pop. Serve pieces hot and ready so textures and flavors arrive together.
Dips and cooling accents: Present a bowl of ranch and another of blue cheese for a classic contrast. Add crisp celery and carrot sticks to cut heat and add a fresh crunch.
Comforting sides: Round the plate with mac and cheese for creaminess, roasted Brussels sprouts for a savory bite, and fries or potato wedges for a hearty touch.
- Serve hot pieces with classic ranch or blue cheese for cooling contrast and creamy richness.
- Balance spice with crisp celery and carrot sticks for texture and freshness.
- Round out with mac and cheese, roasted Brussels sprouts, fries, or potato wedges.
- Offer sauces at the table—Buffalo, honey-garlic, or garlic butter—so guests can customize.
- For an appetizer spread, mix dry-rubbed and sauced pieces to please different tastes.
- Keep platters briefly warm, but avoid covered steaming that softens the crust.
| Serving Element | Why it works | Quick tip |
|---|---|---|
| Dips (ranch / blue cheese) | Provide creamy, cooling contrast to spicy sauce | Serve chilled in small bowls |
| Veg sticks (celery / carrot) | Add crunch and refresh the palate | Cut sticks a day ahead and keep crisp |
| Comfort sides (mac & cheese, fries, Brussels) | Round out meal for guests who want more than an appetizer | Serve mac hot and sprouts roasted for best flavor |
Storing and reheating baked chicken wings the smart way
Store cooled pieces promptly so texture and safety stay intact. Let them cool on a wire rack until steam stops rising. This avoids soggy crust and keeps flavor fresh.
Short-term storage
Refrigerate cooled pieces in an airtight container for 3-4 days. Pack loosely so air circulates and crust stays crisper. Label with the date so you know how many days remain for best quality.
Freezing for later
Freeze on a sheet in a single layer until solid, then transfer to a sealed container or bag. Store up to 2-3 months and thaw overnight in the refrigerator for even reheating. This method helps you store leftover pieces without clumping.
Reheating that restores crunch
Reheat on a wire rack in a 350-375°F oven for about 10-17 minutes, flipping once, until the center reaches 165°F and the exterior re-crisps.
The air fryer excels at quick re-crisping: heat at 375-390°F for 5-8 minutes, flip halfway. It restores texture without drying meat.
- Cool fully before packing to prevent condensation and soggy skin.
- Avoid microwaving; it heats unevenly and makes skin rubbery.
- If sauced, warm a small amount of sauce and toss after reheating to restore gloss.

| Storage Method | How Long | Best Reheat Method |
|---|---|---|
| Refrigerate (airtight container) | 3-4 days | Oven 350-375°F for 10-17 minutes |
| Freeze (single-layer, then sealed container) | 2-3 months | Thaw overnight, reheat in air fryer 375-390°F for 5-8 minutes |
| Quick reheat (fresh or thawed) | Minutes: 5-17 | Air fryer best for speed; oven works for larger batches |
Air fryer vs. oven: choosing the right method for your wings
Choose your heating tool by batch size and timing to get reliable crisp results.
Air fryers excel for small batches and fast finishes. For fresh pieces, set a fryer to 400°F for 10 minutes, flip, then run another 6–8 minutes until an instant-read thermometer hits 165°F. That usually totals about 16–18 minutes and gives very crisp skin with minimal babysitting.
For reheats, the air method shines: 375–390°F for 5–8 minutes restores crunch without drying meat. This is perfect when you want quick, hot servings for a few people.
The oven is best for larger loads and steady browning. Use 400°F for 30–40 minutes or 425°F for roughly 45 minutes, flipping once. A wire rack and spacing keep results even across a full sheet, ideal for game-day batches.
“Pick the tool that fits your batch size and schedule; both reach 165°F safely when used with a thermometer.”
- Small-batch cooking: air fryer crisps fast—about 16–18 minutes total, flip once.
- Reheating: air fryer re-crisps in 5–8 minutes with minimal moisture loss.
- Big batches: oven handles volume, giving uniform browning on a rack.
- Oven requires longer minutes but less active monitoring—good for parties.
| Method | Temp | Typical time |
|---|---|---|
| Air fryer (fresh) | 400°F | 10 min, flip, then 6–8 min (≈16–18 min) |
| Air fryer (reheat) | 375–390°F | 5–8 minutes |
| Oven (rack) | 400–425°F | 30–45 minutes, flip halfway |
Troubleshooting common wing mistakes
Small fixes often solve big problems when skin won’t crisp or sauce won’t cling. Start by checking surface moisture and spacing; these two factors cause most failures.
Wings not crispy? Moisture, crowding, or low heat may be to blame
If skin isn’t crisp, pat each piece thoroughly with paper towels to remove surface water. Alternatively, use the baking powder method to dehydrate the exterior for extra browning.
Make sure pieces are spread single-layer and avoid crowding—about 16 per half-sheet max—so hot air can circulate. Low heat extends bake time and can rubberize skin; target 400–425°F and flip once for even rendering.
Always check internal temperature with an instant-read probe and pull promptly at 165°F to keep meat juicy while preserving crisp crust.
Sauce not sticking? Toss while wings are hot and avoid excess grease
If sauce slides off, toss pieces immediately while hot and use warmed sauce so fats stay fluid and cling. Skim excess grease from bowls or pat pieces lightly before saucing to improve adhesion.
Adjust pepper and salt after tasting one piece to avoid overseasoning a full batch. For reheats, restore texture on a wire rack or in an air fryer so crust returns before saucing.
“Fix moisture and spacing first—most crispness problems vanish once hot air can reach all surfaces.”
- Dry with paper towels or use baking powder for extra crisp.
- Space pieces; do not stack or crowd.
- Target 400–425°F and flip once for even color.
- Check internal temperature and pull at 165°F to prevent dryness.
- Toss hot with warmed sauce; skim grease to help it stick.
| Problem | Likely Cause | Quick Fix |
|---|---|---|
| Not crispy | Surface moisture or overcrowding | Pat dry with paper towels; space pieces; use baking powder |
| Sauce slides off | Cold sauce or greasy surface | Warm sauce; toss while hot; skim excess grease |
| Dry meat | Overcooked past internal temperature | Pull at 165°F; rest 4–5 minutes before serving |
Conclusion
Two proven paths deliver reliable, crisp baked chicken wings at home: 400°F for 30–40 minutes on a rack with one flip, or 425°F for about 45 minutes using aluminum-free baking powder and a small dot of butter for deeper browning.
Control time and temperature to tailor texture. Toss hot pieces with warmed Frank’s RedHot plus butter or a garlic butter finish for classic flavor. Keep a dry rub if maximum crunch is the goal.
Store cooled leftovers properly and reheat on a rack or in an air fryer until the center reads 165°F to restore crisp without drying. Use this recipe framework to adapt seasonings, sauces, and batch size for consistent results.