How to Build a Halloween Snack Board for Parties
Surprising fact: nearly 70% of guests say a themed grazing display makes a party feel more festive and inviting.
This Website contains affiliate links. That means I may earn a small commission if you purchase through my links, at no extra cost to you.
This simple centerpiece can scale from a cozy family movie night to a lively gathering. Use what you already own — a wooden cutting surface, marble slab, large platter, or even a baking sheet. Place small bowls first for dips, olives, and tiny candies so messier items stay contained.
Prep ahead: wash produce, cut cheese, and ready dips to save time on the day. Start with bowls at opposite corners, group colors like orange, black, green, and fill gaps with piles of Cheez‑Its, Oreo spiders, candy pumpkins, and fresh veggies for contrast.
Focus on abundance: build generous piles, mix textures, and add small plates so guests can graze. This recipe-free approach keeps it low-stress, playful, and adaptable to family tastes — kids love gummies and Oreos, while adults enjoy salty, crunchy bites like salami and Cheddar Sun Chips.
Key Takeaways
- Use a tray or surface you already have to keep setup easy and low-cost.
- Place bowls first, then build color groups and fill gaps for a full look.
- Combine packaged treats (Oreos, Reese’s, Cheez‑Its) with fresh produce for balance.
- Prep ingredients ahead to minimize day-of work and keep the spread relaxed.
- This centerpiece works for small family nights or larger holiday crowds.
Why a Halloween Snack Board Is the Perfect Party Centerpiece
Create an instant focal point by arranging a mix of bites and small props in the center of your table. A well-styled snack board invites guests to mingle and graze without formal plates or timing. This makes hosting low-stress and keeps the mood casual and fun.
Use the classic holiday colors—orange, black, green, white, and yellow—to guide placement. Scatter piles of contrasting foods so the display looks balanced from every side.
Bowls at the corners add height and contain messy items like dips, candy eyes, or olives. Small props—mini skeletons, spider rings, tiny bones—boost theme without complicating the foods.
“A colorful, varied spread means every guest finds something they like.”
- Use the display as instant decor and an easy way to encourage mingling.
- Mix salty and sweet so both kids and adults find favorites.
- Stretch your budget: add low-cost staples (popcorn, pretzels) alongside a few hero seasonal treats.
- Keep plates and napkins nearby for easy flow around the table.
No single right way exists—aim for a generous, inviting layout that feels relaxed and playful for the family and guests.
What You’ll Need: Boards, Bowls, and Bite-Size Ingredients
Pick a platform—wood, marble, or metal—that gives you room to arrange foods and props. A wood cutting board, marble board, large platter, or sheet pan all work well. Leave a small perimeter so guests can reach treats and set down napkins.
Add 2–3 small bowls or ramekins for dips, olives, and tiny candies. Bowls give height and keep messy items contained. Include serving spoons, mini forks, and toothpicks to keep the spread tidy and easy to share.
Build a short shopping list that balances sweet, salty, and fresh ingredients. Think Cheez‑Its, candy pumpkins, Halloween M&M’s, Oreo spiders, candy corn, pretzels, blue corn tortilla chips, black olives, gummy worms, baby carrots, clementine pumpkins, Cheddar Sun Chips, popcorn, cheese cut into pumpkin shapes, and salami.
Quick setup checklist
- Pick a sturdy base that fits your table and guest flow.
- Gather 2–3 bowls to compartmentalize dips and small items.
- Set out spoons, forks, and toothpicks for easy sharing.
- Choose core ingredients that hit salty, sweet, and fresh notes.
| Base | Bowls & Tools | Kid-Friendly Items | Texture/Volume |
|---|---|---|---|
| Wood cutting board / marble slab / platter / sheet pan | 2–3 ramekins, serving spoons, mini forks, toothpicks | Oreo spiders, chocolate pretzel ghosts, candy pumpkins | Popcorn, Cheddar Sun Chips, pretzels for crunch |
| Fits table center and traffic flow | Bowls for dips, olives, small candies | Gummy worms, Reese’s Pieces, clementine pumpkins | Cheese shapes, salami piles for substance |
| Leave a perimeter for hands and napkins | Contain messy ingredients and add height | Easy-to-assemble themed treats | Mix chips, crackers, and veggies for balance |
Plan and Prep: Time, Portions, and Make-Ahead Steps
Start by deciding how many people will be grazing so you can scale your setup and shopping list. Estimate headcount first to select the right snack board size and decide how many items to buy. Many displays assemble in about 15 minutes when ingredients are prepped ahead of time.
How many guests, serving sizes, and realistic time
For small gatherings aim for 8–12 distinct items. Larger parties need more variety and volume.
Block out realistic prep time: washing, slicing, and portioning can take 30–45 minutes, but final assembly often takes only 10–15 minutes on party day.
Wash, cut, and pre-portion fruits, veggies, cheeses, dips
Prep produce by rinsing and fully drying to keep the display tidy. Pre-slice firm cheeses and portion delicate foods so they’re easy to place.
Stage everything on the counter grouped by category. Decide what goes in bowls first (dips, olives, tiny candies) so placement is quick.
- Keep perishable items chilled until the last minute and refill from the fridge as needed.
- Mix bite-size options for kids with a few themed treats to keep the spread appealing.
- Add small plates and napkins by the board and a second stack across the table for flow.
- Leave a few inches around the perimeter to slide in final elements and top-ups.

| Guest Count | Items to Aim For | Estimated Prep Time |
|---|---|---|
| 4–8 | 8–12 items | 30–45 minutes (batch prep) |
| 9–16 | 12–18 items | 45–60 minutes |
| 17+ | 18+ items and extra refill trays | 60+ minutes |
Step-by-Step: How to Assemble a halloween snack board
Start assembly by anchoring a few small bowls so dips and tiny candies are easy to reach.
Place bowls first at opposite corners or slightly off-center. This creates visual anchors and keeps messy dips contained. Use one for olives, one for a creamy dip, and one for tiny candies.
Lay out anchor items next—cheeses, salami piles, and larger cookies. These define zones and give the layout weight. Work clockwise so placement feels intentional.
Layer smaller piles around the anchors in arcs and small swirls. Alternate textures: crunchy chips beside chewy gummies, crisp veggies near creamy dips. This keeps each reach interesting.

Color and height strategy
Distribute color evenly: split orange pieces across the surface, add dark elements for depth, and tuck green and white bits to brighten the scene. Vary height by mounding popcorn, stacking cookies, or using a taller ramekin so the eye moves around the board.
Finish and serve
Leave small negative spaces as you go so you can tuck in nuts or extra crackers. Fill gaps at the end so no base surface shows and the display looks abundant.
- Use candy eyes, mini bones, or plastic spiders as tiny accents without crowding edible items.
- Set small plates and napkins by the display and plan to refill from backup bowls in the kitchen.
| Step | What to Place | Reason |
|---|---|---|
| 1 | Bowls (dips, olives, candies) | Contain mess and create anchors for reach |
| 2 | Anchor items (cheese, salami, large cookies) | Define zones and add substance |
| 3 | Smaller piles (chips, gummies, veggies) | Fill movement paths and offer variety |
| 4 | Finishing touches (height, accents, plates) | Balance visual interest and make serving easy |
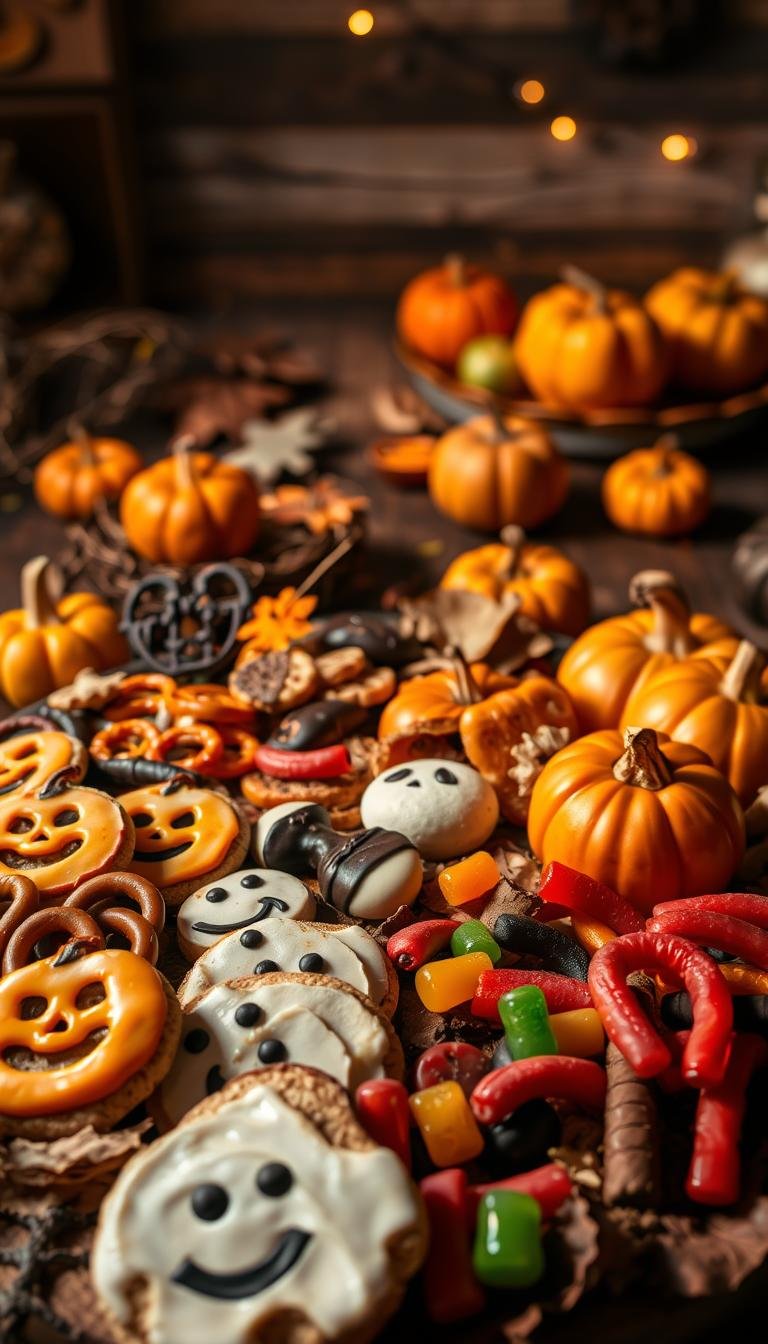
What to Put on Your Board: Sweet, Salty, and Spooky Ideas
Arrange the foods so flavors alternate—sweet, savory, fresh—making each reach interesting. Start by planning a sweet lane and a salty lane, then scatter color clusters across the surface.
Sweet treats: candy corn, candy pumpkins, seasonal M&M’s, gummy worms, and broken chocolate bars give quick pops of color and texture. Space these items so orange and dark tones repeat.
Salty snacks: Add pretzels, popcorn, Cheez‑Its, blue corn tortilla chips, and Cheddar Sun Chips to balance sugar with crunch.
Color and kid-friendly picks
Use orange, yellow, white, black, and green as a checklist. Repeat each shade in several spots to keep the display cohesive.
Kid-approved minis: Oreo spiders (Double Stuf Oreos + stick pretzels + candy eyes), chocolate pretzel ghosts dipped in white chocolate, and clementine pumpkins with celery stems are easy to assemble and loved by kids.
Dips and add-ins
Include one bowl of guacamole with candy eyes, warm queso, caramel dip for fruit, and a small dish of black olives. These add dips, savory punch, and variety of textures.
- Build a repeating sweet lane with candy corn and pumpkins to anchor color.
- Scatter gummy worms near bowls or chips for playful surprises.
- Finish with fresh veggies or apple slices so guests have lighter foods between richer treats.
Pro Tips for Success: Allergies, Outdoor Serving, and Family-Friendly Safety
Keep guests safe and your time manageable by planning simple rules before you set out the spread. A few clear steps cut stress and let the family enjoy the party.
Nut-free options and clear labeling
If allergies are unknown, go nut-free. Separate any packaged candies that contain nuts and pin an ingredient list near the display so guests can scan at a glance.
Outdoor serving: heat, insects, and quick refreshes
Avoid melt-prone chocolates and creamy dips in direct sun. Cover bowls between refills and use lids or mesh to deter flies and ants.
Prep a second tray off to the side to speed refills and limit how long perishable food sits out. Budget a few extra minutes for quick swaps when needed.
Choking hazards and kid-friendly swaps
Watch for whole grapes, hard candies, and large nuts around young kids. Slice produce into bite-size pieces and offer softer swap-ins like cheese cubes and cut fruit.
- Place bowls on opposite corners and alternate colors for balance.
- Keep toothpicks, mini forks, and spoons handy to reduce sticky fingers.
- Mix sweet salty choices so everyone rotates flavors and you save valuable minutes.
| Situation | Do | Quick swap |
|---|---|---|
| Unknown allergies | Serve nut-free, label items | Sunflower seed butter cups |
| Outdoor heat | Avoid chocolate, cover bowls | Caramel dip in cooler |
| Young kids | Slice and supervise | Grape halves, soft cheese |
Conclusion
You can assemble a full, colorful centerpiece in minutes when you prep simple ingredients and follow a clear order.
Start with bowls on a sturdy cutting board or platter, add anchor piles, repeat small color clusters around the surface, then tuck in candies and chips to fill gaps.
Choose treats that match your guests: alternate crunchy and soft textures, swap a chocolate for caramel, or add a pumpkin-shaped cheese for a festive twist.
This format is flexible, not a strict recipe. It saves time, cuts stress, and keeps the focus on fun for kids and adults alike.
Pin this guide and write a quick prep checklist so your next halloween snack spread comes together in about 15 minutes.