Halloween Themed Desserts: Top Picks for the Season
Surprising fact: nearly one in three hosts say a show-stopping sweet becomes the party highlight.
This Website contains affiliate links. That means I may earn a small commission if you purchase through my links, at no extra cost to you.
This future-season roundup gathers top recipes that deliver big visual impact with little fuss. Expect easy cookies, cupcakes, centerpiece cakes, brownies, bark, apples, s’mores twists, and no‑bake lifesavers.
Most recipes will travel well, scale for any guest list, and can be made ahead. You’ll find fall flavors—pumpkin, warm spices, apples, and lots of chocolate—paired with playful looks like ghost swirls and jam “blood.”
Skill levels vary. Kid-friendly decorating sits next to Bundt showpieces and quick ganache finishes. Budget tips will show how boxed mixes and pantry candy become striking toppers.
Key Takeaways
- Find easy, camera-ready ideas for parties and small gatherings.
- Most treats can be prepped ahead and travel well.
- Fall flavors and simple decorations create big impact.
- Options cover kids, beginners, and experienced bakers.
- Budget and time-saving swaps are highlighted throughout.
Spooky season sweets at a glance: what to serve at your Halloween party
Pick a focal cake, a decorate-yourself tray, and a couple crowd-pleasers to simplify setup. That trio keeps the table striking without overworking you.
Fast pick-list for hosts: one showpiece cake, one cookie tray for decorating, one kid-friendly cupcake, one no‑bake item, and one salty‑sweet board. This combo fills tastes and textures for any party.
- Timing: 45 minutes — no‑bake or candy apples; 60–90 minutes — cupcakes or cookies; 2 hours — cake.
- Kids love spider cookies and skeleton biscuits to decorate. Adults enjoy a bold cheeseboard to balance sweet food.
- Pair black velvet cupcakes with chocolate spider-web doughnuts for a cohesive black-and-white look.
A purple fruit punch with lychee “eyeballs” adds motion without more baking. Make cookie decorating and eyeball pops activity stations so kids stay busy while adults mingle.
Simple wins: candy apples and brownies can be made ahead; s’mores dip saves the day last minute. Label each platter and match props to costumes for better photos. Continue reading for full recipes and step-by-step decorating tips.
Cookies that creep it real
Let cookies anchor your table with a trio of dramatic looks and easy projects. This lineup mixes sculpted showstoppers with decorate‑yourself trays that keep kids busy and guests impressed.
Witch Finger Cookies with almond “nails” and jam “blood”
These shortbread fingers hold their shape, thanks to the dough’s low spread. Shortbread is ideal—it snaps cleanly and highlights the buttery bite against a dab of red jam for “blood.” Use whole almonds as nails and pipe jam into the cut edge after baking.
Hocus Pocus Binx Cookies made dark with black cocoa
Black cocoa delivers intense color and a deep chocolate backbone without heavy food dye. It’s perfect when you want dramatic contrast and rich flavor in a simple cookie recipe.
Spider Cookies and Skeleton Biscuits the kids can decorate
Pre‑pipe guide marks on cookie rounds and set bowls of icing eyes, melted chocolate, and sprinkles. Kids can drag a toothpick through concentric chocolate rings to make webs or dot contrasting melts for eyeballs.
Quick tips: swap in store‑bought rounds to save time, keep decorated cookies uncovered until chocolate sets, then store airtight with parchment between layers. Scale batches by freezing dough logs so you can slice and bake fresh the morning of your party.
Want more party builds? Continue reading for cupcakes and showpiece cakes that pair with this cookie spread.
Cupcakes to sink your teeth into
Handheld sweets win every time—they’re neat, portable, and instantly crowd‑pleasing. These single-serve cakes give hosts bold toppers and tidy portions that photograph well on a spooky table.
Vampire treats with jelly “blood”
Vampire Cupcakes start with a sturdy chocolate base. Core the center and fill with strawberry jelly for a dramatic red “blood” surprise. Cap with marshmallow frosting and press cookie crumbs into a thin hairline to suggest a Dracula silhouette.
Quick sandwich-cookie spiders
For fast impact, press an Oreo onto a frosting dome, insert licorice rope legs, and stick on candy eyes. This Sandwich Cookie Spider method needs minimal piping and maximizes wow factor.
Frankenstein assembly line
Set up a simple station for Frankenstein Cupcakes. Pre‑frost or pipe flat tops, then let kids add candy hair, bolt candies, and eyebrows. It keeps little hands busy and speeds service.
Black velvet with simple faces
Use a black velvet sponge and white icing so simple spooky faces pop in low light. A small squeeze bottle or tipped piping bag makes clean eyes and mouths without fuss.
- Bases: choose sturdy chocolate cakes; refresh with simple syrup if baked ahead.
- Transport: chill frosted cupcakes 20–30 minutes, then move in carriers to protect decorations.
- Variations: add peppermint extract for a mint twist or orange zest in the frosting for fall notes.
- Timing: make frosting ahead and rewhip before piping to save party-day minutes.
Next: continue reading for showstopping cakes that pair perfectly with these portable favorites.
Cakes that steal the show
A well-built cake can be the visual anchor of your party and save you last-minute stress.
It’s the Great Bundt‑kin, Charlie Brown is a pumpkin Bundt built to impress. Bundt pans are ideal for showpieces because their sculpted ridges need almost no carving. They bake and cool quickly and hold shape well, so you get a pumpkin look with little fuss.
Jack‑o’‑Lantern from two Bundts
Bake two matching Bundts, trim flat, and sandwich them with frosting. Carve a simple face or pipe features on the surface. This two‑Bundt method gives a rounded, pumpkin silhouette without advanced cake carving skills.
Ghost smears and white chocolate drips
For a dramatic halloween cake, spread swoops of white frosting or ganache to mimic apparitions. Finish with controlled drips of white chocolate for candlelit shine and contrast.
Drippy Candle Cakes
Stack small cylinder cakes, pour warmed white chocolate for natural drips, and insert candles at serving time for an “Is it cake?” moment.
- Structure tips: crumb‑coat, chill between layers, and use dowels for taller builds to prevent shifting during transport.
- Flavor pairings: pumpkin spice, chocolate‑orange, or spiced molasses with cream cheese or marshmallow frosting.
- Make‑ahead: bake a day early, wrap tightly; add drips and decorations the day of for the cleanest finish.
- Serving: use a warm serrated knife and wipe between slices to keep faces intact.
These top centerpiece cakes anchor photos while cupcakes and cookies fill the table—continue reading for brownies and bars if you want easy slice‑and‑serve additions.
Brownies, bars, and bites for every ghoul
When time is tight, a sheet of brownies dressed up with a few props becomes instant party magic.
Start simple: bake a 9×13 pan from a boxed mix or your favorite base, chill the slab, and decorate. Crushed Oreo “dirt,” candy pumpkins, and cookie tombstones transform plain squares into playful party pieces with almost no extra work.
Below are quick takes that scale well for a crowd. Chill the slab before cutting and wipe the knife between slices for clean squares. Offer a nut-free brownie on the same tray and clearly label Buckeye cheesecake bars for guests with allergies.
Pumpkin Patch Brownies with Oreo “dirt”
Top boxed brownies with crushed Oreo crumbs and press candy pumpkins into the surface. The effect is seasonal, but the method stays fast and forgiving.
Graveyard Brownies with cookie tombstones
Stick rectangular cookies upright and pipe simple “R.I.P.” marks. Kids love placing tombstones at a decorate‑yourself station.
No‑Bake Buckeye Cheesecake Bars
This no‑bake option layers a chocolate crust, creamy peanut butter cheesecake, and ganache. Refrigerate and slice just before serving to keep clean edges.
Spooky Brownies — kid and adult friendly
Make mini and full-size squares so guests can sample both. Add a sprinkle of flaky salt or a peanut‑butter swirl to balance sweet, rich chocolate.
- Scale: use 9×13 or half‑sheet pans for high yield.
- Transport: pre‑cut bites in lidded trays speed setup.
- Storage: keep decorated brownies at cool room temp; refrigerate no‑bake bars.
| Option | Prep Time | Best For | Allergen Note |
|---|---|---|---|
| Pumpkin Patch Brownies | 40–60 min | Quick table centerpiece | Contains gluten, may contain nuts |
| Graveyard Brownies | 45–70 min | Kid activity station | Contains gluten |
| No‑Bake Buckeye Bars | 20 min prep + chill | No‑oven hosts, peanut‑butter fans | Contains peanuts |
| Spooky Brownies (mixed sizes) | 40–60 min | Sampling platters | Offer nut‑free option |
Want more five‑minute projects? Continue reading for chocolate bark and fudge ideas that guests can help decorate at the party.
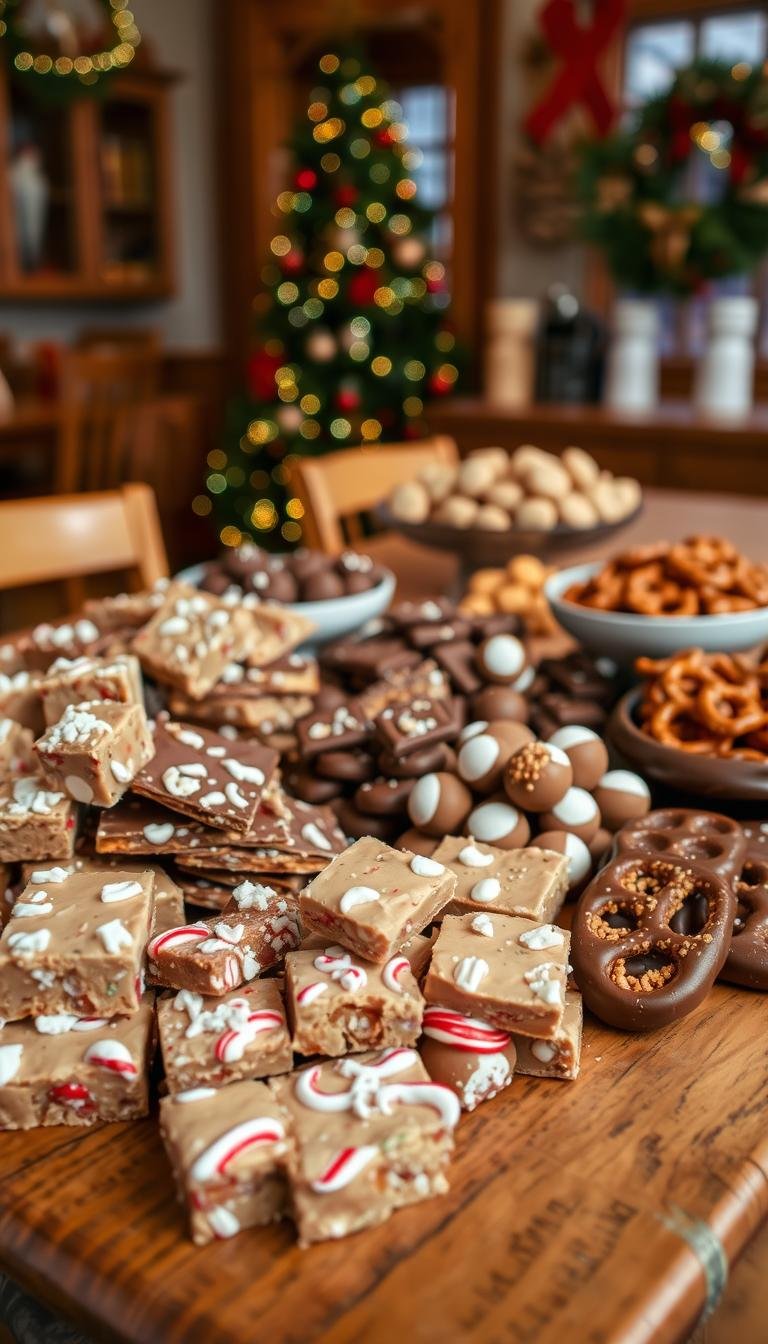
Chocolate bark and fudge favorites
Melted chocolate transforms leftover candy into showy shards that double as decor and snacks.
Why bark wins: if you can melt chocolate, you can make bark. It’s fast, forgiving, and toppings turn it into an easy craft station for kids and guests.
Halloween Candy Bark, quick workflow
Meltdown: gently melt chocolate and spread thin on parchment. Swirl in white chocolate for contrast, then press on halloween candy, pretzels, and icing eyes. Chill until firm, then break into jagged shards for dramatic platters.
Nightmare‑inspired patchwork fudge
Make a rich chocolate fudge base and press in colored lines or small patches of contrasting fudge to nod to Sally’s patchwork. No sculpting needed—just pattern the top before chilling.
“Make extra: both bark and fudge keep refrigerated for days, so prep early in the week.”
- Flavor combos: dark chocolate with peanut candy and sea salt; white chocolate with crushed cookies and orange sprinkles.
- Allergen note: label trays if nut candies are used and offer a nut‑free bark alternative.
- Plating tip: tear parchment edges and scatter icing eyes around the board for a handmade look.
Next: move on to apple treats for a tart break from dense chocolate fare.
Apple treats: candy, caramel, and beyond
Apples bring bright crunch and hand‑held charm to any fall spread. They break up richer items and add a fresh, tart option for guests who want something lighter.
Classic candy apples in about 30 minutes
Make glossy candy apples with a handful of ingredients and a candy thermometer. The thermometer lets you hit the precise crack stage for a shiny, hard shell.
Tip: work quickly—dip, set on parchment, and avoid humid rooms that dull the shine.
Caramel apples rolled in peanuts for easy serving
Soft caramel apples are less formal and kid‑friendly when you use short fondue picks or short sticks. Roll the sticky caramel in chopped peanuts or sprinkles for grip and portion control.
Bloomin’ apples: baked, stuffed, and finished with ice cream
Pre‑cut the apple to open like a bloom, stuff with soft caramels, brush with butter, and bake until tender. Top warm apples with a scoop of vanilla and a drizzle of caramel for plated service.
Brown butter apple blondies with creamy frosting
Brown butter blondies fold tender apple pieces into a dense bar and finish with a brown‑butter frosting that can be made ahead. Slice and stack on parchment for easy self‑service.
- Serving: pre‑slice or offer mini apple bites and provide wet wipes and parchment squares at the station.
- Flavor pairings: cinnamon, nutmeg, and a pinch of salt balance the caramel and toffee notes.
- Storage: keep candy apples at cool room temperature; refrigerate blondies. Avoid humidity to preserve shine.
- Visuals: deep red candy apples and golden caramel ones add contrast to darker chocolate platters.
Bridge: continue reading for s’mores ideas that add graham‑and‑chocolate nostalgia to your party spread.
S’mores with a spooky twist
S’mores flavors translate easily into cookies, dips, and pops, giving hosts quick, shareable options that feel both nostalgic and fresh.

Pumpkin S’mores Cookies: Fold crushed graham crackers and chocolate chips into a pumpkin-spice dough for soft, chewy cookies. The crumbs add crunch while the chips melt into gooey pockets. Adjust pumpkin spice to taste for milder or bolder fall notes.
Ghost S’mores Dip
For a last‑minute plan, melt chocolate and cream in a skillet and top with marshmallows. Bake briefly until puffed, then use a small knife to shape a few marshmallows into ghost faces before they set. Serve hot with graham crackers, apple slices, or pretzels for dipping.
Hocus Pocus‑Inspired S’mores Pops
Pre‑skewer marshmallows, dip in melted chocolate, and press on themed sprinkles or tiny candy accents. Let them set upright in a small cauldron or foam block so guests can grab and go.
- Portion & temp tips: Keep dips warm on trivets; store pops in a cool spot to avoid bloom.
- Kid‑friendly variations: Use mini marshmallows and nut‑free sprinkles for safety.
- Make‑ahead: Bake cookies a day early and rewarm briefly; assemble pops hours before serving for the cleanest finish.
Want more hands‑on ideas? Continue reading for kid‑specific treats and colorful projects.
halloween themed desserts for kids
Kids gravitate to low-mess treats they can personalize and eat in minutes. Keep projects short and colorful so younger helpers stay engaged and parents stay sane.
Monster Rice Krispies Treats
Shape or cut bars, dip the top in colored candy melts, and press on googly eyes for instant characters.
Quick path: warm melts in short bursts, dip edges, add candy eyes before the coating sets. These simple steps let kids decorate with minimal sticky cleanup.
Meringue Ghosts and Pumpkins
Beat to glossy stiff peaks, pipe small ghost shapes, or make pumpkin swirls. Dry them low and slow for a crisp finish that stacks well for parties.
Storage tip: keep meringues dry in airtight containers so they stay crunchy between serving and transport.
Halloween Candy Corn Gelatin Cups
Layer white, yellow, then orange gels, chilling between pours for clean stripes that mimic candy corn. These grab‑and‑go cups are bright and easy for little hands.
- Kid stations: set out simple sprinkles, a cupcake station with colored frosting, and pre-filled piping bags so children can add a final touch without complex tools.
- Allergens & packaging: offer gelatin‑free fruit cups and use nut‑free candy eyes. Pack individual treats in liners or clear bags for school parties.
- Display: arrange color‑themed trays—greens, oranges, purples—so kids can “shop” by color.
- Transport: Rice Krispies keep best at room temp; meringues must stay dry; gel cups chill until serving.
Make it easy: these low‑mess projects keep little hands busy and let hosts prep ahead. Continue reading for no‑bake lifesavers that speed setup even more.
No‑bake and low‑effort party lifesavers
No‑oven options keep your prep quick and your table full of high‑impact bites. These picks need minimal hands‑on time and give strong visuals for a halloween party or casual fall gathering.
Jack Skellington Oreo Pops
Fast steps: insert sticks into sandwich cookies, dip in white coating, and draw Jack’s stitched smile with black icing. Let set on parchment upright so faces stay perfect.
Timing: assemble and chill—pops set in under an hour, so they’re ideal for last‑minute finishing.
White Skull Snack Board
Build a skull‑shaped board that “falls apart” as guests graze. Use a charcoal‑coated cheese, a blue‑veined wedge, crackers, nuts, and dried fruit. Scatter a few candy eyes or toy spiders for atmosphere.
- Use dark slate and layered textures to invite grazing.
- Label cheeses and note allergens; keep nut items separate.
- Add store‑bought dips, olives, and pickles for a full board fast.
Rosemary‑Pumpkin Seed Brittle
Roast pepitas with rosemary, sea salt, and cracked pepper, then combine with a simple caramel. Break into shards for a savory‑sweet crunch that refreshes palates between richer dessert items.
| Item | Prep | Best served |
|---|---|---|
| Oreo Pops | 30–45 min | Fresh, chilled |
| Snack Board | 15–25 min | Room temp, label items |
| Pepita Brittle | 40 min (makes ahead) | Days ahead, stored airtight |
Serving tips: provide small tongs for candy, mini knives for cheeses, and parchment cutouts for easy cleanup. These zero‑bake stars balance sweet and savory and let you move on to pumpkin spice bakes—continue reading for cozy, oven‑baked classics.
Pumpkin spice and everything nice
Let pumpkin anchor the menu with textures that range from pillowy whoopie pies to a deeply spiced molasses cake. These three quick builds show how one seasonal note can deliver handheld treats, a cozy centerpiece, and soft buns with a showy finish.
Pumpkin Whoopie Pies with marshmallow filling
Reimagine the classic as mini sandwich cakes: bake domed pumpkin rounds, cool, then sandwich with a toasted marshmallow filling. Chill briefly so edges stay tidy and slices won’t smear.
Portion tip: make minis for large crowds—mini whoopie pies keep sticky fingers low and let guests sample more.
Spiced Pumpkin‑Molasses Cake
This moist spice cake blends warm cinnamon, ginger, and a touch of molasses for depth. Serve with a cream cheese glaze or a spoon of whipped cream to balance the richness.
Customize: dial spices to taste and add orange zest for brightness if you want a brighter note.
Pumpkin‑Spiced Buns with spiderweb glaze
Soft buns brushed with a simple pumpkin spice icing get a festive finish with a spiderweb glaze. Pipe concentric circles of white icing, then drag a toothpick outward to create instant webbing.
- Make‑ahead: bake cake layers and whoopie rounds a day early; assemble later. Buns are best the day of for peak softness.
- Serving: mix these pumpkin items among chocolate options to keep the table varied in color and flavor.
- Beverage pairings: hot cider or spiced tea complements pumpkin spice without overwhelming it.
Miniaturize for crowd control: small whoopie pies and bun halves help with portioning and reduce waste. If guests want richer cocoa choices, continue reading for chocolate picks that pair well.
Ghoulishly good chocolate picks
When you want big visual contrast, nothing beats glossy chocolate apples and graphic doughnuts. These two quick builds are a cocoa showcase that suits kids and grownups alike.

Chocolate Apples with nuts, sprinkles, and honeycomb
Dipping best practices: chill apples, wipe them dry, and dip in tempered or coating chocolate for a smooth shell. Roll each apple in chopped nuts, sprinkles, or honeycomb pieces while the coating is wet to add crunch and color.
Nut-free option: swap cookie crumbs or colored sugar for toppings so everyone can enjoy the apples.
Spider Web Doughnuts using dark and white chocolate
Glaze doughnuts in dark chocolate, then pipe concentric rings of white chocolate across the top.
Use a skewer to drag lines from center outward to form a clean web. Mix full-size rings with mini doughnuts on tiered stands for height and easy sampling.
- Flavor twists: stir a pinch of espresso into the chocolate glaze or finish with flaky sea salt.
- Storage: keep chocolate apples cool to set; glaze doughnuts the day of serving for best shine.
- Serving tip: add a few chocolate-frosted cupcakes on the tray to offer cake texture alongside dipped treats.
- Interactive idea: host a batch-dipping station with bowls of coatings so guests can finish their own apples.
Next up: continue reading for bloody brilliant bakes that bring dramatic red-and-white showpieces to the table.
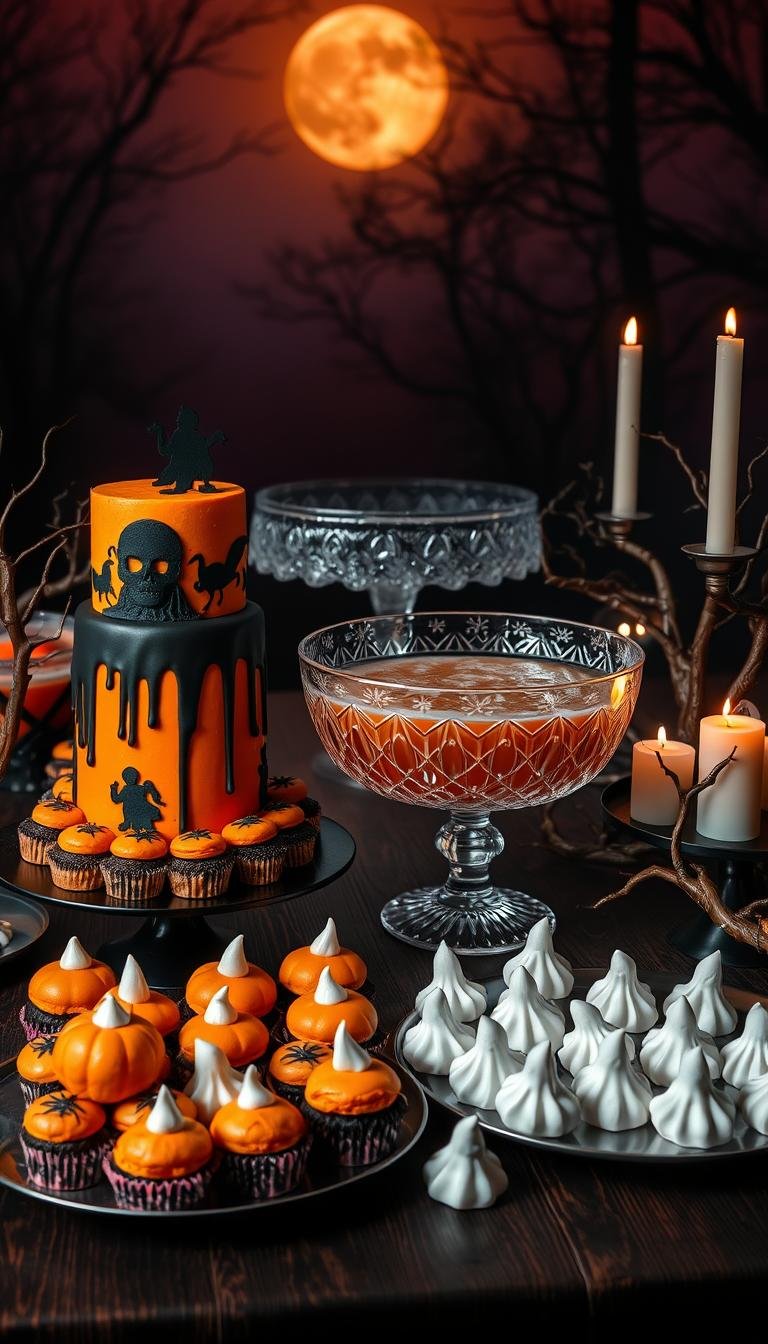
Bloody brilliant bakes
Red glazes and gooey fillings make for the most dramatic cake slices on any party table. Use color and contrast to turn simple bakes into a showpiece that reads bold in photos and on the plate.
Vampire Poke Cake
The poke method maximizes the cherry “blood” effect. While the almond sponge is still warm, press rows of holes with a handle or skewer.
Pour tart cherry sauce into the channels so the liquid sinks through the crumb. Chill, then cap with a light whipped topping for a clean, airy finish and striking red ribbons when sliced.
“Blood”-covered celebration cake
For realistic drips, thin strawberry jam with a little water and a drop of red food coloring until it runs slowly but will set.
Cover the cake in a smooth white fondant for a ghostly canvas; pour the jam mixture around the edge and let gravity form natural drips down the sides.
- Flavor pairings: almond sponge with cherry; vanilla with raspberry for bright tart contrasts.
- Slicing tip: chill briefly and use a warm, wiped knife to avoid drag lines through the red filling.
- Make-ahead: bake bases a day early; add drips the day of to keep shine and shape.
- Serve idea: place on a pedestal away from traffic and add a tray of brownies for guests who prefer dense chocolate.
- Allergens: label colorings and whipped toppings; offer a dye-free cherry compote for sensitive guests.
Ready for screen-ready sweets? Move next to on-theme showstoppers inspired by favorite movies for tie-ins that pair perfectly with a spooky movie night.
On‑theme showstoppers from favorite movies
Pair your favorite movie night with snacks that echo characters and color palettes for instant cohesion.
Nightmare Before Christmas ideas
Patchwork fudge channels Sally’s multicolor panels: layer flavored fudges or swirl colored ganache for a playful cake recipe alternative that guests can slice. It reads bright on a platter and holds up through a full evening.
Jack Skellington Oreo Pops are fast to decorate. Dip cookies in white coating and draw a stitched smile with an edible marker for instant character appeal.
Hocus Pocus pairings
Binx cookies use black cocoa so the contrast pops against white icing eyes. They pair perfectly with Hocus Pocus s’mores pops — portable, hand-held treats that are great during a scene change.
- Set out handheld items first, slice a showpiece cake at intermission.
- Use black‑and‑white napkins for Jack, and purple/green accents for Hocus Pocus.
- Add a Frankenstein cupcake station so guests can “adopt” a character.
- Pad the table with bowls of candy and pumpkin bites for continuous snacking.
Timing tip: prep decorations in the afternoon, arrange the dessert bar an hour before guests arrive, and hold chilled items for the final reveal to make your movie night feel curated and effortless.
Quick, last‑minute dessert ideas before guests arrive
When time runs short, a few fast finishes can turn pantry staples into party hits. Use simple steps to pull three showy items together in under an hour.
Ghost s’mores dip
Assemble fast: melt chocolate and cream, top with marshmallows, and bake until puffed. Serve warm with graham crackers and sliced apples for dipping. This warm dish is best made last so it arrives hot.
Candy bark shards
Spread melted coating on parchment, press on candy and crackers, chill, then break into tall shards. Stack shards in a cauldron for instant height and drama.
Jack Skellington Oreo pops
Insert sticks into sandwich cookies, dip in white coating, and pipe faces with a zip bag. Stand them in floral foam or a small block for neat display and quick transport.
- 30–45 minute emergency plan: start bark, set pops, then bake the dip last.
- Shopping short list: chocolate or coating wafers, sandwich cookies, marshmallows, graham crackers, and a few wrapped caramels.
- Speed tips: microwave chocolate in 20–30 second bursts, stirring between to avoid scorching.
- Quick caramel: melt wrapped caramels with a splash of cream and drizzle over apples, popcorn, or brownies.
- Staging & cleanup: line pans with parchment, use disposable piping or zip bags, and set a mini topping bar so guests personalize treats.
| Item | Ready in | Serve notes |
|---|---|---|
| Ghost s’mores dip | 20–30 min | Serve warm with graham crackers |
| Candy bark shards | 15–25 min + chill | Chill then break into tall shards |
| Oreo pops | 30–45 min | Set upright in foam; layer parchment between rows |
Pro tip: add a pinch of salt, cinnamon, or pumpkin spice from the pantry to lift flavors. If time allows, set platters and boards to round out the spread and keep guests grazing while you finish—continue reading for party boards that pair well.
Party boards and crowd‑pleasing platters
A single striking board can stretch your budget while keeping guests satisfied all night. A well-built platter invites grazing, balances sweet and savory food, and reduces waste by letting people sample small bites.
White Skull Snack Board with crackers and cheeses
Position a skull-shaped cheese or white spread at the center, then radiate crackers, charcoal‑coated and blue‑veined cheeses, apple slices, and nuts outward.
Tip: add mini caramel apples or chocolate apple bites for seasonal apples freshness and easy grabbing.
Halloween‑themed charcuterie with toy spiders and eyeballs
Scatter toy spiders and a few candy accents for a playful look. Include small cookie skeletons or spider cookies to echo the sweet side without overloading sugar.
- Mix textures: crisp crackers, creamy cheese, chewy dried fruit, and brittle shards for palate resets.
- Allergens: keep nuts at one end with signage and a separate nut‑free cluster with dedicated tongs.
- Make‑ahead: pre‑slice hard cheeses, portion dips, and chill apples; assemble about 30 minutes before guests arrive.
- Refill plan: portion by guest—estimate 3–4 bites per person per item—and discreetly top trays from a hidden reserve.
Next: continue reading for planning strategies that map timing, labels, and balance across categories.
How to plan your dessert spread for a Halloween party
Build the spread like a small menu: one showstopper, two grab-and-go items, and one palate cleanser. This keeps the table balanced and cuts decision fatigue on the big day.
Balance: cookies, cupcakes, a cake centerpiece, apples, and bark
Blueprint: target one Bundt-based cake centerpiece, a decorate-it-yourself cookie tray, cupcakes for portion control, a fresh apple feature, and a quick bark or fudge. That mix gives texture and color while covering kid and adult tastes.
Set-up tips: labeling, “continue reading” cards, and allergen notes
Label every platter with ingredients and allergen notes. Use simple card tents so guests don’t need to ask.
Add small QR codes or “continue reading” cards linking to the full cookies recipe or cake instructions for guests who want to copy your work later.
Display ideas: cauldrons, mini pumpkins, and spooky signage
Place the cake in the center for height. Flank it with cupcakes and cookies, then tuck apples and bark at the edges for easy reach.
- Keep extra brownies or cookies in the kitchen to refill platters without crowding the table.
- Separate drinks from sweets to avoid traffic jams; leave space around the cake for photos.
- Use parchment under drippy items, stash extra napkins, and have wet wipes near apple stations.
| Task | When to do it | Notes |
|---|---|---|
| Bake cake & cookies | Day before | Chill and wrap |
| Make bark/fudge | Two days before | Store chilled |
| Finish frostings & apples | Day of | Assemble 1–2 hours prior |
Final check: do a walk‑through 15 minutes before guests arrive to top up trays, set lighting, and confirm temperatures. Small prep steps make the whole party run smoother and keep your display camera‑ready.
Conclusion
Final plan: build a balanced spread with one eye‑catching cake, easy‑serve cupcakes, interactive cookies, a crisp apple feature, and a quick bark or fudge to finish.
Pick two make‑ahead winners and one last‑minute showstopper so the table feels abundant without overwhelming prep. Mix chocolate‑forward items with pumpkin and apple options to keep palates engaged through the party.
Label trays with ingredients and allergen notes, set a cookie or cupcake station for kids, and add simple props for a photogenic display. Chop extra candy into next‑day bark or fold pieces into brownie batter to stretch leftovers.
With a bit of sequencing and a few smart shortcuts, any host can deliver a polished halloween spread. Here’s to fall treats, happy guests, and a stress‑free celebration.