Halloween Sugar Cookies: Simple Recipe & Decorating Tips
Nearly 60% of home bakers say themed treats make gatherings feel unforgettable. That motivates this easy guide to festive slice-and-bake cookies you can make with pantry staples.
This Website contains affiliate links. That means I may earn a small commission if you purchase through my links, at no extra cost to you.
In this short how-to, you’ll get a reliable recipe that starts with creaming butter and sugar, adds eggs and vanilla, then folds in flour and baking powder for tender dough. The steps cover coloring with gel food dye, chilling logs, and slicing for neat pinwheels or a hidden-shape “cat in a log.”
Expect clear timing and tool notes—what to use in the mixer, why chill time matters, and how long to bake in a 350°F oven so treats stay soft yet set. Tips also explain storage, freezing, and simple decorating that keeps flavor front and center.
Key Takeaways
- A single base dough yields classic pinwheels and a hidden-shape variation.
- Cream butter and sugar, add eggs and vanilla, then fold in dry ingredients gently.
- Chill logs well; slice 1/4–1/2 inch for spirals, slightly thicker for shaped centers.
- Bake at 350°F about 9–12 minutes until set, not browned.
- Freeze unbaked logs up to two months; baked cookies freeze after flash-freezing.
Why You’ll Love These Halloween Sugar Cookies
These festive pinwheel treats stay soft for days when stored airtight at room temperature, so you can bake ahead and still serve tender results.
The base uses pantry staples—butter, vanilla, and a simple blend of flour and sugar—so the flavor stays classic while color pops with gel food coloring. Gel gives vivid shades and less bleed, which keeps spirals crisp after baking.
The dough is forgiving and easy to work with. Make logs up to 4 days ahead and refrigerate, then let them sit about 10 minutes at room temp before slicing for clean edges.
- Make-ahead friendly: refrigerate dough up to 4 days.
- Color options: orange/black, purple/green, or any two-tone combo.
- No-fuss finish: decorative out of the oven—minimal icing needed.
- Kid-friendly prep: let kids choose coloring or press sprinkles.
Key Ingredients and Pantry Staples
Gathering the right staples first makes mixing and shaping the dough faster and neater.
Butter, granulated sugar, eggs, and vanilla extract form the flavor core. Typical ratios work well: about 1 cup butter (softened), 1 1/2 cups sugar, 2 large eggs, and 2 tsp vanilla extract. Bring eggs and butter to room temperature for even creaming.
Use about 3 cups all-purpose flour, 1 tsp baking powder, and 1/2 tsp salt for structure and a light lift. Measure flour by spooning into a cup and leveling to avoid dense cookie dough.
Gel food coloring gives vivid coloring without thinning the dough. Knead color in by hand with gloves to avoid stains and to keep work time short.
“Choose real sprinkles for rolling the log; avoid sanding sugar on the exterior to prevent color bleed.”
- Mix dry ingredients in a medium bowl before adding to creamed butter.
- Keep prep to a few minutes; have cups and tools ready to streamline baking.
| Ingredient | Typical Amount | Role |
|---|---|---|
| All-purpose flour | 3 cups | Structure |
| Baking powder | 1 tsp | Light lift |
| Salt | 1/2 tsp | Flavor balance |
| Butter (softened) | 1 cup | Tenderness, flavor |
| Granulated sugar | 1 1/2 cups | Texture, crumb |
| Eggs | 2 large | Bind, moisture |
| Vanilla extract | 2 tsp | Aroma |
Essential Tools: Baking Sheet, Parchment Paper, and Mixer
A few simple tools help you shape neat spirals and keep dough tidy. Start by lining a baking sheet with parchment paper to prevent sticking and to give even bottoms without extra grease.
A stand mixer with a paddle attachment or a good hand mixer speeds creaming and keeps the dough smooth. Keep a clean bowl for dry ingredients so flour and baking powder blend evenly before folding into the wet mix.
Use a rolling pin and an extra sheet of parchment when you need to roll layered dough to 1/8–1/4 inch. Parchment also makes stacking colored sheets easier and reduces handling time.
- Sharp knife or pizza cutter for trimming and clean pinwheel edges.
- Plastic wrap to chill logs tightly and preserve round shape.
- Wire rack for quick, even cooling so centers stay soft and bottoms stay firm.
- Measuring cups and spoons to level flour and measure a cup precisely.
| Tool | Why it helps | Tip |
|---|---|---|
| Baking sheet | Provides flat, even baking surface | Line with parchment for best results |
| Stand mixer / hand mixer | Creams butter and sugar quickly | Use paddle to avoid overworking dough |
| Sharp knife / pizza cutter | Squares edges and yields clean slices | Thin blade slices without squishing logs |
| Plastic wrap & wire rack | Shape and cool with control | Chill logs tightly; cool on rack for even air flow |
Before You Start: Room Temperature Tips and Preheat Oven
Good texture starts before you mix—bring key ingredients to the right temperature first.

Why it matters: Room-temperature butter and eggs form a proper emulsion with sugar and keep dough light. If butter gets too soft the dough can become greasy and the final bake will spread.
- For best texture, aim for butter that dents with gentle pressure but isn’t oily or melted.
- If short on time, microwave wrapped butter in 2-second bursts, checking often to avoid over-softening.
- Place wrapped butter and eggs in a zip-top bag and submerge in warm (not hot) water for several minutes as a safe shortcut.
Always preheat oven to 350°F before you slice the chilled log. Consistent heat helps the rounds set without excessive spread and gives even color and rise.
Check butter by pressing with a fingertip; it should dent but not collapse.
| Tip | Quick test | Why it helps |
|---|---|---|
| Butter readiness | Press fingertip — slight dent | Allows proper creaming and texture |
| Microwave method | 2-second bursts, rotate | Fast, controlled softening |
| Warm-water bag | Wrapped items in warm water | Even, gentle warming for eggs and butter |
| Preheat oven | 350°F before slicing | Ensures cookies set and hold shape |
Step-by-Step: Make the Sugar Cookie Dough
Gather bowls, measuring cups, and your stand mixer before you cream butter and sugar for the dough. Having tools and ingredients ready keeps the process smooth and fast. Work in short, ordered steps so the dough stays tender and easy to shape.
Cream butter and sugar; add eggs and vanilla
Beat softened butter and sugar until just creamy and homogenous. Avoid over-aerating; too much air invites spread during baking.
Beat in eggs one at a time with vanilla extract, scraping the bowl so no streaks remain. This forms the base of your cookie dough.
Whisk dry ingredients and mix into dough
In a separate bowl, whisk flour with baking powder and salt. Add the dry mix to the mixer on low speed until the dough just comes together.
Chill time and why it matters
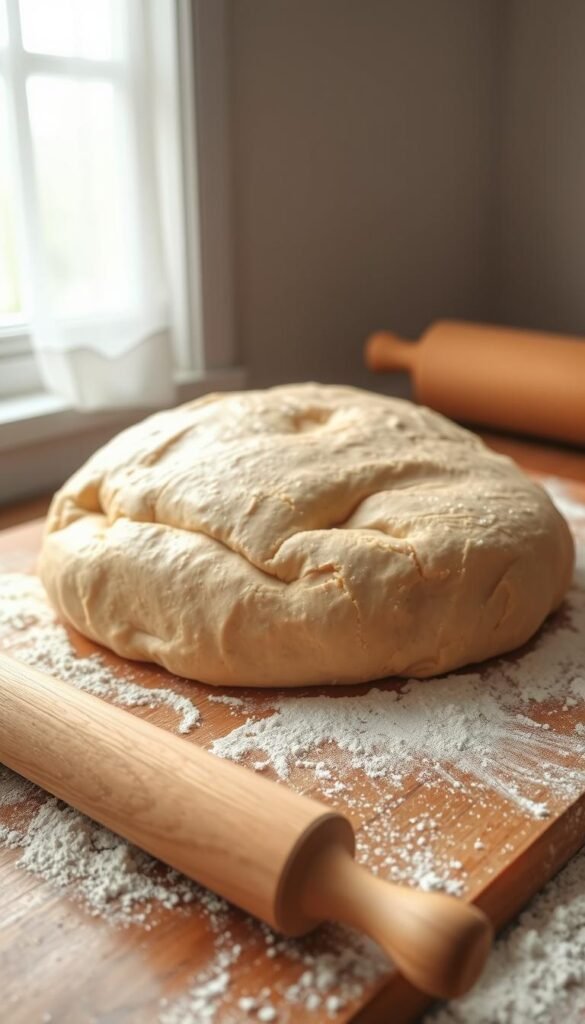
Divide and color the dough if desired, then wrap portions tightly. Chill at least 1–2 hours so the flour hydrates and the dough firms for clean slices.
Rolling thickness, slicing, and bake time cues
Roll colored slabs to 1/8–1/4 inch. Stack, trim straight edges, and roll into a tight log. Chill the log again until very firm before slicing.
- Slice with a thin, sharp blade into 1/4–1/2 inch rounds.
- Arrange on a lined sheet and bake at 350°F for 10–12 minutes until tops lose shine and edges are just set.
- Let rest on the pan briefly; the cookies finish setting as they cool and stay soft inside.
Two Fun Methods: Pinwheel Swirls and Hidden-Shape “Cat in a Log”
Two simple shaping methods turn the same dough into playful spirals or a surprise silhouette. Both techniques use the base cookie dough and the same oven time principles, but each needs slightly different slicing and chill steps for clean results.

Classic pinwheel
Roll thin, stack, trim, roll tight, chill, slice, and bake. Roll two colored rectangles to 1/8–1/4 inch on parchment (about 9×15 inches). Stack them, trim straight edges, then roll from the short end into a tight log.
Wrap and chill at least 2 hours. Slice into 1/4-inch rounds with a thin blade and place on a lined baking sheet. Bake about 10 minutes at 350°F until the top looks set.
Embedded design: black cat centers
Color a small portion black and roll to 1/4 inch. Chill, then cut multiple cat silhouettes. Brush shapes with whisked egg white and press them together into a solid column, pinching fragile tails and legs.
Freeze the column until very firm, then pack colored dough around it, pressing to remove air pockets. Roll the log in black sprinkles for contrast, wrap, and chill about 2 hours. Slice a bit thicker than 1/2 inch and bake 9–10 minutes until set but not browned.
- Pinwheel tips: use parchment to lift and roll, trim square edges, and chill so rounds keep their spiral.
- Slicing: smooth motions with a thin blade keep well-defined edges and maintain the pattern.
- Oven care: place slices on a sheet with space between them and rotate the pan if needed for even color.
“These two methods let you turn one batch of dough into two distinct treats—spirals for a classic look and a hidden shape for a playful surprise.”
Decorating Ideas for Halloween Sugar Cookies
A few smart color and sprinkle choices give each cookie a clear, eye-catching look. Start by picking two high-contrast hues and work from the center outward so the pattern remains visible after baking.
Color combos and coloring tips
Try orange/black, purple/green, or green/black using gel food coloring for bold, even hues. Gel tints deliver vivid color without thinning the dough. Mix a small test piece first to check shade and avoid overworking the dough.
Rolling edges in sprinkles
Lightly brush the chilled log with water, then press sprinkles onto the edges before the final chill for tidy coverage. True sprinkles hold shape in the fridge; avoid sanding sugar—it may weep and stain the dough.
Optional buttercream or simple icing accents
For extra flair, whip 1 cup powdered sugar, 1 stick softened butter, 1 tsp vanilla extract, and 1 Tbsp milk until smooth. Tint with gel food coloring and pipe dots, rings, or tiny borders after cookies cool.
- Keep designs simple so the base pattern stays the star.
- Use a small cup of extra sprinkles for touch-ups.
- Let icing set completely before stacking to keep clean edges.
“Minimal accents often show off the spiral or hidden silhouette best.”
Storage, Make-Ahead, and Freezing
Use these storage tips to hold texture, color, and shape until serving time. Proper handling saves both the dough and the finished treats so your work looks great when guests arrive.
How long treats stay soft at room temperature
Store baked items in an airtight container at room temperature for several days — about one week at most. Do not refrigerate baked goods; refrigeration often dries them out and ruins texture.
Freeze unbaked logs and packed baked items
Refrigerate cookie dough logs up to 4 days. Before slicing, let logs sit at room temperature for ~10 minutes so slices stay neat.
Freeze unbaked logs up to about 2 months. Thaw just enough to slice and bake as directed; you may add a minute or two to bake time.
- Keep baked cookies in an airtight container at room temperature to preserve softness for several days.
- Avoid refrigerating baked cookies; room temperature storage maintains texture better over time.
- Wrap or flash-freeze cooled baked pieces on a tray, then move to a freezer-safe bag with parchment between layers.
- Label each package with the date and coloring combo for quick rotation.
- If dough softens during handling, return it to the fridge to re-firm before slicing.
“A short rest at room temperature helps slices keep clean edges and even baking.”
Troubleshooting & Pro Tips
Quick troubleshooting steps help you stop spread, get clean slices, and nail consistent bake time.
Preventing spread: proper chilling and mixing
Beat butter and sugar only until smooth. Over-creaming traps air and causes spread during baking. Add eggs and vanilla, then fold dry ingredients gently with a low-speed stand mixer or by hand.
Chill logs until very firm. Warm dough deforms under the knife and bakes with fuzzy patterns instead of crisp swirls.
Measuring flour right for tender results
Measure flour by spooning into the cup and leveling or fluffing then scoop. Too much flour makes dry, cakey treats; too little gives excess spread.
Clean slices: blade choice and thickness
Use a thin, sharp blade for tidy rounds. Thick knives compress layers and can distort the spiral or hidden shape.
- Line the sheet with parchment for even bottoms and easy removal.
- Bake until the top loses shine—check at about 10 minutes, adjust by oven.
- If using unsalted butter, add the full salt called for; cut added salt slightly with salted butter.
| Issue | Quick fix | Why it helps |
|---|---|---|
| Spread | Stop creaming early; chill logs | Limits air and firms dough for clean shape |
| Dry, crumbly rounds | Check flour measurement; reduce flour slightly | Prevents over-drying and keeps centers tender |
| Squished spirals | Slice with thin blade; chill if sticky | Maintains sharp edges and clear pattern |
“Keep notes on your oven and humidity—small adjustments change minutes and thickness for repeatable results.”
Flavor and Texture Variations
Small ingredient shifts let you personalize taste and keep texture consistent. A little extra extract or a mild spice blend updates the profile without changing method.
Almond, spice, and gluten-free swaps
Almond extract works well with vanilla; stir a small amount into the base for a bakery-style aroma that complements the dough.
For a fall twist, mix pumpkin spice into the dry ingredients. Start modestly so spices don’t dominate.
To make this a wheat-free option, swap in a 1:1 gluten-free flour blend (for example, Bob’s Red Mill) and follow the same steps.
Unsalted vs salted butter and balancing sweetness
Either unsalted butter or salted butter works. If you use unsalted butter, add salt to taste. If you prefer salted butter, reduce or omit added salt to keep sweetness balanced.
- Keep cups of dry ingredients steady when adding powder spices so dough structure stays stable.
- A touch of citrus zest or a teaspoon of milk with cocoa keeps dough pliable if you alter color or flavor.
| Swap | Effect | Tip |
|---|---|---|
| Almond extract | Bakery aroma | Use sparingly |
| 1:1 GF flour | Wheat-free, same method | Check package notes |
| Unsalted butter vs salted butter | Control salt level | Adjust added salt |
“Small variations preserve the tender crumb while letting you customize every batch.”
Conclusion
Finish strong by confirming a few simple steps that protect your design and deliver tender results. For best results, preheat oven to 350°F and line a baking sheet with parchment paper before you slice.
Plan chill time so the dough firms and slices cleanly. Use a thin knife for neat edges and watch the top — pull the pan when the surface just loses its sheen and edges are not browned.
Use gel food coloring for vivid coloring and roll logs in sturdy sprinkles that won’t bleed. This recipe yields dependable halloween sugar cookies and a classic sugar cookie base you can freeze or store airtight at room temp.
Ready to bake cookies? Gather ingredients, chill thoroughly, and enjoy buttery, show-stopping results.


