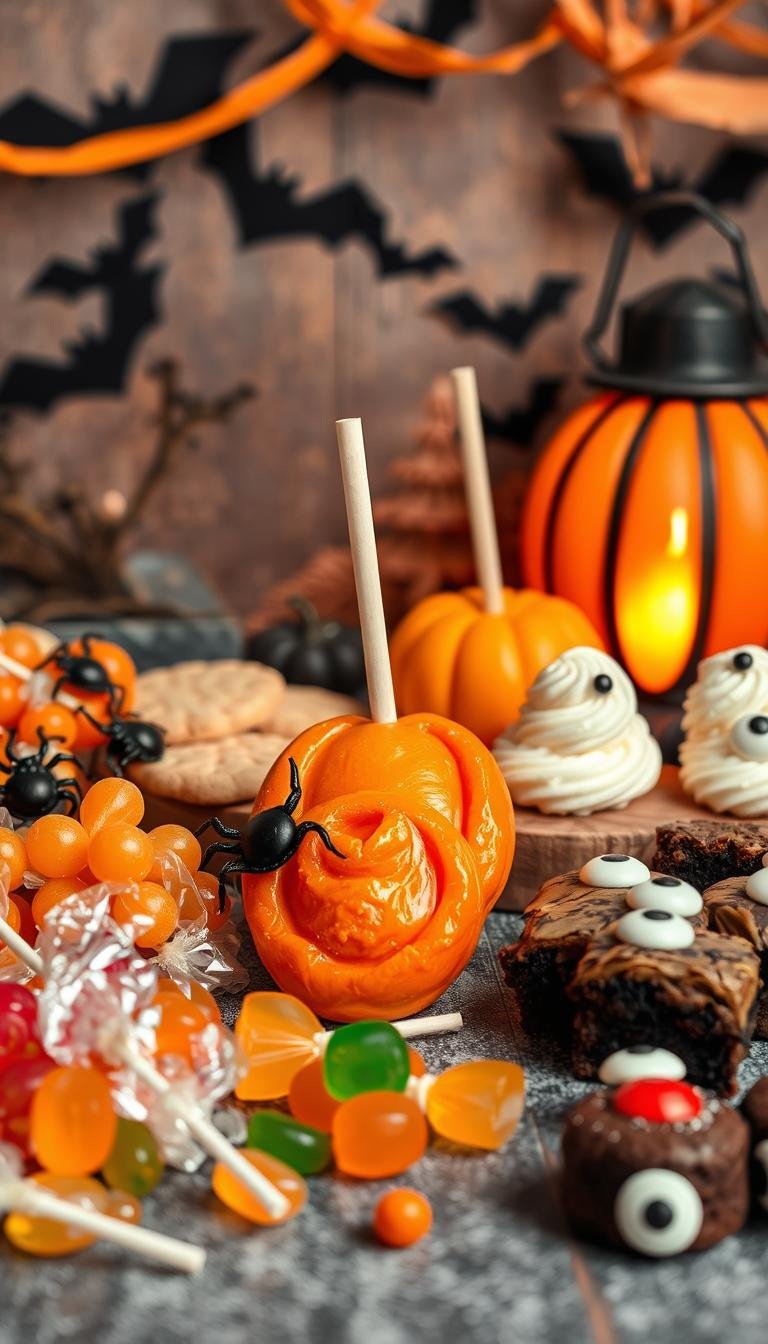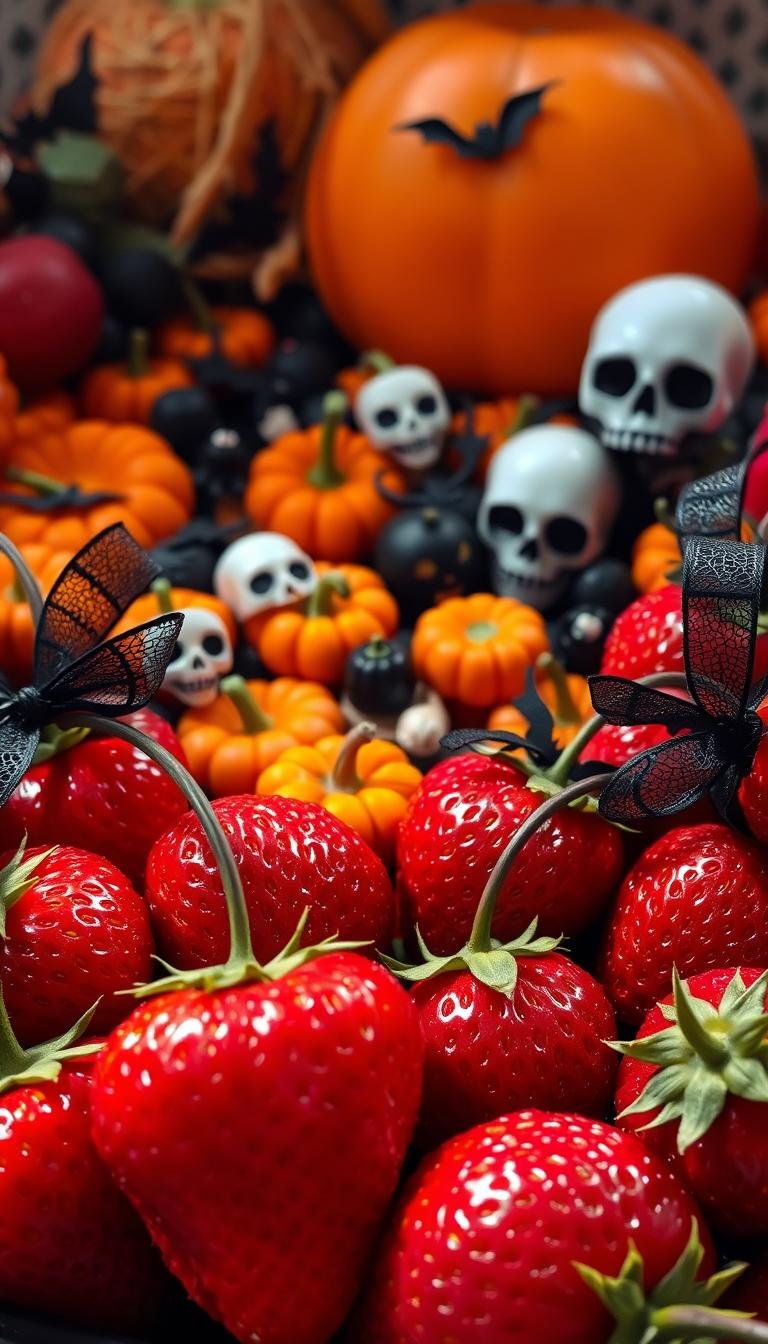
Halloween Strawberries: Easy Recipes for a Spooky Celebration
Surprising fact: over half of party hosts say simple, eye-catching desserts lift a spread — and a tray of chocolate-dipped berries can do that in under 30 minutes.
This Website contains affiliate links. That means I may earn a small commission if you purchase through my links, at no extra cost to you.
This short guide shows how three basics — fresh, medium-to-large strawberries, good-quality chocolate (think Callebaut, Ghirardelli, Lindt, Baker’s, Guittard), and a few playful decorations — make dramatic treats fast.
Start with completely dry, room temperature fruit so the melted chocolate adheres and does not seize. Melt gently in a double boiler or in short bursts in the microwave, stirring between intervals.
Hold berries by the leaves, dip, let excess chocolate drip back, scrape the base on the bowl rim, and set on a parchment-lined sheet. Quick-set in the fridge for 5–10 minutes, then remove to avoid sweating.
Designs range from ghosts and mummies to pumpkin-faced and sprinkle-berry versions. Use reserved chocolate to seed for shine, or white chocolate and candy melts for contrast. This recipe keeps gear minimal and results kid-friendly yet potluck-ready.
Key Takeaways
- Use dry, room temperature berries for best adhesion.
- Choose brands that melt smoothly for glossy results.
- Dip by the leaves, let excess chocolate drip, then set on parchment.
- Seed with reserved chocolate for easy tempering and shine.
- Decorate while chocolate is wet; quick chill for 5–10 minutes.
- Minimal tools and short active time make this an easy Halloween recipe.
Why These Halloween Strawberries Belong at Your Party
Few party additions deliver the same wow factor as glossy, themed chocolate-dipped fruit made fast. These no-bake, three-ingredient bites take about 10 minutes of hands-on time and travel well to potlucks and office events.
They appeal to kids and adults: the fruit keeps things lighter than candy bags while a chocolate shell satisfies sweeter cravings. Simple add-ons like candy eyes and sprinkles make decorating a group activity.
- Scale easily for buffets, charcuterie boards, or classroom parties.
- Room temperature fruit gives you more decorating time because chocolate sets slower.
- Mix a few designs for variety without extra effort.
For hosts, these treats are reliable: minimal prep, flexible chocolate and topping options, and easy transport once set. Serve them on the day of your event for best texture and shine.
Simple Ingredients and Handy Tools
Start with quality fruit and melting chocolate, then add a few easy tools for pro-looking results.
Fresh fruit at the right size and ripeness
Choose medium-to-large, firm strawberries with no soft spots. Consistent size helps the tray look tidy and makes decorating easier.
Very small berries are harder to dress and may not hold candy eyes or piped details well. Pat each berry completely dry on paper towels before dipping.
Chocolate choices: white chocolate, chips, and melts
Use proven melting chocolate for smooth, glossy results—Callebaut callets, Ghirardelli baking chips, Lindt bars, Baker’s, or Guittard. Chop bars for even melting.
White chocolate is ideal for ghosts and mummies and takes color well. Save a bowl of melted chocolate for fine details. Candy melts give bright orange, purple, or black without tinting.
Decorations and tools: eyes, sprinkles, parchment, bags
“Prep once: heat-safe bowls, a jar for dipping, parchment paper-lined sheet, and piping bags make the job faster.”
- Stock candy eyes in a few sizes, sanding sugar (green/orange), and Halloween sprinkles.
- Keep extra chocolate chips or callets for mouths and accents.
- Set up heat-safe bowls, a small jar for deep dipping, parchment paper on a rimmed sheet, and zip-top or piping bags for fine lines.
Prep and Melting Basics for Smooth, Shiny Chocolate
Good prep and the right melting method make the difference between dull and glossy finishes on your treats. Follow these quick steps to avoid common issues and get bakery-style results.
Wash, dry, and bring to room temperature
Wash each strawberry, then pat it completely dry with paper towels. Even one drop of water can cause the chocolate to seize.
Let fruit reach room temperature so condensation doesn’t form and the coating sets slower while you work.
Double boiler vs microwave: timing and tips
For a double boiler, place a heat-safe bowl over a pot with about one inch of barely simmering water. Keep steam away from the chocolate and stir until smooth.
In the microwave, melt in 20-second bursts, stirring between intervals. For candy melts use 50% power for 45–60 seconds, stir, then repeat as needed.
Easy tempering and managing drips
For shine and snap, remove from heat and stir in a small reserved handful of chips or chopped chocolate until the melted chocolate cools and smooths.
Let excess chocolate flow back into the bowl, scrape the base on the rim, and set each berry on parchment paper. A narrow glass or jar makes deep, even dips and cuts waste.
Step-by-Step: Dip, Drip, Set
A steady rhythm of dipping, draining, and setting keeps each berry uniform and photo-ready.
How to hold and dip
Grip the berry by the leafy top, folding leaves back so they act as a handle. Submerge the strawberry into the melted chocolate and rotate in one smooth motion for full coverage.
Manage drips and tidy the base
Pause over the bowl to let excess chocolate drip back. Lightly scrape the base on the rim to avoid a long tail. That reduces mess and makes the bottom neat.
Set on parchment
Place each piece on a parchment-lined sheet with space between items. Add candy eyes or sprinkles while the shell is still wet so they stick.

“Dip, drip, scrape, set—repeat in a steady rhythm for consistent results.”
Quick checklist
- Grip by leaves, fold back as a handle.
- Rotate in melted chocolate for even coat.
- Allow excess chocolate drip; scrape the base on the rim.
- Set on parchment paper; decorate immediately.
- Let set ~15 minutes at room time or chill 5–10 minutes; remove promptly to avoid sweating.
| Step | Action | Timing |
|---|---|---|
| Hold | Fold leaves back and grip top | Instant |
| Dip | Submerge and rotate in melted chocolate | 3–6 seconds |
| Drain & scrape | Let excess chocolate drip, scrape base on bowl rim | 2–4 seconds |
| Set | Place on parchment; decorate while wet | 15 minutes (room) or 5–10 minutes (fridge) |
Halloween Strawberries Decorating Guide
A few simple decorating moves upgrade dipped fruit into memorable party treats. Follow these fast ideas to build variety and keep assembly moving.
Ghosts
Dip in white chocolate and let a small pool form at the front. Press two eyes into the wet shell and add an upside-down chocolate chip for a tiny mouth.
Mummies
Coat in white, let set 1–2 minutes, then drizzle thin bands with a snipped bag or fork. Attach eyes while the drizzle is tacky for a classic mummy look.
Sprinkle Classics
Dip in any chocolate and hold over a bowl. Shower with festive sprinkles to catch excess for the quickest win.
Zombie & Pumpkin
For zombies, roll a white-coated berry in green sanding sugar and press on eyes. For pumpkins, tint white chocolate or use orange candy melts, dust with orange sugar, then pipe a small face.
Spider Webs
Pipe concentric rings with a contrasting melt, then pull a toothpick through to form a web. Add a tiny piped spider with a small piping bag or snipped zip bag.
| Design | Main Coating | Key Add-on | Time |
|---|---|---|---|
| Ghost | White chocolate | Eyes + chocolate chip mouth | 2–4 minutes |
| Mummy | White chocolate | Drizzle bandages + eyes | 3–5 minutes |
| Sprinkle | Any chocolate | Assorted sprinkles | 1 minute |
| Pumpkin | Orange candy melts | Orange sugar + piped face | 3–6 minutes |
“Work one berry at a time so decorations stick before the coating sets.”
Pro Tips for Perfect Chocolate Covered Strawberries
A few smart habits in the prep and dip stages will keep your coated fruit shiny and mess-free.
Water is the enemy. Pat each strawberry completely dry and check bowls, spatulas, and towels for damp spots. Let fruit reach room temperature so condensation doesn’t form while you work.
Parchment or silicone? Choose parchment paper for the most reliable nonstick release; silicone mats are reusable and work well too. Wax paper can be a backup, but it sometimes clings when the chocolate cools.

Use a narrow glass or jar for dipping. Pour melted chocolate into a jar for deeper coverage and fewer touch-ups. Keep a small reserved handful of chips in the bowl for quick tempering and shine.
Decorate one berry at a time. Add candy eyes or sprinkles immediately so they adhere before the surface firms. For quick set, chill 5–10 minutes only, then remove to avoid sweating and preserve the best texture for an easy halloween spread.
Storage, Leftovers, and Make-Ahead Timing
Plan storage before you dip so your finished treats look their best on serving day. Best texture and shine come from serving the chocolate covered strawberries the same day.
Room temperature works well for up to about 12 hours. Leave uncovered on a tray in a cool, dry room to avoid condensation and sweating.
Refrigerator short-term
If you must keep them longer, place pieces in an airtight container lined with a paper towel. The towel soaks up moisture and reduces sweat.
Store one to two days in the fridge max. Keep layers single, or separate stacked layers with parchment.
Why not freezing
Avoid freezing. Thawing forces moisture out of the fruit, ruins the shell, and makes the strawberry mushy.
Use leftover chocolate
Turn excess chocolate into quick Halloween bark: spread the melted chocolate on parchment, scatter candy and sprinkles, cool until set, then break into shards.
- For transport, cushion the airtight container and keep cool; vent lids briefly on arrival to cut humidity.
- Label designs and flavors so guests can pick ghost, mummy, or pumpkin styles easily.
Troubleshooting Common Chocolate Issues
When dips go wrong, quick checks usually fix them. Work with steady heat, dry fruit, and small bowls to keep control.
Chocolate seizing or scorching: causes and fixes
Seizing happens when water or steam hits melted chocolate. Stop heating, stir, and add a little chopped chocolate to smooth a seized batch.
If scorching creates a grainy, dull texture, pause heating. Add a teaspoon of neutral oil only for candy melts and stir until smooth.
Chocolate not sticking to the strawberry
Wet or chilled fruit repels coating. Pat each berry completely dry on paper and let it reach room temperature before dipping.
Work in small batches so the bowl stays fluid and the chocolate adheres easily.
Coating hardens too fast while adding eyes
For fast-setting chocolate, re-dip or use a slightly warmer bowl. Attach candy eyes immediately after dipping to avoid lift-off.
Candy melts too thick: thinning and temperature control
If candy melts thicken, remove from heat and stir a minute. Thin with 1/2–1 teaspoon of coconut or vegetable oil if needed. Rewarm in short bursts and stir between intervals.
“Keep small working amounts in the bowl and rotate with a gently warming spare to maintain flow.”
| Problem | Likely cause | Quick fix |
|---|---|---|
| Seized chocolate | Water or steam contamination | Stop heat, stir, add chopped chocolate |
| Grainy/scorched | Overheating | Cool, add a little oil for melts, remelt gently |
| Coating won’t stick | Wet or cold fruit | Dry fruit, bring to room temp, small batches |
| Thick candy melts | Overheated or cooled too much | Rest, stir, thin with oil, rewarm briefly |
Flavor Twists and Color Ideas
Try pairing different chocolate types to build contrast in both taste and appearance. Mixing dark, milk, semi-sweet, and white chocolate creates plates that look curated and taste layered.
Mixing chocolates for balance
Use dark for bold contrast, milk for classic sweetness, and semi-sweet for balance. Reserve a white base when you want to tint or pipe bright accents.
Gel coloring vs colored melts
Tint white chocolate with gel food coloring in tiny amounts for subtle hues. For reliable, vivid shades, choose pre-colored candy melts instead. Melts hold color better and thin predictably.
Designs for kids and adults
Make kid-friendly monsters with googly eyes, sprinkles, and sanding sugar. For grown-ups, favor darker palettes, fine drizzles, or minimalist webs.
- Load a small piping bag with cooled, flowy melted chocolate to add faces, webs, or stitch marks.
- Use chocolate chips as eyes or mouths when candy eyes run low.
- Fold in crushed cookies or toffee on a few for crunch and variety.
- Keep bowls warm but not hot; rotate to avoid thickening mid-design.
“Offer a tasting mix: some with richer dark profiles, others sweeter, so every guest finds a favorite.”
| Technique | Best For | Quick Tip |
|---|---|---|
| White tinting | Bright accents | Gel color in tiny increments |
| Colored melts | Vibrant designs | Use straight from pouch; thin if needed |
| Piping | Faces & webs | Use a small piping bag; rewarm briefly |
Serving Suggestions and Party Presentation
Serve your treats on a themed board to make grabbing a sweet simple and fun.
Build a show-stopping board. Cluster designs—ghosts, mummies, pumpkins, and zombies—so guests can spot favorites at a glance. Surround the fruit with chocolate-dipped pretzel rods, bite-size cookies, and seasonal candy for variety.
Add to a charcuterie or treat board
Space covered strawberries slightly to protect faces and webs. Line platters lightly with parchment so coatings release cleanly and pieces don’t slide.
Best timing for dipping and serving on the day
Dip on the same day as your event. Let shells set a few minutes before arranging so decorations like eyes stay put. Keep a small chilled reserve to rotate in if the first wave disappears.
- Cluster by design for visual impact and easy picking.
- Mix orange, green, white, and dark chocolate berries for balance.
- Add small tongs or picks for tidy, grab-and-go service—helpful for kids.
- Label ghost, mummy, pumpkin, zombie, and sprinkle variants so guests know what they’re choosing.
| Element | Why it helps | Quick tip |
|---|---|---|
| Clustered designs | Clear visual groups speed selection | Place high-detail pieces front and center |
| Complementary bites | Add texture and flavor contrast | Use pretzels, cookies, and wrapped candy |
| Serving tools | Keeps service tidy and sanitary | Provide small tongs or picks for guests |
| Timing | Maintains shine and texture | Dip the same day; set briefly, then serve |
“Arrange, label, and keep extras chilled so your presentation stays fresh throughout the party.”
Conclusion
Wrap-up: a short routine—dry the fruit, melt gently, seed for shine, and decorate one at a time—delivers glossy, adorable halloween strawberries with minimal fuss.
Mix ghosts, mummies, pumpkins, webs, and sprinkle berries to build a showstopping platter. Try different chocolate types and colors to suit your theme and guests.
Line trays with parchment, manage drips, and scrape bases for neat, professional results. These treats look best on day one; short refrigeration for a few days is possible but may soften details slightly.
Save extra coatings as bark to cut waste, involve kids for easy decorating, and remember: no special skills are needed—just a little planning and a few minutes of hands-on time.