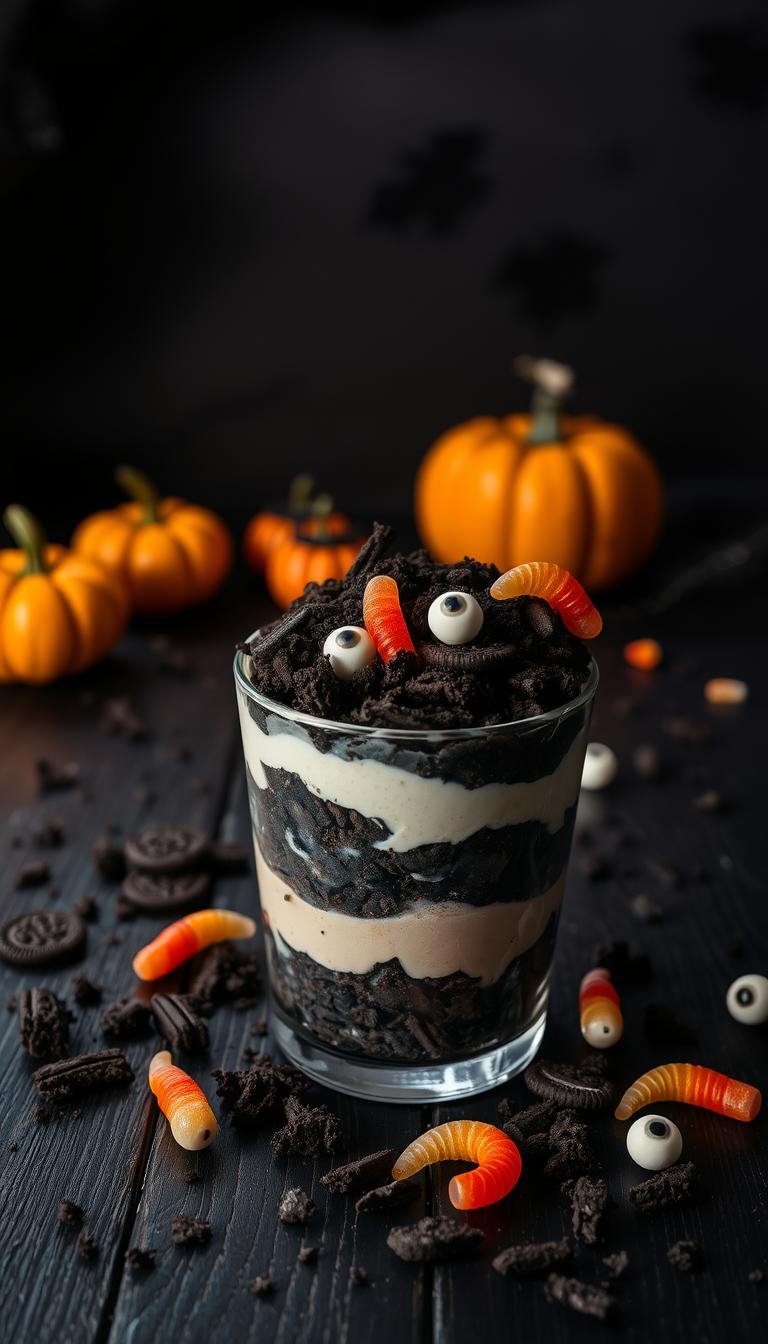
Halloween Dirt Cups Dessert Recipe: Spooky Fun for Kids to Make
Surprising fact: nearly 60% of home hosts pick no-bake desserts for fast party prep, and layered pudding treats rank among the top picks.
This Website contains affiliate links. That means I may earn a small commission if you purchase through my links, at no extra cost to you.
This quick, no-bake recipe shows how to build playful layers of instant chocolate pudding and crushed cookies to mimic garden-style crumb topping. Kids can help whisk pudding, fold in Cool Whip, and press fine crumbs and chunkier cookie bits into clear cups for dramatic layers.
The method is a real time-saver. Active work takes only a few minutes, then chilling for 1–2 hours gives the best mousse texture. Top each dirt cup with gummy worms, candy eyes, or a Milano “RIP” cookie for a cute-not-gross finish that guests love.
Key Takeaways
- Quick and easy make: no-bake layers come together in minutes using pantry staples.
- Kid-friendly: crushing cookies and decorating encourages hands-on fun.
- Texture trick: mix fine crumbs and chunkier pieces for contrast.
- Serving options: use 8‑ounce cups for adults or smaller cup sizes for kids.
- Prep tip: assemble crumbs just before serving and chill for best set.
What Are Halloween Dirt Cups and Why You’ll Love Them
These playful layered treats turn instant pudding and cookie crumbs into tiny edible scenes kids adore. They pair instant chocolate pudding whisked with milk and folded into whipped topping, then layered with Oreo crumbs for a crunchy contrast.
Kid-friendly, no‑bake dessert for parties: Little hands can crush cookies, whisk the pudding mix, and place gummy worms or Milano tombstones. No oven time is required, and assembly takes just minutes before chilling for 1–2 hours.
Creepy-cute look with rich chocolate pudding and cookie “dirt”: Thicker mousse—made by reducing milk to about 1.5 cups—helps decorations stand up. The creamy pudding and crunchy crumbs give a satisfying texture contrast that guests love.
Why these pudding cups work for your party
- Single-serve convenience: Easy to pass around and mess-free for kids and adults.
- Make-ahead friendly: Chill mousse in advance, add crumbs and toppers just before serving so they stay crisp for days leading up to the event.
- Budget and versatile: Simple ingredients scale up, and swapping cookie flavors creates different seasonal scenes.
Key Ingredients and Easy Swaps
A single pudding packet and a bag of cookies turn into crowd-pleasing mini desserts fast. Use one package of instant chocolate pudding (about 3.4–3.9 oz) and mix with milk. To get a thicker, mousse-like pudding that holds toppers, reduce the milk from 2 cups to 1.5 cups.
For the creamy fold-in, use an 8‑ounce tub of Cool Whip or make fresh whipped cream by beating 1 cup heavy cream with 1/2 cup powdered sugar to stiff peaks. The homemade option tones down sweetness and tastes light.
Build realistic texture by making cookie crumbs: pulse oreo cookies into fine sand and reserve some chunkier pieces for contrast. Golden Oreos or gluten-free chocolate cookies work as substitutes for flavor or dietary needs.
Top each serving with gummy worms, Milano cookies piped “RIP,” candy eyes, or small pumpkin candies for a playful look. For a color twist, use vanilla pudding and tint it orange, or layer chocolate and vanilla for a two-tone effect kids notice.
- Pantry staples: one pudding packet, milk, tub of Cool Whip (or homemade cream), and a bag of cookies usually yield several clear cups.
- Flavor swap: add a splash of coffee liqueur to an adult portion—keep it separate and labeled.
- Prep tip: portion crumbs and toppers into bowls so assembly takes just a few minutes.
Tools You’ll Need
Gather simple kitchen tools so assembly moves fast and layers look picture-perfect.
Essential tools
Start with a food processor for fast, uniform crumbs that read like realistic dirt. If you don’t have one, place cookies in a zip-top bag and crush with a rolling pin so kids can help safely.
- Mixing bowls: at least two — one for pudding and milk, one for folding in whipped topping and chunkier crumbs.
- Clear cups to showcase the layers; use an 8-ounce cup for adults or smaller cups for kids.
- Whisk, spoons, and small spatulas for neat layers and even portions.
- Optional novelty shovel spoons for fun, plus regular spoons for actual eating.
How to prep and stage
Set ingredients in separate bowls: fine crumbs, chunky crumbs, pudding mousse, and toppings. Lay parchment under your work area so cleanup is easy.
| Tool | Best use | Time to prep |
|---|---|---|
| Food processor | Make Oreo-style fine crumbs quickly and uniformly | About 1 minute of pulsing |
| Rolling pin | Crush cookies in a bag for a kid-friendly task | 2–3 minutes per batch |
| Clear cup or glass | Showcase chocolate and cream layers for visual appeal | Instant (choose size before filling) |
| Mixing bowl & whisk | Whisk pudding to avoid lumps and fold in Cool Whip | 3–5 minutes |
With these tools staged, your pudding cups recipe becomes a smooth assembly line. Keep small knives and piping gel handy if you plan to add Milano “RIP” toppers or other chocolate accents.
halloween dirt cups: Step-by-Step Assembly
A straightforward assembly flow keeps the process fast: crush, whisk, fold, layer, and chill.
Crush the cookies
Process about a dozen oreo cookies in a food processor to make fine oreo crumbs. Reserve those for the topsoil look.
Place the remaining cookies in a zip-top bag and smash with a rolling pin to leave chunky pieces for texture.
Make the pudding mousse
Whisk instant pudding in a bowl with 1.5–2 cups cold milk for about two minutes. Use 1.5 cups for a firmer mousse.
Chill the mix ~10 minutes until it thickens, then gently fold in cool whip to keep the mousse airy. Fold in the chunky cookie bits last.
Layer and chill
- Start each cup with 1 tablespoon fine crumbs.
- Add one to two scoops of mousse, then more crumbs; repeat and finish with a full crumb top.
- Smooth layers lightly so stripes stay visible; cut Milano cookies and pipe “RIP” to prep headstones.
- Chill assembled but undecorated cups 1–2 hours so the pudding sets firmly.
“Assemble like a small assembly line for the easiest, fastest service.”
Finish just before serving: tuck gummy worms and tombstones into the top layer so decorations sit upright and the texture stays crisp. This easy make method keeps your recipe party-ready.
Decoration Ideas and Themed Variations
Decorating these mini desserts is where the fun and creativity really shine. Use simple toppers to add character and keep assembly easy for kids and hosts.
Graveyard scene: Halve milano cookies and pipe “RIP” in black icing so they look like small headstones poking up from the crumb layer. Press them into a thick top layer so they stay upright.
Worms, eyes, and pumpkins: Arrange gummy worms to crawl from beneath the crumbs and tuck edible candy eyes nearby to suggest tiny creatures. Add pumpkin candies or festive sprinkles for a bright, playful finish.
Color and texture twists: Tint vanilla pudding orange for a two-tone effect under chocolate pudding. Swap some oreo crumbs for crushed golden Oreos to create a sandy contrast or mix green-tinted coconut for mossy accents.
- Keep toppers dry: add them just before serving.
- For a grown-up twist, choose chocolate curls instead of gummy worms.
| Decoration | Key effect | Best use |
|---|---|---|
| Milano cookies | Headstones with “RIP” | Graveyard themes |
| Gummy worms | Movement and fun | Kid-friendly parties |
| Golden Oreos | Sand color contrast | Two-tone layers |
“Add decorations at the last minute to keep crumbs crisp and toppers standing tall.”
Make-Ahead, Storage, and Freezing Notes
Plan your prep so mousse, crumbs, and toppers come together without rush. Make the pudding mousse ahead and chill it 1–2 hours for the best set. Store the mousse covered in an airtight container in the fridge for up to 4–5 days to streamline party day.

Assemble components ahead; add crumbs and toppers just before serving
Keep dry elements like oreo crumbs and other crumbs at room temperature in a sealed bag. Moisture will soften them, so add those crunchy pieces right before you serve the dessert.
Fridge and freezer guidance for mousse and assembled cups
If you need long-term prep, freeze only the mousse (no toppers) in an airtight container for up to 3 months. Thaw in the fridge before layering into pudding cups.
- Avoid freezing fully assembled dirt cups — thawing can separate mousse and make crumbs soggy.
- Store finished pudding cups covered in the fridge and enjoy within 1–2 days for best texture and flavor.
- Label containers with dates to track fridge days and keep your party food safe.
“Assemble toppers at the last minute so gravestones stay crisp and gummies stay fresh.”
Serving Tips, Portions, and Party Ideas
Choose presentation first—individual clear tumblers make the layered effect pop, mini cups stretch servings for kids, and a shareable pan keeps service fast for large groups.
Portioning and serving formats
Adults: this recipe fills six 8-ounce tumblers when brimming with mousse and crumbs.
Kids: use smaller cups or half-fill each cup to make more servings and reduce waste.
Feed a crowd: layer the mix in an 8×8 or 9×9 pan, chill, then scoop and garnish at the table.
DIY topping bar
Set out bowls of gummy worms, candy eyes, pumpkin candies, sprinkles, and Milano headstones so guests build their own dirt cup. Pre-stage toppings in small ramekins to keep the line moving.
Offer orange-tinted vanilla and chocolate pudding for variety. Label allergy-friendly options like gluten-free crumbs and dairy-free whipped topping at the front.
- Keep a few fully assembled servings ready for quick grab-and-go.
- Use clear cups great for visual display and easy portion control.
- Provide sturdy spoons, napkins, and a crumb-catching tray for tidy service.
| Format | Best for | Serving tip |
|---|---|---|
| 8-ounce tumblers | Adults or display | Fill to the top; garnish just before serving |
| Mini cups or half-fill | Kids or many guests | Stretch portions and reduce leftovers |
| 8×8 / 9×9 pan | Large groups | Chill whole, scoop to serve and add toppers |
| DIY topping bar | Interactive party activity | Pre-stage bowls and label allergen-free options |
Pro Tips and Troubleshooting
Follow these quick fixes to prevent soggy tops and to customize themes with ease.
Thawing and texture: Thaw cool whip in the fridge overnight so it folds smoothly into the pudding without deflating the mousse. For firmer mousse, whisk the pudding with only 1.5 cups milk; this thicker mix sets faster and holds decorations better.
Keep crumbs crisp: Sprinkle crumb topping right before serving. Extended contact softens the crumb layer and ruins the crunchy finish. If the surface feels loose, chill longer and add another crumb layer to absorb excess moisture.

Fast prep and flavor tweaks
Speed crumb prep with a food processor, or let kids use a zip-top bag and a rolling pin to crush cookies in minutes.
Swap sweetness by folding in homemade whipped cream with a touch of sugar instead of store-bought topping. Stir in a dash of vanilla or swap a chocolate layer for orange-tinted vanilla for a fun twist.
Theme and presentation fixes
- Make football fields with green-tinted cream and piped yard lines.
- Use small toys for dinosaur scenes (remove before eating) or line up pumpkin candies for a harvest look.
- If headstones lean, press them deeper and pack crumbs behind for support.
“Store mousse and decorations separately; assemble shortly before guests arrive for best texture and appearance.”
Conclusion
In short, halloween dirt cups are a quick, no-bake recipe that’s festive and perfect for busy hosts. The winning combo—creamy chocolate pudding mousse, crunchy oreo crumbs and playful toppers like Milano cookies and gummy worms—delivers a fun look that guests will love.
Plan ahead: make the mousse, store it in an airtight container in the fridge for up to a few days, then add crumbs and decorations just before serving so the texture stays crisp. Clear cups show off layers, or fill a pan to serve a crowd.
Try a half-and-half chocolate and orange-tinted vanilla layer for color, let kids decorate their own cup, and remember the pro tip—reduce milk and chill 1–2 hours so headstones stand tall. This simple, reliable treat is easy to repeat year after year.