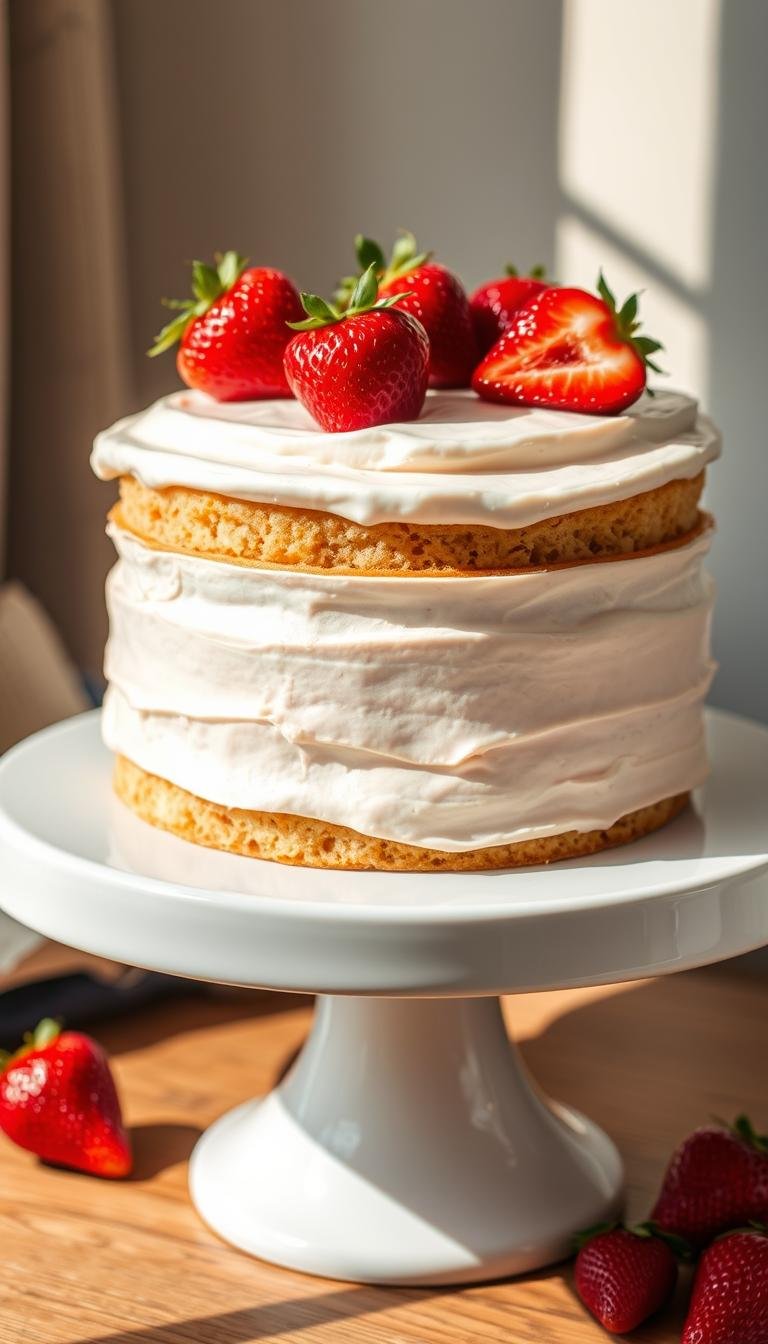
Halloween Cheesecake Recipe: Spooky Dessert Ideas
Surprising fact: nearly one in four party hosts says a show-stopping dessert drives guest requests for seconds. That makes this cookies-and-cream treat worth mastering.
This Website contains affiliate links. That means I may earn a small commission if you purchase through my links, at no extra cost to you.
Meet a cookies-and-cream cheesecake built in a 9-inch springform pan with a crunchy Oreo crust and a gentle water bath for a smooth, crack-free top. Bring all dairy to room temperature and beat cream cheese until silky. Use low mixer speed after creaming to avoid excess air.
Check doneness by a small center jiggle and a 145°F internal temperature. Cool slowly: one hour in the turned-off oven with the door propped, two hours on a rack, then chill at least six hours or overnight for clean slices.
Decorating is simple: whipped cream ghosts, cookie dirt, gummy worms, or a chocolate spiderweb make it bakery-worthy without special tools. This recipe adapts easily—try no-bake or swirl-bar variations for faster prep.
Key Takeaways
- Use a 9-inch springform pan and an Oreo crust for sturdy release.
- Room-temp dairy and smooth cream cheese prevent lumps.
- Water bath and slow cooling stop cracks and ensure even bake.
- Check doneness with a jiggle and 145°F internal temp.
- Chill overnight for the best texture and clean slices.
- Simple decorations deliver big visual impact with little effort.
Why This Halloween Cheesecake Belongs on Your Party Table
Pick the format that fits your event: choose black-and-orange swirled bars in a 9×13 pan for quick squares, or bake a round springform for a dramatic centerpiece. Bars bake in about 50–55 minutes; the round version needs roughly 1 hour 35–1 hour 50 minutes with a water bath. Cool in the open oven for one hour, then chill overnight for clean slices.
Seasonal color meets classic flavor. Crushed Oreos keep the cookies-and-cream profile familiar and crowd-pleasing, while gel tinting creates a punchy palette that reads festive on the top.
Easy to customize and serve. A chilled whole cake slices neatly for plated serving, while bar squares stack into cups or boxes for bake sales and potlucks. Both formats travel well and require only pantry staples.
Use simple drag-and-swirl or fold-in techniques for the visual swirl. Pair slices with pumpkin-flavored drinks or a fall snack board to anchor your spread.
“Reliable steps like a water bath and slow cooling keep the top smooth and picture-ready.”
Key Ingredients and Tools for the Perfect Cheesecake
Start by gathering full‑fat block cream cheese and set it out in cubes. At room temperature (about two hours for cubed blocks) the cheese blends smoothly and avoids lumps.
Bring eggs, sour cream or Greek yogurt, heavy cream, and vanilla extract to room temperature so the batter emulsifies cleanly. Beat the cream cheese first until silky, then add sugar and the small amount of cream to keep the filling velvety.
For the crust, use crushed Oreo cookies and unsalted melted butter. Gel food coloring (AmeriColor or similar) tints batter without thinning it, so color is optional and stable.
- Tools checklist: 9-inch springform pan, roasting pan or larger pans for a water bath, stand or hand mixer, food processor (or zip-top bag + rolling pin), spatula, bowl large enough to beat cream cheese, and an instant-read thermometer.
- Why a springform pan: it gives a clean release so the sides stay intact for neat slices and easy decorating.
- Timing and fat: plan two hours for room temperature; use full‑fat dairy and unsalted butter for consistent texture from bottom to sides.
Make the Oreo Crust: Bottom and Sides that Hold Up
A sturdy cookie base starts with properly crushed cookies and the right butter ratio. Crush 20 Oreos into fine crumbs and mix with 1/4 cup melted unsalted butter. If you use Double Stuf, remove some filling so the crust won’t turn greasy.
Two easy crushing methods:
- Pulse cookies in a food processor for uniform crumbs.
- Or seal them in a bag and smash with a rolling pin for a no-gadget option.
Pressing and pre-baking for a set crust
Grease a 9-inch springform pan and firmly press crumbs across the bottom and slightly up the sides. For bars, line a 9×13 pan with parchment and press evenly into corners.
Pre-bake at 325°F for 8–10 minutes until the crust looks dry and matte. Cool completely before adding the filling—warm crumbs can separate or become greasy.
- Butter guideline: about 1/4 cup per 20 cookies gives a pressable base.
- Well-packed sides reduce crumbling and keep slices neat when releasing the springform.
- Set the pan on a tray to catch stray crumbs and make oven transfers easier.
Create a Lump-Free Cheesecake Filling
Smooth texture starts in the bowl. Begin with full-fat block cream cheese at room temperature. Beat on medium-high about 2 minutes in a stand mixer until the mass is glossy and free of lumps.

Beat cream cheese and control mixer speed
Do not rush. After the first 2 minutes, add sugar and beat about 2 more minutes. Then lower the mixer to low before adding wet ingredients.
Add sugar, cream, and vanilla without overworking
On low speed, add sour cream or Greek yogurt, a splash of heavy cream, and vanilla. Add eggs one at a time on low until just combined to avoid trapping air.
Fold in chopped Oreos and tint gently
Tint with gel food coloring for bold Halloween color without thinning the filling. Fold chopped cookies in by hand with a spatula so pieces stay intact and the batter keeps its structure.
- Scrape the bowl and beater often so no cheese clings to the sides.
- A batter that ribbons and holds shape signals the right texture.
- Use full-fat dairy for stable set and fewer cracks.
Master the Water Bath for a Smooth, Crack-Free Top
The right pan setup prevents leaks and helps the filling rise evenly across the top. Place the 9-inch springform pan inside a slightly larger round pan (for example, a 10-inch cake pan). Then set both pans into a roasting pan or the largest pan you have.
This nested approach avoids wrapping the springform in foil and eliminates the risk of water soaking the crust. Pour hot water into the outermost roasting pan until it reaches halfway up the sides of the middle pan.
Nesting-pan method to avoid foil leaks
Assemble pans on the oven rack before adding water to avoid spills and protect your hands and floors. Allow about 5–7 minutes to position pans and pour the water so the batter does not sit too long before baking.
How steam supports an even rise
Moist, steady heat from the bath keeps the oven temperature stable and creates gentle steam. That steam helps the filling rise uniformly and greatly reduces cracking and sinking during cool down.
- Pour hot water to midway up the middle pan for consistent temperature transfer.
- Bake until the outer ring is set and the center (about 2 inches) still jiggles slightly; doneness is about texture, not dryness.
- When removing, lift the roasting pan carefully to avoid sloshing hot water into the springform pan.
| Step | Action | Approx. Minutes |
|---|---|---|
| Prep pans | Nest 9-inch springform inside a 10-inch pan, place in roasting pan | 2–3 |
| Add water | Pour hot water to halfway up middle pan on oven rack | 3–5 |
| Bake and monitor | Maintain steady temperature; avoid opening door often | Minutes vary by recipe |
| Remove and cool | Carefully lift roasting pan; let residual heat set the top | 1–2 to remove safely |
How to Bake, Check Doneness, and Cool the Cheesecake
Set your oven to 325°F and plan for a long, gentle bake so the filling sets without cracking. For a 9-inch cake in a water bath expect about 95 to 110 minutes. Start checking at the early end so you don’t overbake.
Visual jiggle test and temperature targets
Use the jiggle test: the outer ring should be set while a 2-inch center circle wobbles slightly. If you prefer numbers, an instant-read thermometer should register around 145°F in the center.
Slow cooling, then chilling overnight
When baking finishes, turn the oven off and prop the door open. Let the pan cool inside for 1 hour—this reduces shock and cracking.
Move the cake to a rack for about 2 more hours to reach room temperature. Then place it in the fridge to chill at least 6 hours or overnight for clean slices.
- Run a thin spatula or butter knife around the rim before releasing the springform.
- Pat away any condensation with a paper towel before decorating.
- Keep saved cookie crumbs handy to tidy the sides after unmolding.
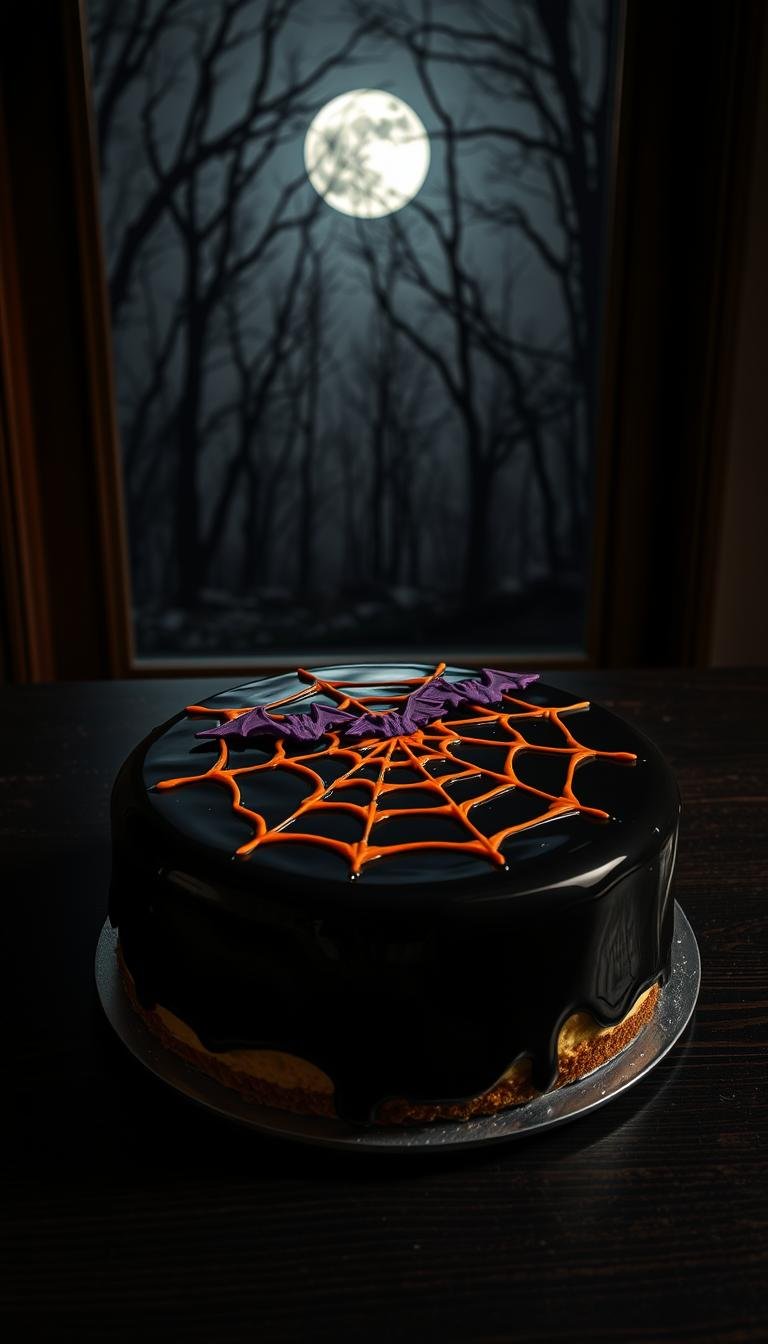
Decorating Ideas: Ghosts, Graveyards, and Spiderwebs
Small accents—ghost puffs, cookie crumbs, and a chocolate web—deliver big visual impact. Start with a clean, chilled top so decorations sit firmly and look crisp.
Whipped cream ghosts are the easiest standout: whip cream to medium-stiff peaks in a bowl, flavor lightly with a drop of vanilla, then transfer to a piping bag. Pipe tall mounds and press candy eyes into each for instant personality.
Create a graveyard by crushing cookies into “dirt” across the bottom edge and center. Tuck gummy worms into the crumbs and press small tombstone cookies along the pan rim for height and contrast.
For a spiderweb, melt chocolate and make a thin ganache. Pipe concentric circles across the top with a small round tip, then drag a toothpick from center outward at intervals to form web strands. Chill briefly so lines set.
- Tinting: use gel food coloring to add orange or green accents to whipped cream without thinning it.
- Layer: rim cookie crumbs at the bottom, a central web, and a cluster of ghost puffs off-center for balance.
- Finish: crown the top with halved Oreo or mini cookies to echo the bottom crust.
halloween cheesecake Variations You’ll Love
For simple assembly and dramatic looks, make black-and-orange marbled bars or a pale white chocolate cake with a raspberry “blood” layer.
Black-and-orange swirl cheesecake bars for easy serving
Line a 9×13 pan with parchment and press an Oreo crust made with crushed cookies, butter, and a touch of sugar.
Mix the filling in a bowl, using your mixer on low once cream cheese and sugar are combined. Divide batter, tint one portion black and the other orange, then spoon alternating stripes into the pan.
Spooning and dragging a knife creates bold marbling in minutes. Bake at 325°F for 50–55 minutes until the center barely jiggles.
Cool for 1 hour in the open oven and chill overnight so bars cut into clean squares the next day.

No-bake white chocolate cheesecake with “bloody” raspberry layer
Press a dark Oreo crust in a 9×13 pan and make a white chocolate cream filling with melted chocolate and whipped cream.
Spread half the filling, chill briefly to set, then spoon a homemade raspberry sauce across the center. Top with the remaining filling and pipe a chocolate spiderweb for drama.
Chill at least 6 hours before slicing. Store in the fridge for 3–5 days or freeze for longer keep.
| Variation | Pan | Key bake or chill time | Top finish |
|---|---|---|---|
| Black-and-orange bars | 9×13 with parchment | Bake 50–55 min; cool 1 hr in open oven; chill overnight | Marbled top, optional whipped ghosts |
| No-bake white chocolate | 9×13, press crust | Chill ≥6 hours (or overnight) | Raspberry ribbon, chocolate spiderweb |
| Prep tips | Food processor or bag for crust | Room temp ingredients; cream cheese creamed well | Use clear vanilla extract to preserve color |
Pro Tips for Bakery-Style Results
A few consistent habits in prep and timing will raise a home bake to pastry-shop quality. Follow these refinements to get a smooth top, even set, and neat slices every time.
Room temperature matters: bring all dairy to room temperature so the batter emulsifies smoothly. Start with cubed cream cheese and let it sit until soft to the touch before you beat it in the mixing bowl.
Mixer control and gentle handling
Beat cream cheese until it’s completely lump-free before adding sugar. Then keep the mixer on low for add-ins and when you add eggs—use a stand mixer or hand mixer, but avoid high speed once the wet ingredients go in.
Flavor, fat, and cooling
Choose clear vanilla extract for light-tinted batters so you don’t add a brown cast when using pale or orange colors. Favor full-fat dairy; the extra fat helps the filling set creamy instead of chalky.
- Beat cream cheese fully before sugar to prevent grit.
- Add eggs one at a time on low just until streaks disappear.
- Scrape the bowl and beater often so no cheese hides on the sides.
- Budget time for slow cooling: 1 hour in the off oven, then room cool, then a long chill.
- If cracks form, cover them with whipped decorations or a chocolate web for a tidy finish.
| Tip | Why it matters | Quick action |
|---|---|---|
| Room temperature dairy | Helps batter emulsify and bake evenly edge to center | Bring dairy to room temp ~2 hours before mixing |
| Low mixer speed | Prevents trapped air and bubbles that cause cracks | Use low speed after adding liquids and eggs |
| Clear vanilla extract | Keeps pale or colored batters bright | Use clear extract in light-tinted fillings |
| Slow cooling time | Reduces thermal shock and top cracks | Cool 1 hr in oven, 2 hrs room temp, then chill |
Storage, Freezing, Serving, and Nutrition Notes
A clear fridge routine saves texture and makes serving simple during busy events. Refrigerate a baked or no‑bake cake for at least 6 hours before slicing; overnight gives the cleanest cut and best mouthfeel.
Short-term storage: keep the cake covered and refrigerated 3–5 days. Wrap loosely or use an airtight container and keep it away from strong-smelling food so the filling won’t absorb odors.
Fridge timing, freezing, and make-ahead strategy
- Chill at least 6 hours; overnight is ideal for texture and slicing.
- For freezing up to 3 months: chill until firm, remove from the springform base, wrap in plastic, then foil, and place back in a pan or box for stability.
- Thaw wrapped in the fridge overnight (about 8–12 hours) before serving.
- Decorate the top the day of service so whipped toppings and candy stay fresh and crisp.
Estimated calories per serving and portion guidance
A typical 9-inch serving yields 10–12 slices. An example baked slice can be about 579 calories, though actual calories vary with cream, sugar, and add-ins.
| Item | Guideline | Notes |
|---|---|---|
| Fridge | 3–5 days | Cover to avoid absorbing other food odors |
| Freeze | Up to 3 months | Wrap on pan base; thaw in fridge overnight (8–12 hours) |
| Portion | 10–12 slices (9-inch) | Use a hot, dry knife and wipe between cuts for clean edges |
| Nutrition | ~579 calories per slice* | Varies by crust, sugar, cream, cookies, and added fat |
Tip: Use a 1/4‑cup or 1/3‑cup measuring cup to portion sauces or whipped cream so each serving stays consistent at events. For long displays, rotate the cake between the table and the fridge every few hours to keep food-safe and photo-ready.
Conclusion
Wrap up: finish your cookies-and-cream cheesecake by following the simple path to success—press a sturdy Oreo crust, beat the filling gently at low speed, bake in a water bath, then cool slowly and chill overnight.
Final flourish: pipe whipped cream ghosts, add a cookie “graveyard,” or paint a chocolate spiderweb for bakery-style impact. Use a springform pan and the proper pan setup to protect the bottom and keep neat sides when unmolding.
Choose the way that fits your schedule: classic baked, black-and-orange swirl bars for easy serving, or a no‑bake white chocolate and raspberry version. Remember to use full‑fat cream, respect time for cooling, and add a drop of vanilla to lift the filling.
Make ahead and share: store in the fridge 3–5 days or freeze up to 3 months. Follow the steps, give it time, and you’ll slice clean, photo-ready pieces every time.