Halloween Charcuterie Board Ideas: A Spooky Snack Guide
Nearly 70% of casual hosts say themed snacks make gatherings feel more festive, and a well-planned spread does just that.
This Website contains affiliate links. That means I may earn a small commission if you purchase through my links, at no extra cost to you.
This short guide will help you plan a fast, flavorful display that looks impressive and comes together with minimal stress. Expect step-by-step tips to make halloween charcuterie that balance sweet and savory, and serve guests of all ages.
We cover how to choose seasonal produce, select cheeses and meats, and arrange elements for color, texture, and height. Simple tools like small bowls, cookie cutters, and picks cut prep time and boost visual impact.
Find easy recipe-style notes for kid-friendly minis, skeleton layouts, and elevated cheese-forward spreads you can scale for any guest count. By the end, you’ll have a repeatable framework to craft a reliable, photogenic snack centerpiece.
Key Takeaways
- Plan: Choose a focal cheese and build flavors around it.
- Tools matter: Use small bowls and cutters to speed assembly.
- Visuals: Contrast color and texture for instant impact.
- Balance: Mix sweet and savory for every bite to shine.
- Scale: Use the same recipe steps for small or large gatherings.
Why These Halloween Boards Work for Parties and Movie Nights
Quick, high-impact spreads win at parties because a few anchor pieces make the whole layout fall into place. Start by placing bowls and any pumpkin or seasonal decor first. Those large elements create natural zones and save time when you fill in smaller bites.
What makes these layouts reliable:
- Assemble from large-to-small so placement feels intuitive and fast.
- Use contrast in color and texture so every section pops for guests and photos.
- Keep sweets away from meats to prevent cross-flavor transfer on a shared surface.
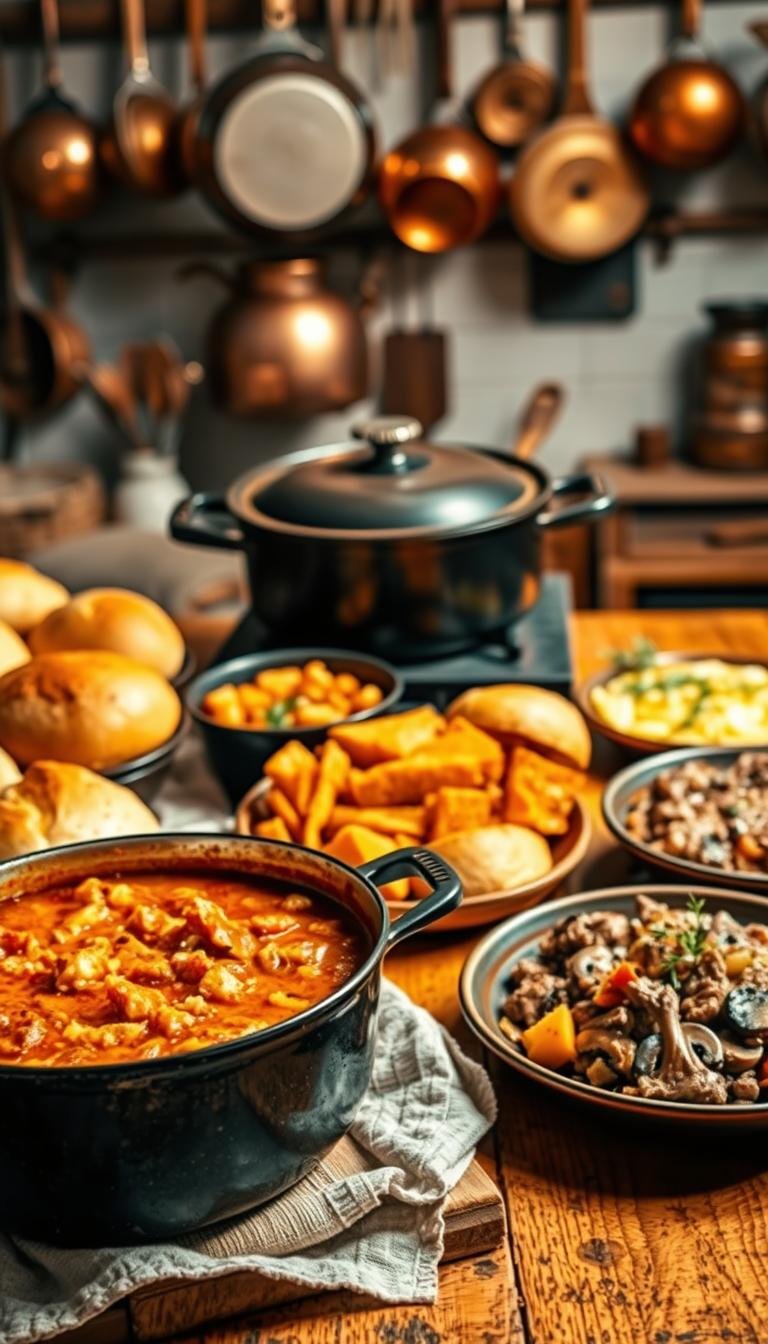
Bring cheeses to room temperature before serving for better flavor and softer texture. Props like mini pumpkins, plastic spiders, or tiny skeleton hands add theme without fuss. You can use any flat surface as a makeshift charcuterie board—cutting boards, slate, or even parchment on a table all work well.
With a simple plan—anchor with bowls, cluster firm, soft, and funky cheeses, then fill—you get a festive, low-effort spread that’s easy to top up during long fall movie nights.
Halloween Charcuterie Board Ideas to Try This Fall
Simple layouts let you layer cheese, fruit, and sweets into a striking seasonal centerpiece.
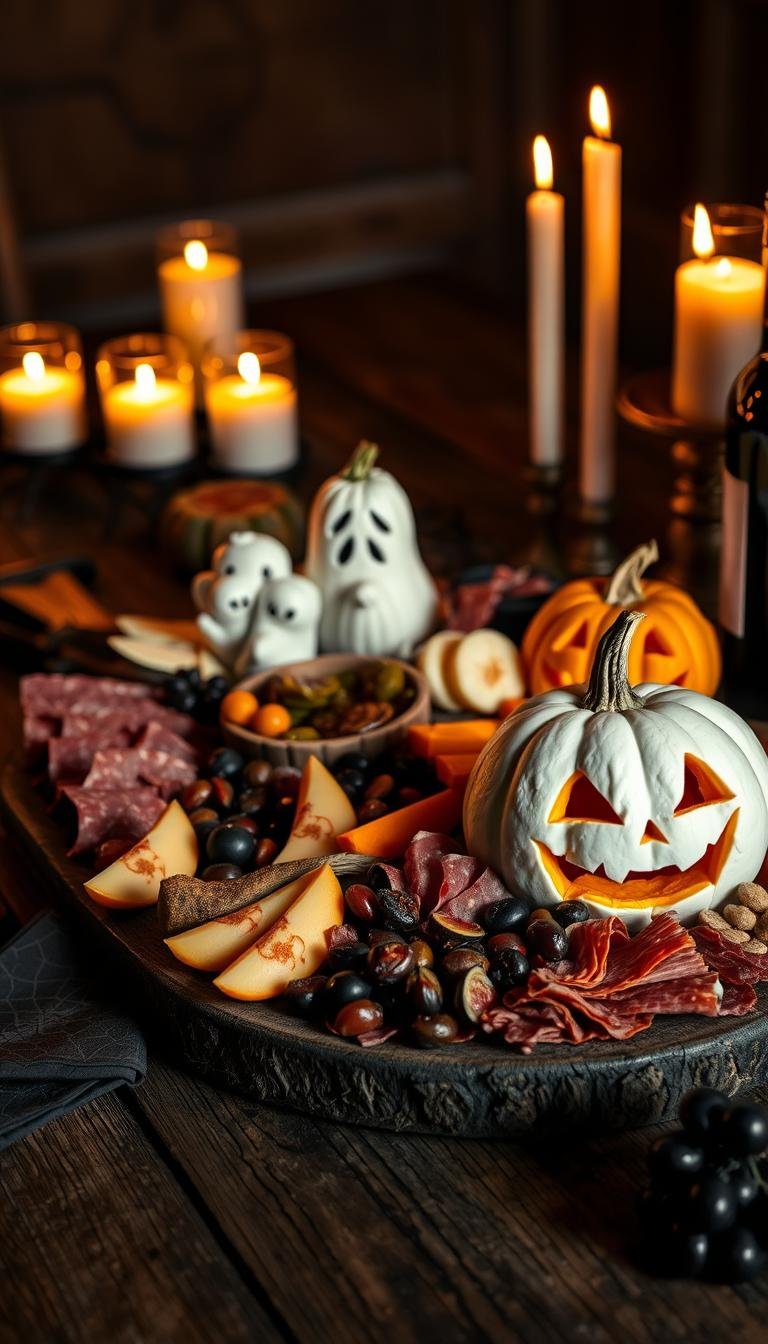
Sweet-and-savory skeleton setup
Anchor the spread with a small skeleton prop and bowls. Cut chilled brie into ghost shapes using cookie cutters cut from the cold wheel. Fold Genoa or spicy salami and tuck prosciutto around the “ribcage.” Frame the area with grapes, blackberries, and dried apricots for bright contrast.
Trader Joe’s candy-and-cheese mashup
Cluster Creamy Toscano or Autumn Chimay with Ghosts & Bats potato snacks, Candy Corn Popcorn, Halloween gummies, and mini pumpkin cookies. Keep sweets on one edge and savory meats on the other for cleaner bites.
Pumpkin patch and kid-friendly mini bowls
Use cookie cutters to press cheddar into pumpkin shapes and mix orange hues with candy corn and dried apricots. For kids, portion popcorn, gummies, and mozzarella pearls topped with candy eyeballs into mini bowls to cut down crowding.
Elevated cheese-forward spread
For a grown-up option, pair a soft-ripened French cheese, a blue like Stilton, and a hard sheep’s milk cheese. Add figs, Castelvetrano olives, and thinly sliced meats for wine-friendly balance.
Start with a Spooky Color Palette
Pick a tight palette first so each element reads like part of a single scene.
Locking in orange, purple, yellow, brown, and black guides every selection. This makes styling faster and keeps the spread cohesive for fall gatherings.
How to hit the hues
For orange, use sharp cheddar, pumpkin-shaped cheeses, dried apricots, or sweet potato crackers. Purple comes from dark grapes or purple carrots that add depth without extra sweets.
Yellow is simple: popcorn, cheese twists, or buttery crackers give crunch and neutral flavor. Brown anchors come from chocolate pieces, pretzels, or roasted nut clusters.
Black accents—blackberries, black olives, or dark chocolate—add dramatic contrast next to pale cheeses and light crackers.
Produce and pantry picks that deliver color fast
- Decor anchors: washed, dried mini gourds or small pumpkins (non-edible props).
- Ratio tip: favor produce and cheese, then add candy sparingly as a highlight.
- Cheese note: varied rinds create built-in color shifts and rhythm on the board.
| Hue | Fast Picks | Purpose | Placement |
|---|---|---|---|
| Orange | Cheddar, dried apricots, pumpkin cheese | Warm focal spots | Cluster near center |
| Purple | Dark grapes, purple carrots | Deep saturation | Edge clusters |
| Black | Blackberries, olives, dark chocolate | Contrast and drama | Small punctuations across board |
Must-Have Cheeses, Meats, and Snacks
A great spread begins with a small set of trusted cheeses, meats, and crunchy snacks. Pick choices that cover mild, bold, and spicy notes so guests can mix and match bites.
Cheese picks: include sharp cheddar cut into pumpkin shapes, brie trimmed into ghost silhouettes, jalapeño pepper jack for heat, a crumbly blue (like Stilton), and mozzarella pearls topped with candy eyeballs to add whimsy.
Meats to buy: prosciutto for silky folds, Genoa for easy bites, capicola for savory depth, and one spicy salami to satisfy heat seekers. These meats balance the creamy cheeses and sweet fruit.
Crunch, carbs, and sweets: stock water crackers, fig-and-olive crisps, pretzel sticks, and Ghosts & Bats snacks. Add grapes, blackberries, figs, and dried apricots plus a small ring of candy corn for color and nostalgia.
Extras and serving bowls: include Castelvetrano olives, mixed nuts, and a jar of popcorn to fill gaps. Use two small bowls for fig jam and chocolate dip so sauces stay tidy.
| Category | Examples | Why it works |
|---|---|---|
| Cheeses | Cheddar, Brie ghosts, Pepper jack, Blue, Mozzarella pearls | Range of texture and strength; visual theme |
| Meats | Prosciutto, Genoa, Capicola, Spicy salami | Foldable, salty, and spicy options |
| Crunch & carbs | Water crackers, fig crisps, pretzels, Ghosts & Bats | Vehicles for cheese and meats; textural contrast |
| Fruit & sweets | Grapes, blackberries, figs, dried apricots, candy corn | Freshness, color, and a hint of sweetness |
| Extras | Olives, nuts, popcorn, fig jam, chocolate dip | Salty bites, fillers, and dipping options |
Pro tip: arrange cheeses from mild to strong around the board so guests move through flavor naturally. Keep portions modest and refill as needed to keep the spread looking fresh at your next home gathering.
Trader Joe’s Finds That Make Boards Boo-tiful
Trader Joe’s seasonal shelf has quick hits that instantly lift a themed spread. Pick a few packaged items and you can assemble a festive display in minutes.
Seasonal staples: Candy Corn Popcorn, Halloween gummies, and mini pumpkin cookies fill color and sweet crunch without extra prep.
Cheese picks: Look for Creamy Toscano (Syrah), White Stilton with Apricots, and Autumn Chimay to give your cheese board autumn character. Add a mild option to balance bold flavors.
- Snack MVPs: Ghosts & Bats chips, Baked Cheese Crunchies, and seed crackers plug gaps with texture.
- Anchor the charcuterie board with two small bowls (chocolate almond spread or hummus) and a small pumpkin, then arrange snacks and cheeses around them.
- Keep candy and cookie clusters away from meats to preserve clean flavor zones.
| Item | Use | Swap |
|---|---|---|
| Ghosts & Bats chips | Crunchy accent | Ghost bat-style chips from other stores |
| Candy Corn Popcorn | Sweet popcorn contrast | Caramel corn |
| Creamy Toscano / Stilton | Anchor cheeses | Any fruity or washed-rind cheeses |
Pro tip: use cookie cutters cut into soft cheese for shapes, then return trimmings to the kitchen. Finish with a few salty bites and fruit so the spread stays balanced.
How to Assemble: From Bowls to Final Fill-Ins
Start assembly with the largest elements so the layout grows naturally from a clear footprint. Place two bowls for dips and small items near the center, then add a pumpkin prop or skeleton hand and your biggest wedges of cheese.
Anchor first: set bowls and large cheeses to define the space. This helps the rest of the board feel intentional and balanced.
Layer meats and arrange cheeses
Arrange cheeses as wedges, cubes, and whole pieces to create height and easy access. Save room for crackers and leave gaps to tuck in folded Genoa, capicola, and a little spicy salami.
Place sweets and cluster complementary bites
Keep candy and other sweets in a separate zone away from meats. Cluster berries near chocolate dip and drop olives next to mild cheeses to cut richness.
Finish with crackers, nuts, popcorn, and garnishes
Fan or stack crackers last so they stay crisp. Use popcorn and nuts to fill tiny gaps and add airy texture.
Add themed touches like plastic spiders or small skeleton hands at the end so decor doesn’t touch food directly. If you need more space, expand onto a parchment-lined table or use a baking sheet to transport the charcuterie board.

| Step | What to place | Why |
|---|---|---|
| Anchor | Bowls, big cheeses, props | Create zones and a clear footprint |
| Layer | Cheeses then meats | Build texture and flavor flow |
| Fill & Finish | Crackers, olives, popcorn, nuts, decor | Preserve crispness and add contrast |
Quick tips: keep napkins and picks at the edge and store refills in separate bowls so guests enjoy a tidy snack station. These steps make a plentiful, organized halloween charcuterie board without chaos.
Styling Tricks: Cookie Cutters, Candy Eyeballs, and Plastic Spiders
Smart styling lifts a snack layout from casual to wow with minimal effort. Use a few repeat motifs and one or two high-impact props to make the whole spread read as intentional.
Cut shapes that read from across the room, add tidy “eyeball” clusters, and place decor last.
Cookie cutters for pumpkins, ghosts, and bats
Use small cookie cutters to press pumpkins, ghosts, and bat shapes into firm cheeses and chilled brie. Chill soft cheese first so cookie cutters cut cleanly and release without sticking.
Save trimmings for the kitchen or cube them to add back onto the board so nothing goes to waste.
“Eyeballs” made easy
Garnish mozzarella pearls with candy eyeballs and nestle them in a small ramekin for a tidy cluster. This creates a playful focal point that’s easy for kids and adults to grab.
Decor safely with plastic spiders and gourds
Add plastic spiders, skulls, and skeleton hands only after food is placed so props don’t displace small items or collect crumbs.
Wash and dry any decorative gourds or pumpkins before styling and keep decor to the edges so delicate cheese stays untouched.
“Choose a few strong motifs—an eyeball bowl, a brie-ghost arc—and let them do the heavy lifting.”
| Trick | How | Timing |
|---|---|---|
| Cookie cutters | Chill brie; press pumpkins, ghosts, bats | Before final placement |
| Candy eyeballs | Stick on mozzarella pearls; serve in ramekin | After cheese is on board |
| Plastic spiders & gourds | Place at edges; wash gourds first | Last step |
Halloween Cheese Board Ideas for Kids and Guests with Dietary Needs
Make a welcoming spread that’s simple to navigate and easy to enjoy for everyone.
Mini bowls for little hands and easy portioning
Use small bowls to portion popcorn, gummies, or fruit so kids can grab-and-go without disturbing the rest of the board.
Bowls also keep sticky sweets contained and reduce sticky fingers on shared cheeses and crackers.

Sweet-only and savory-only zones
Create clear sweet-only and savory-only zones to simplify choices for guests and to cut cross-contact between meats and candy.
Label zones with small tags or use distinct bowls so visual cues make navigation fast at busy parties.
Simple swaps for allergies and preferences
Offer gluten-free crackers near the cheeses and mark a nut-free area. Keep nuts in a separate bowl away from main traffic.
Provide vegetarian items like hummus, olive tapenade, extra fruit, and roasted veggies so everyone finds a satisfying bite.
- Keep knives and spreaders next to their cheeses to avoid mix-ups.
- Repeat simple items (two or three of the same cracker or fruit) so kids recognize favorites quickly.
- Consider separate mini boards for strict diets to reduce confusion during peak serving times.
With modest selections—a mild and a bold cheese, clear zones, and reachable napkins and picks—you’ll serve guests confidently and make it easy for kids to help themselves.
Pro Tips: Make-Ahead, Serving, and Transport
A little planning keeps your spread fresh, portable, and ready to impress. Follow timing and packing habits that protect flavor and appearance while making hosting easier.
Staging and timing
Assemble large-to-small: anchor the layout with bowls and pumpkins or props, then place cheeses. Add crackers and finishing items last so nothing gets crushed.
Bring cheese to room temperature about 30–60 minutes before serving for best flavor. Cover lightly until guests arrive to prevent drying.
Surfaces that work
Any sturdy flat surface will do: a cutting board, slate, a rimmed baking sheet for travel, or parchment on the table at home. Use what fits your car and serving plan.
Transport and final touches
When moving a charcuterie board, wrap tightly with plastic, keep it level in the car, and add fragile decor—plastic spiders or small props—at the destination.
- Prep a few backup trays to refresh quickly without rebuilding.
- Keep a small kit with napkins, extra picks, and a spare knife.
- Scatter a few candy corn sparingly for theme, and place meats last in their zone to preserve texture.
| Task | Timing | Why |
|---|---|---|
| Bring cheese out | 30–60 min before | Better aroma and softer texture |
| Wrap for travel | Just before leaving | Keeps items secure and level |
| Add decor | At destination | Prevents displacement and keeps food clean |
“Small prep moves save time and keep the spread photo-ready from kitchen to table.”
Conclusion
Finish strong: use a short, recipe-like routine to rebuild this look in minutes. Anchor-first assembly, clear flavor zones, and a small list of go-to items make setup repeatable and fast.
Lean on a balanced lineup: two to three cheeses, a couple of meats such as salami, crisp crackers, olives, and dried apricots. Add themed cookie or candy clusters sparingly so guests can mix sweet and savory without overload.
Keep a running folder of recipes and favorite items like Ghosts & Bats snacks, figs, and mini cookies. These save time and let you scale the cheese board across surfaces for any fall gathering.
With this plan, your halloween charcuterie board becomes a reliable, eye-catching centerpiece you can rebuild again and again.