Halloween Bats: Top Picks for Spooky Decor & Collectibles
Nearly 60% of holiday decorators try a themed wall or mantel each year, and swarms of flying silhouettes are a top pick for fast impact.
This Website contains affiliate links. That means I may earn a small commission if you purchase through my links, at no extra cost to you.
This roundup highlights peel-and-stick swarms, sculptural collectibles, and an easy DIY cardboard bat project using Miss Mustard Seed’s MilkPaint in Typewriter and Farmhouse White.
We focus on quality, visual impact, and U.S. availability so you can find items reviewed united states and often ready to get soon monday from shop store amazon or small makers with occasional aug free shipping deals.
Expect 3D wall sets, outdoor silhouettes, mantel accents, and a kid-friendly diy with a step-by-step video and picture guide. Use gaffer tape for lightweight cardboard pieces and Command Strips for paint-safe hanging to keep walls pristine and reusable next year.
Whether you want cute or creepy, this guide covers budget-friendly bulk options and premium matte pieces to build the right mix of sizes for drama and balance.
Key Takeaways
- Find U.S.-available decor options that ship fast and are reviewed united states.
- Try the DIY MilkPaint cardboard project for a non-toxic, kid-friendly activity with a video tutorial.
- Use gaffer tape for temporary mounts and Command Strips for paint-safe, damage-free removal.
- Shop options range from budget bulk swarms to premium sculptural pieces.
- Look for listings that offer expedited fulfillment to get soon monday and occasional aug free shipping.
Why Bats Are the MVP of Halloween Decorations Right Now
Few decor moves give the same instant drama as a spread of flying silhouettes across a mantel or door. A compact swarm signals night imagery and suspense in one visual hit, so a single group reads as an immediate seasonal cue.
Versatility is a big reason these pieces work. They scale from mini accents for small apartments to statement shapes for large entryways. Use them on walls, windows, doors, or mantels to layer depth without clutter.
Stick-on options make setup fast and renter-friendly. They stage a room in minutes and remove cleanly with paint-safe mounts, which keeps landlord relations smooth.
Design-wise, finishes run from matte modern to farmhouse white and glossy black, so the pieces pair easily with pumpkins, candles, and other fall accents. Lightweight paper or PVC choices are kid- and pet-friendly when placed out of reach.
- Cost-effective: Bulk packs fill a wall quickly.
- Photo-ready: High-contrast shapes make great backdrops for parties.
- Indoor/outdoor: Choose weather-rated materials for porches and soft adhesive for indoor use.
| Feature | Best For | Material | Quick Tip |
|---|---|---|---|
| Swarms | Anchoring a vignette | Paper, PVC | Use Command Strips on painted walls |
| Single large piece | Statement doorway | Rigid plastic, metal | Mount with outdoor-rated anchors |
| 3D pieces | Mantels and shelves | Foam, molded PVC | Place away from heat and open flame |
| Peel-and-stick | Last-minute styling | Adhesive-backed paper | Test on a small area first |
How We Chose the Best Picks for This Product Roundup
Our selection started with real-world tests focused on material strength and how pieces behave on painted walls. We weighted durability, safe mounting, and clear listing details to identify items that will work in everyday U.S. homes.
Quality, Materials, and Wall-Safe Adhesion
Material durability was a top filter. We compared PVC, molded plastic, and heavy cardstock for tear resistance and ability to hold a shaped wing.
Adhesion testing favored Command Strips for painted walls and trim, including cutting strips for smaller accents. For lightweight DIY cardboard elements, we recommend gaffer tape as a temporary mount.
“Picks must be easy to remove and leave no residue when used as instructed.”
Value, Size Variety, and U.S. Availability
We calculated cost per piece and looked for sets that include multiple sizes so you can layer depth from small accents to a large statement piece. Listings that disclose exact size and material thickness scored higher.
- We prioritized items reviewed united states with clear shipping windows and return policies.
- We checked customer feedback for adhesion, shape retention, and visual effect, flagging thin plastics and weak adhesives.
- DIY-friendly sets that mix well with handmade pieces earned bonus points for versatility and creative use.
Top Picks: 3D Bats for Walls and Doors
Choose 3D winged accents that balance sculptural detail with easy mounting for walls and entryways. These pieces change a plain wall into a focal point without heavy tools or messy anchors.
Best Overall: Flexible PVC/Plastic Sets
Flexible PVC kits with crisp embossing and pre-scored folds are our top recommendation. Multiple sizes in one pack let you shape realistic swarms across a wall and a door for a cohesive look.
Use included stickies when supplied. For paint-safe installs, cut Command Strips to fit smaller pieces for secure, damage-free mounting.
Budget Pick: Bulk Value Packs
Bulk sets often include 60–120 pcs bats halloween, ideal for filling a feature wall or stairwell on a budget. Compare cost-per-piece and confirm the size breakdown so you get enough mediums and larges, not only minis.
Premium Look: Matte Finish Sets
Matte finishes resist glare and read more high-end in photos and modern interiors. Look for thicker material to keep wing shape and avoid curling under bright lights.
- Sizes explained: Kits that list ranges (for example, 4–12 inches) help you plan scale and depth.
- Surface compatibility: Smooth, clean paint sticks best; warm adhesives slightly with fingers to boost tack.
- Where to buy: shop store amazon and major decor retailers often have fast windows, many reviewed united states and able to get soon monday with paid options.
Check promotions for free shipping orders thresholds and confirm shipping orders shipped timelines. For real-life impressions, double tap read product specs and read moresee reviews before checkout.
Removable Bats Wall Decor: Damage-Free Setup
Keep decoration damage-free by choosing removable mounting methods that protect your painted walls. Use paint-safe hardware and simple placement tricks to get a strong visual effect without repair work later.
Command Strips for Paint-Safe Hanging
Command Strips are the easiest option for most smooth-painted surfaces. They remove cleanly and hold light to medium cutouts without tearing paint.
Cut strips in half for smaller pieces to reduce bulk and improve grip. For very lightweight cardboard, attach gaffer tape behind wings to create a flying pose during setup.
Placement Tips for Hallways, Mantels, and Entry Doors
Prep the surface with a dry microfiber cloth to remove dust. Make sure paint is fully cured before mounting to avoid lifting the finish.
- Start low, sweep up: arrange pieces rising toward a focal point to mimic flight.
- Mind the size: mix one medium for every two smalls near a door to avoid blocking hardware.
- Test first: mount one piece overnight and remove it slowly to confirm clean release.
- Store for reuse: keep backing liners or wax paper with Command tabs so you can use them next year.
| Mounting Method | Best For | Tip |
|---|---|---|
| Command Strips | Painted interior walls, mantels, doors | Cut in half for small cutouts; follow weight guidelines |
| Gaffer Tape | Lightweight cardboard and temporary DIY pieces | Place behind wings to create a dynamic flying angle |
| Adhesive Putty | Short-term displays on smooth surfaces | Test removal; avoid textured or fresh paint |
Indoor Halloween Bats to Style Your Mantel and Gallery Wall
A simple arrangement of mixed-material wing shapes will lift a blank wall and make a mantel feel curated.
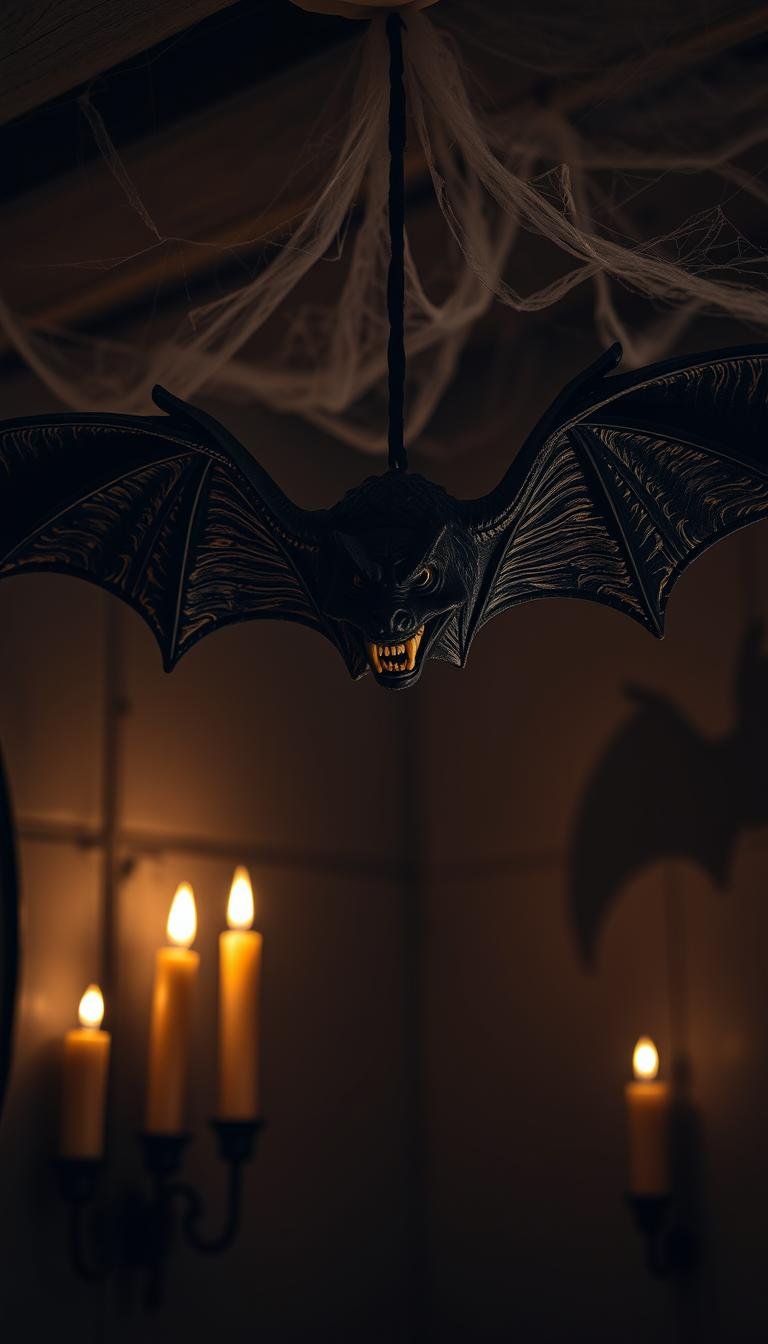
Place pieces to lead the eye. Start low on the left and let the flock rise to the upper right. Anchor the run with a candle cluster or a wreath for a classic halloween decorations touch.
Combine store kits with one handcrafted bat painted in MilkPaint for contrast. MilkPaint is non-toxic, so kids can help and the project stays safe and fun.
- Mix sizes: alternate small and medium for depth; reserve a few larger silhouettes near the visual apex to avoid clutter.
- Keep finishes cohesive: matte black pieces pair well with white frames; farmhouse white painted accents pop on dark walls.
- Mounting tips: use paint-safe strips at the wing base and a tiny stabilizer at the tip or gaffer tape behind cardboard to prevent droop.
- Lighting: add a sconce or LED candle to cast shadows and increase drama at night.
Verify quality by choosing sets reviewed united states to ensure true-to-photo color and reliable adhesive strength for indoor installations. Extend the swarm into nearby frames to create flow while keeping negative space so the bats halloween decoration stays the focal point.
| Display Spot | Recommended Material | Mounting Tip |
|---|---|---|
| Mantel | Handcrafted MilkPaint bat + cardstock | Paint-safe strips at wing base; small stabilizer at tip |
| Gallery wall | Mixed sizes of adhesive-backed cutouts | Alternate small/medium for depth; keep spacing consistent |
| Doorway edge | Rigid PVC or thicker cardstock | Secure with outdoor-rated anchors or extra gaffer tape for flying motion |
Outdoor-Safe Bats for Porch, Yard, and Front Door
Pick materials and fasteners rated for exterior use to keep a front entry display looking crisp all season. Choose thicker PVC or molded plastic so pieces resist moisture and sun fading.

Weather-Resistant Materials and Mounting Notes
Materials: thicker PVC, UV-stable plastic, and painted metal last longest outdoors. Avoid cardboard and thin paper for porch or yard use; those work best inside.
Mounting: use weather-rated mounting squares or outdoor Command alternatives for smooth doors. For railings and stakes, secure with zip ties or clear fishing line.
“Anchor outdoor pieces with a second fastener at wing tips for stability in gusts.”
- Place clusters away from the handle and swing path of a door.
- Scale up for curb appeal: larger sizes read better from the street; mix medium pieces to bridge groups.
- Angle each piece into the prevailing wind and add a tiny stabilizer at the wing tip.
- Check listings reviewed united states for notes on UV resistance and care.
- Confirm shipping windows like shipping orders shipped estimates and free shipping orders thresholds so you can get soon monday if needed.
| Item | Best Use | Outdoor Tip |
|---|---|---|
| Thick PVC cutouts | Porch and door clusters | Use outdoor-rated mounting squares on clean painted metal |
| Painted metal silhouettes | Yard stakes and railings | Zip-tie to rails; anchor to ground stakes for wind |
| UV-stable plastic | High-visibility curb displays | Choose larger sizes for distance visibility |
Cute to Creepy: Bats Halloween Figurines and Collectibles
Create a tabletop vignette by centering a playful creature on a small pedestal and layering low elements so guests can see each other across the table.
Tabletop Centerpieces for Living Rooms and Dining Centers
Explore collectible styles from cute ceramic figures to gothic metal silhouettes. Pick a piece that sets the tone for your table center while matching wall swarms nearby.
Build a layered centerpiece: elevate one medium bat on stacked books, flank it with candlesticks, and add a low garland so sightlines stay open.
- Balance cute and creepy: pair glossy mini bats with matte skulls, or keep things whimsical with smiley figures. Use a consistent finish to tie the scene together.
- Mix ready-made and DIY: tuck a small DIY MilkPaint bat card at each place setting to add a personal touch that echoes larger collectibles.
- Practical sizing: keep figurines below eye level; a medium figure between two lower items keeps conversation flowing.
- Entry console idea: place one bat figurine by the door to echo the table display and guide the eye from entry to center.
| Style | Best Use | Quick Tip |
|---|---|---|
| Ceramic/cute | Family-friendly tables | Wipe with a soft cloth; avoid direct heat |
| Metal/gothic | Formal dining centers | Anchor on a tray to protect surfaces |
| Handpainted DIY | Personal place settings | Store in divided boxes to protect wings |
Shop for variety at shop store amazon and local makers, and favor items reviewed united states for accurate photos and quality notes. Check shipping orders shipped timelines or upgrade if you need to get soon monday.
Care and gifting: dust with a soft cloth, store carefully, and consider figurines as seasonal gifts for others who like subtle holiday flair and fun DIY accents.
DIY Spotlight: Cardboard halloween bats Painted with MilkPaint
Take a simple sheet of recycled cardboard and turn it into winged decor. This quick project uses a printable template, Miss Mustard Seed’s MilkPaint, and basic tools so kids can join in safely.
What you need
- Recycled cardboard and a printable template in two sizes to create depth.
- Miss Mustard Seed’s MilkPaint in Typewriter (black) and Farmhouse White, a craft brush, pencil, and scissors or a craft knife.
- Gaffer tape for mounting and a cutting mat for clean edges.
Make, fold for wing movement, and paint accents
Trace the template and cut two size groups so the flock reads as layered. Fold at the wing base to give each piece a natural mid-flight curve.
Mix Typewriter MilkPaint 1:1 with water and brush a thin coat front, back, and edges to seal and color the cardboard. For highlights, mix Farmhouse White 2:1 with water and dab the body. Add one stripe per wing on small pieces and two for larger ones.
Video walkthrough and family-friendly finish
The paint is non-toxic, so children can help with simple brushing and dabbing. Mount by placing gaffer tape behind the body or wing base and arc small bats across the wall for a convincing flight path.
Watch the full video if you want a step-by-step visual of cuts, folds, and brushwork. Many crafters enjoy making bats this way and return to the project year after year.
| Step | Action | Tip |
|---|---|---|
| Cut | Trace template on cardboard and cut | Use a craft knife for clean edges on larger sizes |
| Fold | Score at wing base and crease | Test angle before mounting for best motion |
| Paint | Typewriter 1:1 for base; Farmhouse White 2:1 for accents | Thin base coats prevent soggy edges; dab accents for texture |
| Mount | Gaffer tape behind body or wing base | Place small stabilizers on tips for outdoor breezes |
Sizes and Quantities: Choosing the Right Mix for Your Space
Deciding how many winged cutouts to place starts with the wall’s proportions and a simple ratio-based plan. A clear map prevents clutter and helps the arrangement feel intentional.
Small Pieces, Medium Connectors, and One Anchor
Start with a plan: on a large wall, aim for a 60/30/10 ratio of small, medium, and large pieces to create a graduated flight that reads naturally.
- Define roles: small items fill negative space; medium pieces link groups; a single large piece becomes the visual center and anchor.
- Count planning: for a 6–8 foot span, 30–60 total pieces usually looks bold without feeling crowded.
- Layering tips: overlap wing tips slightly and vary angles so shadows add depth without extra hardware.
| Area | Recommended mix | Quick tip |
|---|---|---|
| Small room | Mostly small + few medium | Limit largest size to avoid overpowering art |
| Mantel or doorway | Medium bridge + one large off moving parts | Keep large piece away from hinges and handles |
| Stairwell | Mix sizes for visibility from below | Scale up for distance readability |
Cohesion matters: stick to one or two finishes so size changes create drama, not clashing colors. For rentals, place clusters near existing hooks to avoid new holes. Try a paper mockup first to preview the flight before committing.
Installation Made Easy: From Command Strips to Gaffer Tape
Mounting your swarm is simple when you match adhesive strength to material and surface. Start with a quick test piece so you know how well a strip or tape will hold before committing to the full layout.
When to Choose Command Strips vs. Tape
Command Strips are ideal for painted drywall and wood trim. Cut strips in half for small pieces and press for 30 seconds to improve grip.
Gaffer tape is best for lightweight DIY pieces. It’s matte, flexible, and holds curves without damaging finishes.
Creating a “Flying” Motion Across the Wall
Map the path with pencil marks or painter’s tape arrows. Arrange pieces from lower left to upper right for dynamic flow.
- Scale adhesives to sizes: half tabs for small bats, full tabs or two pieces for medium, two contact points for large.
- Vary wing angles so shadows shift and the display feels alive.
- Keep a 6-inch safety zone from thermostats and switches to avoid heat or oils that weaken hold.
- For textured walls, test a single piece; switch to smoother doors or use mounting putty if needed.
| Method | Best For | Tip |
|---|---|---|
| Command Strips | Painted interior walls, reusable displays | Cut in half for small pieces; press 30 seconds |
| Gaffer Tape | DIY cardboard and curved mounts | Place behind body; use matte side out |
| Mounting Putty | Short-term on smooth surfaces | Test removal first; hide at wing tips |
| Outdoor-rated anchors | Large PVC or metal pieces | Use two points and zip ties for wind |
Remove Command tabs by stretching straight down and peel tape slowly at a low angle if you rent. Save a photo of the layout so you can replicate the exact flight pattern next season and make the setup work faster next time.
Color and Finish: Classic Black, Farmhouse White, or Painted Accents
Color and finish choices shape whether a display feels crisp, cozy, or cinematic. Pick a base tone, then add one accent color to keep the look intentional.
Classic black delivers high contrast on light walls and reads cleanly in photos. Use matte cuts for a premium look or satin if you want a gentle sheen under soft lighting.
Farmhouse white accents pop on dark backgrounds and pair well with lanterns, wood mantels, and neutral fall palettes. A single white-highlighted bat among darker shapes creates a focal point.
- Painted accents: Typewriter (black) base with Farmhouse White stripes adds texture and a subtle, realistic wing highlight.
- Size pairing: lighter finishes for large pieces prevent visual heaviness; darker minis thicken edges for depth.
- Finish tips: matte cuts glare; satin gives life in low light. Seal hand-painted work with a clear matte topcoat for durability.
- Keep it simple: limit the palette to two finishes to avoid visual noise and keep the flight motion clear.
Customer Review Highlights and Common Pain Points
Real buyers often highlight easy placement and a picture-ready result with minimal tools. Many reviewers praise quick installs and clean removal when following package instructions.

What Shoppers Love: Easy Setup, Fun Look, Use Next Year
Quick setup and tidy removal top positive notes. Command Strips are frequently named for not ripping off paint, letting customers plan to use decor next year without repair work.
Value is another common praise. Large sets reviewed united states deliver dramatic swarms for less, and verified photos help shoppers imagine scale.
Customer reviews 4.4 appears often for bestselling kits, showing broad satisfaction across styles and homes. Flexible wings, cohesive size mixes, and finishes that hold shape are favorite features.
Mixed Opinions: Adhesion, Product Issues, and Seller Support
Not all feedback is perfect. Negativecustomers mixed opinions surface where adhesives fail on textured walls or humid rooms, causing lifting corners or falls.
One customer noting success after switching to Command Strips shows small fixes can save a set. Other buyers report thin material or creases on arrival and may report issue product to request replacements.
Some shoppers mention issue product seller delays; contacting support early and using platform tools to report issue product speeds resolution.
- Tip: read moresee reviews and filter for photos to confirm scale and finish.
- Tip: if a listing has many star4 star3 star2 entries or clusters of star3 star2 star1, expect mixed outcomes and check seller response times.
| Highlight | What Shoppers Say | Action |
|---|---|---|
| Setup | Fast; Command Strips preserve paint | Follow strip instructions; test one piece |
| Material | Some thin pieces on arrival | Report issue product for replacements |
| Adhesion | Weak on textured walls | Swap to Command Strips or gaffer tape |
| Ratings | customer reviews 4.4 common; reviewed united states photos help | Read verified photos and comments |
Shipping and Availability in the United States
Factor regional inventory and carrier schedules when you need a display delivered by Monday. Fast arrival depends on seller location and cutoff times, so check fulfillment details before you buy.
Fast Options to Get It by Monday
Choose domestic warehouses and next-day or same-day shipping options to shorten transit. Marketplace listings often show real-time stock for shoppers reviewed united states.
- Expedited shipping: select next-day dispatch and confirm weekend cutoff times to truly get soon monday.
- Bulk orders: verify pcs bats halloween counts and size breakdown so you avoid last-minute shortages.
- Rural delivery: allow extra days; carrier service to remote addresses may extend shipping orders shipped timelines.
Free Shipping Promos and Timing
Watch for aug free shipping deals and membership perks that lower costs. Free shipping orders thresholds can save money but may add transit time.
| Promotion | Tip | When to expect |
|---|---|---|
| aug free shipping | Check minimum cart value | united states august |
| free shipping orders | Compare with expedited cost | Peak season (united states december) |
| Seller-based fast ship | Confirm warehouse origin | shipping orders shipped within 24–48 hrs |
Keep packing and photos on arrival for quick returns or replacements. For transparent ETAs, shop store amazon and other reputable sites for tracking and consolidated shipping when you need it fast.
Care, Storage, and Reuse for Next Year
Treat fragile cutouts like small artworks: proper storage preserves shape and finish so your display is ready to go when the season returns.
Remove gently. Stretch Command tabs straight down to release. If you used gaffer tape on a bat, peel slowly at a low angle to protect the paint and wall.
Flatten and store. Place pieces between wax paper sheets inside a rigid folder or box. This keeps wing bends intact and prevents crushing delicate edges.
- Climate control: store in a cool, dry place to avoid warping and adhesive breakdown.
- Label by location: group mantel, stair, and door clusters for quick re-installation and to easily use next year.
- Refresh adhesives: replace mounting tabs annually to reduce mid-season failures.
- Touch-ups: keep a small jar of matching MilkPaint or note the mix ratio for quick edge repairs.
Sort by finish to prevent abrasion: separate matte and satin pieces with tissue paper. Inspect bends and warm stubborn creases with hand heat before remounting.
| Care Step | Action | Why it matters |
|---|---|---|
| Removal | Stretch Command tabs; peel gaffer tape at a low angle | Protects wall paint and avoids chipping on painted edges |
| Storage | Wax paper between pieces; rigid box; label by location | Preserves shape and speeds up next season setup |
| Adhesives | Replace tabs yearly; keep spare gaffer tape | Prevents falls that can damage pieces or finishes |
| Repairs | Spot-paint scuffs; keep small MilkPaint mix saved | Maintains a consistent look and extends useful life |
Keep a layout photo and a count list so you can recreate the exact flight path and minimize guesswork the next season. A small repair kit with tabs, tape, and touch-up paint helps your set remain reliable through the whole year.
Conclusion
Bring the display together: pick a signature silhouette, balance small, medium, and large pieces, and rehearse placement with painter’s tape before you commit.
From quick-stick 3D swarms to heirloom figurines or one handmade bat painted in MilkPaint, choose the route that fits your space and budget. Use Command Strips for paint-safe mounting and map a flowing bats wall from the foyer to the living room door for a cohesive look.
Shop smart: check shipping orders shipped estimates, promos for free shipping orders, and expedited options to get soon monday. Reliable retailers like shop store amazon simplify returns and delivery.
Keep it fun and reuse pieces each year; a single handcrafted accent makes the setup feel personal and memorable. For details and sizing, double tap read the relevant sections above and enjoy making bats.