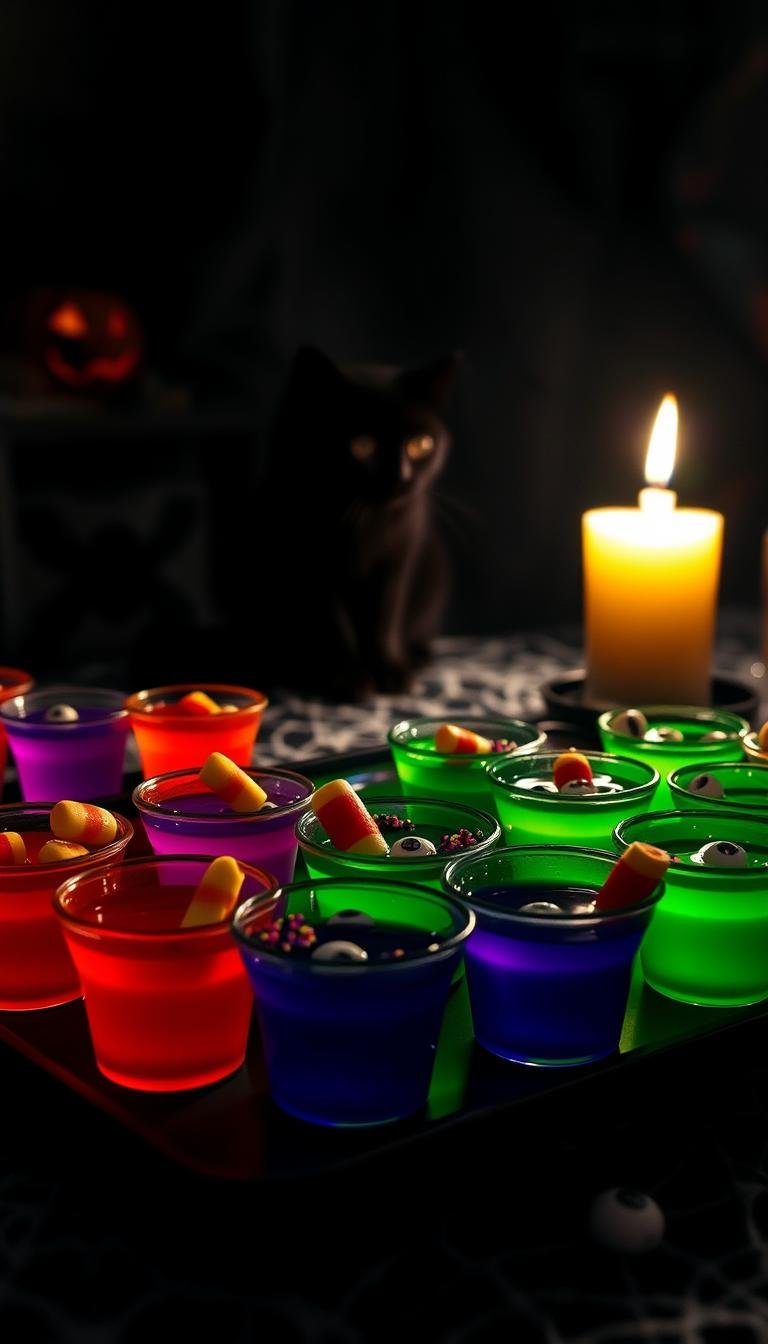
Easy Halloween Jello Shots: A Festive Treat
Surprising fact: more than 40% of party hosts say a bright, layered gelatin treat becomes the most photographed item at gatherings.
This Website contains affiliate links. That means I may earn a small commission if you purchase through my links, at no extra cost to you.
This quick how-to walks you from ingredients to presentation with reliable proportions. For a 3-ounce gelatin box, use 1 cup boiling water, 1/2 cup vodka (or liquor of choice), and 1/2 cup cold water. Dissolve gelatin fully in hot water, then stir in alcohol and cold water before pouring into 2-ounce cups or syringes.
Layered candy corn looks use lemon and orange flavors; chill each layer about 90 minutes so the colors stay clean. Top with whipped cream and sprinkles right before serving for a party-ready finish.
Want no-alcohol versions? Swap the spirit for extra cold water and you get the same set and texture. This guide also covers timing, troubleshooting, and presentation tips so you get consistent results every time.
Key Takeaways
- Use the 1 cup hot water : 1/2 cup vodka : 1/2 cup cold water ratio for a 3-ounce box.
- Choose 2-ounce cups or syringes for standard servings and dramatic displays.
- Chill layers fully (about 90 minutes) to get crisp candy corn stripes.
- Top with whipped cream and sprinkles just before serving for best texture.
- Make an alcohol-free batch by replacing vodka with cold water for the same set.
Why These Halloween Jello Shots Belong at Your Next Halloween Party
Portable and low-mess: these mini treats are easy to hand out to parents or guests during neighborhood trick-or-treating and work well for any busy halloween party.
They pair smoothly with other cocktails and themed snacks. Hosts can serve a creamy option, a fruity option, and a novelty option to cover varied tastes.
Batch-friendly prep: make large trays ahead, chill quickly, and transport in cups or syringes. This format cuts cleanup and speeds service for both indoor and outdoor party settings.
- Scale the base recipe to fit small gatherings or bigger crowds.
- Swap flavors to match costumes or decor—candy corn layers with vanilla or whipped cream add nostalgia.
- Visual colors and toppings make these a focal point on dessert tables or cocktail stations.
| Advantage | Why it Helps Hosts | Quick Tip |
|---|---|---|
| Portability | Easy to hand out and serve | Use 2-oz cups or syringes |
| Flavor variety | Matches themes and guest preferences | Offer one creamy, one fruity, one spooky |
| Batch prep | Reliable, repeatable recipes save time | Chill bases overnight for faster assembly |
Confidence for hosts: this guide includes troubleshooting so your jello shot set and presentation go smoothly. These ideas give you flexible, crowd-pleasing options that travel well and look great.
What You’ll Need: Ingredients, Tools, and Cups
A small list of reliable ingredients and tools will make every batch turn out consistent. Gather items before you start so mixing and pouring stay quick and tidy.
Core ingredients
Essentials: a 3-ounce box of flavored gelatin, 1 cup boiling water to dissolve it, then 1/2 cup vodka and 1/2 cup cold water to finish the base. This cup vodka ratio gives a dependable set.
Optional add-ins
Top or mix in whipped cream, festive sprinkles, candy eyeballs, or green boba pearls for texture and theme. Canned whipped cream speeds service; fresh whipped cream gives a thicker dollop.
Tools and containers
Use a mixing bowl and whisk to dissolve the gelatin, and a spouted measuring cup for neat pouring. Standard serving containers are 2-ounce plastic cups or 60 ml syringes—both make clean displays.
Chill lids before capping, but let liquids cool first to avoid condensation. Prep a tray to move filled cups to the fridge without spills, and keep extra cups on hand for layered designs.
The Base Recipe: Simple Jello Shot Mixture That Always Sets
Start with a fail-safe base so every cup sets firm and every guest gets the same taste. The key is precise measurements and a full dissolve of the gelatin in boiling liquid.
For a 3‑ounce box: whisk the gelatin in 1 cup boiling water until fully dissolved. Stir in 1/2 cup vodka and 1/2 cup cold water to finish the smooth mixture. Pour into about 10–12 two‑ounce cups and chill.
Doubling the recipe is simple: a 6‑ounce box needs twice the water and alcohol. Choose 2‑ounce cups or 60 ml syringes depending on presentation; larger cups increase chill time to the 3–4 hour range.
“Accurate amounts keep the set predictable—too much alcohol or too little water changes the texture.”
- Use a bowl with a pour spout or transfer the mix to a measuring cup to avoid spills.
- Test one cup if you change spirits or swap ingredients to confirm the set.
- Pre-chilled vodka and cooler room temps can slightly speed setting, but allow the full chill time for best results.
Yields, timing, and tips
Plan for consistent shot size to manage servings and responsibility. Clear spirits like vodka are most predictable at the stated cup vodka amount.
Step-by-Step: Making halloween jello shots the Easy Way
Use these clear, timed steps to turn powdered gelatin into perfectly set party cups. Follow them in order and keep tools handy so the process stays smooth.
Boil, whisk, and dissolve the gelatin
Start by boiling 1 cup of hot water. Sprinkle the powdered gelatin into a bowl and whisk until no grains remain. Heat and agitation are the keys to a smooth mixture.
Add cold water and vodka, then pour into cups
Stir in 1/2 cup cold water and 1/2 cup flavored vodka to finish the base. Transfer the liquid to a spouted measuring cup for clean, even pours.
- Fill each 2‑oz cup about three-quarters full to allow space for toppings.
- For syringes, submerge the tip and draw the liquid up, then cap before chilling.
- Wipe drips immediately to keep presentation neat.
Chill time and how to make sure they set properly
Let the filled cups cool a few minutes before adding lids to avoid condensation. Place cups on a rimmed baking sheet for easy transport to the fridge.
“Give them the full 2–4 hours in the refrigerator so the set is firm and reliable.”
Make sure the fridge door stays closed during the first few hours; frequent opening can extend set time. If you need firmer texture, chill about 4 hours or use a slightly colder fridge setting.
Candy Corn Layered Jello Shots: The Iconic Look
For a standout display, build bright yellow and orange tiers that mimic candy corn in every cup. Use clear 2‑ounce cups so the colors pop and guests can see the classic three‑tone effect.
Yellow and orange layers: timing, ratios, and cooling between layers
Start with lemon gelatin for the yellow base. Mix each layer with the standard base ratio so both layers set firmly.
Pour the yellow layer first and chill about 90 minutes until fully set. Keep the second orange mixture slightly cooled before pouring to avoid melting the bottom layer.
After adding the orange layer, cap and return to the fridge for another 90 minutes. Total set time is roughly 3 hours for both layers.
Topping with whipped cream and sprinkles right before serving
Use vanilla or whipped cream vodka in the recipe for a dessert-forward finish that suits the candy corn theme.
- Top with canned or fresh whipped cream and festive sprinkles just before serving.
- Place cups on a level shelf and rotate trays if your fridge has hot spots.
- Plan the process in stages to keep layers clean and distinct.
“Chill each layer fully and add cream and sprinkles at the last minute for the best look and texture.”
Jello Shot Syringes for a Spooky “Mad Scientist” Vibe
Transform ordinary party servings into a lab-inspired display that thrills guests. Use food-grade 60 ml (2-ounce) syringes to give your bar a theatrical, clinical look.

Filling technique: dissolve the gelatin in boiling water, stir in vodka and cold water, then lower the syringe tip into the liquid and pull back smoothly on the plunger.
Cap each syringe to avoid spills and plan on about 4 hours of chill time. The narrow shape can slow setting, so allow extra time for a firm set.
Serving ideas and station setup
- Choose 2-ounce (60 ml) food-grade syringes so caps fit snugly and servings are consistent.
- Display in galvanized ice buckets to keep them cold, or line stainless surgical trays for a lab-style presentation.
- Keep a small stack of cups on hand for guests who prefer a traditional cup over a syringe.
- Wipe barrels before serving, label colored caps, and add a simple instruction card: press the plunger steadily to enjoy.
- Use red jello for a dramatic “blood” effect or neon green for toxic-ooze themes; include a short recipe card and cocktails signage to tie the station into your larger party.
Halloween-Themed Variations: Eyeballs, Monsters, and Witch’s Cauldron
Upgrade your base recipe with playful props and color-driven flavors to make each cup stand out. These themed ideas focus on texture and visuals while keeping prep simple.
Eyeball shots with gummy eyes
Make an eye-catching batch by pouring the standard base and letting it set fully. Right before serving, press a single gummy eyeball on top of each cup for a bold finish.
Tip: use cherry or strawberry for a clear red jello layer that makes the gummy pop.
Monster shots with green boba and candy eyeballs
Use lime or green apple flavor for a bright base. After chilling, add a spoonful of green boba pearls and stick on candy eyeballs to build playful faces.
Keep in mind: don’t add boba or candy décor until serving time so textures stay fresh and colors don’t bleed.
Witch’s cauldron with black cups, boba “bubbles,” and swizzle sticks
Fill black cups for a dramatic cauldron look. Top with green boba bubbles and insert a trimmed swizzle stick as a stirring wand.
For a dessert twist, pair green apple gelatin with caramel vodka for a caramel apple variation and add a tiny caramel drizzle on the lid.
- Make eyeball shots by preparing the base, letting it set, and topping each with a single gummy eyeball.
- Build monster shots with green jello, then add green boba pearls and candy eyeballs for faces.
- For a witch’s cauldron, use black cups, green boba “bubbles,” and trimmed swizzle sticks as stirrers.
- Hold off on boba and candy until serving so textures stay fresh and toppings don’t bleed color.
- Balance cream notes by choosing vanilla or whipped cream varieties if you want a sweeter, dessert-style option.
- Prep small menu cards so guests can identify flavors and try several ideas across the display.
“Toppings belong at the last minute—freshness and texture make the presentation sing.”
Timing, Layers, and Set Times: Plan Ahead for Party Perfection
Plan your chilling schedule first so each cup and tier reaches peak firmness before guests arrive. Typical base cups need about 2–4 hours to set, while layered candy corn requires roughly 90 minutes per layer.
For syringes, allow close to 4 hours because the narrow shape slows the set. Stage work so each layer is completely firm before pouring the next to keep colors crisp.
Make sure the mixture cools before adding lids to avoid condensation. Keep the fridge door closed and reserve a steady middle shelf for layered trays.
- Map schedule: cups 2–4 hrs; layers ~90 mins each; syringes ~4 hrs.
- Stagger batches to save space and track progress.
- Label trays with start and expected set time.
- Adjust if you change water or alcohol in the recipe; it can alter set time.
“Build a one-hour buffer before the party so final toppings and decorations are fresh.”
This tidy plan helps your jello shot prep finish calmly and makes the party setup simple and reliable.
Alcohol and Flavor Pairings: Vodka, Flavored Vodka, and Beyond
A smart spirit choice keeps colors vivid and layers flavorful without masking the base taste. Clear liquors preserve bright hues and let the gelatin flavor shine. When in doubt, pick a neutral or lightly flavored spirit.
When to use vanilla, whipped cream, or caramel vodka
Use vanilla or whipped cream vodka when you want dessert notes. Orange creamsicle works best with orange jello and whipped cream vodka to recreate that creamsicle flavor.
Choose caramel vodka with green apple jello for a true caramel apple vibe. A little caramel garnish signals the twist and makes the pairing obvious to guests.
Alternatives: white rum, tequila, and non-alcoholic swaps
Try coconut white rum with lime jello for a tropical “lime in the coconut” shot that still reads seasonal with green color. White rum and blanco tequila work well because they are clear and mild.
Swap alcohol for cold water to make non-alcoholic versions. Keep the same liquid ratios so the set remains reliable.
Flavor matchups and serving tips
- Cherry almond: cherry jello mixed with vodka and a splash of amaretto for depth.
- Caramel apple: green apple jello plus caramel vodka and a tiny caramel drizzle.
- Orange creamsicle: orange jello with whipped cream vodka and a whipped topping.
“Stick with clear spirits so colors stay bright and the base flavor shines through the gelatin.”
Plan a mini flight: a fruity red jello, a caramel apple, and an orange creamsicle. Offer one or two per guest to keep tastings responsible alongside other cocktail options.
Make-Ahead, Storage, and Day-Of Assembly
Plan your prep schedule so cups and layered colors are ready well before guests arrive.
Make base cups 1–3 days ahead to streamline party day and free fridge space. Cover cooled cups to protect flavors and keep surfaces pristine.
Build candy corn layers a day or two in advance; the tiers hold color separation well when chilled. Let each layer cool fully before covering to avoid condensation.
How far in advance to make bases and layers
Syringe-style servings are best within 3–4 days. Keep them capped and cold, and let the liquids cool before sealing to reduce moisture under lids.
Adding toppings right before serving
Hold off on whipped cream and candy decorations until the last minute. Adding them early makes toppings deflate or bleed color.
- Storage tip: transport on sheet pans or in sealed containers to stack safely.
- Stacking: use shallow trays and stagger rows so lids don’t stick.
- Day-of station: set a small finish area with toppings and napkins for quick assembly.
- Batch tracking: label dates so older cups rotate forward during service.
| Item | Make-Ahead Window | Storage | Day-Of Action |
|---|---|---|---|
| Base cups | 1–3 days | Covered in fridge, on tray | Top and plate just before serving |
| Candy corn layers | 1–2 days | Covered after fully cooled | Add whipped cream & sprinkles at service |
| Syringes | 3–4 days | Capped, chilled upright | Keep cold; refresh caps if needed |
| Garnishes | Day of | Stored separately cool and dry | Apply immediately before serving |
“Prepare early, finish fresh—this keeps textures lively and presentation sharp.”
Presentation Ideas: Trays, Cups, and Party-Ready Displays
Small details like cup choice and tray color instantly upgrade the whole presentation. Choose elements that match your theme and make serving simple for guests.
Disposable cups vs. squeezable cups
Disposable cups are cheap and fast. They work well for large crowds and quick cleanup.
Squeezable cups help when you want easy release and neater layers. They cost more but cut serving time.
Spooky trays, themed sprinkles, and color layering
Serve candy corn jello shots on spooky trays and top each with whipped cream just before guests arrive. Syringe-style servings look great in ice buckets or on stainless surgical trays to reinforce the theme.
Arrange cups by color gradient so the table reads like a curated cocktails display. Add small candy accents on lids—mini bats or skull sprinkles—for a festive touch.
“Pack trays densely but evenly so everything looks neat and is easy to restock.”
| Item | Best Use | Visual Result | Quick Tip |
|---|---|---|---|
| Disposable cups | Large parties | Uniform, low-cost | Use clear for layers; black for cauldron look |
| Squeezable cups | Layered builds | Clean releases, crisp layers | Chill before peeling to avoid smudges |
| Syringes | Themed stations | Lab vibe in ice buckets | Keep caps capped until service |
| Display trays | Table focal points | Elevated, curated cocktails way | Create height with risers or cake stands |
Signage with fun names helps guests know flavor and shot choices at a glance. For outdoor events, use ice-lined trays to keep items cold longer and maintain quality during your halloween party.
Troubleshooting Your Jello Shots
A quick troubleshooting checklist helps you fix common problems fast so your tray is party-ready.
If the mixture won’t set, first confirm the gelatin fully dissolved in boiling liquid. Use the base ratio: dissolve in hot water, then add cold water and alcohol. Chill cups for the full 2–4 hours; syringes may need ~4 hours.

Common issues and quick fixes
- Not setting: Recheck proportions and that the gelatin dissolved in boiling water before adding alcohol.
- Cloudy layers: Let each layer cool before lidding; avoid capping hot mixtures.
- Condensation under lids: Let the mix cool a few minutes or leave lids off briefly before sealing.
- Sliding layers: Chill each tier until firm and pour the next layer when cooler but still pourable.
“Measure carefully and cool between steps—small changes make big differences.”
| Issue | Likely Cause | Fast Fix |
|---|---|---|
| Wobbly texture | Too much alcohol or under-dissolved gelatin | Test one cup; reheat small batch with boiling water and redissolve gelatin |
| Murky color | Aged spirits or cloudy mix | Use clear spirits and stir gently to remove foam |
| Sweat under lid | Lidding while warm | Cool mix, then use a measuring cup to pour and wait before sealing |
Measure water precisely and keep notes on any tweaks to this recipe. If flavors taste weak, avoid over-pouring between cup fills and use a good pour spout to steady the flow.
Nutrition, Serving Size, and Responsible Enjoyment
Count servings before you start so adults can enjoy responsibly and hosts can track intake.
Typical nutrition for a 2-ounce cup varies by brand and any added toppings. A plain 2‑oz portion often contains modest calories, but whipped cream and sprinkles raise sugar and fat quickly. Plan the amount per guest with that in mind.
Serve 1–2 per adult at a time and pair each with water and snacks. Keep an eye on total alcohol because festive formats can lead to extra pours.
Offer a non-alcoholic set by swapping liquor for cold water. Clear spirits like vodka stay predictable for set and color when you do include alcohol.
“Label adult servings clearly and provide a non-alcoholic option for designated drivers.”
| Focus | Why it matters | Practical tip |
|---|---|---|
| Portion control | Limits unintended overconsumption | Serve 1–2 per adult; count servings |
| Toppings | Adds calories and sugar | Offer cream and sprinkles at the finish |
| Alternatives | Includes guests who skip alcohol | Make non‑alcoholic cups and label them |
| Safety | Prevents underage or excessive service | Mark alcohol cups and keep trash/recycle nearby |
Quick reminder: encourage guests to alternate a cocktail or shot with water, avoid serving anyone under 21, and keep a simple count of how many you’ve served.
Conclusion
Finish strong by locking in timing, measurements, and a simple garnish plan before party day. The foolproof base ratio for a 3‑ounce box is 1 cup boiling water, 1/2 cup vodka, and 1/2 cup cold water.
Candy corn layers set best in two firm stages of about 90 minutes each. Syringes need roughly 4 hours and present well on ice or trays. Add whipped cream and sprinkles right before serving for the best texture.
Mix cups, syringes, and candy-forward designs to please different guests. Offer labeled non-alcoholic versions and serve responsibly. Make ahead, chill fully, and garnish quickly to keep party day calm and colorful.
Plan your shopping list and timeline, experiment with seasonal flavors, and keep measurements consistent to repeat great results every time.,