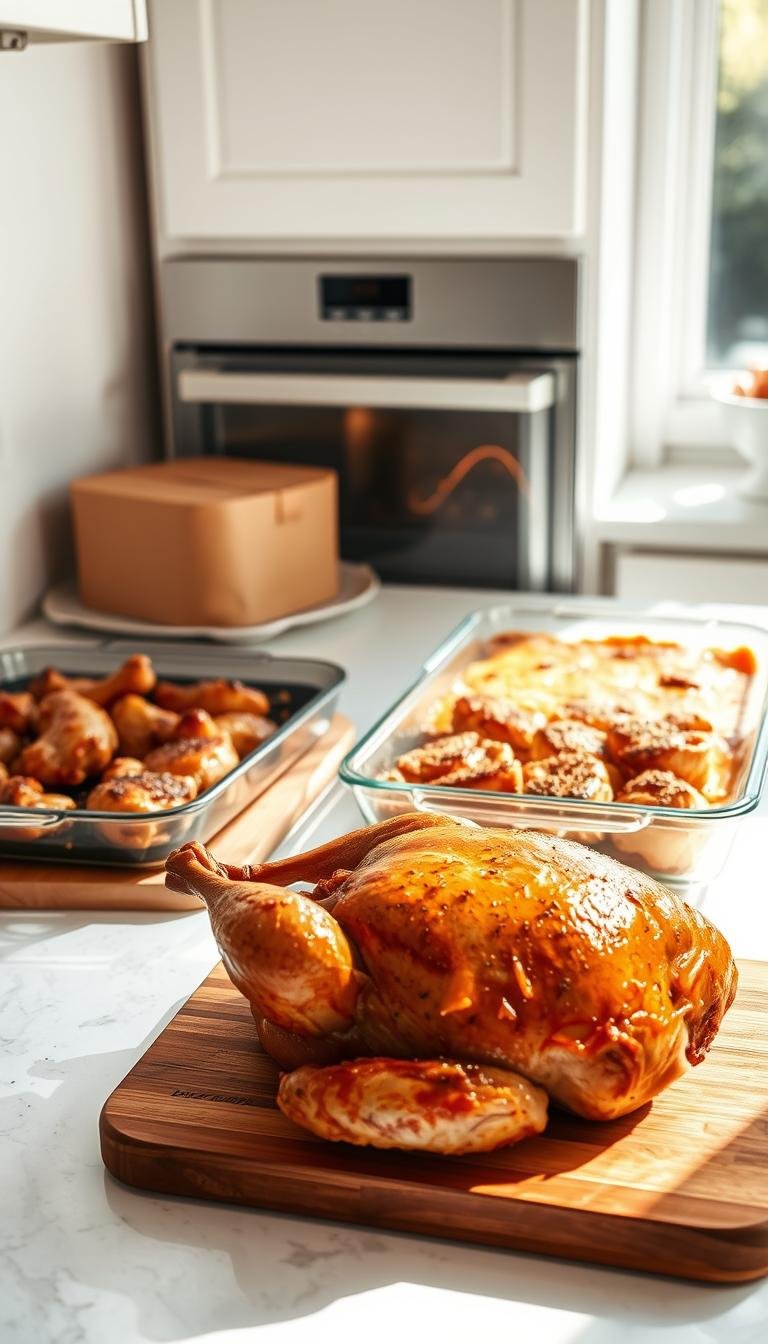
Easy Chicken Recipes to Make in the Oven
Believe it or not, a 425°F bake for 18–20 minutes often turns boneless, skinless breasts into juicy dinner winners. That simple window, plus a quick broil for color and a probe to 165°F, gives dependable results for busy weeknights.
This Website contains affiliate links. That means I may earn a small commission if you purchase through my links, at no extra cost to you.
This short guide lays out a streamlined approach: pound breasts to even thickness, use olive oil, garlic, lemon, and a few pantry spices, then follow precise times so you waste less time guessing.
Expect clear rules for thighs and breasts, when to cover or uncover, and how a brown sugar rub or Italian herb mix changes the final flavor. Resting 5–10 minutes locks in juices and makes reheating easier for meal prep.
No fancy gear, just proven temps, simple seasoning, and a thermometer to take the mystery out of weeknight baking.
Key Takeaways
- High heat (425°F) + 18–20 minutes yields juicy boneless breasts; broil to brown edges.
- Pound parts to even thickness and check 165°F for safe doneness.
- Italian herbs, garlic, and lemon or a brown sugar rub add reliable flavor quickly.
- Boneless thigh fillets need about 25–30 minutes; rest 5–10 minutes after baking.
- Minimal prep and common pantry ingredients keep this a practical weeknight method.
Why Oven-Baked Chicken Works for Busy Weeknights
Busy evenings demand predictable results — and a hot oven delivers them fast. A preheated 425°F bake for 18–20 minutes shrinks total time spent while producing consistent texture.
Start with a quick seasoning, place pieces on a tray, and let steady heat do the work while you prep sides. Covering with foil for the first 10 minutes traps steam and helps retain moisture; then uncover to finish for browning.
Hands-off cooking means less splatter and no constant stirring like stovetop methods. Use a thermometer and rest the meat for 5–10 minutes to lock juices and avoid guesswork.
- Bake multiple pieces at once for easy meal prep and leftovers.
- Keep the same timing while swapping herbs, sauces, or spice blends.
- Quick broil at the end adds color without extending total cooking minutes.
Key Techniques for Juicy Oven Chicken Every Time
A few reliable steps are all you need for moist, evenly cooked breasts. Follow clear technique and you’ll cut guesswork and save time while baking.
Pound to even thickness for faster, even cooking
Pound breasts to about 0.5–0.75 inch (roughly 1.5 cm). This prevents thin edges from overcooking while the center finishes.
Use a rolling pin or meat mallet and work between plastic wrap for easy cleanup and uniform results.
Preheat hot and bake hard for caramelization
Preheat oven to 425°F and bake 18–20 minutes for standard fillets. High, steady heat gives good surface color without drying the interior.
Use a meat thermometer: target 165°F internal temperature
Verify doneness with an instant-read thermometer at the thickest part. Aim for an internal temperature of 165°F — trust degrees more than minutes.
Let chicken rest to lock in juices
Rest 5–10 minutes before slicing. Cover loosely to hold heat and moisture. If you want deeper color, a 1–3 minute broil at the end works — watch closely to avoid burning.
Chicken Recipes Oven: The Core 425°F Method
Heating the oven to 425°F sets the stage for tender, well-browned fillets every time.
Prep: Pound chicken breasts to an even 0.5–0.75 inch. Pat dry, then coat lightly with olive oil. Season with salt, pepper, paprika, and garlic powder for a balanced savory profile.
Placement matters: Place chicken in a single layer with space between pieces. Good air flow helps color and keeps edges from steaming.
Time and finish
Bake 18–20 minutes depending on thickness. Use an instant-read thermometer and pull at 165°F. For added browning, broil 1–3 minutes while watching closely.
- Try Italian herbs (oregano, thyme) for a savory twist.
- A touch of brown sugar creates a caramelized crust and extra moisture.
| Step | Temp | Minutes | Tip |
|---|---|---|---|
| Preheat & prep | 425°F | — | Pound to even thickness; oil and season |
| Bake | 425°F | 18–20 | Check with thermometer at thickest part |
| Broil (optional) | High | 1–3 | Watch to avoid burning |
| Rest & serve | — | 3–5+ | Spoon pan juices over slices or toss with rice |
Alternate Oven Temperatures and Timings
Different temperatures and timers let you tailor baking to thickness, time, and desired crust.
At 400°F: plan for about 22–26 minutes depending on the size and starting temperature of each fillet. Thicker pieces toward the upper end of that range will need more minutes.
At 350°F: expect a slower bake, closer to 30 minutes. This gentler heat reduces browning but can dry the meat if left too long, so watch closely.
When to cover and when to uncover
Cover the dish with foil for the first 10 minutes to trap steam; this helps the interior come up to temperature faster. Then uncover to finish for color and a light crust.
Key checks and small adjustments
- Always confirm 165°F internal temperature with a reliable thermometer at the thickest point before resting.
- Adjust rack position and pan material to fine-tune browning if you change heat or baking time.
- Document how your own oven performs — note minutes and temp so future bakes match expectations.
Flavor Boosters and Seasoning Ideas
A few smart seasoning swaps transform a plain bake into a bright, craveable meal.
Brown sugar rub: Mix a light dusting of brown sugar with sweet paprika, oregano or thyme, garlic powder, salt, and pepper. This blend encourages a caramelized crust and helps retain moisture while baking.
Italian profile: Combine dried oregano and thyme with fresh garlic, sweet paprika, a splash of olive oil, and lemon. Toss with parsley or basil after resting for herbaceous, bright notes.
Simplest route: Generous salt and pepper plus olive oil give a clean, versatile base that pairs well with most sides. A small dab of butter in the pan will enrich pan juices without adding heavy fat.
Practical tips: Coat pieces evenly and let sit 10 minutes for better adhesion. Use dried herbs when shelves are low; finish with fresh herbs for color and freshness.
Step-by-Step: From Prep to Plate
Start your prep with clear steps so each piece cooks evenly and you waste less time. Follow this simple sequence for consistent results and a quick finish.
Pat dry, pound, and season
Preheat oven 425 before you begin. Pat the surface dry and pound to an even thickness to promote uniform cooking.
Brush both sides with olive oil and season with salt, pepper, paprika, and garlic. For an Italian touch, arrange pieces over sliced red onion and halved tomatoes in the baking dish.

Place, bake, check, and rest
Place chicken breasts in a single layer with space between pieces so hot air circulates. Cover and bake 10 minutes, then uncover and finish 8–10 minutes until the internal temperature reads 165°F.
Let chicken rest 5–10 minutes before slicing to retain juices. Tent loosely with foil during the rest if desired.
- Quick checklist: preheat oven 425 • place chicken in baking dish • brush with olive oil • time in minutes as above.
- Spoon pan juices over slices and finish with chopped parsley and basil for bright flavor.
Cut Choices and Doneness
Deciding between breasts and thigh fillets and verifying doneness sets the stage for success.
Boneless, skinless breasts usually bake 18–20 minutes at 425°F when pounded to an even thickness. Large pieces can be split horizontally into two thin steaks for more predictable results.
Skinless breasts vs. thigh fillets
Thigh fillets are slightly thicker and need about 25–30 minutes. They tolerate small timing slips and stay juicier thanks to higher fat content.
Thickness: pounding or splitting
Pound or slice large portions so thickness is uniform. Even thickness keeps the center from overcooking while the surface browns.
Reading doneness beyond minutes
Use a reliable thermometer and aim for an internal temperature of 165°F at the thickest part. Avoid touching pan metal or bone when you probe.
- Check juices — they should run clear, not pink.
- Account for piece size, fridge start temp, and oven variance; these can shift minutes.
- For larger cuts, increase resting time slightly so juices settle before slicing.
Serving Ideas to Make It a Complete Dinner
Turn a baking dish into a complete dinner with a few fast starches and bright vegetables. Small, quick sides let the main rest while you finish plates and add final herbs.
Carb sides that finish quickly
Make garlic butter rice, tomato-basil rice, or mushroom rice to soak up pan juices. A simple Mediterranean olive oil pasta with lemon and herbs takes minutes.
For family-friendly crunch, roast crispy oven fries alongside the baking dish so everything finishes together.

Vegetable pairings
Serve Italian roasted vegetables, baked zucchini, or a bright mixed salad to balance richer elements. A squeeze of lemon and chopped parsley or basil at the table lifts the whole plate.
Quick sauces and pan juices to spoon over
Spoon warm pan juices over rice or pasta for instant flavor. Finish plates with a light lemony-herb drizzle or a pat of butter for gloss and depth.
Make-ahead tip: Cook grains or prep vegetables earlier in the day so the main goes straight from heat to table.
Meal Prep, Storage, and Leftovers
A single batch can power several meals when you store and reuse it smartly. Store baked chicken in airtight containers in the fridge for up to 3 days to keep texture and food safety under control.
Cooling matters: Cool pieces quickly on a tray, then transfer to containers. Label each container with the date and time for easy rotation.
How to repurpose cooked meat
Slice for salads and grain bowls. Dice for casseroles or pasta bakes. Shred for soups, tacos, or wraps. Properly rested breasts retain moisture better for next-day lunches.
Reheat and refresh
Reheat gently on low heat or microwave briefly to avoid drying. Or serve cold in composed salads to preserve juiciness. Adjust seasoning when reusing — add a squeeze of lemon or extra herbs to revive the flavor.
“Labeling with date saves time and prevents guesswork.”
- Cool quickly, store airtight, use within 3 days.
- Slice, dice, or shred to match the dish you plan.
- Reheat gently or serve cold; tweak seasoning for best results.
Nutrition Snapshot and What Affects It
A quick nutrition snapshot helps you balance flavor with calories and macros. A standard baked chicken breast serving is high in protein, typically about 32–46g per portion, and naturally low in fat unless you add fats during cooking.
Protein-rich, lean meat; how oil, butter, and sugar impact macros
Chicken breast is a lean, protein-dense option. The final macros depend on how much oil or butter you add while cooking.
A light coating of olive oil supports browning and mouthfeel with a moderate fat contribution. A small dab of butter enriches pan juices and raises saturated fat slightly.
Brown sugar in a rub adds minimal carbs per serving but helps form a caramelized crust and retains moisture. Keep added sugar small to limit extra calories.
- Manage salt to taste and health needs; finish sparingly.
- Micronutrients: poultry supplies B‑vitamins and modest minerals.
- Vitamins and fiber mainly come from sides like vegetables and whole grains.
“A light oil brush keeps the meat juicy while keeping calories in check.”
Conclusion
Finish strong: a few clear rules make baking lean breasts fast and foolproof. This compact method is the easiest way to get a reliably juicy baked chicken breast every week.
Pound to even thickness, preheat to 425°F, and plan for 18–20 minutes. Verify doneness with an instant-read thermometer at 165°F. A brief broil adds color; then let the meat rest for a few minutes.
Swap seasonings freely — try Italian herb and lemon or a brown sugar‑paprika crust. If you want richer, more forgiving results, use thighs and increase time to about 25–30 minutes.
Small steps matter: preheating and a thermometer turn guesswork into consistent results. Mix sides and quick sauces to keep this oven baked chicken approach new each week.