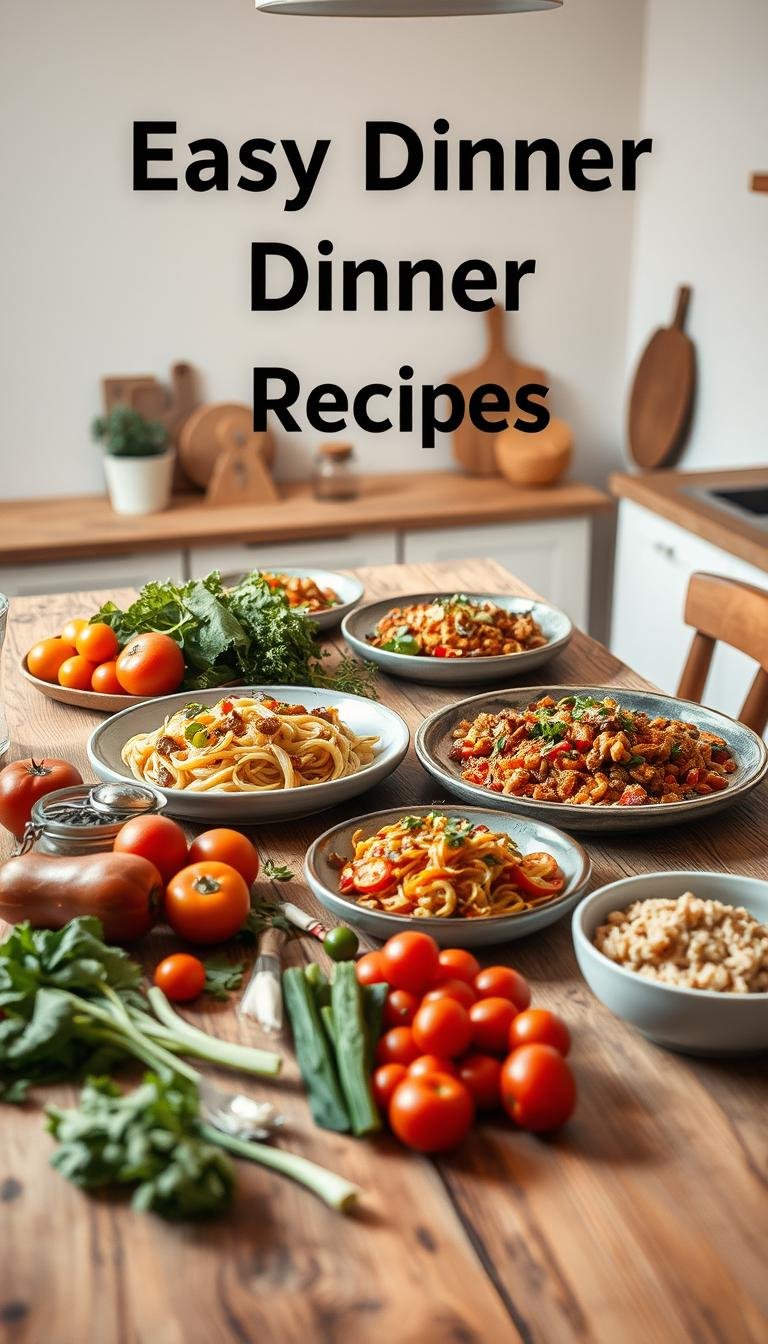
Dolci Halloween: Spooky Sweet Treats for Your Party
Surprising fact: nearly 70% of home hosts say a themed dessert table defines their party’s success — and the right sweets can make your gathering unforgettable.
This Website contains affiliate links. That means I may earn a small commission if you purchase through my links, at no extra cost to you.
This guide sets the scene for an Italian-inspired spread that mixes playful frights with refined flavors. You’ll find clear ricette with step-by-step instructions, make-ahead tips, and troubleshooting notes to help you bake with confidence.
We preview two hero desserts — a chocolate “coffin” cake and mini pumpkin cakes — plus kid-friendly options and simple US-friendly swaps. Expect precise measurements, straightforward techniques, and visual cues to hit timing and texture when baking for a crowd.
Also included: ideas to build a cohesive party tema using shapes, colors, and decor that feel spooky yet appetizing. Quick storage advice and basic safety tips for dairy fillings and chocolate glazes help keep your event smooth and safe.
Key Takeaways
- Find easy and show-stopping ricette for all skill levels.
- Step-by-step instructions, make-ahead tips, and troubleshooting included.
- Hero desserts: chocolate coffin cake and mini pumpkin cakes.
- Design a cohesive tema with color, shape, and plating ideas.
- US-friendly ingredient swaps, clear measurements, and safety notes.
What “dolci halloween” Means for Your Upcoming Party
Think of these sweets as party ambassadors: they bring warmth in taste and a wink in appearance. The concept pairs a gentle dolcetto with a playful scherzetto so flavors stay inviting while shapes add the fun.
Cornerstone ingredienti include warm spices, pumpkin, and chocolate. Combine those with Italian basics such as pan di Spagna and marmellata for reliable texture and familiar flavor.
Forma drives recognition: coffins, lapidi, and tiny pumpkins signal the theme fast. These silhouettes read spooky without complex sugar sculpture and keep assembly quick.
Use bold color contrast—jet-black chocolate, bright orange, and bone-white icing—to make a dessert table pop. Plan portions by guest: finger bites for grazing, minis for self-serve, or plated desserts for a sit-down meal.
Keep tastes crowd-pleasing for mixed ages and add simple props like slate boards or vintage plates that support the theme without stealing the show.
- Label allergens (nuts, dairy, gluten) clearly.
- Follow refrigeration timelines for dairy fillings and store make-ahead elements separately.
Pro tip: a make-ahead workflow reduces day-of stress and preserves texture—bake bases early and finish glazes and piping on the event day.
Planning Your Spooky Sweet Menu for the Season Ahead
A clear menu map helps you serve playful sweets that feel spooky but still welcome to every palate. Start by grouping treats by audience: kid-friendly minis, adult-leaning richness, and neutral bites for mixed ages.
Balance the menu in one smart modo: include one rich chocolate centerpiece, one lighter fruit-forward item, and a seasonal zucca highlight to keep flavors varied and approachable.
Balancing sweet and spooky
Keep decoration playful, not gory. Reserve bolder visuals for a few showpieces and let most items stay classic in flavor.
Choosing a unified tema with shapes and colors
- Pick two or three signature colors and repeat them across desserts and serving pieces for cohesion.
- Align shapes—coffins, lapidi, and pumpkins—across sizes to add dimension without clutter.
- Plan serving flow with labeled stands, small tongs, and napkins so guests move through the station easily.
Practical prep notes: bake sponges a day or two ahead and finish frostings and glazes on the event day. Include at least one chilled item and one room-temp item to protect fridge space and texture.
Tip: offer one dietary-friendly alternate and keep garnishes minimal to highlight clean shapes. Build a buffer of extra minis in case RSVPs rise.
Essential Ingredient Staples for Italian-Inspired Dolci
Before you cut shapes or pipe details, build a pantry that supports crisp edges and glossy glazes. A focused kit of staples keeps textures reliable and speeds up assembly on party day.
Zucchero, farina, lievito: your base pantry
Keep all-purpose flour, baking powder, quality cocoa, neutral oil, dairy, and good vanilla on hand. Sift dry ingredients for an even crumb and use fine zucchero or powdered sugar for stable batters and smooth frostings.
Marmellata, cioccolato, panna: flavor and finish
Stock a reliable base—pan di Spagna or a store-bought sponge—so you can cut shapes without crumbling. Reserve high-quality chocolate and fresh panna for glazes that set cleanly. Keep marmellata strained for a glossy, spreadable layer.
Decorations: occhi di zucchero, gel colorants, sac-à-poche
Choose sturdy biscotti for edible tombstones and trim them with a serrated knife. Use gel colorants, multiple sac-à-poche bags, small tips, and a bit of corn syrup or glucose for shiny coatings. Store everything airtight and rotate stock for peak freshness.
- Tip: gel over liquid color keeps frosting consistency steady.
- Tip: label allergens and keep extras for last-minute guests.
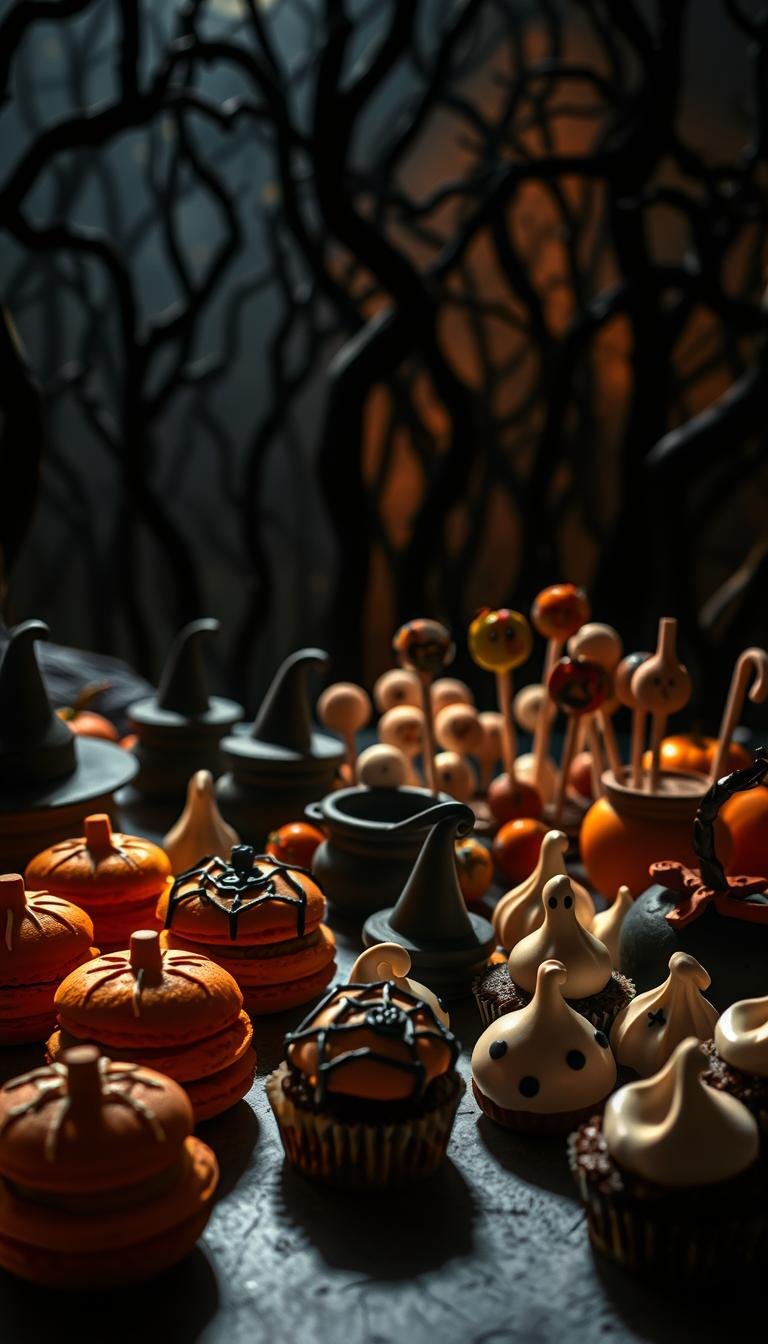
Featured Ricetta: Dolci Bare di Halloween (Chocolate “Coffin” Cakes)
Turn a classic sponge into eerie individual cakes with simple shaping and a shiny chocolate coat. Trace a 10 cm by 6 cm coffin template on card, then cut at least ten shapes from two pan di Spagna discs. Slice each shape horizontally to create two thin layers for stacking.
Base and shaping
Trim cleanly so edges remain sharp after glazing. Stack layers with a thin spread between to keep form steady. Use parchment and gloves when moving cakes to avoid smudges.
Filling and smoothing
Setaccia la marmellata through a sieve to remove fruit bits. Spread a thin interior layer, then coat sides and top for a smooth surface that helps glaze adhere.
Chocolate glaze
Warm the cream gently; when it nears a simmer, remove from heat and add glucosio and finely chopped cioccolato. Stir until fully melted—mescolare fino ottenere a glossy, pourable glassa. Pour on a rack and nudge with an offset spatula for full coverage.
Biscotti lapidi
Trim cookie corners for tombstone shapes. Whisk powdered sugar with 2 tsp boiling water to a dense water-icing and coat biscuits. Dry on a rack, then pipe “RIP” with melted dark chocolate using a fine tip. Let set before serving.
Step-by-Step: Assembling and Decorating Biscotti Halloween Lapidi
Prep and pacing make the difference between messy cookies and crisp, spooky tombstones. Start by shaping each cookie so the silhouette reads clearly as a tombstone. Work on a clean board with a sharp knife and steady hands.
Trimming and glazing to reach full coverage
Square off the top forma by trimming two small angles from each cookie. This creates the classic tombstone profile at a glance.
Make a dense water glaze by whisking powdered sugar with 2 teaspoons of boiling water until smooth. Spoon or dip the cookies on a rack to fino ottenere an even coat. Tap gently so drips fall away and avoid pooling at the base.
Piping precision using a small tool
Allow full drying before chocolate writing to stop bleeding. Melt dark chocolate gently and load it into a sac-à-poche fitted with a small round tip.
Use a small cucchiaino to steady your hand or nudge stray glaze lines back into shape. For neat text, lightly trace “RIP” with a toothpick, then pipe over the guide in one smooth pass.
- Stage finished tombstones on parchment until set, then attach to cakes at serving time.
- If glaze thickens, add a few drops of hot water; if thin, sift in extra powdered sugar.
- Store decorated cookies in a cool, dry place to keep crunch and finish.
Featured Ricetta: Zucche Dolci di Halloween (Mini Pumpkin Cakes)
These bite-sized pumpkin cakes combine moist crumb and playful piping for an instant table favorite. The method uses an oil-blended zucca base, a stable mascarpone frosting, and simple green piping for stems and leaves.

Impasto alla zucca: oil-blended base
Blend 250 g of cooked zucca with 80 g neutral oil until silky. Whip 130 g sugar, 2 eggs, and a pinch of salt to ribbon, then fold in the pumpkin mix.
Sift 130 g flour, 30 g starch, and 10 g baking powder and add gently. Tint with a scant ½ teaspoon orange gel for color.
Baking semi-sphere bases and doneness
Grease 5 cm semi-sphere molds and fill to ¾. Bake in a static oven at 175°C for about 12 minutes.
Check with a clean toothpick; it should come out with a few moist crumbs, not raw batter.
Frosting, coloring, and piping stems
Beat 100 g mascarpone, 75 g cream cheese, and 45 g powdered sugar. Fold in 130 g well-chilled whipped cream for pipeable body.
Divide frosting into orange and green. Use a 9–10 mm round tip for the orange fill and a 6–7 mm plus a leaf tip for green stems and leaves. Attach two sugar occhi with a dab of frosting and chill an hour before serving.
- Yield: about 18 mini pumpkins.
- Store under a dome in the fridge up to 2 days.
Decor Tips: Eyes, Shapes, and Finishing Touches
The final touches — eyes, crisp edges, and glossy glazes — turn simple cakes and cookies into memorable party pieces. Small, deliberate moves help keep textures clean and decorations secure.
Attaching sugar eyes and anchoring details
Use tiny dabs of thick frosting or melted chocolate to anchor sugar eyes. Place each occhi slightly off-center for a playful look and press gently so it seats without breaking the coating.
Keep a clean, dry cucchiaino nearby to remove stray drips or tidy borders without adding heat.
Neat edges and glossy, smooth glassa surfaces
Level edges with a sharp serrated knife and apply a thin crumb-coat before the final glaze. Work in a cool room to fino ottenere smoother sets and fewer drip tails.
Warm an offset spatula under hot water, dry it, then use light strokes to smooth chocolate. For biscuit accents like biscotti halloween, glaze fully and dry on racks to avoid fingerprints.
- Pipe details in stages; allow short set times between layers for crisp lines.
- Use gel colors for vivid hues without thinning frostings.
- Stage finished pieces on parchment-lined trays and chill briefly before transport.
Kid-Friendly Dolcetti for Bimbi
Little guests love treats that are easy to pick up and mess-free to eat. Keep the focus on small portions, soft textures, and familiar flavors so children can enjoy the party without fuss.
Mini portions and low-mess serving ideas
Pre-cup minis in paper liners or small cups make grab-and-go easy. Place them on a lower tier so bimbi can serve themselves safely.
Offer sturdy biscotti or small cookies as dippers with tiny pots of icing. This creates an interactive station without tools or sharp toppers.
- Simplify decorations: candy eyes and gentle drizzles work best.
- Avoid hard candies or sharp picks; choose melt-in-the-mouth textures.
- Plan two to three minis per child for active parties.
“Label allergen info clearly and keep kid-friendly treats separate from richer adult options.”
Set up napkin and water stations next to the dessert table and add themed picks or stickers so children can decorate their own minis. This keeps the flow smooth and cleanup quick.
Make-Ahead, Storage, and Day-Of Assembly
Divide work into bake, chill, and finish phases to protect texture and shape. Start by baking the sponge base and any torta elements the day before. Wrap cooled layers tightly to prevent drying and free oven time on the event day.
Prep smarter: portion ingredienti and tools into labeled bins the night before. Include piping tips, bags, spatulas, and extra frosting so setup moves quickly.
Assemble pumpkin zucca minis and coffin cakes partially a day ahead. Chill them so layers settle, then reserve final glazing and piping for the day of to keep edges sharp and sheen high.
Store marmellata-coated cakes chilled; the fruit layer firms up and stops glazes from sliding. Keep dairy-based items refrigerated until just before service and re-whip chilled frosting briefly to restore pipeability.
Day-of modo: work in batches—glaze chilled pieces first and move finished items to cold trays to set. Transport on flat, cold boards and bring a small repair kit with extra frosting, wipes, and spare decorations.

- Use airtight containers and cake domes to avoid fridge odors and condensation.
- Build a timeline with 30–45 minute buffers for unexpected delays.
Troubleshooting Common Issues
Small texture problems can seem big on a dessert table—here’s how to fix them fast. Use these quick checks to keep finishes smooth and shapes clean before guests arrive.
Glaze and icing fixes
If chocolate glassa is too thin, cool it slightly to thicken or stir in a small amount of finely chopped chocolate. If it’s too thick, warm in short bursts and whisk until pourable.
Water icing adjustments: add powdered zucchero to thicken, or a few drops of hot water to loosen. Whisk fully before recoating to avoid streaks.
Texture, shape, and condensation
Soggy biscotti often come from trapped moisture. Dry glazed cookies completely, then store airtight away from humidity until assembly.
If marmellata slides, spread a very thin layer and chill the coated cake so the fruit layer sets before pouring chocolate. This creates a tacky barrier that prevents slipping.
Misshapen forma are fixable: chill shaped sponges briefly before trimming and glazing so edges stay firm and crisp.
Finishing touches and common quick fixes
- Grainy frostings: let ingredients reach similar temperatures or re-whip with a splash of cream.
- Condensation: move chilled items to a cool, dry room to temper before serving.
- Piping that feathers: wait until the base coat is fully set; use a smaller tip for control.
- Bald glaze spots: correct with a second thin pour—avoid overworking with a spatula.
- Keep tools clean and wipe frequently to prevent crumbs and smears from ruining finishes.
Ingredient Swaps and US-Friendly Alternatives
If you’re shopping in the United States, a few pantry swaps let you recreate classic Italian textures with local items. These small changes keep the results true to the ricette while making sourcing easy.
Pan di Spagna and biscuit substitutes
- Replace pan di Spagna with store-bought sponge cake, pound cake, or angel food cake sheets from grocery bakeries.
- Use graham crackers, butter cookies, or rectangular shortbread as bases for biscotti halloween tombstones; they cut cleanly and take glaze well.
Coloring, sugar, and chocolate choices
Pick gel food colors from US brands like AmeriColor or Wilton to get vivid tones without thinning frostings.
- Choose confectioners’ sugar labeled “10x” (sift before use) for smooth icings.
- For glazes, melt quality baking chocolate bars (60–70% cacao) rather than relying on chips for better shine.
- Swap glucose with light corn syrup when you need extra sheen and stable viscosity.
Practical pantry swaps for recipes
Use canned pumpkin puree—never canned pie filling—for consistent zucca texture and neutral flavor.
- Brick-style cream cheese gives sturdy frosting structure; buy reputable mascarpone for a clean finish.
- If semi-sphere molds are missing, bake in mini muffin pans and level domes with a paring knife.
- Adjust sweetness to your cucina preference by slightly reducing sugar in batters while keeping ratios for structure.
Quick tip: test one small swap before scaling a full batch to confirm texture and flavor.
Serving and Styling Your Dolci Halloween Table
A well-styled dessert table keeps guests moving, highlights texture, and preserves delicate glazes. Start with a clear plan for flow, lighting, and backups so each piece looks its best when served.
Plating ideas: gratella-to-platter without smudges
Move glazed items from gratella to platters using two offset spatulas to avoid finger marks. Chill items briefly so surfaces firm before transfer.
Perch each tombstone biscotti at a slight angle against its cake to add depth. Add wafer flowers on the coffin surface for a delicate accent.
Prendete ora delle ciotoline rettangolari, capovolgetele e ricopritele con un tovagliolo di carta colorata, quindi adagiatevi sopra una bara, alla quale appoggerete una lapide. Decorate infine la superficie della bara con dei fiorellini di cialda.
Themed props to match your scherzetto tema
Elevate individual coffin cakes by placing them on inverted small rectangular bowls wrapped in colored napkins. Mix heights with stands and low trays so treats read clearly from across the room.
Group mini pumpkins (zucca minis) together for visual impact. Scatter small edible leaves or candy eyes as accents to keep the table playful and cohesive.
- Coordinate linens—black, orange, bone white—to reinforce the scherzetto theme and focus attention on shine and texture.
- Label each ricetta with tent cards noting flavors and allergens; use icons for quick choices.
- Place napkins and dessert plates at both ends to reduce bottlenecks and keep lines moving.
- Arrange lighting to avoid direct heat on glazes; cool LED candles add mood without melting risks.
- Refresh platters in small waves, rotating chilled backups to keep edges crisp all night.
Conclusion
Finish strong by balancing a few striking centerpieces with several easy, grab-and-go treats.
You’re now set to plan, prep, and present a polished dolci halloween menu that pairs showpieces with simple dolcetto bites. With a clear shopping list of ingredienti and a realistic timeline, you can execute like a pro.
Blend one bold torta with minis and dolcetti so guests get variety without overwhelming your cucina. Batch key components, finish glazing near service, and rotate chilled backups to protect shine and texture.
Small details—clean edges, well-placed occhi, crisp lettering on biscotti—lift homemade treats to bakery-level appeal. Customize ricette and celebrate zucca, chocolate, and spice in crowd-friendly forms. Capture photos and note what worked to make next year smoother.