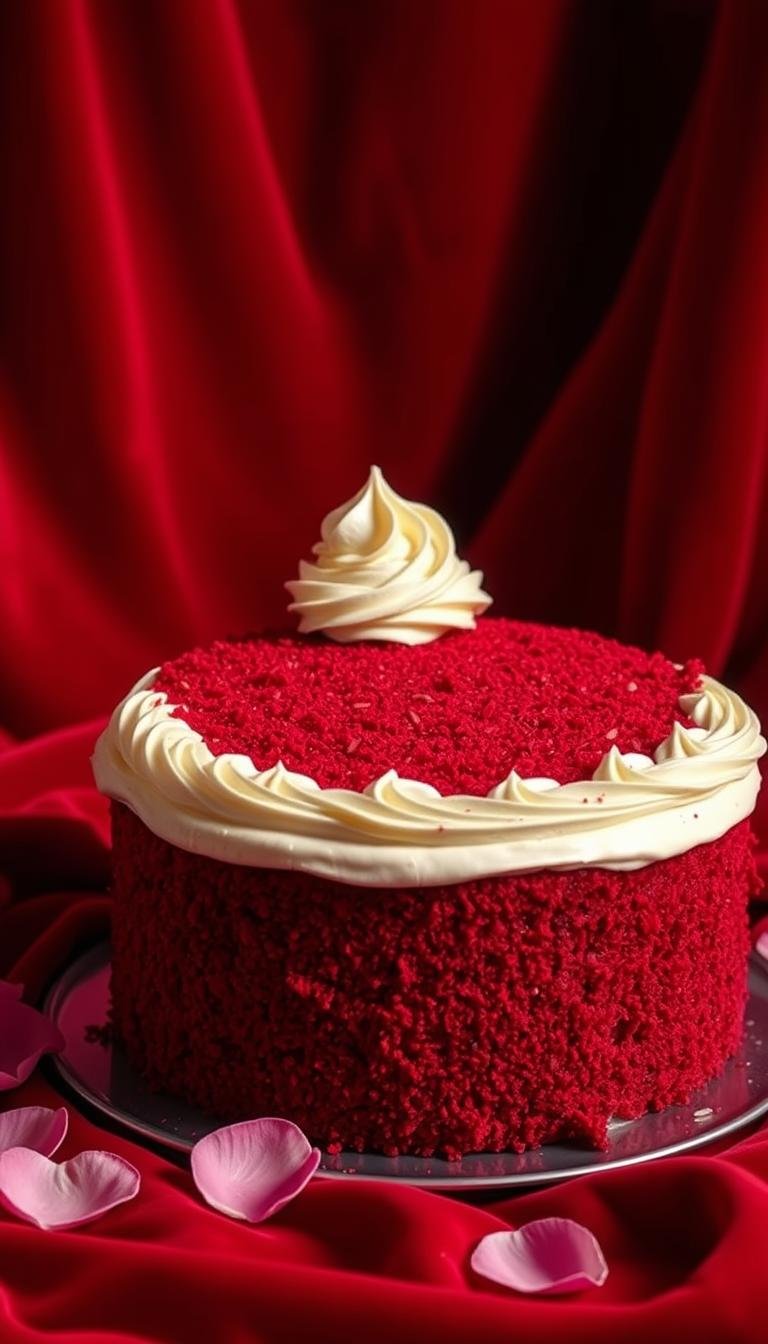
Discover the Strawberry Cake Aesthetic: Pretty Cake Ideas
Surprising fact: 68% of home bakers say a single photo can make their dessert go viral online, so design matters as much as flavor.
This Website contains affiliate links. That means I may earn a small commission if you purchase through my links, at no extra cost to you.
This guide shows a three-part approach that keeps the flavor true and the look modern. The base is a fruit reduction that doubles as filling and flavor lift. Soft, even layers baked in two 8-inch tins give reliable height and clean slices.
Technique matters: the batter is creamed, egg whites are added in stages, and the final mix is finished by hand for an ultra-soft crumb. The frosting blends butter, powdered sugar, cold cream cheese frosting, and a touch of fruit extract to amplify aroma without overdoing it.
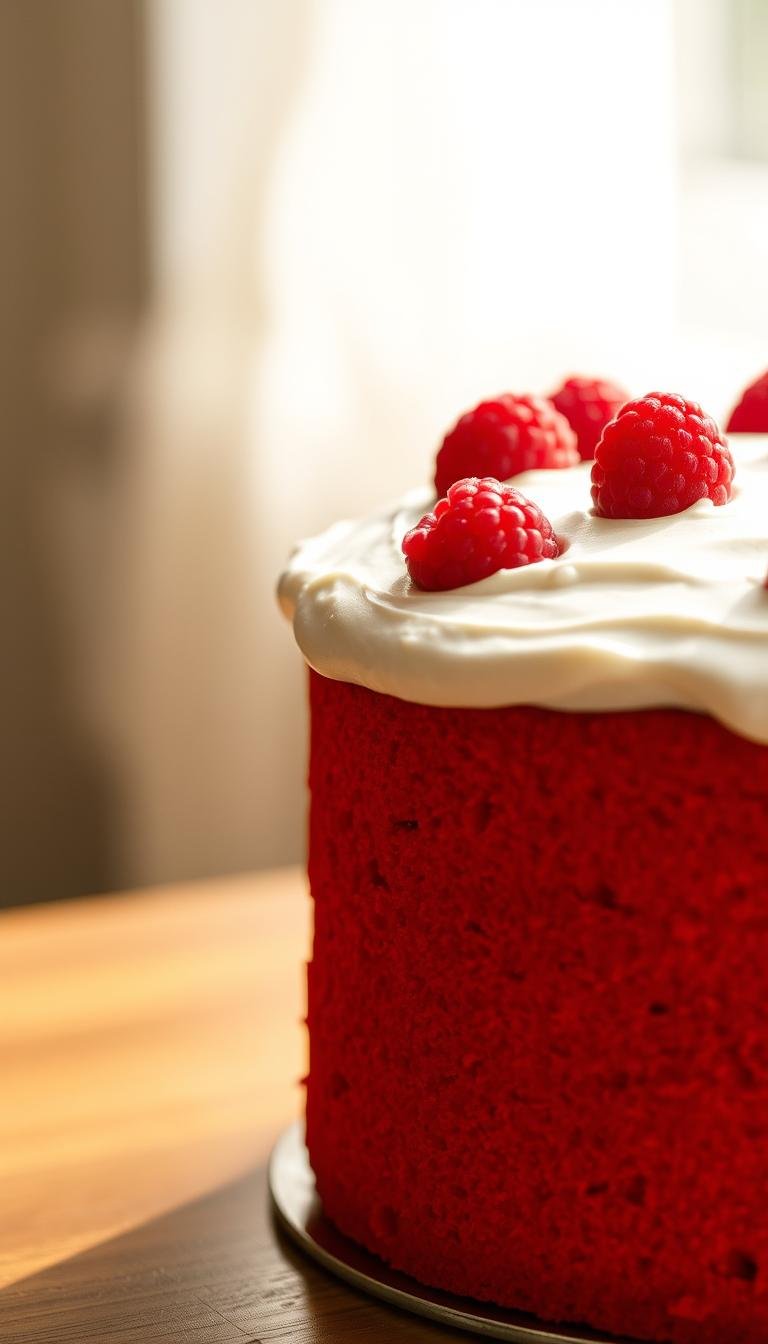
Plan your workflow: make the filling first and cool it, then bake and chill layers before assembling. This cuts stress and delivers a stable, photogenic result that highlights cake bursting fresh flavor and naturally pink tones in the strawberry cake layers.
Key Takeaways
- Three elements: fruit reduction, soft layers, and tangy cream cheese frosting create depth.
- Mix gently and finish by hand for a tender crumb and clean slices.
- Cool the filling and layers fully to streamline assembly and reduce errors.
- Use a small amount of extract to boost aroma while keeping fresh fruit forward.
- Adjust oven settings for fan or conventional modes for consistent doneness.
- Style with intent to make photos that perform on pinterest facebook reddit.
What makes the strawberry cake aesthetic irresistible right now
What draws eyes and forks is the way concentrated fruit flavor meets careful technique.
Flavor comes first. A fresh fruit reduction forms the backbone of taste and aroma. Use that reduction in both batter and frosting so the profile carries through each bite.
The concentrated base is lifted with a measured drop of strawberry essence extract to frame the fruit without masking it. Taste the reduction and the batter as you go to set extract levels for a cake bursting fresh appeal.
Color and texture need small nudges. Natural berries lose pigment in the oven, so a tiny drop of red gel food restores a lively crumb. Treat a little dull colour with restraint—better to tweak than to overload.
Practical technique notes
- Start mixing on power for aeration, then finish by hand so the wet and dry are mix well combined without toughening the crumb.
- Whether you are using stand mixer or a hand model, control speed to keep volume and a smooth emulsion.
- Let the reduction flavor multiple components; that repetition makes aroma bloom and creates a consistent signature.
Strawberry cake aesthetic
Nailing flavor, color, and crumb starts with precise pantry choices and tool selection.
Key ingredients set the foundation. Use a mix of all-purpose flour plus cornstarch (or cake flour) for a tender crumb. Balance unsalted butter with neutral oil so the batter stays moist while sugar mixed butter creaming builds early aeration.
Make the strawberry milk mixture by combining 3/4s cup of reduction with milk to saturate the crumb. Add strawberry essence extract sparingly for depth. Add vanilla and a splash of white vinegar for structure and warmth.
Tools that help
Choose two sturdy inch cake tins (8-inch) for even rise and straight sides. For creaming, using stand mixer with a paddle is fast—set to medium high speed—while a hand mixer stand approach still works with care.
Start with an electric mixer and add egg whites in batches, then fold in remaining dry ingredients and batter finished hand to avoid toughness. Finish with a cream cheese buttercream to balance sweet layers.
| Item | Role | Tip |
|---|---|---|
| Inch cake tins (8-inch) | Even bake, straight sides | Use accurate fill for uniform layers |
| Stand mixer + paddle | Creams butter and sugar | Mix on medium high speed, then slow |
| Hand mixer / hand tools | Final folding and control | Fold remaining dry ingredients by hand |
| Spatula & scraper | Clean layers and smooth finish | Use for batter finished hand steps |
Make the strawberry filling reduction (the base of the recipe)
Begin with a gentle simmer of fruit, sugar, lemon zest, and juice to build a bright, concentrated filling. Place 3 cups (600 g) hulled berries, 3/4 cup (150 g) sugar, 1 tbsp lemon zest, and 1/4 cup (60 g) lemon juice in a large pan over medium heat for 10 minutes, stirring occasionally.
Cook, mash, and reduce: Mash well, then reduce another 10 minutes so flavors intensify. If the mixture is loose, continue to reduce another minutes until you reach about 2 cups of concentrated puree.
Water mix cornstarch — mixing avoid lumps
Combine 3 tbsp (22 g) cornstarch with 2 tbsp water to make a slurry. Stream it into the hot fruit while stirring to mixing avoid lumps and get a glossy finish.
Cooling fast and timing
Reduce for a few more minutes, then spread filling onto a wide, shallow dish to cool quickly. The filling needs cool before assembly; refrigerate about 30 minutes.
- This strawberry filling made portion can be used in batter, frosting, and center filling.
- Prepare it a day beforehand save time and reduce stress on assembly day.
Mix the cake batter for soft, even strawberry cake layers
Start by whisking the remaining dry ingredients so the leavening is evenly distributed and the batter will mix well combined without lumps.
In a small bowl, combine 3/4s cup of the strawberry filling reduction with 1/4 cup milk to form the strawberry milk mixture. Add a single drop of red gel food to stabilize hue through baking.
Cream 1/2 cup butter and 1/2 cup oil with 1 1/2 cups sugar using an electric mixer until pale and fluffy. This sugar mixed butter base builds structure and moisture for a tender crumb.
Add egg whites in three additions to preserve emulsion. Briefly mix after each addition, then add half the strawberry milk mixture plus vanilla and vinegar.
Fold in half the remaining dry ingredients, then the rest of the strawberry milk mixture, then add remaining dry. Keep the batter finished hand and stop when just combined.
Do a color check: if the crumb looks dull, add another drop of tint now or plan to adjust later. Divide the batter evenly into two inch cake tins so batter evenly two and bake until a toothpick comes clean.
| Step | Why it matters | Quick tip |
|---|---|---|
| Whisk remaining dry ingredients | Even rise and no pockets | Sift then whisk to mix well combined |
| Cream sugar mixed butter using electric mixer | Light, tender crumb | 3 minutes until pale |
| Add egg whites (3 stages) | Stable volume and shine | 10–15 sec per addition |
| Portion into two inch cake tins | Uniform layers for stacking | Weigh pans for batter evenly two |
Bake and cool: from oven to ready-to-frost
Preheat carefully and time your bake so layers finish with even height and texture. Set the oven to 160°C (320°F) with fan for about 35 minutes. If your oven has no fan, use 175°C (347°F) instead.
Check doneness by inserting a toothpick into the center; remove when the toothpick comes clean. Use visual cues too: golden edges and a slight spring-back at the center mean the crumb is set.
Divide batter between two 8-inch tins so both layers bake at the same rate. Use sturdy inch cake tins and level the batter so the rise is uniform. Avoid opening the door early — heat loss can make the center collapse and reduce that cake bursting fresh texture.
Let the pans rest 15–20 minutes to firm up, then turn out onto a wire rack to cool completely. If layers dome slightly, level them after cooling for a stable stack when you place next cake on the filled base.
“Good timing and patience are the easiest ways to beforehand save time and a cleaner finish.”
- Use a timer and the toothpick test together.
- Confirm cakes are cool to the touch before frosting.
- Wrap cooled layers if you’ll frost later the same day to retain moisture.
| Step | Why it matters | Quick tip |
|---|---|---|
| Correct temp | Even crumb and color | Fan 160°C / no-fan 175°C |
| Rest in tins | Prevents tearing | 15–20 minutes |
| Cool on rack | Protects frosting | Cool completely before assembly |
Whip the strawberry cream cheese buttercream
Kick off the buttercream by beating butter at medium high speed for a lofted base. Cream 1 cup (225 g) unsalted butter until light and fluffy.

Cream and sweeten
Use paddle attachment if using stand mixer for best texture control. Add 4 1/2 cups (570 g) powdered sugar in three batches on low.
After each addition, stop and mix well combined so the sugar loses grain and the mix stays smooth.
Bring in the cream cheese gently
Beat in 1 1/2 cups (335 g) cold cream cheese in chunks. Keep mixing brief so the emulsion does not thin.
Fold in 2 tsp strawberry essence extract and 1 tsp vanilla just until smooth.
Finish with the filling and color
Gently fold 1/4 cup (65 g) of the filling made earlier—this adds real fruit depth from the strawberry filling reduction without overworking the buttercream.
If hue needs a nudge, add a conservative drop red gel and blend briefly. For flexible tools, a hand mixer stand or using stand mixer both work; slow speeds after cream cheese keeps structure.
“Aim for a glossy, pipeable cream that holds peaks but still spreads easily.”
- Chill briefly if frosting is too soft for clean piping.
- Taste and tweak with a pinch of salt or extract if needed.
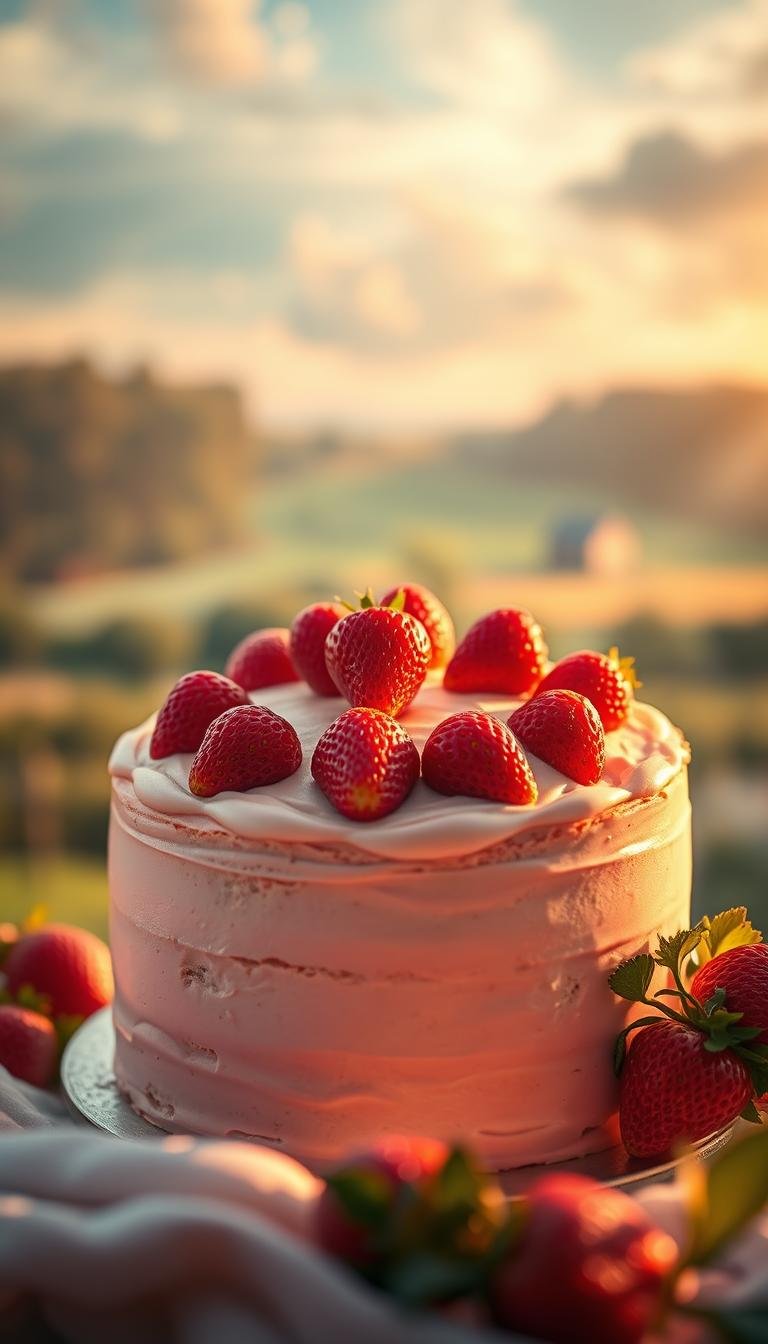
Assemble and decorate for a picture-perfect cake
Start assembly on a cool work surface so layers stack true and piping stays tidy. Level domed tops with a serrated knife for even strawberry cake layers that sit flat and stable.
Leveling and stacking
Trim gently until each layer is flat. Use a ruler or cake board to confirm uniform height across both pans.
Pipe a buttercream dam
With a 1A round tip, pipe a tall dam around the edge so the layer hold strawberry filling without seepage. Keep the wall high enough to contain the filling but low enough to fit the next layer.
Fill and stack
Center the strawberry filling made into the gap and leave a small margin from the edge. Then place next cake layer carefully so you don’t squish the filling.
Crumb coat and finish
Apply a thin crumb coat of cream cheese buttercream, chill to set, then smooth with a scraper for sleek sides. Use remaining buttercream to pipe top remaining borders and tidy edges.
Color, tint, and garnish
Adjust hue with gel food colouring; add an additional colouring point in tiny increments. If necessary, use a single restrained drop red gel to match crumb tone.
“A precise dam, a centered fill, and steady smoothing make the difference between good and gallery-ready.”
- Pipe simple borders with consistent pressure for clean shapes.
- Garnish with fresh berries—halved, whole, or fanned—for shine and a natural cue to flavor.
- Consider small white chocolate curls or a light sprinkle to complement the filling reduction.
Color and flavor optimization tips
A few careful adjustments to tint and aroma go a long way toward a natural, camera-ready finish. Start by trusting the fruit reduction for base tone and taste, then make tiny tweaks to match the visual you want.

Balancing fresh fruit with extract without tasting artificial
Use the reduction first. Let the strawberry filling reduction carry most of the flavor. The concentrate gives authentic fruit depth that extract alone cannot match.
Treat the strawberry essence extract as a fine-tuning tool. Add it in very small amounts, taste, then stop. If flavor edges toward artificial, pause and reassess rather than adding more.
Red gel food vs natural hue: when to add and how long to wait
Natural pigments fade in the oven, so rely on the strawberry milk mixture for base color and add gel only when needed. If the crumb looks a little dull colour after mixing, add another drop before the final folds.
For frosting, use a conservative drop red gel and, if necessary, one additional colouring point. Let tinted frosting rest—another minutes take—so air bubbles settle and color deepens before deciding to add more.
| Issue | Fix | Quick tip |
|---|---|---|
| Faint crumb tone | Add another drop to batter | Adjust before last folds |
| Pastel frosting | Drop red gel + extra point | Rest 5–10 minutes, then reassess |
| Filling loses shine | Use water mix cornstarch slurry | Cook until glossy, then cool |
| Uneven color | Mix gently to disperse | Avoid overbeating to keep sheen |
Final notes: Keep red gel food additions small and consistent across layers so photos and plate shots match. A smooth slurry and proper cook (mixture reduce another step if needed) lock color into the filling and help the whole cake look cohesive.
“Small, deliberate edits beat large corrections every time.”
Make-ahead, storage, and serving
Tackle high-effort tasks a day ahead to keep the finishing hour calm and precise.
Day beforehand save effort by completing parts that hold well.
Day-before steps that help
Make the strawberry filling reduction and spread it on a wide dish to cool fast. Let the filling made earlier chill fully; this prevents runny layers and makes assembly neater.
Bake layers ahead, cool completely, then wrap tightly to lock moisture. These prep moves help you beforehand save time on decorating day.
Storing, assembling, and serving
Whip frosting close to the finish; it can be chilled and briefly re-whipped but avoid overmixing. If you assemble the day beforehand save, crumb coat and chill, then add final borders and fresh garnish when you serve.
| Item | How to store | Why it helps |
|---|---|---|
| Strawberry filling reduction | Refrigerate in airtight jar | Ready for filling made earlier and touch-ups |
| Cooled layers | Wrap in plastic, room or fridge | Locks moisture and speeds decorating |
| Frosting | Chill, then re-whip briefly | Keeps texture silky without overworking |
| Assembled dessert | Store chilled; bring to room temp 20–30 min | Cream cheese stays safe and flavor blooms |
“Chill well, transport snugly, and add final garnishes just before photos for pinterest facebook reddit-ready shots.”
Conclusion
Finish confidently by focusing on timing, gentle technique, and final visual touches. , Use the concentrated reduction across batter, filling, and frosting to keep flavor unified and honest.
Mix gently and check doneness with the toothpick test so layers stay soft and even. Pipe a firm dam, build a clean crumb coat, and chill briefly for sharp edges that photograph well.
Trust the cream cheese buttercream and the strawberry cream cheese touch to add tang and structure. A modest use of tint and a short rest will keep colors consistent across slices.
Plan make-ahead steps to ease serving day. With these final moves you deliver a balanced, fruit-forward dessert that looks refined and tastes unmistakably of strawberry.