Delicious Halloween Cake Pops to Make
Surprising fact: a single 12 oz store-bought angel food cake can yield about 18 cake balls when mixed with 3/4 cup vanilla frosting and a teaspoon of vanilla.
This Website contains affiliate links. That means I may earn a small commission if you purchase through my links, at no extra cost to you.
That quick yield means you can have a dozen or more ready in minutes after a short chill. Use donut holes instead and you can finish 12 pops in roughly 10–15 minutes from dipping to setting.
This recipe is built for speed and fun. Mix crumbs and frosting in a bowl, roll 1.5-inch balls, glue sticks with melted chocolate, freeze, then dip and decorate with sprinkles or candy eyes. White chocolate tints well when thinned with a little vegetable oil.
Party-ready perks: these treats travel well upright in a box with holes and store covered in the refrigerator up to a week for cake-based versions. Donut-hole versions stay best for 1–2 days or can be frozen for longer.
Key Takeaways
- One 12 oz angel food cake makes about 18 cake balls with frosting—fast prep time.
- Donut-hole pops give 12 treats in about 10–15 minutes for no-bake convenience.
- Melt chocolate carefully, stirring every 15–20 seconds; stop before fully smooth to avoid scorching.
- Thin white chocolate with ~1/2 tsp vegetable oil for easier dipping and tinting.
- Store cake-based pops covered in the fridge up to one week; donut versions best 1–2 days or freeze.
- Kids can help with rolling and decorating; this is a quick, craft-like party recipe.
Why You’ll Love This Recipe Right Now
You don’t need an oven to make a memorable dessert. Use donut holes for instant 1-inch spheres or crumble a store-bought angel food to skip baking. Both routes cut prep time and keep the result sturdy enough for dipping and decorating.
Quick, no-bake options for busy weeknights
- Donut holes yield a dozen in about 15 minutes—perfect when minutes matter.
- Angel food cake mixed with frosting chills 10–15 minutes for easy rolling and classic texture.
Kid-friendly, craft-like decorating fun
Kids can dip, roll in sprinkles, and press on candy eyes. Melting chocolate in 15–20 second microwave bursts and stirring often keeps coatings smooth and safe for little helpers.
| Base | Prep Time | Texture |
|---|---|---|
| Donut holes | ~15 minutes | Soft, uniform bite |
| Angel food + frosting | Chill 10–15 minutes | Classic cake pop chew |
| Pre-crumbled cake | 10 minutes | Custom flavor and density |
Ingredients and Tools You’ll Need
Start by laying out bases, coatings, and stands so you can move from chilling to dipping without stopping.
Base options
Crumbled cake: Use a 12 oz angel food cake mixed with 3/4 cup vanilla frosting and 1 tsp vanilla to make about 18 cake balls that roll easily.
Donut holes: Twelve unglazed donut holes give a quick, 3-ingredient route for evenly sized cake pops.
Coatings and decorations
Have melted chocolate and white chocolate ready. Keep candy melts in seasonal colors, plus candy eyeballs and sprinkles for fast finishing touches.
Sticks and setup
Stock cake pop sticks and a stand, styrofoam, or a sturdy box with holes so dipped pops set upright. Line a work surface with parchment and use microwave-safe bowls for melting in 15–20 second bursts.
- Keep 1/2 tsp vegetable oil nearby to thin thick white chocolate or candy melts.
- Use small bowls for sprinkles and a deep, narrow bowl for dipping.
- Extra sticks, paper towels, and food-safe gloves speed batch work and cleanup.
Step-by-Step: From Cake to Pops
This step-by-step guide walks you from crumbs to dipped treats with timing and tips for steady results.
Make the cake balls: Crumble a 12 oz angel food cake into fine crumbs. Mix with 3/4 cup vanilla frosting and 1 tsp vanilla. Divide, add color (about 25 drops per bowl), then chill 10–15 minutes. Roll tight 1.5-inch balls (about 18).
Secure the stick
Heat ~1/3 cup chocolate. Dip the tip of each cake pop stick in the melted chocolate and insert halfway to glue. Freeze 10–15 minutes so the bond sets.
Melt and dip
Melt remaining coating in the microwave in 15–20 second bursts, stirring between. Use a deep bowl or spoon for dipping. Thin thick white chocolate with about 1/2 tsp oil if needed.
Decorate and set
While wet, press on candy eyeballs or roll in sprinkles. For a mummy look, drizzle white chocolate over the set base. Stand upright in foam or a box with holes to dry fully.
“Work in small batches so the coating sets smoothly and surfaces stay tacky for decorations.”
| Step | Time | Tip |
|---|---|---|
| Mix & chill | 10–15 minutes | Chill for firmer rolling |
| Glue sticks | Freeze 10–15 minutes | Use melted chocolate as adhesive |
| Dip & decorate | Variable | Dip in deep bowl; add eyeballs before dry |
Pro Tips and Troubleshooting
Prep, chill, and pace your work to keep each dip clean and each decoration precise.
Prevent scorching: Microwave coatings in 15–20 second bursts and stir often. Stop heating when most chips are softened and finish by stirring; residual heat melts the rest without grainy, seized results. This protects melted chocolate and candy melts.
Thin thick coatings: If white chocolate or candy melts are too stiff, add about 1/2 teaspoon of vegetable or coconut oil in a bowl and blend until smooth. A thinner coating flows evenly and sets with a glossy finish.
Keep pops firm: Roll cake balls tightly and chill 10–15 minutes or longer. Store most in the freezer and bring out a few at a time so warm items don’t slide down the pop stick melted bond or crack when cooling.
- Work small batches and let each coating layer set before adding another to build thicker shells without drips.
- Use a box or stand to hold pops upright while curing to avoid flat spots and fingerprints.
- If a pop detaches, re-chill, dip the stick tip in chocolate, reinsert, and set before re-dipping.
“Thin the coating sparingly—fat from oil changes texture, so add a little at a time.”

Halloween Decorating Ideas and Styles
Give each pop its own personality with a few simple decorating tricks that look impressive but take minutes. These styles work whether you start from cake balls, donut holes, or a dip cake base.
Mummy stripes with white chocolate drizzle
Apply a smooth base coat and let it set. Then drizzle thin ribbons of white chocolate back and forth for bandage-like stripes.
Press candy eyeballs onto the still-tacky area so they sit nestled between the stripes. This creates a fast, spooky mummy look.
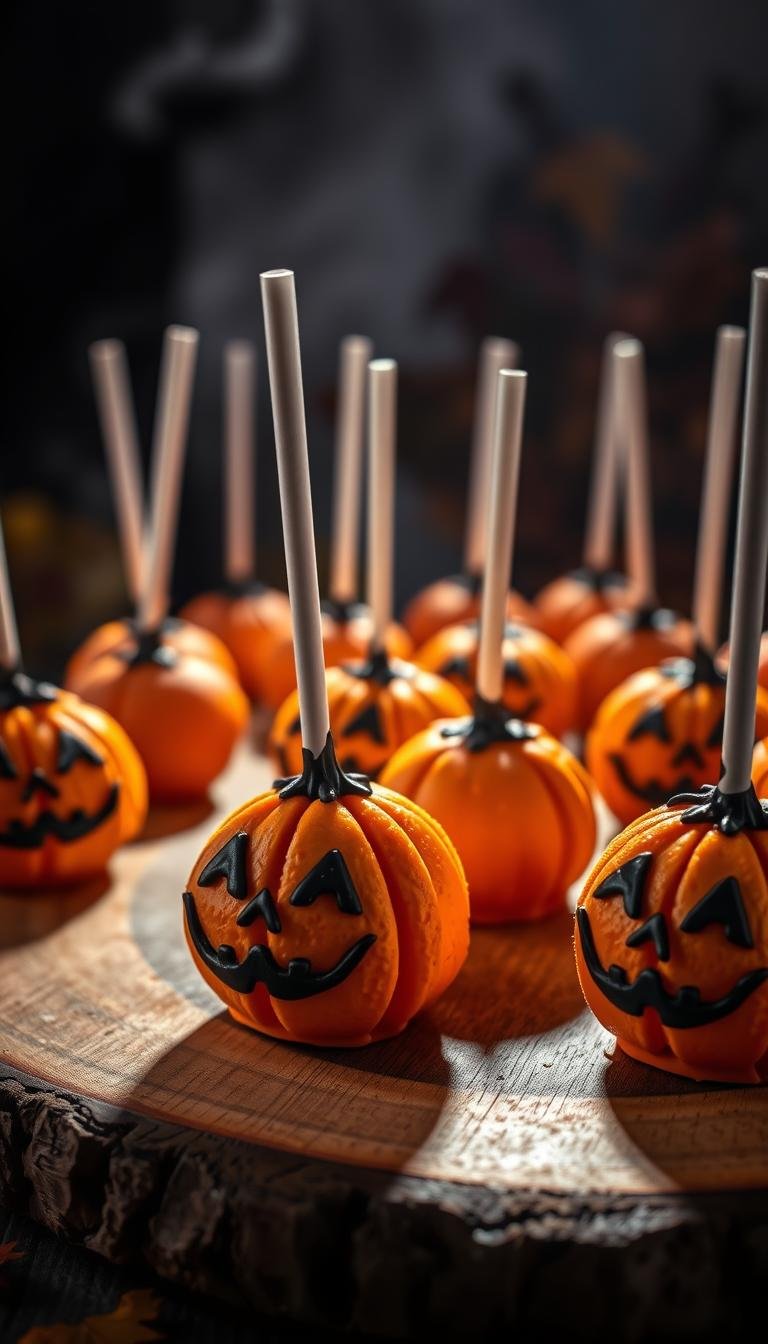
Jack-o’-lantern orange pops with faces
Tint melted coating to a pumpkin orange and dip evenly in a narrow glass for a glossy shell.
When semi-set, pipe triangle eyes and a grin using a small tip for clean lines.
Monster pops with candy eyeballs and spooky sprinkles
Layer candy eyeballs—single or multiple—then add bold sprinkles and contrasting swirls. Use candy melts in seasonal shades for vivid color that holds.
Classic black-and-orange sprinkle coating
For a quick finish, roll freshly dipped treats in black-and-orange sprinkles. It’s fast and consistent for party displays.
“Thin your coating slightly for crisp piping, and work in small batches for the neatest results.”
- Plan coating thickness: thinner for detail, thicker for textured drizzles.
- Use a stick and foam stand to set pops upright while drying.
- Add edible shimmer sparingly to highlight features without masking colors.
halloween cake pops
Two fast paths make this recipe ideal for parties: a classic crumb-and-frosting mix or simple donut centers. Both let you dip quickly into melted chocolate or white chocolate melts and finish with themed sprinkles for instant festive flair.
Melt coatings smoothly in short bursts, then use a deep bowl or tall glass to dip each pop. Rotate gently to form an even, glossy coating. For white chocolate, add a little vegetable oil to thin and tint to bright seasonal shades.
Workstation tips: set up a sprinkle station, a bowl for dipped items, and a stand so each pop can set undisturbed for about 10 minutes. Layer coatings for extra thickness, letting each layer set before the next, to build a durable shell that holds up in transport.
“Prepare multiple small bowls of melts to rotate batches quickly and keep the coating flowing.”
| Base | Set Time | Storage |
|---|---|---|
| Donut-hole | Set ~10 minutes | Refrigerate 1–2 days; freeze longer |
| Crumb + frosting | Chill then set 10–15 minutes | Refrigerate up to 2 days; freeze 1–2 months |
| Layered coating | Allow 5–10 minutes between layers | Good for party transport |

This method scales easily: prep extra dips, rotate batches through the bowl, and use a stand to cure many at once. See the step section for exact dipping cadence and the decorating section for mummy, monster, and pumpkin ideas.
Storage, Make-Ahead, and Transport
Plan storage before you decorate so your treats stay glossy and intact during serving. A short plan saves time and prevents cracked chocolate or smeared candy details.
Room vs. refrigerator
Room temperature works for short stints in cool, low-humidity spaces when treats sit in an airtight container.
For longer keeping, store cake pops and similar items covered in the refrigerator. Cake-based versions stay fresh up to one week chilled. Donut-hole bases are best within 1–2 days.
Freezing and thawing
Wrap well and freeze for longer storage—up to a couple of months for pop versions. Thaw in the refrigerator to cut down condensation, then rest at room temperature for a few minutes before serving.
Transport upright
Move treats upright in a stand, foam block, or a snug box with holes. Mini cupcake liners also work for stick-side up service. Separate layers with parchment so decorations do not stick.
“Avoid abrupt temperature swings; thin shells with a touch of oil so coatings flex during travel.”
| Storage Method | Best For | Keep Time |
|---|---|---|
| Refrigerator in airtight container | Crumb + frosting balls | Up to 1 week |
| Refrigerate (short term) | Donut-hole pops | 1–2 days |
| Freeze wrapped | Any pop with sturdy shell | Up to 2 months |
Nutrition, Yield, and Scaling
Plan yields and timing before you start. From a 12 oz angel food base mixed with frosting you’ll get about 18 cake pops. A donut-hole method usually yields 12 pops per pack.
Typical serving: Assume 1–2 treats per guest. For kids or dessert tables, budget on the higher side.
Approximate nutrition and variation
A white‑chocolate‑coated angel‑food pop is roughly 223 calories with about 32g carbs and 10g fat. Smaller donut‑hole versions can be much lower (examples near 50–160 calories depending on coating and candy).
“Calories and fat climb with thicker shells, extra drizzle, or heavy decorations.”
Scaling tips and workflow
- Stagger tasks: Chill balls, glue sticks, then dip in rotating batches to save time and avoid remelting.
- Set stations: Use multiple bowls of melted chocolate and extra sticks so several people can dip at once.
- Stock up: Count extra sticks, stands, and ingredients when you scale up—coatings and candy add up fast.
| Base | Yield | Prep time |
|---|---|---|
| Angel food + frosting | ~18 cake balls | Chill 10–15 minutes |
| Donut holes | ~12 pops | ~15 minutes |
| Decorated (thick shell) | Variable | Add extra minutes per layer |
Conclusion
With a few smart shortcuts, you can turn basic ingredients into a festive tray in under an hour.
These halloween cake pops are fast, flexible, and fun whether you use crumbled angel food or grab donut holes for a three‑ingredient shortcut. Smooth chocolate shells, bold colors, and simple add‑ons like candy eyeballs and sprinkles make eye‑catching results with little effort.
Try themed designs—mummies, jack‑o’‑lanterns, or monsters—using candy melts and a light drizzle or pipe for detail. Thin coatings slightly with oil for cleaner finishes and fewer cracks; let each layer set between dips for best results.
Make ahead smartly: cake‑based versions keep up to one week refrigerated; donut‑hole treats are freshest in 1–2 days or freeze for longer. Pack upright for a halloween party or nest pops in mini liners for grab‑and‑go service.
Scale by batching chill, dip, and set steps, keep extra sticks and bowls of melts ready, and invite kids to help—this recipe turns decorating into a shared, festive activity.