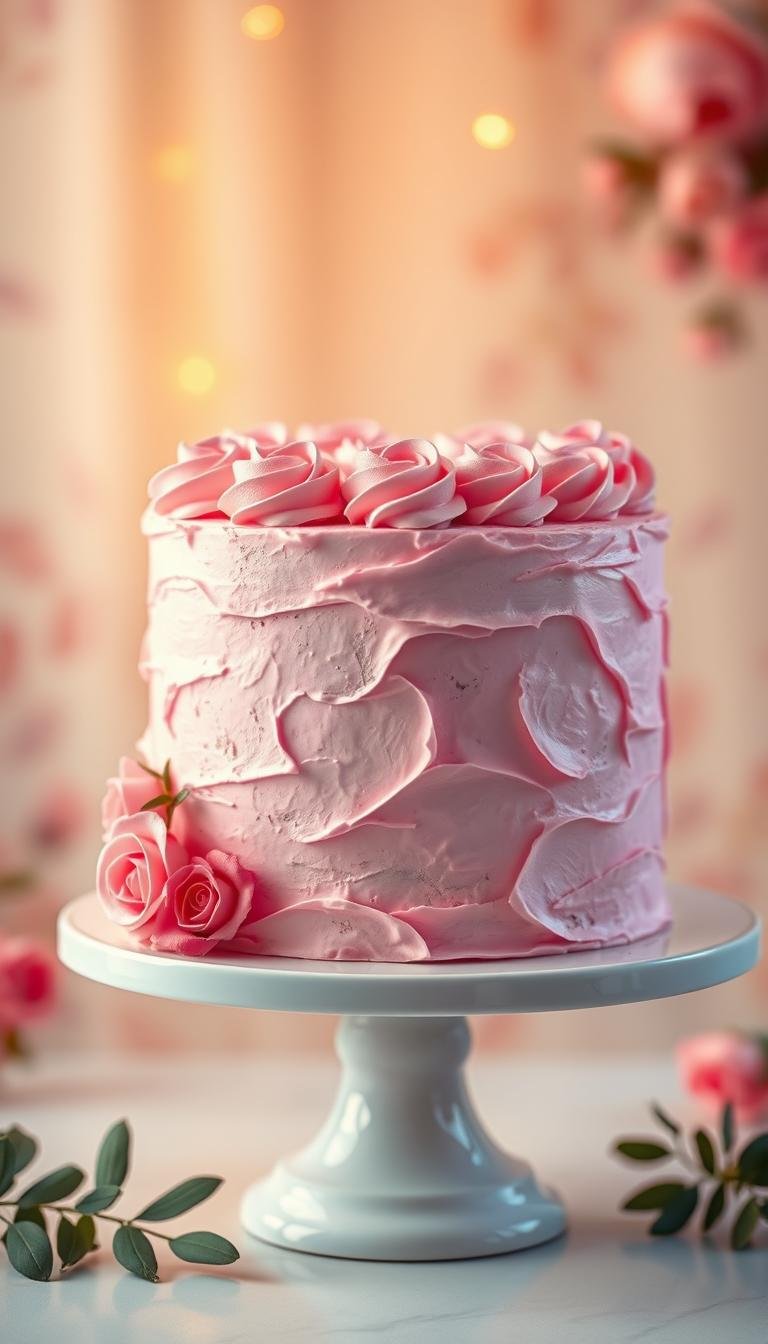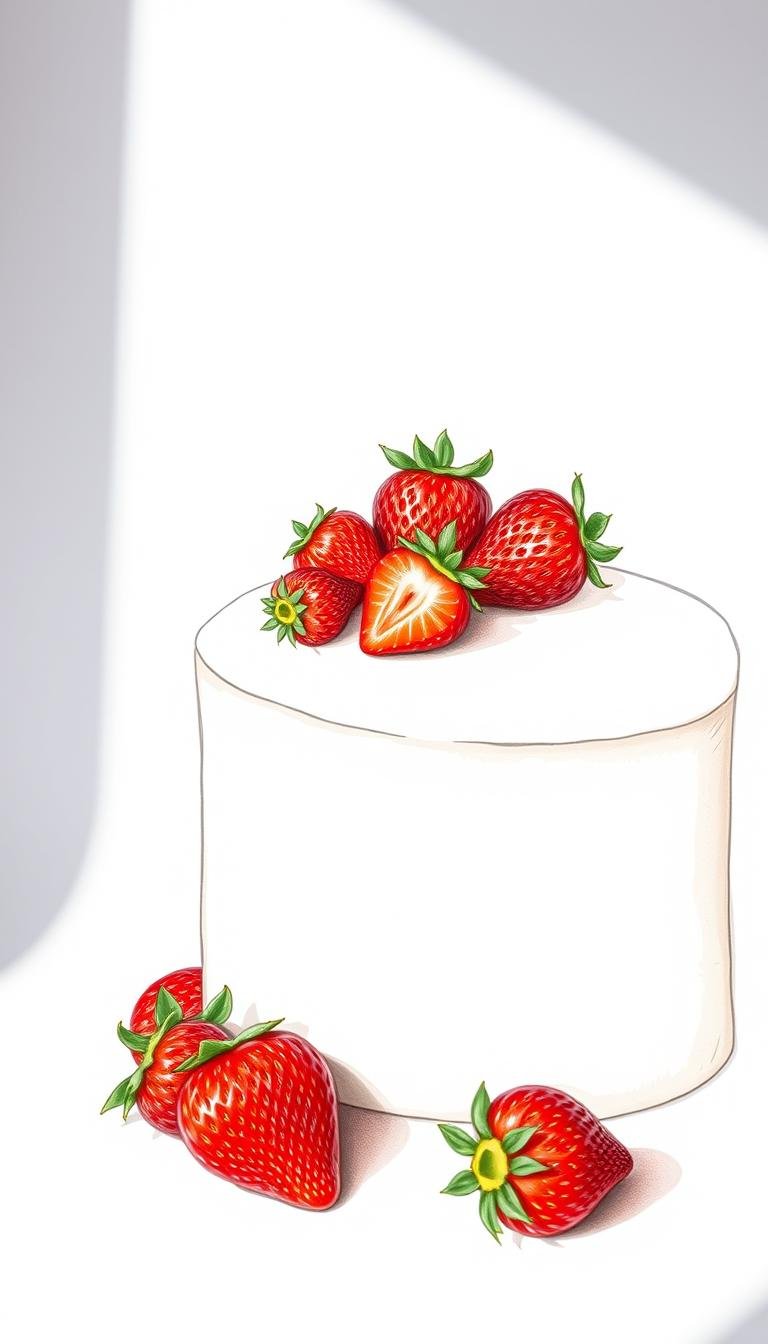
Classic Red Velvet Birthday Cake Recipe for Celebration
Surprising fact: more than one in five home bakers pick a layered dessert for special events, and this classic stands out for its look and texture.
This Website contains affiliate links. That means I may earn a small commission if you purchase through my links, at no extra cost to you.
This recipe balances mild cocoa and sweet vanilla with tangy buttermilk to create a soft, velvety crumb. Authentic versions use natural cocoa, vinegar, and a touch of coloring, then pair the layers with a smooth cream cheese frosting.
The guide covers two reliable pan options: three 6-inch layers or two 9-inch rounds baked at 350°F for about 30–35 minutes. For lift, baking soda reacts with acidic ingredients, and simple techniques—creaming butter and sugar or blending butter with oil—give both flavor and moisture.
Pro tips include whipping egg whites to fold in for an ultra-tender crumb and using cake strips for even layers. Whether you use gel dye or a natural beet powder, the goal is a dramatic slice that finishes clean and tastes classic.
Key Takeaways
- This recipe highlights mild cocoa, sweet vanilla, and tangy buttermilk for a signature flavor.
- Choose three 6-inch or two 9-inch pans; bake at 350°F and test for a springy center.
- Creaming or butter-plus-oil methods balance lift and moisture.
- Whipping egg whites and using cake strips improves crumb and even baking.
- Cream cheese frosting and a short chill help clean slices and a smooth finish.
Why This Red Velvet Cake Belongs at Every Celebration
A great celebration deserves a dessert that blends subtle cocoa, buttered richness, and a bright tang from cultured milk.
Signature flavor: mild cocoa, sweet vanilla, tangy buttermilk
Red velvet balances mild cocoa with vanilla and butter so the taste feels festive, not heavy. The real lift comes from buttermilk and a touch of vinegar. Their acidity reacts with baking soda for a fine, tender crumb and reliable rise.
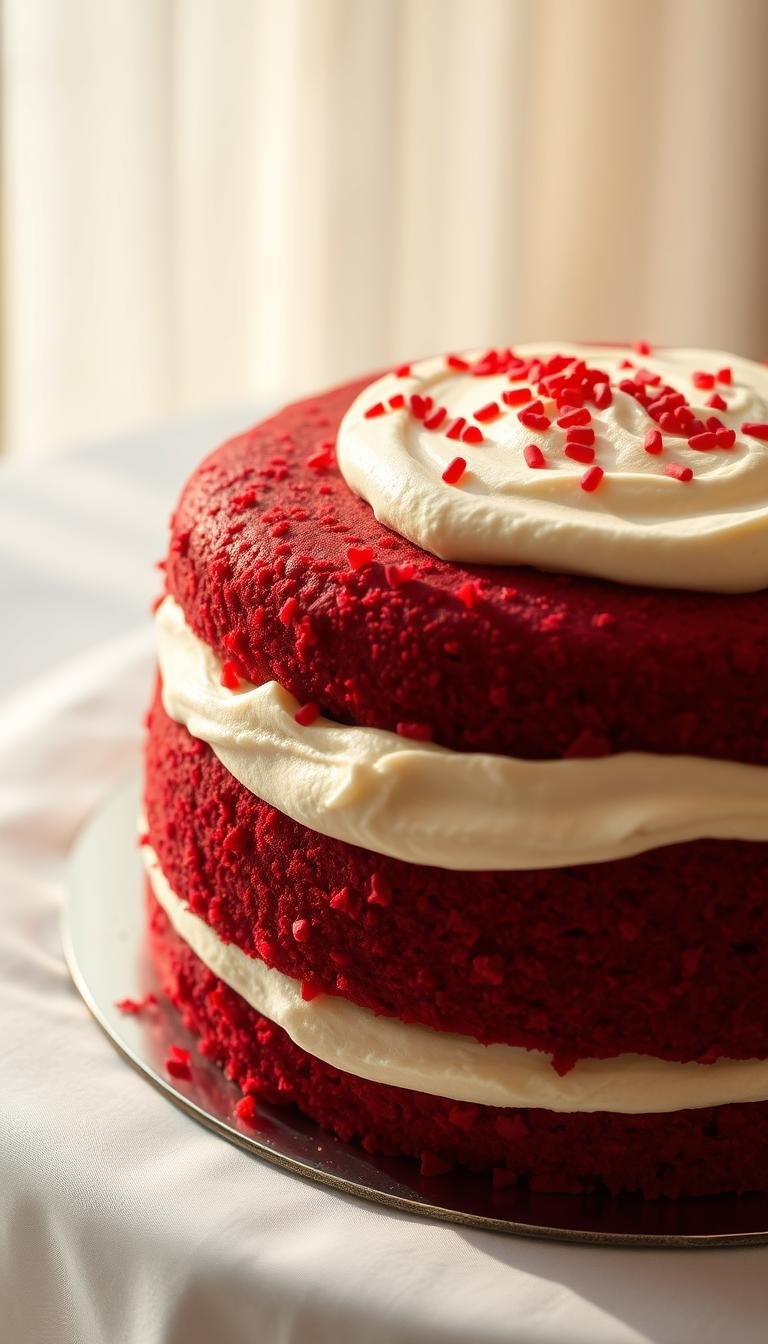
Velvety crumb and showstopping layers for celebrations
The crumb is soft and moist; whipped egg whites folded in give a plush, bakery-style mouthfeel. Tall, even layers slice cleanly for dramatic presentations and candles.
Finish with a stable cream cheese frosting made from brick-style cream cheese, unsalted butter, confectioners’ sugar, and vanilla. It adds a tangy-sweet contrast that brightens the overall flavor without overpowering the gentle chocolate notes.
- Less cocoa than a true chocolate cake, so the texture stays tender.
- Gel color yields vivid hue; beet powder or no dye keeps the pure taste.
- Reliable rise and forgiving frosting make this recipe ideal for crowds and many pan sizes.
Ingredients That Make Authentic Red Velvet Flavor
Select ingredients that build lift, color, and a fine crumb. Measure carefully and use room temperature items for a smooth batter.
Dry ingredients
Use all-purpose flour for structure. Combine natural cocoa (about 2 tablespoons), 1 teaspoon baking soda, a pinch of salt, and 1 cup granulated sugar. Sift to remove lumps and ensure even mixing.
Wet ingredients
Whisk 1 cup cultured buttermilk, 1 tablespoon white vinegar, 2 large eggs, and 1 teaspoon pure vanilla in a separate bowl. These activate the soda and keep the crumb tender.
Color and texture
For vivid hue, use 1–2 teaspoons gel or about 1–2 tablespoons liquid red food coloring. Beet powder is a natural alternative for gentle coloring.
Cream cheese frosting essentials
Choose brick-style full-fat cream cheese and unsalted butter for stable, pipeable frosting. Sift confectioners’ sugar before beating to a silky finish.
| Component | Typical Amount | Purpose |
|---|---|---|
| All-purpose flour | 2 cups (by spoon-and-level) | Structure, even crumb |
| Natural cocoa | 2 tbsp | Flavor and acidity for leavening |
| Baking soda | 1 tsp | Lift when activated by buttermilk/vinegar |
| Buttermilk | 1 cup | Tenderness and reaction with soda |
| White vinegar | 1 tbsp | Boosts lift and color development |
Tools and Setup: Stand Mixer, Paddle Attachment, and Cake Pans
Start by arranging your stand and work stations so every tool and ingredient is within reach. A clear prep area speeds work and reduces mistakes.
Stand mixer with a paddle attachment speeds creaming and yields smooth frosting. A hand mixer will do the job but expect slightly longer mixing times.
Pan choices and bake windows
Choose pan sizes to match your event: three 6-inch layers for height or two 9-inch rounds for classic slices.
- Three 6-inch layers — 30–35 minutes.
- Two 9-inch rounds — slightly less time; watch centers.
- 9×13-inch sheet — 40–45 minutes; 12×17-inch sheet — 20–25 minutes.
- 10-cup bundt — roughly 60 minutes; adjust and test.
Room-temperature prep and mise en place
Bring butter, eggs, and buttermilk to room temperature to prevent curdling and dense batter. Weigh flour and sugar, sift cocoa, and pre-measure liquids.
Use a large bowl for dry ingredients and a liquid measuring cup for wet additions. Line pans with parchment and add cake strips for level layers.
“A tidy mise en place halves stress and doubles consistency.”
| Pan | Typical minutes | Notes |
|---|---|---|
| Three 6-inch | 30–35 | Tall layers, even slices |
| Two 9-inch | ~28–33 | Classic serving size |
| 9×13-inch | 40–45 | Easy serving |
Cool in pans briefly, then turn out onto racks. Keep a bench scraper and offset spatula ready for smooth assembly.
Step-by-Step: Make the Cake Batter Like a Pro
Measure and sift first. Whisk together flour, cocoa, baking soda, and salt in a dry bowl to remove lumps and add air.
Creaming and emulsifying
Cream unsalted butter and sugar in a stand mixer or with a hand mixer until light and fluffy, about 3 minutes. Beat in large eggs one at a time, then add vanilla.
Combine wet and dry
In a measuring cup, mix buttermilk, vinegar, and red food coloring so acidity and color distribute evenly. Add dry and wet in alternating additions on low speed. Scrape the bowl to avoid pockets of dry flour.
Optional pro technique
For an ultra-soft crumb, separate eggs and whip whites to soft peaks (about 3 minutes). Fold them in gently at the end for a silkier batter.
Quick tip: Keep ingredients at room temp and stop mixing as soon as the batter is combined. Then set aside just long enough to prep pans and preheat the oven.
| Step | Tool | Time |
|---|---|---|
| Sift dry ingredients | Large bowl | 2 minutes |
| Cream butter and sugar | Stand mixer | 3 minutes |
| Alternate additions | Spatula/mixer | 2–4 minutes |
Perfect Baking and Layering for Even Cake Layers
Even heat and consistent portioning are the foundation for evenly baked layers every time. Divide batter evenly to help each pan finish at the same pace and avoid overmixing near the end.
Divide batter, bake times, and doneness cues
Weigh or eyeball equal portions into prepared pans for uniform thickness. Bake at 350°F and target 30–35 minutes for three 6-inch rounds; two 9-inch rounds will need slightly less time.
For sheet formats plan about 40–45 minutes for a 9×13 and 20–25 minutes for a 12×17; check early to avoid overbaking. Use doneness cues: press the center for a springy rebound and confirm with a clean toothpick.
Cooling, leveling domes, and using cake strips
Let layers rest in pans roughly 10 minutes, then invert to racks to finish cooling to room temperature. This stabilizes the crumb and reduces sticking.
Wrap pans with cake strips before baking to keep edges cooler and encourage flat tops. If domes form, level with a long serrated knife so cake layers stack without gaps.
- Keep cakes on the center rack at a steady oven temp; rotate only if needed late in the bake.
- Avoid opening the oven early — structure sets in the final minutes.
- If not assembling, cool to room temp, then wrap layers to preserve moisture.
Cream Cheese Frosting That Sets Smooth and Silky
Start with brick-style cream cheese and softened unsalted butter to build a lump-free, pipeable frosting. Work in a cool kitchen and use a large bowl and a hand or stand mixer for even blending.
Mixing for a stable frosting: room temperature, proper order, and brief beating
Beat the butter and cream cheese together on medium speed until smooth, about 2–3 minutes. Add vanilla and a pinch of salt next to balance sweetness.
On low, slowly add sifted confectioners’ sugar to prevent air pockets. Beat just until fluffy—overmixing warms the mixture and makes the frosting too loose.

Chilling to pipe borders and coat layers cleanly
Chill the frosting 20–60 minutes to firm it for piping and sharp sides. Keep a small reserved portion in a piping bag for borders and details.
- Use an offset spatula and bench scraper for smooth sides.
- Return the bowl to the fridge briefly if the frosting softens while decorating.
- Avoid tub-style cream cheese for stable results.
| Action | Tool | Time |
|---|---|---|
| Beat butter + cream cheese | Mixer, large bowl | 2–3 minutes |
| Add sifted sugar slowly | Mixer on low | 2–4 minutes |
| Chill frosting before piping | Refrigerator | 20–60 minutes |
“Use room temperature ingredients and brief mixing to keep the frosting stable and silky.”
Red Velvet Birthday Cake: Decorating, Variations, and Flavor Tweaks
A smooth, professional finish starts with trapping crumbs under a light coat and giving the layers time to firm.
Classic finish: crumb coat, smooth sides, and decorative border
Apply a thin crumb coat and chill 30–60 minutes to set. This locks loose crumbs so the final coat stays clean.
Use a bench scraper against a rotating stand for even sides. After the final coat, pipe a simple border with Wilton tip #12 or a similar round or star tip.
Pan conversions: cupcakes, sheet cake, and three-layer 9-inch
Convert batter easily: cupcakes bake about 20–21 minutes. A 9×13-inch sheet needs 40–45 minutes and a 12×17-inch sheet about 20–25 minutes.
For a taller display, split into three 9-inch pans and bake ~22–25 minutes each. Stack with even amounts of frosting between cake layers for balanced servings.
Coloring choices: gel, beet powder, or low-dye options
Choose gel food coloring for saturated hue without thinning the batter. Use beet powder rehydrated for a natural tint; expect a muted tone and subtle earthy notes.
If you prefer minimal dye, reduce coloring and let natural cocoa show—the flavor stays the same.
| Format | Bake Time | Yield | Notes |
|---|---|---|---|
| Cupcakes | 20–21 min | 24–30 | Easy single servings |
| 9×13-inch sheet | 40–45 min | 12–16 slices | Great for crowds |
| 12×17-inch sheet | 20–25 min | 24–30 squares | Thinner, quick bake |
| Three 9-inch layers | 22–25 min each | 10–14 slices | Tall, showstopping stack |
Storage, Make-Ahead, and Freezing Instructions
Plan ahead: how you chill, wrap, and thaw affects final texture and presentation. Follow simple steps to keep the crumb tender and the frosting stable.
Room temperature versus refrigeration: If serving within two days, keep the assembled cake covered at room temperature for best softness. With cream cheese frosting, refrigerate if storing beyond 48 hours. Store covered in a cake carrier or lightly wrapped for up to five days. Bring to room temperature before slicing so flavors and texture bloom.

Freezing, thawing, and timing
Double-wrap whole cakes, cakes slices, or single layers in plastic and foil to prevent freezer burn. Freeze for up to 2–3 months and label with date.
Thaw overnight in the refrigerator, then allow additional time at room temperature before serving. This extra time helps the crumb soften and the frosting regain creaminess.
Make-ahead tips for tenderness
- For longer holds, swap some butter for oil in the batter to retain moisture after chilling.
- Wrap layers while slightly warm to trap steam and lock in moisture.
- Keep the frosting cold and re-whip briefly before using if stored separately.
“Plan extra time for chilling and thawing to ensure clean cuts and a stable presentation.”
Conclusion
Finish with a clear recap of the formula: natural cocoa, cultured buttermilk, and a splash of vinegar give the signature crumb and subtle chocolate flavor. This is a strong, reliable formula for any red velvet cake or similar dessert.
Follow technique pillars: measure precisely, sift dry ingredients, cream properly, and add wet and dry in alternation for an even batter. Fold whipped egg whites for extra silk if you like.
Match pans to the occasion, watch doneness by spring-back and toothpick checks, then cool briefly before turning out. For frosting, use brick-style cream cheese, unsalted butter, and sifted sugar; chill between coats and finish with a crumb coat and final border.
Store assembled cakes refrigerated for long holds, freeze layers when needed, and bring to room temperature before serving for best texture and flavor.