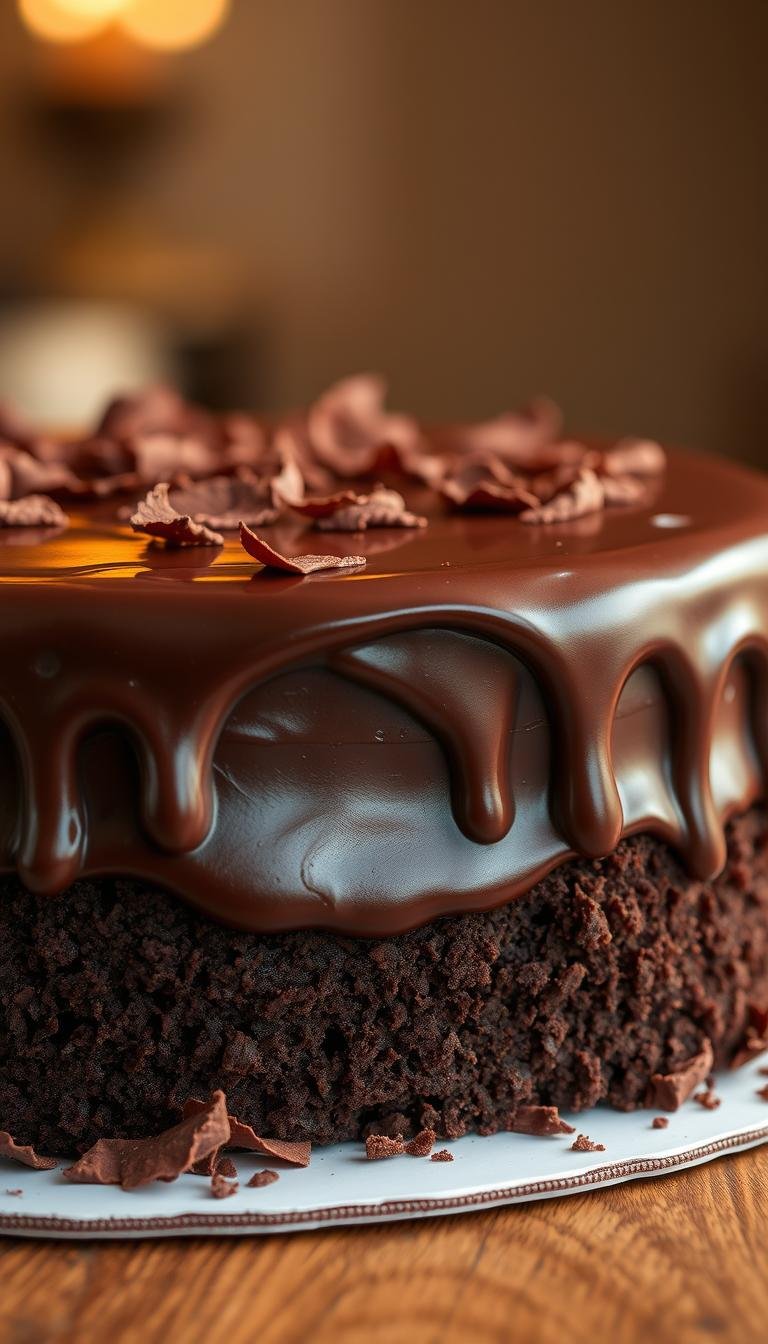
Chocolate Birthday Cake Recipe: A Decadent Delight
Surprising fact: using hot coffee or boiling water can make cocoa bloom and deepen flavor, boosting richness more than extra cocoa powder ever could.
This Website contains affiliate links. That means I may earn a small commission if you purchase through my links, at no extra cost to you.
This simple recipe delivers a moist, tender crumb by combining natural cocoa, oil for moisture, and a hot liquid to unlock deeper notes. You can whisk the batter by hand and still get bakery-quality results.
Expect a thin batter—that’s the secret to an ultra-moist crumb. The layers bake quickly in two 9-inch pans, then finish with a creamy chocolate buttercream that spreads smoothly and holds shape.
Espresso powder is optional but highly effective; it heightens flavor without making the dessert taste like coffee. Make-ahead steps are practical: bake, cool, wrap, and freeze layers for up to three months, then assemble the day you serve.
Key Takeaways
- Oil and hot liquid create a moist, tender crumb with deep flavor.
- Hand-whisk method keeps equipment minimal and results reliable.
- Creamy buttercream complements the rich profile and holds shape.
- Espresso powder boosts flavor without overt coffee taste.
- Layers freeze well; bake ahead to simplify celebration day.
Why this birthday cake chocolate recipe is rich, moist, and party-perfect
Natural cocoa paired with baking soda gives the batter reliable lift and the classic, slightly reddish hue of devil’s food-style treats.
Using neutral oil keeps the crumb soft and prevents drying that can come from heavy cocoa. Buttermilk adds a gentle acidity that tenderizes and balances sweetness for a deeper flavor profile.
Hot water or coffee blooms the cocoa powder, intensifying aroma and dissolving lumps for a smooth batter. A pinch of salt brightens the chocolate and vanilla notes without tasting salty.
Baking powder and baking soda work together for steady oven spring and an even crumb. Room temperature eggs and dairy help the ingredients emulsify so the mixture bakes evenly at the right temperature.
- Expect a thin batter by design; it yields a plush, melt-in-your-mouth texture.
- Typical bake time ranges let hosts plan service and chilling with confidence.
These choices make this chocolate cake reliable and crowd-pleasing for gatherings and celebrations.
Ingredients for a moist chocolate cake that never fails
Gather the pantry basics before you begin. Accurate measures and room-temperature eggs set you up for consistent results.
Dry ingredients
- All-purpose flour (about 1¾–2 cups) — provides structure.
- Granulated sugar (1¾–2 cups) — sweetens and helps retain moisture.
- Natural cocoa powder (¾ cup) — required for the baking soda reaction and rich color.
- Baking soda (1–2 tsp), baking powder (1 tsp), and salt (1 tsp) — for lift and balance.
- Espresso powder (1–2 tsp) — small but mighty for depth of flavor.
Wet ingredients
- Neutral oil (½ cup) for tenderness.
- Eggs (2 large, room temperature) for structure and richness.
- Vanilla extract (2 tsp) for aroma.
- Buttermilk (1 cup) — acidity keeps crumbs tender; or use milk soured with a splash of vinegar.
- Hot coffee or boiling water (1 cup) to bloom the cocoa and smooth the batter.
“Measure flour by spooning into the cup and leveling; it prevents dense layers.”
Optional add-ins
Stir in chocolate chips or chopped nuts for texture, or top with sprinkles for a festive finish.
| Ingredient | Typical Amount | Role |
|---|---|---|
| Flour | 1¾–2 cups | Structure |
| Sugar | 1¾–2 cups | Sweetness, moisture |
| Cocoa powder | ¾ cup | Flavor, color, reacts with soda |
| Oil, Eggs, Buttermilk | ½ cup, 2, 1 cup | Tenderness, richness, acidity |
Tools, pans, and prep: set up for success
Right-size pans and simple tools make the recipe reliable every time. Take a few focused prep minutes and the rest of the process flows smoothly.
Preheat and pan prep
Preheat the oven to 350°F before you measure ingredients. Grease two 9-inch rounds, then line with parchment for fail-safe release.
Which pan to choose
Use two 9-inch round cake pans for a classic layered presentation. A 9×13-inch pan works for a single-layer option—bake about 35–40 minutes.
For feeding a crowd, an 18×13-inch sheet pan bakes in roughly 20 minutes and takes a poured warm icing for a Texas-style finish.
Essential tools and tips
- Use a large mixing bowl and a whisk or paddle; no heavy-duty mixer is required.
- Have measuring cups, spoons, a scale if available, and an offset spatula or bench scraper for frosting.
- Lightly spray pans or smear a thin butter layer so parchment stays put and edges unmold cleanly.
- Check pan size and depth to avoid overfilling. Center pans in the oven with space for air circulation.
- Plan bake minutes by pan type so you know cooling and assembly time.
Step-by-step: make the cake batter like a pro
Start by sifting the dry mix so flour, sugar, natural cocoa powder, baking soda, baking powder, salt, and optional espresso powder disperse evenly. This prevents pockets of bitterness and helps the cake rise uniformly.

Whisk dry ingredients
Whisk the dry ingredients in one bowl until the color and texture look uniform. Give the cocoa and powder special attention so they don’t clump.
Combine wet ingredients
In another bowl, whisk oil, eggs, and vanilla extract until smooth. Add buttermilk so the liquids are consistent and at room temperature.
Bloom the cocoa
Pour the wet into the dry and stir until combined. Then stream in hot coffee or boiling water. The batter will be thin — that is normal and yields a moist, tender crumb.
Divide, bake, and cool
Divide the cake batter evenly between two prepared 9-inch pans and tap to level. Bake about 23–35 minutes; start checking at the lower end of the minutes range.
- Rest cakes in pans 10 minutes to set structure.
- Turn out and cool completely on a rack before frosting.
- Level domes with a serrated knife for tidy stacking.
Chocolate buttercream frosting that’s creamy, stable, and easy
A silky, stable buttercream transforms simple layers into a polished centerpiece. Start by beating room-temperature butter in a bowl until very smooth and pale. This creates the light base your frosting needs.
Slowly add confectioners’ sugar and sifted cocoa powder while mixing on low to avoid dust clouds. Stream in a little cream or milk with vanilla extract and a pinch of salt.
Beat briefly on high to finish—a short burst gives a glossy, spreadable texture. Add more sugar to thicken or a splash more cream to loosen the frosting until it spreads easily.
Level, layer, and frost like a pro
Level cooled layers before stacking. Apply a thin crumb coat to lock in stray crumbs, chill for 10–15 minutes, then do the final coat.
- Use an offset spatula and bench scraper for clean sides and sharp edges.
- Keep mixing times moderate to avoid large air pockets that make smoothing harder.
- Refrigerate leftover frosting and bring it back to room temperature, then re-whip before using.
“This buttercream suits two- to three-layer cakes and pairs well with vanilla or fruit frostings.”
birthday cake chocolate variations and pan conversions
Converting this recipe between rounds, a sheet, or cupcakes is straightforward with a few timing tweaks.
Two-layer or three-layer rounds: Divide batter evenly between two 9-inch pans for a classic two-layer. For three layers, use three 8- or 9-inch cake pans and reduce bake minutes to about 22–25.
9×13-inch pan option: Pour the same batter into a 9×13-inch pan and bake at 350°F for about 35–40 minutes. Frost directly in the pan for easy serving and transport.
Texas-style sheet cake: Use an 18×13-inch pan and bake roughly 20 minutes. Pour warm, fudgy icing over the warm cake for a glossy finish that feeds a crowd.
Cupcakes and minis: Fill liners two-thirds full. Expect 24–36 standard cupcakes from one batch. Begin checking a few minutes earlier than usual for doneness.
- Keep oven temperature steady at 350°F and watch toward the end of the time range.
- Use a cup measure to portion batter evenly so layers rise to similar heights.
- Scale frosting up slightly for three-layer cakes and cool layers fully before stacking to prevent sliding.
Smart substitutions and dietary tweaks that still taste amazing
Small swaps can change texture and flavor without derailing the whole recipe.
Oil or butter? Swap neutral oil for melted butter one-to-one for a richer crumb. The texture shifts slightly, but the result stays tender.
DIY buttermilk is easy: add 1 tbsp white vinegar or lemon juice to 1 cup milk and let sit for 5 minutes. Use this in place of buttermilk to keep acidity that reacts with soda.
Coffee and liquid swaps
Replace hot coffee with hot water or robust tea to still bloom the cocoa powder. Water preserves the deep chocolate notes without adding coffee flavor.
Gluten-free, dairy-free, and egg-free options
- Gluten-free: use an equal amount of a reliable gluten-free all-purpose flour blend.
- Dairy-free: use almond, oat, or coconut milk plus dairy-free butter for the frosting.
- Egg-free: substitute about 2/3 cup unsweetened applesauce or a commercial egg replacer; extend bake minutes slightly and test for doneness.
| Swap | Use | Notes |
|---|---|---|
| Oil | Melted butter (1:1) | Richer flavor; adjust salt if using salted butter |
| Buttermilk | Milk + vinegar/lemon | Maintains acidity to react with baking soda |
| Eggs | Applesauce or replacer | Use 2/3 cup applesauce for 2 eggs; check bake time |
| Flour | Gluten-free blend (1:1) | Monitor batter thickness; small time tweaks may be needed |
Keep sugar and cocoa powder consistent to preserve tenderness and bold chocolate flavor in any adapted cake recipe.
Pro baking tips for a tender crumb and bold chocolate flavor
Precision in temperature and measuring often separates a good bake from a great one. These small steps help the batter come together in the bowl and produce a reliably soft crumb and rich flavor.

Room temperature ingredients, measuring, and thin batter confidence
Always bring eggs and dairy to room temperature so the batter emulsifies and traps air evenly. Spooning and leveling flour prevents dense layers and keeps texture light.
After you add hot liquid, expect a thin batter that pours easily. Trust that consistency; it yields a moist cake with deep cocoa notes.
High altitude, salt, and cocoa powder choices
At high altitude, reduce soda and baking powder slightly and add a touch more liquid; consult a trusted altitude chart for minutes and ratios.
Prefer Diamond Crystal kosher salt or cut quantities when using Morton’s or fine table salt to avoid oversalting. Use natural cocoa powder in the batter so baking soda reacts correctly. Save Dutch-process cocoa for frosting where leavening isn’t needed.
- Calibrate your oven with a thermometer to keep bake time reliable.
- Mix just until combined; overworking flour toughens the crumb.
- Check doneness by a clean toothpick or a set center, not only by minutes.
| Step | Why it matters | Quick tip |
|---|---|---|
| Room temperature | Better emulsification | Bring ingredients out 30–60 minutes before baking |
| Measure flour | Prevents dense texture | Spoon and level, don’t scoop |
| Cocoa choice | Leavening reaction & color | Use natural cocoa in the recipe batter |
Make-ahead, storage, and freezing: keep your cake fresh for days or months
Treat cooled layers like fragile food cargo: let them cool completely before wrapping so condensation doesn’t create soggy surfaces.
Wrap each layer tightly in plastic, then add a second layer of foil. Place wrapped layers flat in a pan or on a sheet to protect the shape during freezing.
Freeze plain layers up to 1–3 months. Thaw overnight in the refrigerator with wrapping intact to hold moisture.
Buttercream can be made 2–3 days ahead; chill and re-whip briefly before spreading. Frosted desserts refrigerate for several days; use a cake carrier to protect decorated surfaces during transport.
- Assemble the day before for parties and refrigerate; bring to room-ish temperature before serving for best texture.
- Sheet pans and sheet cakes keep at room temperature, tightly covered, for about three days.
- If freezing a frosted item, thaw overnight in the fridge, then finish at room temperature for clean slices.
“When time is tight, bake layers one day, frost the next, and decorate the morning of the event.”
| Item | Storage | Notes |
|---|---|---|
| Unfrosted layers | Freezer, 1–3 months | Wrap plastic + foil; store flat in a pan |
| Buttercream | Refrigerate, 2–3 days | Re-whip before use |
| Sheet cakes | Room temp, ~3 days | Keep tightly covered |
Conclusion
Finish strong by focusing on a few practical steps that guarantee a tender, deeply flavored result.
Measure flour accurately, whisk in powder thoroughly, and use hot liquid to bloom the cocoa so the batter develops real depth. Trust a thin batter and check centers by feel and minutes—don’t rely on time alone.
Frosting mastery comes from a stable buttercream built with butter, confectioners’ sugar, cocoa, a splash of cream or milk, and vanilla for balance. Smooth layers in two 9‑inch pans or convert to a 9×13 pan or sheet to match your guest list.
Bring eggs and dairy to room temperature, keep a cup measure handy for even layers, and tweak salt or butter to refine flavor. Cool completely, wrap well, and freeze or refrigerate so timing the celebration stays stress‑free.