Birthday Cake Photoshoot Ideas: Creative Tips for Stunning Shots
Fact: more than 70% of people say candid images from a casual picnic or party feel more meaningful than polished studio frames.
This Website contains affiliate links. That means I may earn a small commission if you purchase through my links, at no extra cost to you.
This guide packs practical tips to make your next celebration look intentional and personal. You’ll learn how to use simple props, like number candles, cherries, and fresh florals, to upgrade a budget Walmart or Safeway cake into shareable moments.
We cover lighting tricks—from a retro point-and-shoot flash for nostalgia to a DIY spotlight made by shining a flashlight through a tube. Try a white sheet as a seamless backdrop for clean portraits, or embrace a Miami beach picnic vibe with roses and heart-shaped treats for outdoor charm.
For first-year sessions, plan the flow: family portraits, the smash, then a warm bath. Keep safety simple—remove hard toppers and large pearls—and match cake colors to outfits and props for cohesive frames.
Ready for practical, budget-friendly ideas and step-by-step setups that work in small spaces or on the sand? This list will make your special day photos feel polished without fancy gear.
Key Takeaways
- Practical setups: DIY backdrops and simple props turn store-bought treats into great photos.
- Lighting options: Use on-camera flash for retro vibes or window light for soft skin tones.
- Baby sessions: Follow family → smash → bath flow and prioritize safety.
- Styling matters: Coordinate cake, outfits, and florals for cohesive images.
- Low-cost tools: Apps like LensBuddy and Dazzcam, plus timers and gridlines, make self-shooting easy.
What Makes a Great Birthday Cake Photoshoot Right Now
Creators are getting the most engagement with visually cohesive, nostalgia-leaning setups. UGC trends show heart-shaped vintage treats, Polaroid filters, and matched outfit-to-dessert palettes drive clicks and saves.
Define the look: pick a limited palette, a simple backdrop, and one statement dessert to anchor the frame. Small props—roses, number candles, cherries—add graphic punch without clutter.
Lighting is key. Use on-camera flash for party energy and a film vibe, or soft window light for creamy skin tones. Plan a short photo shoot list: set scene, candle wish, then the celebration bite to capture variety fast.
“Tactile details—frosting swirls, flame glow, and hand interaction—make close-ups feel alive.”
- Pick a theme that fits the year and mood.
- Keep people natural: seated, slight lean-in, or candid tasting.
- Shoot portrait and square formats so the main decor stays in frame.
Set the Scene: Backdrops, Props, Lighting, and Style
A clean backdrop and a few well-chosen props make styling fast and repeatable. Pick one anchor — a white sheet, seamless paper, or a picnic blanket — and layer simple accents so the frame reads at a glance.
Simple backdrops that pop
Tape a wrinkle-free white sheet or an Amazon paper roll to the wall for a studio feel. Outdoors, a picnic blanket adds texture and lifestyle context.
On-trend props that add personality
Use balloons, flowers, ribbons, a tiara, number candles, and Polaroid prints. Keep one focal prop and avoid clutter so the main dessert and hands stay visible.
Lighting that flatters
Start with soft window light to bring out frosting texture and skin tones. For a retro edge, use on-camera flash or a compact point‑and‑shoot for crisp party-style edges.
Color cohesion and surface styling
Match outfit and makeup to two or three core colors across props and dress. Elevate a supermarket buy by adding a small pedestal, a gold fork, and a few supermarket flowers.
- DIY hacks: Make a spotlight by shining a flashlight through a tube (TP roll) for a dramatic circular highlight.
- Height tricks: Stack hat boxes or books under fabric to build layers behind the subject.
- Workflow: Style first, test lighting with Dazzcam or LensBuddy, then bring the dessert in last to avoid melting frost.
“Simple repeats — color, texture, and a clear focal point — make every frame feel intentional.”
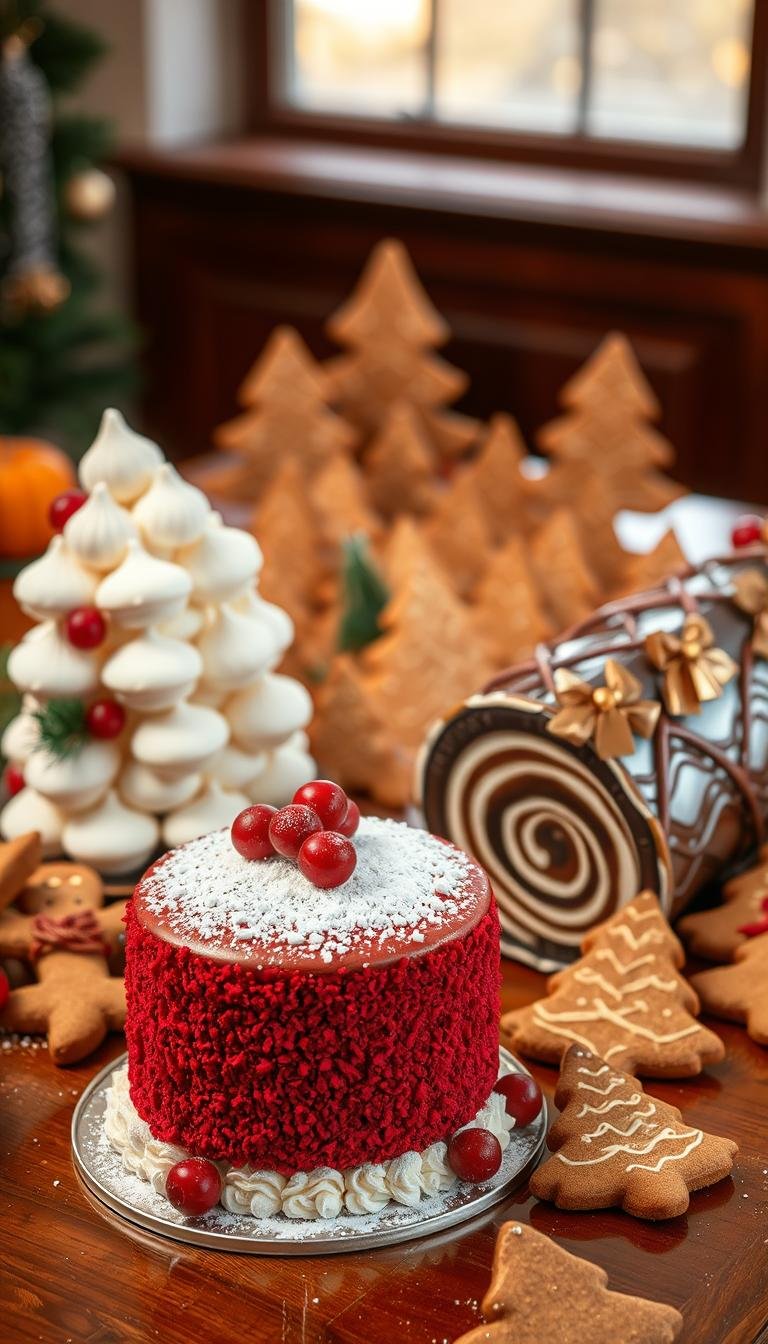
Birthday Cake Photoshoot Ideas for Grown‑Up Celebrations
Adult sessions reward a clear mood and one standout prop. Keep styling simple so the frame reads fast and feels polished.
Beach picnic aesthetic
Pair a heart-shaped cake with pink roses and coastal views. Anchor the setup with a mini picnic table and a neutral blanket for steady composition.
Vintage heart vibe
Style a piped heart cake topped with cherries and use on-camera flash for an early‑2000s party feel. This produces punchy highlights and nostalgic texture.
DIY home studio
Hang a white backdrop, set a tripod, and make a circular spotlight through a tube for drama. Small adjustments to height and distance change the mood fast.
Jordan Year & personal themes
Lace up sneakers and pose in a casual fit for bold, graphic portraits. Try photo-collage or zodiac motifs to personalize the theme and encourage shares.
- Budget glam: elevate a grocery-store cake with fresh flowers, thrifted candle holders, and number candles for luxe on a budget.
- Keep it fun: a champagne pop or confetti toss adds movement to close the shoot.
birthday cake photoshoot Ideas for Baby’s First Year and Cake Smash
Start with calm family portraits, then let loose for the smash, and finish with a warm bath for candid, joyful images.

Session flow and safety
Plan the session as three parts: family poses, the smash moment, and a bubbly bath finale. This order keeps the little one relaxed and captures key emotions.
Safety first: remove large pearls and hard toppers, choose soft decorations, and size the smash cake so it’s easy to grab.
Theme ideas and props
- Butterfly princess: wings, pompoms, a sparkly crown, and pastel buttercream for delicate frames.
- Candy-color delight: sprinkles, bright backdrops, and bold props for energetic images.
- Cottagecore & garden fairy: florals, lace, and pixie wings for soft, airy tones.
- Mermaid/aquaworld and fruity milk-bath: pearls, shells, strawberries, and citrus for sensory shots.
- Holiday or sunflowers/pink glam: themed accents and twinkle lights for seasonal charm.
Lighting and capture tips
Use soft window light or open shade so skin tones and frosting texture read well during the smash. Focus on tiny hands, surprised smiles, and eye contact—these moments tell the story.
“Keep backgrounds simple so the baby remains the center of every photo.”
| Theme | Key Props | Best Light |
|---|---|---|
| Butterfly princess | Wings, crown, pastel frosting | Window light |
| Candy-color | Sprinkles, bright backdrop | Open shade |
| Mermaid / Fruity milk bath | Pearls, shells, strawberries | Soft natural light |
Posing and Composition Prompts That Always Work
Small actions tell the story. Use short, repeatable prompts to make each frame feel intentional. Plan a few beats and guide people with simple directions so everyone relaxes and enjoys the shoot.
Make a wish: light, blow, and capture the candle glow
Frame the wish as three shots: lighting, the warm glow on the face, and the blow. Capture the candle flame close enough to show warmth. These beats create a tiny narrative the viewer can follow.
Taste test moments: finger‑frosting and playful “messy” shots
Prompt a gentle taste test—finger to frosting, a shy smile, a playful messy lick. These candid frames drive engagement and feel authentic.
Mirror and close‑ups: reflections, textures, and details
Use a clean mirror to add depth. Shoot reflections and then tight close-ups of piping, cherries, and frosting peaks. Texture sells the image.
Movement cues: confetti toss, champagne pop, and laugh‑in‑motion
For motion, call for a quick toss or pop. Use burst mode or a faster shutter speed to freeze joyous action. Motion adds energy and variety to the set.
Angles and crops: top‑down for design, tight portraits for emotion
Shoot top-down to show design and plate styling. Switch to eye level for connection. Finish with close crops on hands, candles, and frosting details to tell intimate moments.
“Ask subjects to lean in, chin toward the dessert, and soften their smiles for instant warmth.”
Quick checklist for the shoot:
- Wish sequence: three beats—light, glow, blow.
- Taste test: candid frosting-on-finger frames.
- Mirror magic: reflections then texture close-ups.
- Movement: confetti or champagne, burst mode advised.
- Angles: top-down, eye level, tight crops.
| Prompt | Why it works | Camera tip |
|---|---|---|
| Wish sequence | Creates a mini story and a natural climax | Burst mode; focus on face and candle |
| Taste test | Authentic, shareable emotion | Use shallow depth for soft background |
| Mirror shots | Adds depth and symmetry | Shoot both reflection and close detail |
| Confetti/Pop | Injects motion and joy | Fast shutter; continuous autofocus |
How to Capture the Look: Shooting, Flash, and Editing Styles
Decide how you want the final gallery to feel, then match lighting, angles, and edits to that mood. A clear plan saves time and keeps every shot consistent.

Point-and-shoot flash aesthetic
Use on-camera flash or a compact point‑and‑shoot for crisp edges and a party-night vibe. This look lifts glossy frosting highlights and produces punchy contrast.
Step back from walls to reduce harsh shadows. Shoot bursts for candle blows or confetti tosses so you can pick the best moment.
Natural light basics
Position the cake near a bright window with sheer curtains to get soft highlights and even tones. Outdoors, choose open shade for consistent light.
Set a custom white balance or plan to correct mixed light in editing so skin and dessert colors stay true.
Smartphone settings and home workflow
Enable gridlines, drag exposure down slightly to protect highlights, and use a timer app for group shots or self-portraits. Apps like LensBuddy help with timing and composition.
Simple gear—tripod, white sheet backdrop, and a clean lens—makes a reliable birthday photoshoot home setup.
Editing touches that sell
Unify tones: cool whites for vintage moods or warm skin tones for beach themes. Keep the cake’s true colors accurate while harmonizing the frame.
Apply selective sharpening to frosting peaks and a light film grain across the image for texture. Avoid over‑processing skin; keep faces soft.
“Selective clarity on the dessert and subtle grain give modern photos a tactile, shareable feel.”
- Shoot checklist: clean lens, lock focus on the front edge of the cake, capture wide/medium/close.
- Watch white balance and mixed lighting indoors.
- Use Dazzcam for Polaroid-style filters when you want a retro finish.
| Task | Why it matters | Tip |
|---|---|---|
| Lock focus on dessert | Sharp details sell likes and prints | Tap focus or use back-button for DSLR |
| Use burst mode | Grab the best candle blow or mess moment | Shoot 5–10 frames per sequence |
| Check files | Wide/medium/close builds a cohesive gallery | Delete bad frames and sync edits |
Plan Like a Pro: DIY Checklist, Budget Tips, and When to Hire
A clear timeline and a small kit let you capture strong images without pro gear.
DIY checklist
Must-pack items
Pack a backdrop or clean sheet, the cake and candles, a lighter, and fresh florals. Add balloons, wipes, a drop cloth, scissors, and tape. These few items cover styling and cleanup so you can reset fast.
Budget wins
Stretch your dollar
Save by buying a $5–$30 store cake and asking the bakery to add simple piping. Thrift candle holders and shop Amazon for inexpensive backdrops. Creators often manage a full shoot at home with these small buys.
When to hire a photographer
Choose pro help for keepsakes
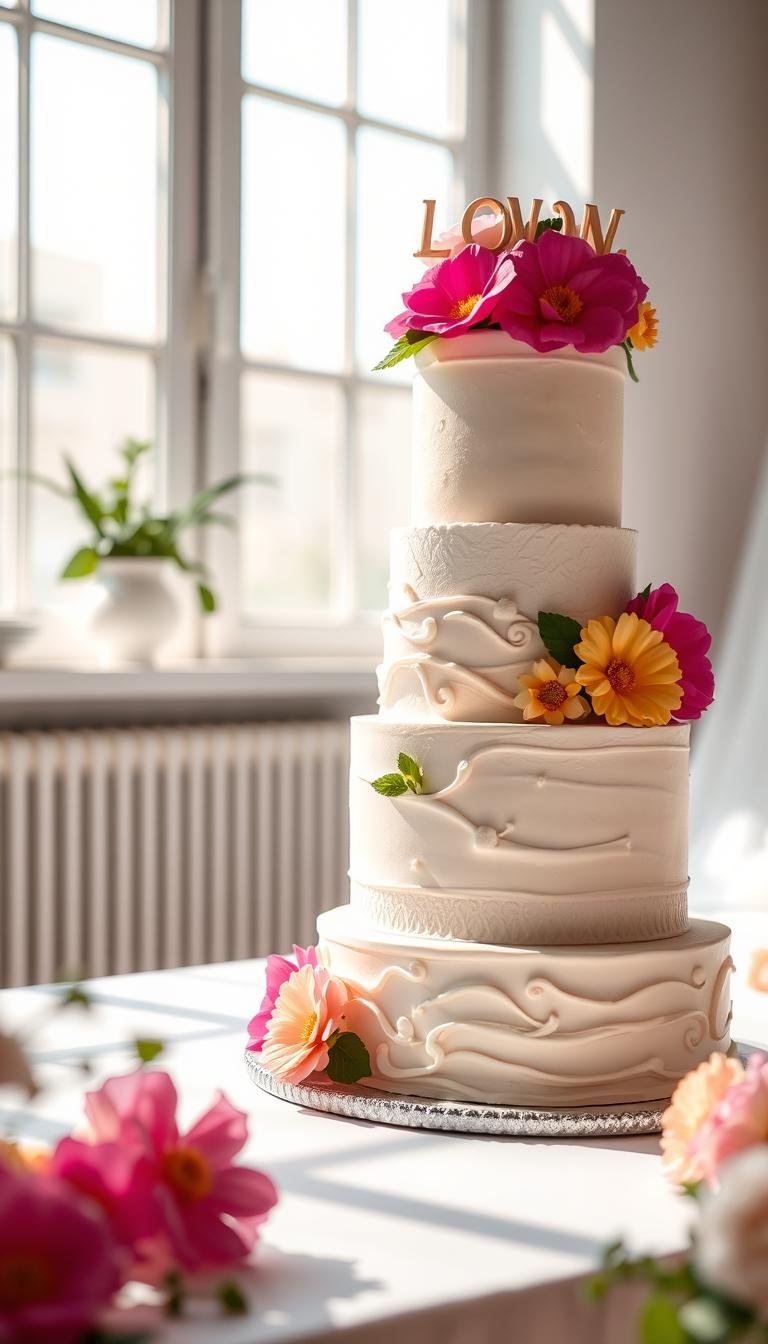
For milestone sessions, a photographer adds custom sets, pro lighting, and fine prints you’ll keep for decades. Hire when you want heirloom albums or large wall art from a special day.
Timing and logistics
Schedule and safety
Plan golden hour outdoors or mid-morning window light for birthday photoshoot home setups. Keep baby nap times in mind to avoid fussy frames. Remove hard toppers and keep wipes and a warm towel ready after the smash.
Quick workflow tips
- Space: leave room to move; set cake height to chest or waist level for seated shots.
- Time management: build a short shot list — scene, candles, taste test, hero — and use timers.
- Sharing plan: shoot portrait and square crops; pick 6–9 hero photos plus BTS.
| Item | Real cost example | Why it helps |
|---|---|---|
| Store cake | $5–$30 (bakery counter) | Fast, low-cost centerpiece |
| Thrift candles/holders | $3–$15 | Adds vintage or luxe accents |
| Amazon backdrop | $10–$25 | Consistent, clean background |
| Photographer | $200+ for milestone packages | Pro lighting, prints, and custom sets |
“Set a max spend for props and prints, and use a simple mind map to keep tasks tidy.”
Conclusion
, Close the session with a simple plan that highlights real moments and keepsakes.
Recap the best ideas: retro flash, heart-shaped desserts, coastal picnics, and easy at-home backdrops give you solid birthday photoshoot inspo. For families, a cake smash works best around naps, soft light, and a tidy, safe set.
Pick a theme that fits the year — butterfly princess, garden fairy, aquaworld, or fruity milk‑bath — and build props, flowers, and a dress to match for cohesive frames.
Keep safety first: remove hard toppers and large pearls, use soft frosting for a first birthday cake, and let the baby lead the fun. Choose 6–9 hero photos plus detail shots, edit with restraint, and consider prints for keepsakes.
Have fun and make room for surprise smash moments — those candid beats become the memories you print and share.