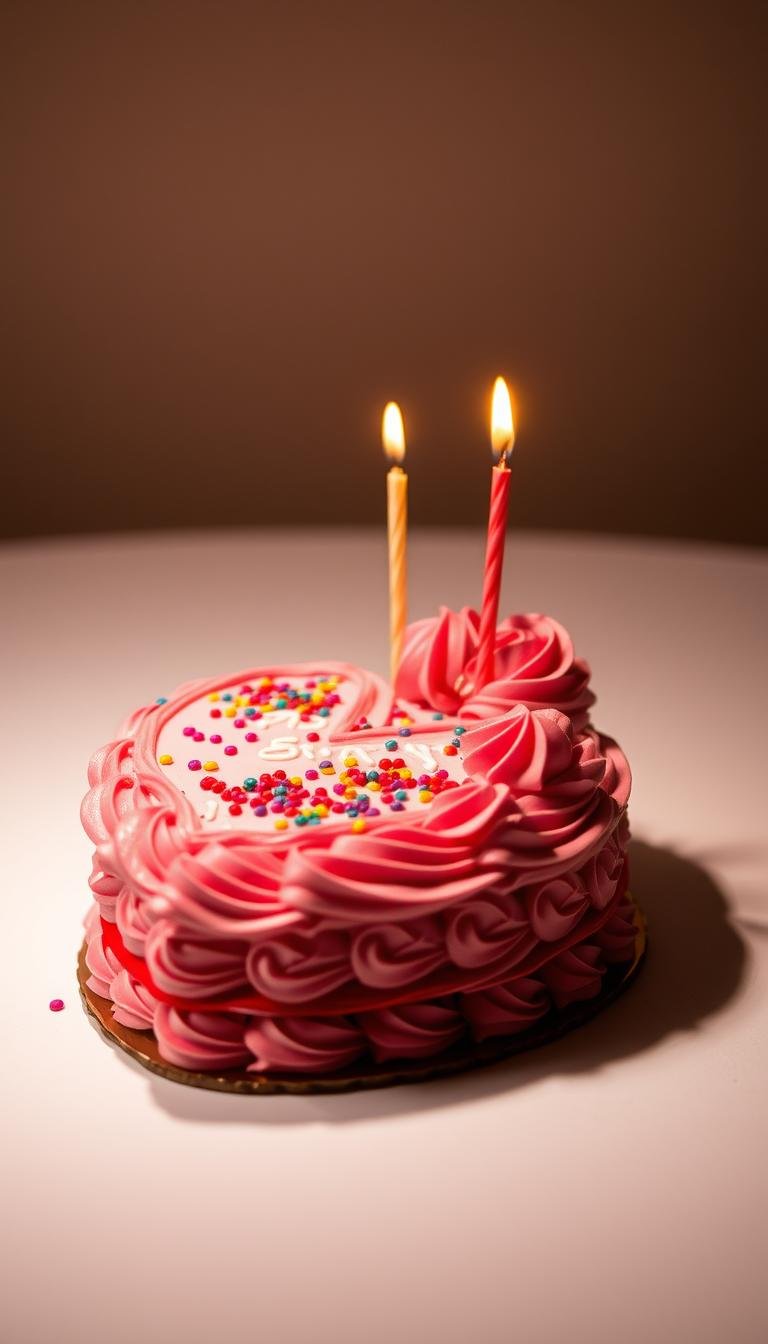
Birthday Cake Heart: Simple Recipe and Decoration Ideas
One surprising fact: many home bakers see a 25–30% improvement in crumb texture when they whip whole eggs with sugar and stream in scalded milk, a trick adapted from King Arthur Flour methods.
This Website contains affiliate links. That means I may earn a small commission if you purchase through my links, at no extra cost to you.
This guide shows how to turn two 8-inch rounds into a neat birthday cake heart without a specialty pan. You can pick a fluffy vanilla-lemon base or a rich chocolate version that bakes at recommended temps for even doneness.
Follow clear steps: whip for aeration, add scalded milk (180–185°F) with melted butter and oil, and bake at 335°F for the vanilla-lemon rounds. Cut two 5-inch lines at right angles, join curved cutoffs with frosting, chill, then finish with piping or simple borders.
Practical tips: use King Arthur Measure for Measure or Bob’s Red Mill 1-to-1 for gluten-free options, refrigerate the finished cake, and allow about 30 minutes at room temperature before serving to restore texture.
Key Takeaways
- Choose vanilla-lemon or chocolate based on preferred flavor and bake time.
- Use whipped whole eggs and scalded milk for a light, even crumb.
- Assemble two 8-inch rounds into a heart with simple cuts and frosting joins.
- Gluten-free flours from King Arthur and Bob’s Red Mill work well with minor adjustments.
- Refrigerate the finished cake and let it sit at room temperature ~30 minutes before serving.
What readers want right now: a simple, romantic birthday cake heart
No specialty pan needed: two 8-inch rounds, two 5-inch guides, and a little frosting make an elegant heart shape. Mark two 5-inch lines at right angles, then use a serrated knife to trim the bottom point and smooth the curves.
Quick tip: chill each trimmed layer in the freezer for 10–30 minutes. A brief freeze firms crumbs and makes handling and frosting much neater.
Attach the curved cutoffs with a thin ribbon of frosting, press gently, and chill again to lock the shape. For a clean finish, pipe a shell border with a Wilton 32 tip, then add small lines or dots using tips 18 and 3.
- Flavors: vanilla-lemon bakes at 335°F; chocolate buttermilk at 350°F.
- Frosting: cream cheese is less sweet and pipes nicely; chocolate American buttercream is sturdy for gradations.
- Beginner-friendly: practice piping on parchment first, then personalize with a short message or a few cherries for valentine day flair.
Recipe at a glance: vanilla-lemon and chocolate heart options
Pick your base and plan the day. Choose a light vanilla-lemon sponge for an airy crumb or a chocolate buttermilk version for a moist, stable finish. Both turn two 8-inch rounds into one shaped dessert that serves about 12–16.
Quick comparison: the vanilla-lemon method whips whole eggs with sugar, then streams scalded milk with butter and oil for extra lift. Bake two 8-inch layers at 335°F for a fluffy, moist crumb.
The chocolate buttermilk path uses egg whites, reverse-creamed butter, and buttermilk. Bake at 350°F; layers rise flat and level easily—ideal when you want neat stackable layers.
Skill level, yield, and total time
Both options suit home bakers with basic skills. A stand mixer or hand mixer speeds mixing and yields consistent results.
Active time ranges 30–45 minutes. Baking runs 32–45 minutes depending on recipe. Allow chilling windows to firm layers before trimming and frosting.
| Feature | Vanilla-Lemon | Chocolate Buttermilk | Yield / Notes |
|---|---|---|---|
| Mixing method | Whip whole eggs & sugar; stream scalded milk | Egg whites; reverse-cream butter into dry | Stand mixer or hand mixer recommended |
| Bake temp & time | 335°F — 32–40 min | 350°F — 35–45 min | Times vary by oven; test with toothpick |
| Texture & finishing | Airy, delicate crumb; may need light trim | Moist, fine crumb; bakes flat for easy leveling | Stacks into a single heart; serves 12–16 |
Pick the base that matches flavor and event style, then follow the same assembly steps to shape, chill, and finish. This simple cake recipe workflow keeps the process predictable and fun.
Ingredients you’ll need for the cake layers
Start by stocking the pantry with precise, quality ingredients. That sets the tone for even rise, clean edges, and reliable assembly.
Vanilla-lemon base
Pantry lineup: sifted all-purpose flour, baking powder, granulated sugar, 4 eggs, milk (or thinned canned coconut), vegetable oil, 1/4 cup unsalted butter, lemon zest, and vanilla extract.
Chocolate base
Use AP flour, your preferred cocoa (dark or Dutch), baking powder, a pinch of salt, egg whites (or 3 whole eggs for stability), buttermilk (or yogurt/sour cream), a bit of oil and butter, plus vanilla for depth.
Smart swaps and what not to change
Keep baking powder non-negotiable; baking soda won’t reproduce the same lift. Do not swap granulated sugar for liquid sweeteners or reduce it significantly.
- Measure flour by weight for consistent height and texture.
- For dairy-free vanilla, replace butter with extra oil; flavor is richer with butter, but texture holds.
- GF tip: KAF Measure for Measure bakes lighter edges than Bob’s 1-to-1, which stays slightly denser but works well under frosting.
Frosting choices: cream cheese or chocolate buttercream
Pick a finish that suits your flavor and decorating plan. A soft, tangy cream cheese option gives a vintage pink look, while a chocolate American buttercream creates crisp ridges and stable borders. Both can be piped neatly with tips like Wilton 32, 18, 10, and 3.
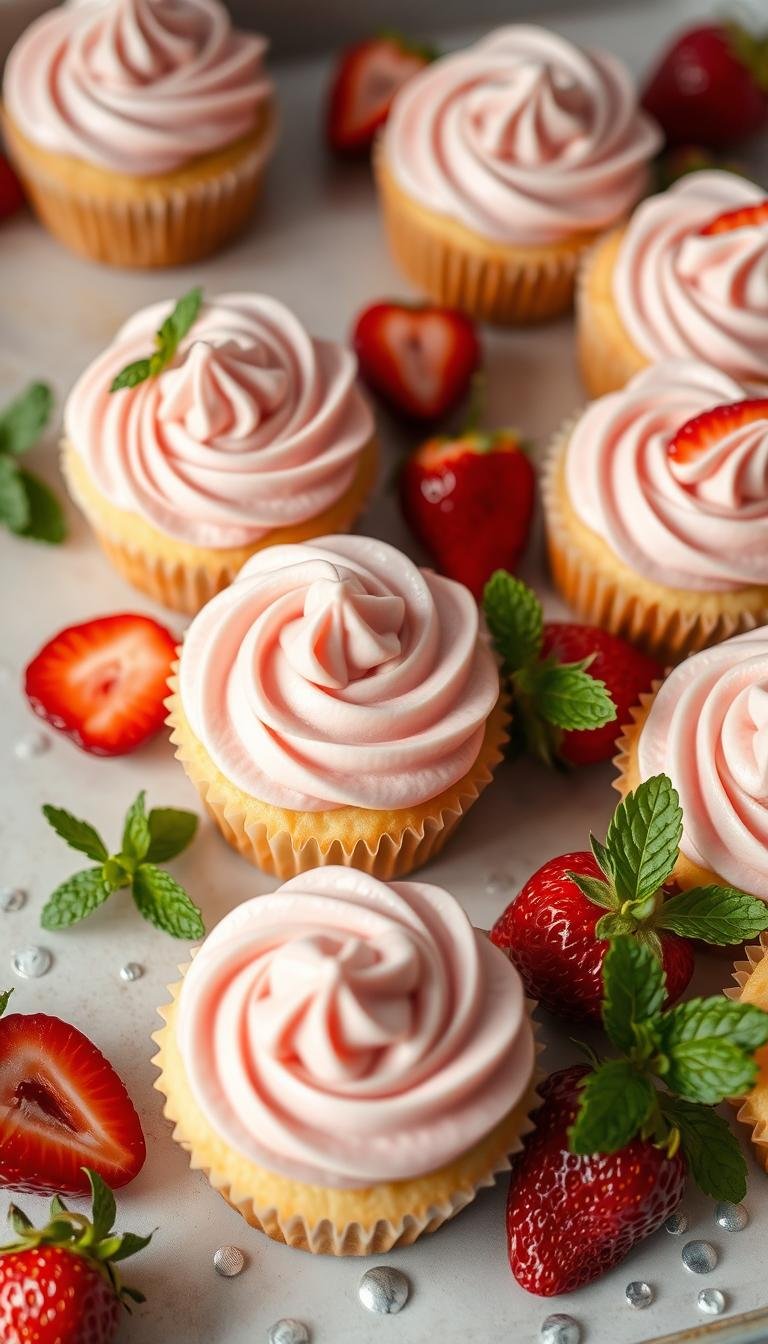
Lower-sugar pink cream cheese frosting that pipes well
Use full-fat cream cheese beaten with very soft unsalted butter until smooth. Gradually add powdered sugar, a splash of vanilla, and a pinch of salt.
Add natural pink powders (McCormick Nature’s Inspiration or Supernatural) or a tiny amount of Wilton gel for tinting. This version is pipeable but stays relatively soft; keep the finished dessert refrigerated and allow 30 minutes at room temp before slicing.
Chocolate American buttercream with gradations for décor
Beat butter with powdered sugar, cocoa, vanilla, and cream until smooth. For three shades, stir in cooled melted dark chocolate in stages and adjust cream to control thickness.
This buttercream holds edges well and works for vintage lines, borders, and stacked gradations.
Getting frosting consistency right for smooth coats and piping
A spreadable base coat should glide on easily. For piping, firm the mix slightly by adding more powdered sugar or chilling briefly to help the frosting firm for clean detail.
Test a small tinted batch before committing to full decoration. Chill the frosted dessert briefly so smoothing and piping stay neat, then finish with your chosen Wilton tips for classic borders.
| Feature | Cream Cheese Frosting | Chocolate American Buttercream |
|---|---|---|
| Main fats | Full‑fat cream cheese + very soft unsalted butter | Unsalted butter (room temp) |
| Sweetener | Powdered sugar (lower amount) | Powdered sugar (higher amount) |
| Texture & use | Soft, pipeable; refrigerate before serving | Sturdy, holds piped ridges and gradations |
| Tinting | Natural powders or Wilton gel for pinks | Gel tints or melted chocolate for shade depth |
Tools that make it easier
A small set of reliable tools makes trimming and decorating much less stressful.
Mixing and handling: Use a stand mixer or a compact hand mixer to whip eggs, cream butter, and blend batter without overworking it. A mixer stand or a sturdy bowl helps keep hands free for measuring and folding.
Cutting, smoothing, and support
An offset spatula and a bench scraper give clean sides and crisp curves. A serrated knife trims rounds into shape with fewer crumbs. Place layers on a 10-inch cake board or flat plate for steady assembly.
Piping and finishing
- Small piping bags with plastic couplers speed color changes and let you pipe small shells and dots.
- Essential tips—like Wilton 32, 18, 10, and 3—cover shells, ropes, rounds, and fine writing.
- Use parchment rounds and light non-stick spray for clean release.
Short freezer rests (10–30 minutes) firm layers for neater trimming and easier frosting.
birthday cake heart
Start by placing one cooled 8-inch layer on a board and marking two 5-inch guide lines that meet at a right angle. Use a serrated knife to cut along those marks and remove the curved sections that form the bottom point.
How to cut two 8-inch rounds into a perfect shape
Place the second layer beside the first and trim mirror-image curves. Press the curved offcuts gently to the top to create the lobes, using a small amount of frosting as glue. If the center dip is uneven, shave a tiny notch between the lobes so the silhouette reads clearly.
Using frosting to secure trimmed curves and chill before finishing
Chill the shaped assembly in the freezer for 10–30 minutes to set joins and stop sliding. Add a thin crumb coat to seal crumbs and unify the surface before smoothing.
- Place and mark: two 5-inch lines at 90° on the top layer, then cut with a serrated blade.
- Attach lobes: press trimmed pieces in place and tack with frosting.
- Set and seal: freeze briefly, then apply a thin coat to prep for decoration.
- Finish: pipe a shell border around the base and a matching border around top with Wilton 32; add a few dots or short message on the top heart for a vintage look.
Tip:Practice a few shells on parchment if you’re unsure—steady, consistent pressure makes tidy shells and lines.
Mixing the vanilla-lemon batter the right way
Start by whipping four eggs with granulated sugar until the mix is thick and pale. Use a whisk attachment for about 2 minutes or a paddle for 5 minutes to reach ribbon stage. Then add vanilla extract and lemon extract and mix briefly.
Whisk flour, baking powder, and salt in a separate bowl. Fold the dry mix into the batter on low speed until just combined. Stop as soon as the flour disappears to avoid a tough crumb.
Scald milk with lemon zest to 180–185°F, then remove from heat. Stir in butter and oil until melted and smooth. Make sure the liquid is warm and fluid before streaming it into the batter.
Stream the milk mixture into the batter on low speed so the emulsion forms without losing air. Divide the batter evenly (about 580 g per pan) and set aside any small excess. Level the tops and bake at 335°F until the top is set and a toothpick comes out clean or with a few tiny crumbs.
| Step | Action | Outcome |
|---|---|---|
| Beat eggs & sugar | 2 min whisk / 5 min paddle | Ribbon-thick base for light cake |
| Fold dry ingredients | Low speed, stop when mixed | Avoids toughness; even texture |
| Scald milk & add fats | 180–185°F; stir in butter + oil | Extra lift and moist crumb |
Baking times and temperatures that actually work
Oven temperature and timing make the biggest difference between a tender crumb and a dry finish. Use the temps below as a tested starting point, then adjust for your oven and pans.
Recommended bake temps
Vanilla-lemon: set the oven to 335°F and plan for about 33–45 minutes for 8-inch cake layers. This slightly lower temp helps produce an airy crumb across multiple tests.
Chocolate buttermilk: bake at 350°F for roughly 32–35 minutes. The structure sets faster and these layers usually need minimal leveling.
Doneness cues and handling
Make sure to check with a toothpick in the center; a clean or lightly crumbed pick means it’s done without overbaking. Look for a set top and slight pull from the pan as visual cues.
Cool in the pan 10–15 minutes to reduce breakage, then turn out to a rack to finish cooling so steam won’t soften the crust. For gluten-free mixes, watch timing closely—some blends bake slower in the middle.
- Record exact time in your kitchen; different pans shift minutes.
- Aim for consistent doneness on both layers to speed stacking and trimming.
Level, stack, and crumb coat like a pro
After cooling, take a moment to level each layer so stacked pieces sit flat and true.
Anchor the first layer by placing a small swipe of frosting on the board. Set the bottom layer on that dab so the assembly won’t slide as you work.
Trim domes if present so cake layers stack securely without rocking. Spread the filling evenly and place the top cake layer upside down to create a naturally flat top for the final finish.
Why a thin crumb coat matters and quick-chill timing
Apply a thin crumb coat that just catches stray crumbs rather than burying them in heavy frosting. This thin seal makes smoothing easier and keeps the silhouette clean.
Chill briefly until the frosting firm surface resists a fingertip. Freeze 10–30 minutes or refrigerate about 20–60 minutes. Once the crumb coat feels set and stable, proceed with the final coat.
- Use an offset spatula for corners and a bench scraper for sides to keep the silhouette tidy.
- Keep layers aligned at the center notch to maintain a crisp outline when frosted.
- Move on to the finish coat only when the crumb coat supports smooth passes without dragging crumbs.
Quick tip: setting the top cake layer upside down gives you a naturally flat surface that reduces trimming and speeds decorating.
| Step | Action | Timing / Cue |
|---|---|---|
| Level layers | Trim domes; check for wobble | Immediately after cooling |
| Anchor base | Small swipe of frosting on board | Before placing bottom layer |
| Crumb coat | Thin layer to catch crumbs | Chill until frosting firm to touch |
| Chill | Freeze or fridge to set | 10–30 min freeze / 20–60 min fridge |
Smoothing on your final coat
A steady second coat transforms the surface into a canvas for piping and accents.
Apply a generous second coat once the crumb coat is firm to the touch. Spread the frosting in steady, light passes to avoid pulling crumbs from beneath. Rotate the turntable slowly as you work to keep pressure even and symmetry intact.
Use a bench scraper on the sides for a clean plane. Use a small offset spatula to refine the lobes and the point so the heart silhouette reads clearly. Keep a warm towel nearby to wipe tools between passes for a pristine finish.
Chill the top cake again after smoothing so the finish resists smudging during piping and when placing accents. Make sure to allow extra chilling time if you used cream cheese frosting, since it stays softer even when cold.
- Spread a thicker second coat; avoid heavy scraping.
- Detail lobes and point with a small spatula for definition.
- Chill to set before piping; chocolate buttercream firms into crisper edges.
| Action | Tool | When to do it |
|---|---|---|
| Second coat application | Offset spatula / bench scraper | After crumb coat firms |
| Refine lobes & point | Small offset spatula | While rotating turntable |
| Chill to set | Freezer or refrigerator | 10–30 min; longer for cream cheese |
Decoration ideas that wow but stay simple
Small piping choices give big visual payoff with very little extra work. Focus on a few classic elements to finish your layered cake without overcomplicating the process.
Shell border with Wilton tips
Outline a shell border around the base, then mirror a shell border around the top to frame the shape neatly. Start with Wilton 32 for the main pass and add a second, slightly smaller pass with tip 18 for depth.
Vintage lines, dots, and messages
Use small round tips to pipe small lines, dots, and short messages across the top cake layer. Try Wilton 10 for bolder dots and writing, and tip 3 for fine lines and delicate lettering.
Maraschino cherry accents and neat borders
Finish with maraschino cherries spaced evenly around top for a nostalgic pop. Keep spacing consistent along borders and lobes so the final look reads symmetrical.
- Steady hand: plant your elbow and pipe small, steady shapes on a chilled cake so mistakes scrape away cleanly.
- Vary tips: use a shell tip for texture, a thicker round for bold words, and a fine round for accents.
- Score light guide marks before piping to keep designs level and balanced.
Coloring your frosting: natural tints and gels
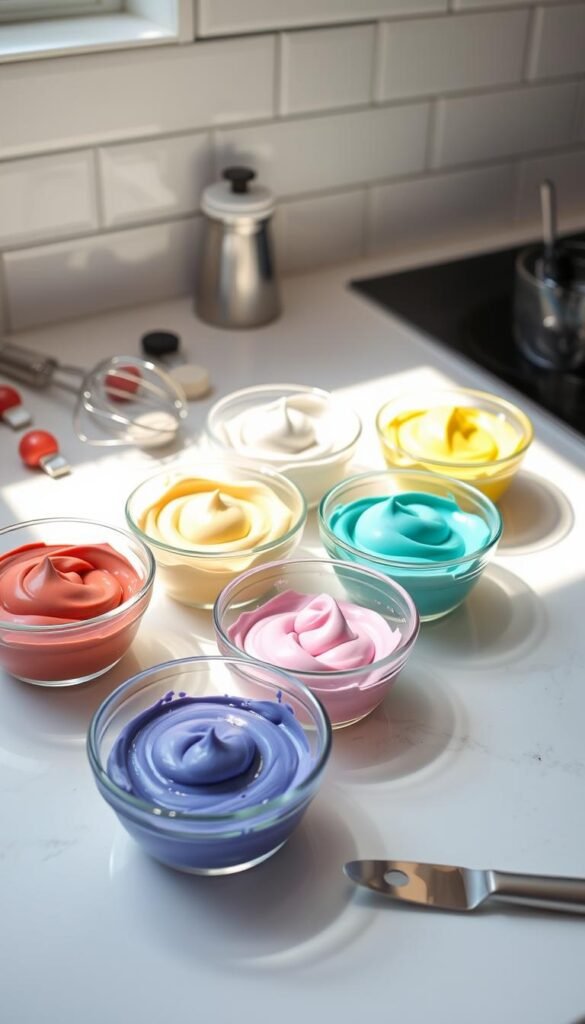
For soft blush tones, powdered berry colors blend in without changing texture; gels are best when you need vivid saturation.
Natural powders like McCormick Nature’s Inspiration or Supernatural mix directly into frosting. Stir them into the bowl so they color without adding liquid. This keeps structure stable and avoids thinning your finish.
Gel colors such as Wilton give bright, precise shades. Add a tiny amount at a time and mix well. Let the tinted batch set aside for a minute so the true hue develops before you decide to add more.
Practical color control tips
If the frosting softens, chill briefly and stir before you pipe. You can also firm it with a small dusting of powdered sugar to recover piping thickness.
Split one batch into two bowls to create a light base and a slightly darker shade. Use the darker tint for borders or lettering and the lighter for broad coverage.
- Stir berry powders directly into frosting to avoid extra liquid that loosens structure.
- Add gel colors in tiny increments for saturated tones; mix and let color set aside a moment.
- If frosting thins, restore texture with powdered sugar or a short chill.
- Test a small spoonful on a plate to preview contrast against the cake before committing.
- For cream cheese frosting, refrigerate until close to serving and allow a 30-minute sit room temperature for best slicing texture.
| Method | Best for | Notes |
|---|---|---|
| Berry powder | Soft pinks, vintage looks | Mix directly; no water; preserves piping strength |
| Gel color (Wilton) | Bold accents, precise shades | Add tiny amounts; let color set before adjusting |
| Fixes | Thinned frosting | Add powdered sugar or chill briefly; then test piping |
Make-ahead, freezing, and timeline planning
Plan your timeline around short chilling windows so each step stays tidy and stress-free. Breaking the work into stages helps you make cake without last-minute rush.
Bake, cool, and wrap each layer tightly in plastic. Store at room temp up to 2 days, refrigerate up to 3 days, or freeze up to 3 months. Label and date wrapped cake layers to avoid freezer flavor transfer.
Freeze to simplify assembly
Use short freezer minutes to firm layers for trimming and shaping. You can assemble straight from the freezer; if the knife resists, let the layers rest 10–15 minutes before cutting.
Frosting amounts and set times
For cream cheese frosting, plan roughly 3 1/4 cups for base coats and reserve about 1 3/4 cups for piping. After stacking and a thin crumb coat, freeze 30–60 minutes or refrigerate 1–2 hours to set before the final finish.
“Set aside a portion of frosting for piping accents so you don’t overuse it in the base coats.”
- Break into stages and set aside work between steps.
- Use freezer minutes to speed trimming and keep crumbs down.
- Plan time for crumb-coat setting so final smoothing is quick.
Storage and serving: fridge, room temperature, and timing
Smart timing—when to chill, when to let it warm—preserves texture and presentation. Follow simple rules to keep the dessert looking fresh and tasting its best.
When to chill and when to let it sit
With cream cheese frosting, always refrigerate the finished cake. If serving within a few hours, it may sit out briefly, but ideally keep it chilled until 30 minutes before slicing. Let the assembled dessert sit room temperature about 30 minutes so the crumb and frosting relax for cleaner cuts.
Slicing, leftovers, and freezing finished cake
- Cover or box chocolate buttercream versions; they can sit at room temperature up to 48 hours. For longer storage refrigerate 5–7 days.
- Chill after decorating so borders set, then temper slightly before serving to restore creaminess.
- Use a long, sharp knife and wipe between slices for tidy portions that preserve the design on the remaining cake.
- Keep a small 1/2 cup reserve of frosting chilled for touch-ups later in the day.
- Wrap leftovers tightly; freeze whole or sliced (no cherries) up to 3 months. Slices thaw in 10–30 minutes depending on thickness. Label and date packages to track freshness.
Dietary notes: gluten-free flours, egg replacers, and dairy-free tweaks
Substituting ingredients can affect rise, texture, and timing. Make swaps with the aim of keeping the original structure intact.
Gluten-free blends: choose King Arthur Measure for Measure when you want fluffier layers and cleaner edges. Bob’s Red Mill 1-to-1 works well too but can bake slightly denser and take a little longer in the center.
Egg replacer guidance
The vanilla‑lemon method depends on whole-egg aeration, so an egg replacer will not reproduce that lift reliably. Reserve egg replacer use for the chocolate version, which tolerates it better.
Dairy-free and other swaps
For dairy-free needs, swap butter for extra vegetable oil in the vanilla base and use dairy-free milk or yogurt. For chocolate, use vegan butter sticks and alt milks; keep cocoa and sugar unchanged.
- Do not replace baking powder with baking soda; preserve written amounts to maintain lift.
- When a recipe lists all-purpose flour, that means conventional wheat flour unless a 1-to-1 GF substitute is specified.
“Expect slight texture differences with GF blends, but both recommended brands make moist layers that hold up under frosting.”
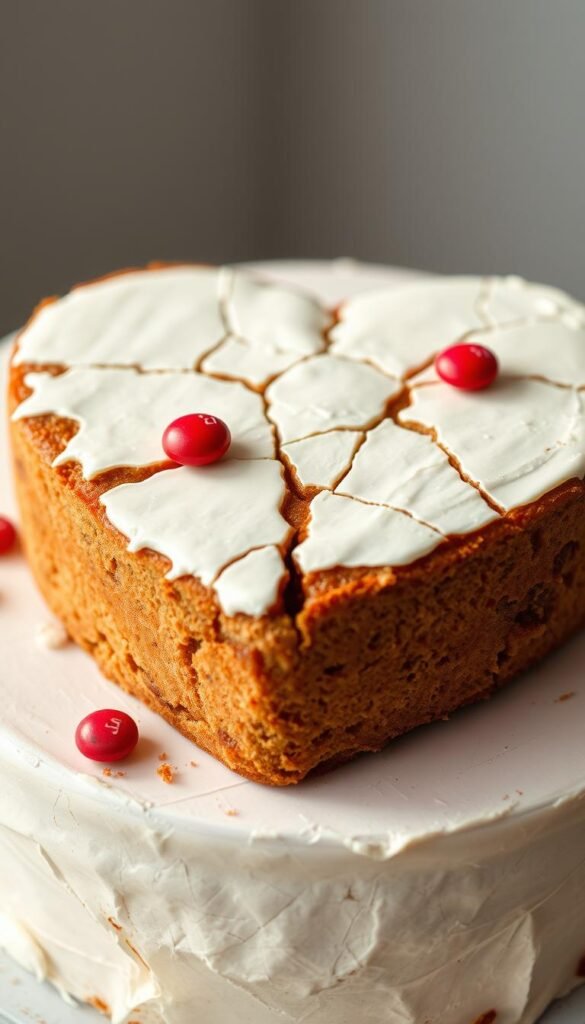
Troubleshooting common heart-cake issues
Many finish-line issues come down to measurement, temperature, or a short chill. Read these quick fixes to rescue layers, restore frosting, and clean up piping without starting over.
Uneven rise, dense middles, and soft layers
Make sure you measure flour accurately. Weigh flour or use the spoon-and-level method to avoid dense middles.
Mixing matters. Undermixed batter can tunnel; overmixing makes it tough. Mix just to combine using a stand mixer or hand mixer as directed.
Confirm oven temps and pan sizes. The validated temps—335°F for vanilla and 350°F for chocolate—help the cake bake evenly to the center.
Frosting too soft and fixing piping on chilled cakes
If cream cheese frosting is loose, chill the bowl and rewhip briefly. Keep the assembled dessert cold so details hold.
For buttercream, add a tablespoon of powdered sugar or chill briefly to firm piping. To fix a decoration, lift mistakes gently with a clean offset spatula and re-pipe on the chilled surface.
When writing on a chocolate heart cake, sketch a guide line and pipe slowly with a small round tip to reduce wobble.
| Problem | Quick fix | When to use |
|---|---|---|
| Dense middle | Weigh flour; mix minimally | Before baking |
| Soft layers | Short chill 10–30 min | Before trimming/stacking |
| Loose frosting | Chill bowl; rewhip or add sugar | Before piping |
Conclusion
End with a plan: reserve about 1/2 cup of frosting for attachments, time short freezer minutes to firm joins, and keep a mixer stand or hand mixer stand ready for quick re-whips.
Recap the essentials: weigh or measure flour, add liquids at low speed, and watch bake time so each cake layer sets with a clean, set top and even crumb. Level, fill, place the top cake layer upside down, apply a thin crumb coat, chill until the frosting firm, then smooth a final coat.
Frame the design with a shell border around the base and a matching border around top using tips like Wilton. Whether you make a vanilla or chocolate heart-shaped version or a chocolate heart cake, these small steps make the finish super easy and reliable.
