Best Fried Chicken Wings Recipe: Easy & Delicious
Surprising fact: home cooks who keep oil at about 350 degrees and fry in small batches cut sogginess by more than half and get that restaurant crunch every time.
This Website contains affiliate links. That means I may earn a small commission if you purchase through my links, at no extra cost to you.
This recipe shows an approachable method to reach golden, crisp results using simple pantry ingredients. A light flour-and-cornstarch coating, brief time in hot oil, and a quick finish on a wire rack keep the crust shatteringly crisp and the meat juicy.
Follow a clear step sequence: measure your coating, heat oil to 350 degrees, fry for 5–10 minutes until an instant-read thermometer hits 165°F, and hold wings on a rack in a low oven. Small batches prevent steaming and preserve texture.
Expect quick prep that works for weeknights or game-day spreads. Season the flour well, salt right after frying, and plan simple sauces—Buffalo, garlic-parmesan, or a soy-based glaze—so you can customize without changing the base method.
Key Takeaways
- Keep oil near 350 degrees and fry in small batches to avoid soggy crusts.
- Use a flour-and-cornstarch mix (optional baking powder) for a light, crisp exterior.
- Fry until 165°F internal, about 5–10 minutes per batch, using an instant-read thermometer.
- Hold on a wire rack and keep warm in a low oven to maintain crunch.
- Simple pantry ingredients and one clear step-by-step approach yield consistent results.
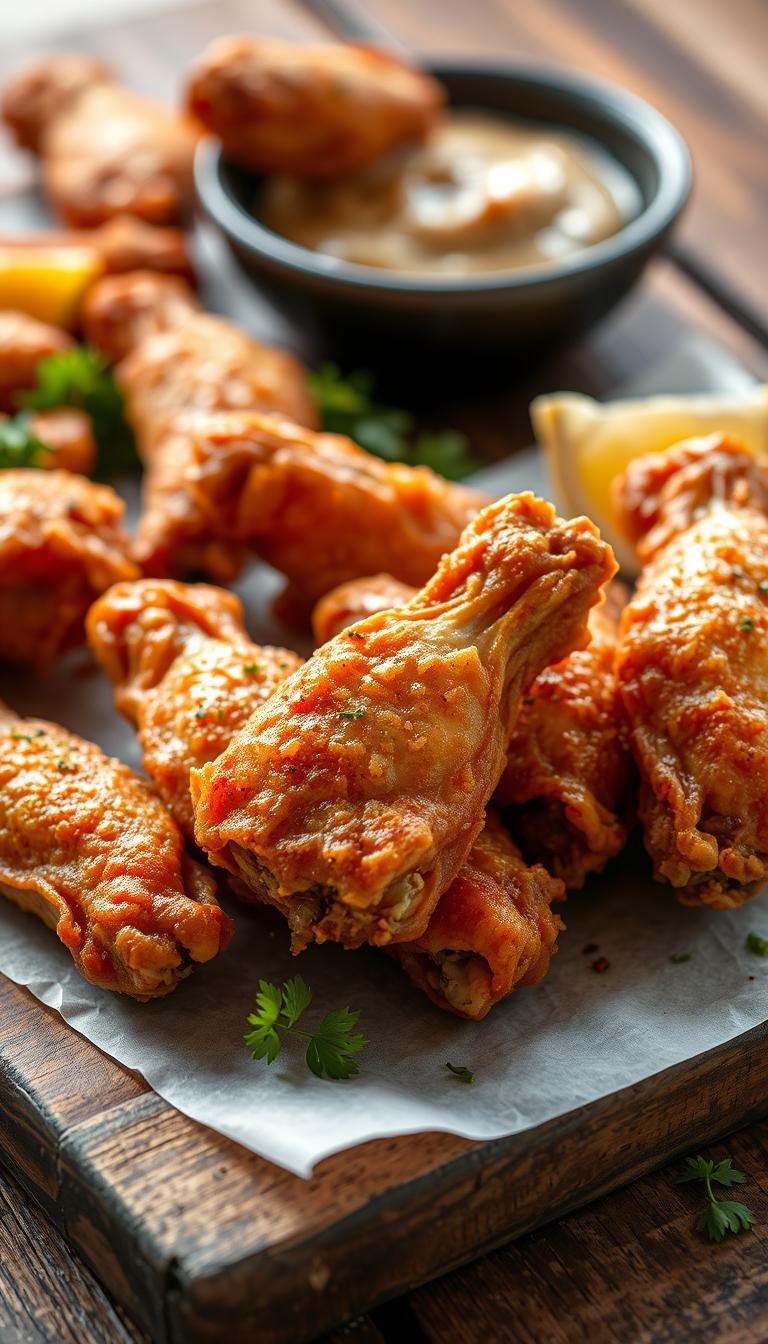
Meet your new game-day favorite: crispy fried chicken wings
Game days demand a snack that’s quick, crunchy, and easy to pass around. These chicken wings cook fast at 350°F, so you can batch-fry and keep a steady flow to the table.
A simple salt-and-pepper base with a seasoned flour coating gives big flavor before any finishing sauce. Drain each batch on a wire rack to prevent sogginess and keep the crust audible and golden at first bite.
Timing matters: plan for short cook time windows of a few minutes per batch so halves and commercials won’t interrupt service. Finish with a sprinkle of black pepper or finishing salt while the pieces are still hot so spices stick.
- Serve: a platter with celery, carrot sticks, and dips like ranch or blue cheese.
- Flavor: offer Buffalo, lemon-pepper, or sweet-heat glazes so guests choose their heat level.
- Tip: keep earlier batches on the rack and rotate fresh portions to the table.
Why this recipe works for ultra-crispy, juicy wings
Crunch comes from chemistry: the right dry components, brief high heat, and spacing deliver a thin, glassy crust that stays crisp.
Cornstarch + flour blend for shatteringly crisp skin
Mix cornstarch with a cup of all-purpose flour mixture and a pinch of baking powder. Cornstarch limits gluten, which keeps the crust brittle instead of chewy.
A slight rise in pH from baking powder pulls surface moisture outward, speeding browning and tightening the coating. Season the dry mix so flavor sits in the crust before any sauce is added.
Light breading, hot oil, and batch frying to prevent soggy results
A thin, even dredge traps less oil than a heavy batter. Keep the oil near 350 degrees and fry in small batches so temperature recovers fast.
Crowding cools the fat and creates steam, which softens the crust. Drain and rest pieces on a wire rack to let air circulate and avoid condensation.
“Controlled temperature, light dredge, and spacing are the three pillars of consistent, ultra-crispy results.”
Ingredients & smart substitutions
Start with clear, adaptable ingredients so you can tailor flavor and texture without extra fuss. Pick party packs of drums and flats for even cooking. Whole pieces are fine if you split them at the joint.
Choose the right pieces
Look for meaty pieces that hold the coating and stay juicy through the cook. Drums and flats heat more uniformly, which helps a consistent crust.
Seasonings that actually taste good
Use a flexible base: kosher salt, black pepper, garlic powder, paprika, and a pinch of cayenne for heat. Add dried parsley or thyme for a milder herb note.
Tip: many Cajun or blackening blends include salt. If you use them, reduce added seasoning salt so the final dish isn’t overly salty.
Coating essentials
Make a crisp crust with a simple flour + cornstarch mixture. A spoonful of baking powder is optional; it helps wick moisture and speeds browning.
Keep the dusting light. A thin, even layer adheres better than a thick, clumpy dredge and yields a delicate, crunchy shell.
- Oil: choose a neutral, high-smoke-point fat such as vegetable oil for clean taste and steady temp control.
- Depth: plan on 1–2 inch oil depth in a heavy pot—measure to cover pieces safely rather than strict cups.
- Scale: increase spice in the flour mixture so the crust has flavor even without sauce.
“A light, well-seasoned flour mixture and the right cut make crisp results predictable.”
Tools, oil, and temperature control
The right equipment and steady heat are the backbone of any reliable frying session. Set up before you heat the oil so each batch moves quickly and safely.

Cookware and gear
Use a heavy-bottomed Dutch oven or a countertop fryer to keep heat steady and avoid hot spots. Plan for about 1–2 inches of oil depth — that gives good buoyancy without needing many cups of fat.
Thermometer and utensils
An accurate thermometer is essential: hold oil near 350 degrees (up to 375°F if needed) and check that the thickest piece reaches 165°F. A spider or slotted spoon makes transfers safe and reduces splatter.
Drainage and station setup
Stage a wire rack over a sheet pan next to the stove. Some cooks use paper towels, but a rack keeps the crust crisp by avoiding steam. Keep the workspace clear and use paper-lined trays to catch drips.
- Choose neutral, high-smoke-point vegetable oil for clean flavor.
- Gently agitate pieces with the spider after adding them to prevent sticking and encourage even browning.
- Moderate burner settings and pause between batches so oil can recover its heat.
Fried chicken wings: step-by-step instructions
Follow these clear steps to move from prep to plate with the crispest results. These short instructions make the process predictable and safe.
Prep and dry
Pat each piece thoroughly with a paper towel. Optionally chill on a wire rack for up to an hour to tighten skin and dry the surface for extra crunch.
Dredge
Whisk a seasoned flour-cornstarch mixture and, if using, a small amount of baking powder. Toss pieces in the mix, press lightly so a thin layer sticks, then shake off excess to avoid clumps.
Fry in batches
Heat oil to about 350 degrees and confirm with a thermometer. Add a few pieces at a time so the oil holds temp; frying usually takes 5–10 minutes per batch until golden and 165°F internal.
Drain and season
Move finished pieces to a wire rack so air circulates. A paper towel lined or towel lined plate works in a pinch, but it can soften the crust.
- Season immediately while hot so salt adheres.
- Keep cooked pieces warm on the rack in a low oven until serving.
- Toss with sauce just before serving to preserve crispness.
Pro tips for extra-crispy wings every time
Small choices during frying and resting make a big difference. Use these practical tips to lock in crunch and keep meat juicy for the table.
Don’t crowd the pot
Fry in small batches so pieces have space. Crowding drops the oil and creates steam, which softens the crust.
Leave generous gaps so each piece browns quickly and evenly.
Let oil return to temp between loads
Allow the oil to recover before adding the next batch. A steady temperature keeps cook times consistent and prevents greasy crusts.
Use an instant-read thermometer to remove guesswork and nail doneness without drying the meat.
Season right after the fryer
Salt or apply your favorite seasoning salt while pieces are piping hot so crystals stick and melt slightly into the shell.
Also, shake off excess flour before frying to avoid hydrated pockets that ruin texture.
- Move each piece to a wire rack instead of stacking or using paper towels to preserve airflow.
- Hold finished orders on a rack-on-sheet in a low oven to keep them hot without softening the crust.
- Finish with a final grind of pepper or spice dust while hot for extra flavor.
Variations, sauces, and serving ideas
Small tweaks to the dredge or a quick toss in hot glaze can move this snack from familiar to show-stopping. Use simple shifts in seasoning or a finishing sauce to give each portion a clear identity without extra fuss.
Flavor twists
Garlic‑parmesan: toss hot wings with melted butter, grated Parmesan, and minced garlic, then finish with parsley so the cheese clings to the crust.
Lemon‑pepper: mix lemon zest with cracked pepper and a touch of oil for a bright, dry finish that avoids sogginess.
Cajun or herb blends: fold dried rosemary, oregano, basil, or a blackening rub into the flour mixture for an aromatic, resilient crust.
Sauces to try
Classic Buffalo is a reliable route—melted butter and hot sauce, balanced with honey to tame heat. For an Asian twist, toss lightly in bulgogi or katsu sauce so the glaze adds sweetness without collapsing the crust.
What to serve
Pair with cooling dips like ranch or blue cheese and crisp veggie sticks for contrast. Add fries, pickles, or fried pickles to echo a bar‑food vibe.
“Test small batches for seasoning intensity before coating a full tray; it saves time and keeps texture perfect.”
Baking, air frying, and make-ahead options
If oven time fits your schedule, baking delivers a hands-off route to crisp, predictable results.
Oven method: Arrange dried, seasoned chicken wings on a lightly oiled rack over a sheet pan. Bake at about 400°F for roughly 45 minutes, flipping halfway. Remove when the thickest part reads 165°F to preserve juiciness.

Air fryer workflow
For a lighter approach, use an air fryer at a high setting. Work in small batches, keep pieces spaced for airflow, and check the internal temp to 165°F.
Make-ahead and re-crisp
Par-cook by baking or frying until just done, cool on a rack, and refrigerate. To finish, reheat in a hot oven or air fryer to restore crunch—avoid the microwave; it adds steam and softens the shell.
“Par-cook early and re-crisp at serving time so everything hits the table hot and crisp.”
- Use a light dusting of flour for oven or air methods—avoid thick dredges.
- Flip once mid-run; use convection if available for even browning.
- Plan prep and step timing: par-cook before the event, re-crisp during halftime.
Storage, reheating, and freezing without losing crunch
A few simple storage habits let you enjoy near‑fresh texture the next day. Cool pieces on a rack until they reach room temperature so steam can escape. This step preserves the crust and prevents sogginess in storage.
Store cooled pieces in a shallow, airtight container in the refrigerator for 3–4 days. Using a shallow container avoids stacking that traps moisture. If you must absorb surface oil briefly, a single paper towel under the pieces works, but avoid long contact.
Reheat at 350 degrees or in the air fryer
Reheat in a 350 degrees oven or use an air fryer until the interior is hot and the shell re-crisps. Typical reheat time is about 10–15 minutes, depending on size. Skip the microwave; it adds steam and softens the coating unless you finish with dry heat.
Freezing and preventing excess oiliness
To freeze, cool completely, place pieces on a sheet to flash-freeze, then transfer to a sealed bag. Keep for up to six months. Thaw overnight in the fridge, then re-crisp at high heat to drive off surface moisture and reduce any oily feel.
- Cool on a rack, not a towel lined plate, to avoid trapped steam.
- Use a paper towel lined option only for immediate serving to blot excess oil briefly.
- Lightly re-season after reheating if flavors have dulled.
Conclusion
Mastering temperature and timing is the fastest path to a dependable, crunchy result. Dry the meat, press on a light seasoned dredge of flour and cornstarch, and hold oil near 350°F so each piece browns quickly.
Work in small batches, let the oil recover between loads, and salt immediately while hot. Use a thermometer to confirm 165°F inside and a wire rack to keep the crust crisp while you finish other portions.
Oven baking or an air fryer are valid alternatives when spacing and heat are controlled. Experiment with Buffalo, garlic‑parmesan, lemon‑pepper, or global glaze finishes, and serve mixed drums and flats with dips for a complete spread.
Follow these steps, respect the heat, and enjoy perfectly crisp results every time.