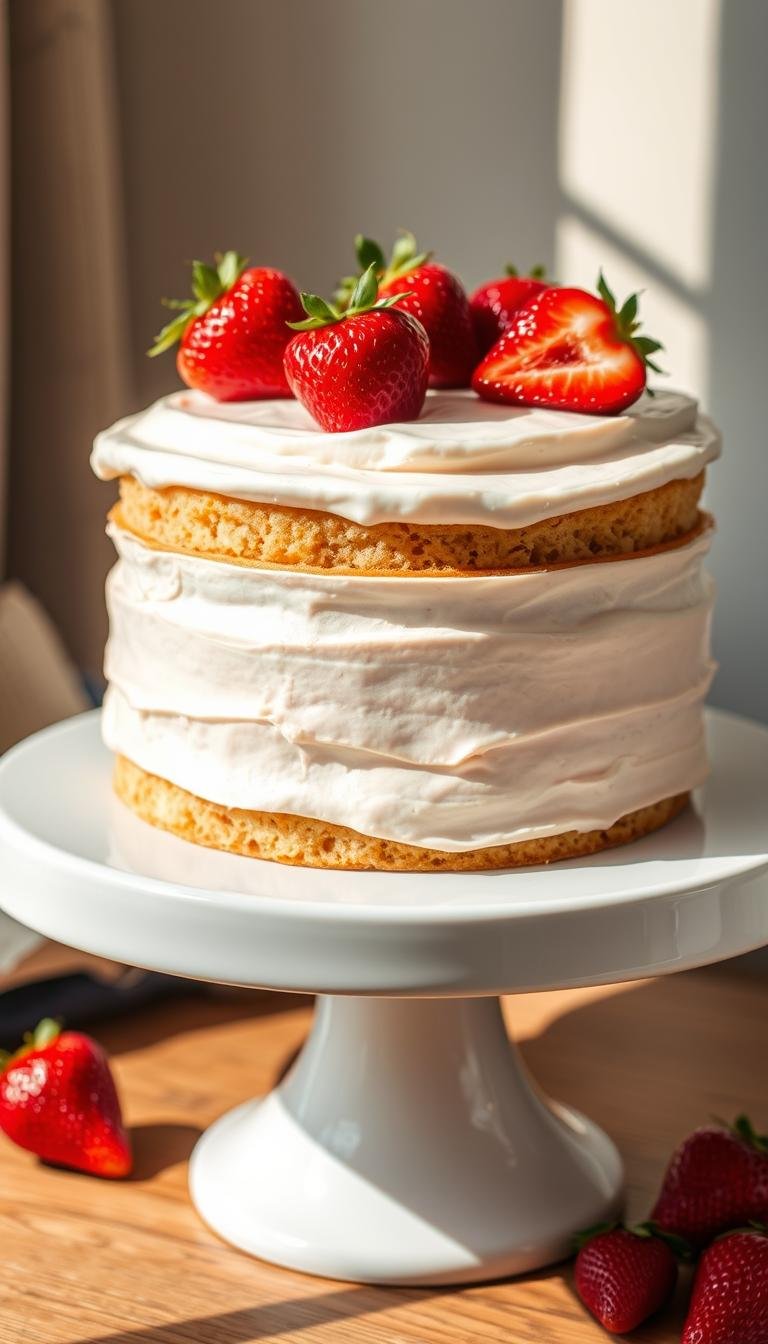
Top Halloween Desserts for Parties to Try This Year
Surprising fact: nearly 72% of hosts say one standout sweet steals the show at a spooky season spread.
This Website contains affiliate links. That means I may earn a small commission if you purchase through my links, at no extra cost to you.
That makes your dessert choices powerful. This short guide previews top picks that build a memorable menu without long hours in the kitchen.
Expect a hero cake—think Autumn Spiced Pumpkin Cake with white chocolate ghosts—plus easy cupcakes, cookies, and no-bake bites that suit busy hosts.
We balance classic fall flavors like pumpkin, caramel, and apples with playful candy-studded ideas. Each entry gives a quick recipe hint and serving tip so you can decide fast.
Family-friendly options include eyeball cake pops kids can decorate and skeleton biscuits that travel well. Make-ahead notes and storage tips help treats stay fresh through the event.
Key Takeaways
- Pick one show-stopping cake and two easy fillers to simplify planning.
- Blend pumpkin and apple flavors with candy accents for broad appeal.
- Choose at least one no-bake item to save time on the day.
- Tag family-friendly choices so kids can join decorating.
- Use transport and storage tips to keep treats picture-perfect.
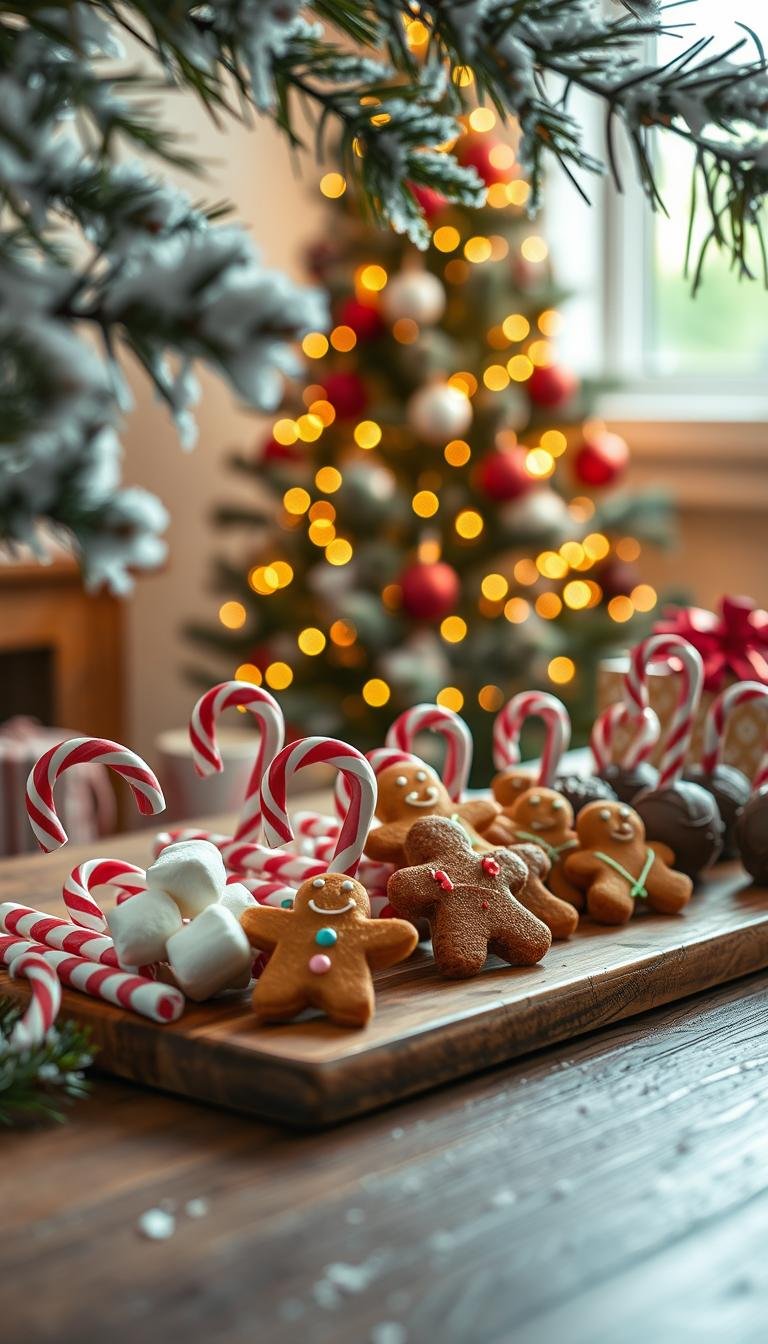
Spooky sweets to kick off your Halloween party
A bold centerpiece instantly signals the theme; spider-web chocolate doughnuts are simple and striking. Pair one dramatic item with smaller bites to give the table height and balance.
Set the tone with make-ahead treats and easy decorations
Prep once, assemble later. Make edible “blood” syrup and chocolate drizzles the day before. Keep marshmallow webs and candy eyeballs in sealed containers until serving.
- Use a webbed cake or doughnut tower as a visual anchor.
- Lean on toy spiders, candy eyes, and marshmallow webs to turn basics into themed food.
- Set a Halloween charcuterie board as a flexible center; fill gaps with bowls of candy.
“A quick prep kit—black stands, spare tongs, and labeled tags—saves time and stress.”
| Make-Ahead Item | Prep Time | Serve Tip |
|---|---|---|
| Edible “blood” syrup | 10 minutes | Drizzle just before serving |
| Chocolate drizzles | 15 minutes | Pipe from a squeeze bottle |
| Charcuterie board | 20 minutes | Add candies as trays empty |
Quick tip: place the treat station away from drinks, label spicy items, and keep knives and tongs ready. Guests will see the theme at a glance and continue reading for quick recipes and setup ideas.
halloween desserts for parties
Shortcuts and showstoppers can coexist—pick three small wins that feed a crowd without long oven time.
Quick picks for busy hosts
Start with two or three easy items that scale: candy-topped brownies, ghoulish chocolate bark with icing eyes, and spider cookies made with mini peanut butter cups and chocolate-covered raisins. These items take minimal hands-on time and give a festive table fast.
Boxed mix cupcakes transform with a simple buttercream swirl and a few candy toppers. Use one-bowl base batters and split them with gel color to make multiple looks from a single bake. Pre-portion batter into mini pans to speed cooking and control servings.
Kid-friendly options that double as activities
Set a decorate-your-own cookie and cake-pop station so kids can join the fun. Offer plain cookies, tubs of frosting, sprinkles, and candy eyes.
“A tidy station—parchment-lined trays, disposable covers, and labeled bowls—keeps chaos low and creativity high.”
- Eyeball chocolate cake pops kids love to decorate.
- Skeleton biscuits that double as an activity and a snack.
- Witch finger shortbreads with almond “nails” for an easy showpiece.
Include both chocolate and vanilla bases and one no-bake item to stagger prep time. These small moves keep you in control while the table reads like a planned spread. Continue reading to see show-stopping cakes next.
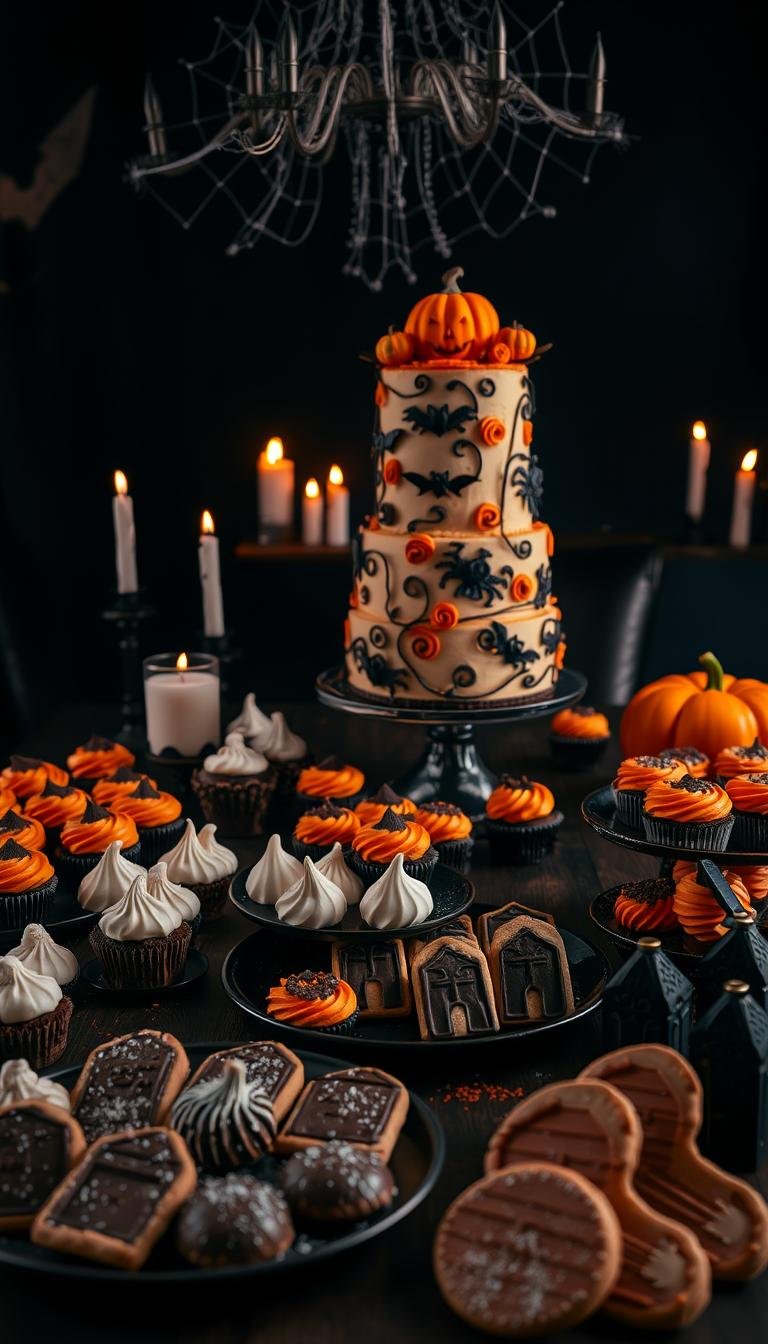
Show-stopping Halloween cakes that wow a crowd
Choose one centerpiece cake that steals the spotlight and builds the table’s entire mood. A bold cake sets the tone and makes the rest of the food feel intentional.
Spiderweb Cake with marshmallow webs
What it is: a rich chocolate layer with spun marshmallow webs pulled over warm melted marshmallows. Microwave small batches to form strands and refresh them on site if travel compresses the design.
Pumpkin Spice Bundt and “Great Bundt-kin” centerpiece
The Pumpkin Spice Bundt gets a glossy caramel glaze that holds up on the tray. Turn a few small Bundts into a pumpkin patch centerpiece—stack cleverly and add small faux gourds for a photo-ready display.
Vampire Poke Cake with cherry “blood”
Poke an almond sheet, pour tart cherry syrup into the holes, and top with stable whipped topping. The cherry “blood” effect sells the theme and makes the cake ideal to transport and serve at potlucks.
Autumn Spiced Pumpkin Cake with white chocolate ghosts
Finish this seasonal favorite with orange buttercream and white chocolate ghost toppers to signal fall flavors at first glance. Keep frosting sturdy—American buttercream travels best—and add delicate toppers on site.
“Pick one centerpiece cake to headline your table; pre-score Bundts and add a tent card with the cake recipe title and allergens.”
Continue reading to see cupcake and cookie ideas that pair with these show-stoppers.
Creepy-cute cupcakes everyone will devour
A tray of themed cupcakes can become the table’s most playful focal point. These small cakes are fast to scale, simple to transport, and perfect for a mix of chocolate and seasonal flavors.
Ghost cupcakes with buttercream “boo” toppers
Start with a boxed mix and focus on piping. Use a large round tip to swirl soft buttercream into ghost shapes.
Press two mini chocolate chips into each ghost for eyes. The quick technique gives a polished look with minimal tools.
Vampire cupcakes with jelly centers
Core cooled cupcakes and spoon in strawberry or cherry jelly for a dramatic “blood” reveal.
Top with marshmallow-like frosting so the filling bursts when bitten. This trick makes the first bite a show.
Black velvet cupcakes for little monsters
Use a deep cocoa batter or black food color for an on-theme base. Keep icing simple and let kids add faces, sprinkles, or candy eyes.
Tip: alternate chocolate and vanilla bases and add a pumpkin or cinnamon option to balance sweetness.
- Best practice: box mixes save time; invest effort in frosting and toppers.
- Keep frosting cool for cleaner piping and transport in deep carriers.
- Set out an undecorated tray and a bowl of candy for a DIY station that entertains kids and guests.
| Type | Base | Topper | Serve Tip |
|---|---|---|---|
| Ghost | Boxed vanilla | Buttercream ghost + mini chocolate chips | Pipe on site if traveling |
| Vampire | Chocolate or vanilla | Jelly center + marshmallow frosting | Fill after cooling to avoid soggy crumbs |
| Black velvet | Black cocoa | Simple faces, candy eyes | Use dark liners to hide grease spots |
“Keep frosting slightly cooler for cleaner piping and add toppers on arrival to protect delicate details.”
Cookies that double as decorations
Turn plain rounds into tabletop props by shaping cookies into spiders, bats, and black cats that pull double duty as snacks and centerpieces.
Spider cookies and spooky bat cookies
Spider cookies come together fast: press a mini peanut butter cup into a round cookie and add chocolate-covered raisins for the body. Pipe thin legs with melted chocolate and dot a few “squashed flies” using chocolate chips.
Bat shapes use the same base. Trim edges and add small chocolate chips as eyes for an extra spooky touch.
Witch Finger Cookies with almond nails
Make shortbread dough into long fingers, press an almond at the tip for a nail, and add a dab of jam for realistic “blood.” These witch cookies are striking and simple to shape.
Candy corn cookies and Binx black cat cookies
Candy corn cookies use color-blocked dough to add bright contrast among darker designs. Binx black cat cookies use black cocoa for deep color; highlight faces with a thin line of white chocolate or royal icing.
Skeleton biscuits the kids can ice
Bake sturdy biscuit-style cookies so kids can ice them at a station. Provide squeeze bottles of icing to reduce mess and let little hands decorate with candy bones and sprinkles.
- Tip: portion dough with a scoop for even baking and neat plating.
- Dust cooling racks with parchment when icing dries to prevent sticking.
- Keep both chocolate and vanilla doughs to suit tastes and limit heavy dye use.
“Choose cookie shapes that serve as edible decorations to save time and boost visual impact.”
Want more ideas? Continue reading to pair these treats with brownies and bars in the next section.
Brownies and bars for effortless sharing
Brownies and slab-style bars make sharing simple when guests stream through a buffet. These pan bakes cut clean, stack well, and let you offer both chocolate-rich and lighter options without juggling multiple trays.
Spooky brownies topped with candy
What to do: bake a fudgy base, then press mixed candy and sprinkles into the warm top. The colorful crunch updates a basic chocolate square into an eye-catching treat.
Pumpkin Patch Brownies with Oreo “dirt”
Boost a boxed recipe by crumbling Oreos across the top and arranging candied pumpkins. The idea reads seasonal and takes minutes while keeping prep simple.
Halloween Cheesecake Bars with candy eyeballs
Cheesecake bars bake in one pan, chill overnight, then slice for tidy servings. Add a pumpkin swirl or place candy eyeballs on each square to skip piping and keep the look playful.
- Tip: use parchment slings to lift slabs from pans.
- Bake a day ahead and wipe the knife between cuts for clean edges.
- Label allergens and set a nut-free tray to widen guest options.
“Slab-style treats save time and feed a crowd without fuss.”
Pumpkin-forward treats for peak spooky season
Lean into pumpkin notes across small handhelds, dips, and one grand cake to unify the menu.
Pumpkin Whoopie Pies marry cake and cookie textures. Soft spiced rounds sandwich a stable marshmallow frosting that holds up to travel and kid handling.
Pumpkin Truffles make tidy favors. Roll spiced pumpkin ganache in festive sprinkles or crushed candy and nest them in mini cups or cello bags.
Pumpkin Dip with apples, graham crackers, and pretzels
A creamy pumpkin dip becomes an instant grazing anchor. Surround it with sliced apples, graham crackers, and salted pretzels for a sweet-and-salty spread guests can dig into between bites.
Classic Pumpkin Cheesecake with caramel and pecans
The cheesecake is the showpiece: spiced pumpkin filling, baked until just set, chilled overnight, then finished with a glossy caramel and chopped pecans.
Keep spices balanced—cinnamon and nutmeg can quickly overpower—so kids and spice-sensitive guests enjoy each bite.
“Build one handheld, one dip, and one showpiece so guests can sample pumpkin in multiple textures.”
| Item | Texture | Serve Tip | Best Use |
|---|---|---|---|
| Pumpkin Whoopie Pies | Soft, portable | Assemble day of; chill briefly | Handheld snack |
| Pumpkin Truffles | Rich, bite-size | Roll in sprinkles; package as favors | Gifts and grab-and-go |
| Pumpkin Dip | Creamy, dippable | Serve with apples & crackers | Snack board anchor |
| Pumpkin Cheesecake | Silky, sliceable | Chill overnight; add caramel & pecans | Centerpiece dessert |
Quick checklist: thread pumpkin notes across the menu without repeating formats, add white chocolate accents or small ghost toppers, and offer a no-nut topping option when serving mixed crowds. Plan an overnight chill for cheesecake and a short thaw window before serving to hit ideal texture.
Apple desserts that channel caramel apple vibes
Bring orchard favorites to the table with a mix of sticky, spiced, and chocolate-dipped apple treats. These options marry crisp fruit with warm spice and bright candy finishes to match the spooky season mood.

Candy apples and candied apples (sweet + spicy)
Red-hot candied apples use melted cinnamon candies to create a glossy, sweet-spicy shell. The vivid color grabs attention and tastes like a classic fair treat.
Chocolate apples rolled in nuts and sprinkles
Chocolate-dipped apples invite customization: roll halves in chopped nuts, sprinkles, or honeycomb. Pre-slice some for kid-friendly service and easier plating.
Caramel Apple Sheet Cake & caramel apple cookies
A Caramel Apple Sheet Cake studs Granny Smith slices into the batter and finishes with caramel frosting for easy slicing. Caramel apple cookie bites bring the same flavor in a stackable, travel-friendly form.
Apple Cider Doughnuts and Apple Cider Doughnut Cake
Apple cider doughnuts, dusted in cinnamon sugar, are perfect warm handouts. A bundt-style doughnut cake offers the same spice on a larger scale and pairs well with hot cider.
Baked and Bloomin’ Apples with cinnamon sugar
Baked or bloomin’ apples are simple, cozy serves. Stuff with oats, brown sugar, and cinnamon; bake until tender and serve warm with ice cream.
“Anchor your apple set with one iconic stick treat—candied or chocolate-dipped apples—then add a tray bake to slice and share.”
| Item | Texture | Serve Tip |
|---|---|---|
| Candied apples | Crisp shell, juicy core | Label stick hazards; serve whole or halved |
| Chocolate-dipped apples | Crunchy edge, creamy coating | Pre-slice for kids; add nuts or sprinkles |
| Caramel Apple Sheet Cake | Tender, sliceable | Cool fully; frost with caramel before serving |
| Apple Cider Doughnuts | Light, cinnamon-sugared | Serve warm; offer a bundt cake version |
| Baked / Bloomin’ apples | Soft, warm | Top with ice cream and extra cinnamon sugar |
Quick tip: balance textures—crisp candy shells, tender cake, and warm baked apples—and add a small pumpkin note elsewhere on the table to tie this apple set into your overall fall menu. Continue reading for no-bake crowd pleasers.
No-bake and low-fuss crowd-pleasers
Skip the oven and rely on chilled, set-and-serve sweets that scale fast. These no-bake options deliver big flavor with small effort and fit crowded tables well.
Halloween Candy Bark and chocolate bark with eyeballs
Quick volume play: melt chocolate, spread it thin, then scatter candy eyeballs, themed sweets, and sprinkles. Chill until firm and break into irregular shards to create a dramatic platter instantly.
No-Bake Buckeye Cheesecake Bars
Layer a cookie crumb base, peanut-buttery cheesecake filling, and a glossy chocolate top. Chill overnight for clean bars; use a warm knife to pre-score neat edges before serving.
Pretzel Turtles and homemade peanut butter cups
Pretzel Turtles need only four pantry items: pretzels, caramel candies, pecans, and chocolate. Press caramel and nuts on each pretzel, top with melted chocolate, and set.
Homemade peanut butter cups are another easy favorite—mix peanut butter, a touch of salt, and powdered sugar, press into liners, and coat with chocolate. Make mini and standard sizes to control portions.
“Lean on the freezer to set bars faster, then finish them in the fridge to avoid condensation.”
- Tip: add no-bake chocolate-dipped apples when oven space is tight.
- Use themed sprinkles to tie simple no-bakes into the overall table aesthetic.
- Keep a nut-free variant (swap pecans for seeds) so more guests can indulge safely.
| Item | Main Flavors | Set Time | Serve Tip |
|---|---|---|---|
| Candy Bark | chocolate + candy | 30–45 minutes (chill) | Break into shards; mix mini and large pieces |
| Buckeye Cheesecake Bars | peanut butter + chocolate | Overnight chill | Pre-score with warm knife for clean slices |
| Pretzel Turtles | salty-sweet caramel + pecans | 20–40 minutes (fridge) | Scale on baking sheets for fast batch making |
| Homemade PB Cups | peanut butter + chocolate | 30–60 minutes (fridge) | Package as favors or stack on trays |
Doughnuts, cake pops, and handheld party treats
Small, themed handhelds deliver big visual impact while cutting down on serving fuss. They keep lines moving and limit utensils on a busy table.
Spider web chocolate doughnuts
What to do: coat yeast or cake doughnuts in dark chocolate, then pipe thin white chocolate lines in a concentric pattern. Drag a toothpick from center to edge to create a clean web effect.
Tip: offer both standard and mini doughnuts to balance portions and plate presence.
Eyeball chocolate cake pops kids can decorate
Make cake pops with sturdy sticks and chill them before transport to avoid sliding. Kids love a dip station with sprinkles and candy eyes to personalize each pop.
Keep a small bowl of frosting handy to patch any travel bumps and store coatings in a narrow, deep container for smooth dipping.
- Sanitation: set aprons, wipes, and lined trays for the decorating area.
- Label flavors clearly so guests can grab-and-go without lingering.
- Plan seasonal flavors like apple cider or get pumpkin spice to tie into the menu.
| Handheld | Main coating | Serve tip |
|---|---|---|
| Spider web doughnut | Dark + white chocolate | Pipe webs on site if traveling |
| Eyeball cake pop | Chocolate coating | Chill, use sturdy sticks |
| Mini doughnuts | Glaze or chocolate | Mix sizes on tiered stands |
“Handhelds keep the table tidy and let guests sample many items quickly.”
Party boards, dips, and sharables to graze on
Build one grazing board that keeps guests nibbling and mingling at your next party. Balance sweet dips with salty snacks and a few savory bites so people can grab a little between activities.
Halloween charcuterie and themed cheeseboard
Start with a base of crackers and add a blue-veined cheese plus a charcoal-coated wheel for dramatic color. Use small bowls to hold sticky items and prevent flavors from bleeding.
- Decorations: place toy spiders and candy eyeballs among clusters of grapes and cookies.
- Refresh trays periodically and keep a clear nut-free zone so sensitive guests relax.
- Add chocolate clusters or bark shards to tie the board to the dessert table.
Ghost S’mores Dip with graham crackers and apples
Set a warm Ghost S’mores dip at the center with graham crackers, sliced apples, pretzels, or chips for dipping. Include small spoons and serving tongs at multiple points to avoid bottlenecks.
“Mix textures—crisp, chewy, creamy—to keep every bite interesting.”
Quick recipe note: melt chocolate with marshmallow spread, transfer to a shallow dish, and toast mini marshmallows on top. Chill backups and swap them in to keep the spread looking abundant.
Continue reading for ghoulish finishes and kid-friendly stations.
Ghoulish finishes: edible “blood,” webs, and eyes
Small accents make a major impression. Use glossy drips, marshmallow strands, and playful peepers to upgrade trays at the last minute.

Edible fake blood that’s pantry-friendly
Make a quick edible “blood” with corn syrup, a little corn starch, and red food color. Thin with water to control flow.
Test the mix on parchment to check set time. Drizzle sparingly over cakes and cupcakes so the effect reads dramatic, not messy.
Candy eyeballs, toy spiders, and web effects
Press candy eyeballs into cookies or cake pops for instant theme and low effort. Vary eye sizes to keep designs playful and kid-friendly.
Use pulled marshmallow strands or thin piped chocolate to weave webs. Add a dab of cream-based frosting to catch drips and boost contrast.
“Keep a tiny repair kit—extra eyes, a spare piping bag, and napkins—so you can touch up after transport.”
- Save edible space by placing small toy spiders on platters.
- Photograph the table early; top looks fade once slices are cut.
- Top tip: keep one plain jar of sugar sprinkles to rescue any flat spots quickly.
Kid-approved desserts that are also activities
Set up hands-on stations that feed curiosity and keep little chefs busy while grown-ups mingle. These activity zones mix crafting and snacking so kids help shape the menu and feel proud of their work.
Decorate-your-own cookies and cupcakes station
Provide plain rounds and unfrosted cupcakes, tubs of frosting, and bowls of candy eyes. Label the tubs and include a simple cookies recipe and a cupcakes recipe card so caregivers can follow safe swaps if needed.
Set-up tips: pre-portion toppings into small cups, offer smocks, and place wipes at each table. Display a few finished examples to inspire creativity without pressure.
Build-a-bark and DIY apple dipping bar
Offer warm, melted chocolate and trays of mix-ins—pretzels, sprinkles, and icing eyes—so kids can press and chill their own bark. For the apple bar, slice and whole apples sit next to chocolate, caramel, and toppings with a candy thermometer on hand for quick sugar checks.
Rotate small groups to reduce crowding and set a drying rack with name cards so creations are easy to find later.
“Keep allergy-aware bowls and separate tools to make every child feel included.”
| Station | Main items | Serve tip |
|---|---|---|
| Decorate Cookies & Cupcakes | Plain cookies, cupcakes, frostings, candy eyes | Pre-portion toppings; add name cards |
| Build-a-Bark | Melted chocolate, pretzels, sprinkles, icing eyes | Chill on parchment; break into slabs |
| Apple Dipping Bar | Sliced apples, chocolate, caramel, toppings | Keep caramel warm; label nut-free bowls |
Allergy-aware and mix-and-match ideas
Make inclusivity part of the menu—small swaps keep bold looks while cutting common allergens. When you plan, think beyond one tray. Group options so guests can identify safe picks at a glance.
Nut-free swaps, gluten-friendly bases, and dye-light options
Build a labeled grid with sections like nut-free bark, gluten-friendly cookies, and dye-light frostings. Clear labels help guests mix and match without asking.
Swap nuts for toasted seeds or crunchy rice cereal in bark and apple coatings to keep texture. Use cup-for-cup gluten-free flour in your cake and cookie bases and keep a separate set of utensils to avoid cross-contact.
- Offer mini, single-serve packaging so people avoid shared platters.
- Choose black cocoa or natural tints instead of heavy synthetic dyes to reduce reactions.
- Keep a certified allergen-safe decoration kit and list ingredients next to each treat.
“Serve allergy-aware bakes on distinct trays and put them out first to reduce contact.”
| Swap | Why it works | Serve tip |
|---|---|---|
| Nuts → Seeds / Rice cereal | Same crunch, fewer allergens | Label as nut-free; place near fruit |
| Wheat → Cup-for-cup GF flour | Makes cake & cookies approachable | Use dedicated pans and tools |
| Synthetic dyes → Black cocoa / natural tints | Dramatic color with less irritation | Test shades on a mini sample first |
Final note: check labels on candy eyes and sprinkles to avoid hidden allergens, and continue reading to learn make-ahead timelines and serving tips.
Make-ahead timelines and serving tips for party success
Good timing turns busy trays into calm service. A short, clear timeline keeps slices neat and decorations intact. Plan which items need overnight chill and which finish on the day.
What to bake the day before vs. party day
Bake bars, brownies, and sheet cakes a day ahead. Chill them overnight so they slice cleaner. Use a warm knife to cut on arrival for tidy edges.
Make classic cheesecakes and no-bake cheesecake bars the day before to set properly. Garnish just before serving so toppings like caramel and candy eyes stay fresh.
Transporting, slicing, and display ideas
Assemble bark and Pretzel Turtles early; store in airtight containers with parchment between layers. Prep boards the morning of: pile crackers, position bowls, then add dips like Ghost S’mores with graham crackers last.
- Pre-score cakes and bars at home to speed service.
- Pack delicate decorations separately and place them on-site.
- Use snug containers with non-slip liners for transport.
“Set up a backup station behind the scenes for quick refills and keep a small tool roll—offset spatulas, wipes, and serving knives—handy.”
Tip: stagger set-out times so chilled items stay cold and warm items arrive at peak texture. If you are still reading, continue reading to the conclusion for final checklist.
Conclusion
Close your plan with a simple rule: one hero cake, two or three shareable trays, and a no‑bake dip keep service smooth and sightlines clear. Use height and color contrast so even small bakes read like a curated spread.
Keep flavors seasonal—get pumpkin, caramel, and apple notes across the table. Pack at least one kid‑activity dessert and one allergy‑aware tray so every guest finds a safe bite.
Make-ahead items and last‑minute toppers (eyeballs, marshmallow webs) cut stress. Label trays, slice smart, and refill strategically to keep the display tidy and photo-ready.
Save your favorite recipe ideas and note what guests love. With these tips you’ll serve cohesive, eye-catching food that photographs well and satisfies every sweet tooth. Continue reading only if you want extra checklists and shopping guides.