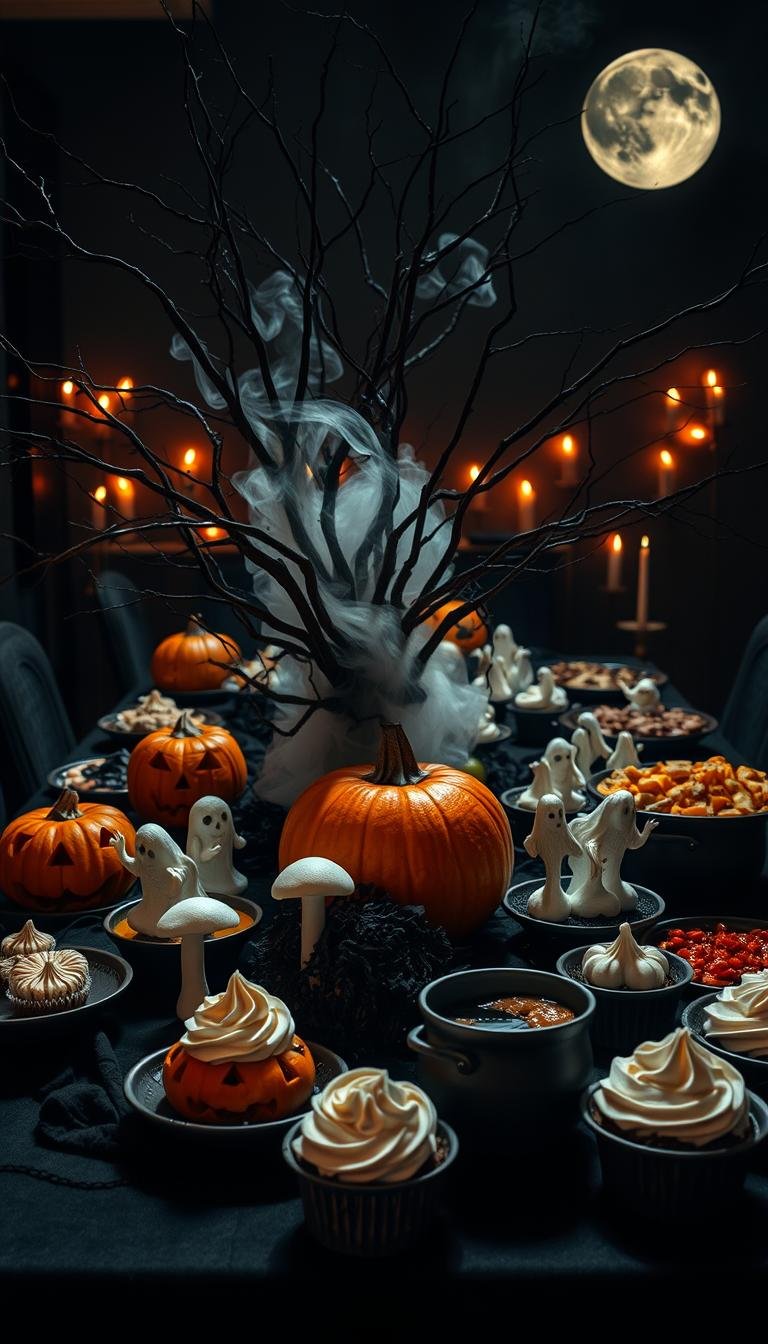
Halloween Macarons: A Spooky Sweet Treat Recipe
Surprising fact: a stable Swiss meringue can cut shell failure by more than half when you weigh ingredients and warm sugar with egg whites over a double boiler.
This Website contains affiliate links. That means I may earn a small commission if you purchase through my links, at no extra cost to you.
This recipe pairs festive design with a reliable technique. Start by whisking egg whites and granulated sugar gently until dissolved, then whip to stiff peaks. Folding in finely ground blanched almond flour and powdered sugar creates a lava-like batter that sets smooth tops and strong feet.
Plan for 30–60 minutes of resting so a skin forms. Bake low and slow — most ovens do best around 290–300°F for 20–26 minutes. Humidity affects drying time, so allow extra time on damp days. Simple tools matter: a stand mixer, food scale, piping bag with a round tip, and an oven thermometer make consistent shells more likely.
Key Takeaways
- Swiss meringue gives a glossy, stable base for decorated treats.
- Weigh almond flour and sugar; sift dry ingredients twice.
- Fold to a slow lava batter for smooth tops and good feet.
- Rest shells until a skin forms; adjust time for humidity and dark colors.
- Use food coloring, scribe techniques, or red gel for themed decorations.
Get Into the Spirit: What Makes Halloween Macarons Perfect for Your Party
Little layered treats make a big statement on a party table when you match flavor to design. These halloween macarons can be flavored with pumpkin-pie spice or filled with a tart cherry core to surprise guests.
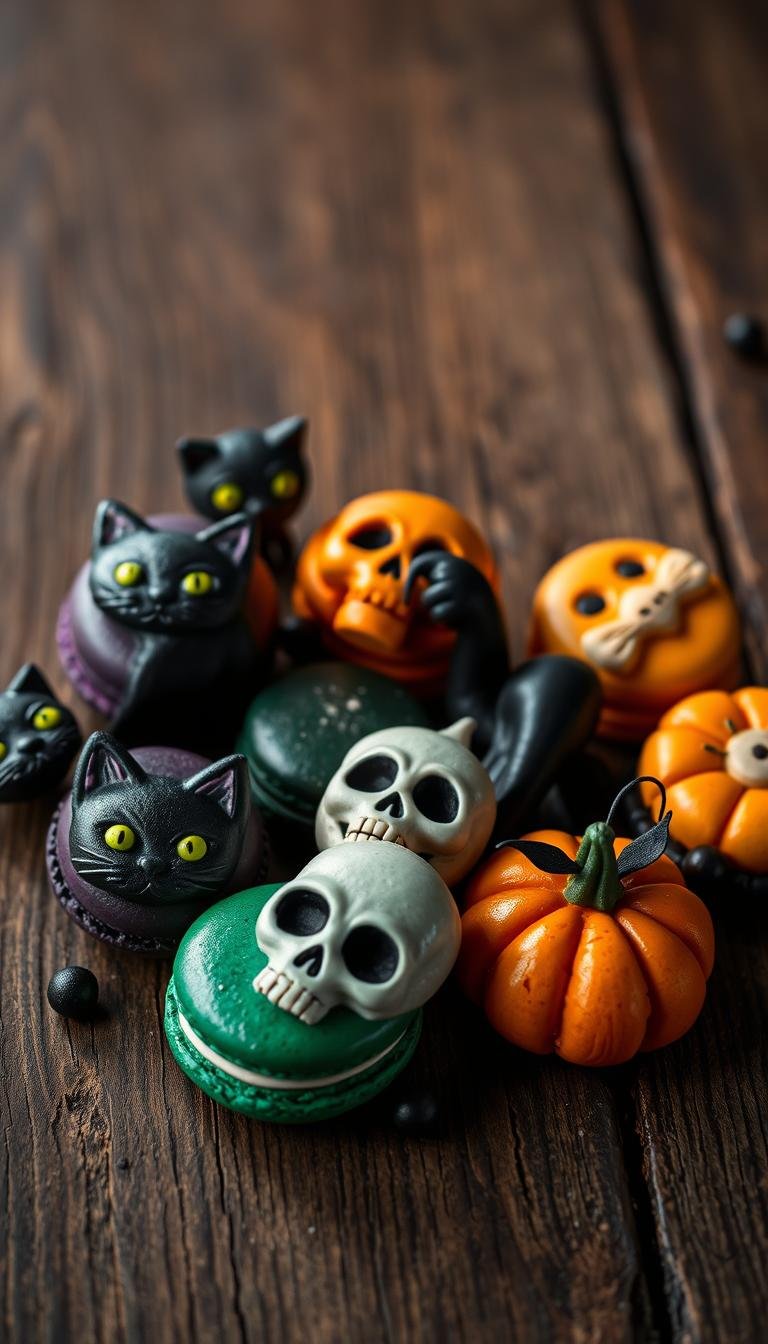
Shells show bold seasonal coloring and graphics: orange shells with black pen faces, deep black with white for spider webs, or white shells with red splatter for a dramatic finish.
The same small set of ingredients yields many looks. Split the batter into colors, switch piping tips for details, and you can run an efficient assembly line for party prep.
“Weighing ingredients and using a repeatable Swiss method keeps results consistent for large batches.”
Plan your time: a few minutes to sift, mixing and macaronage, 30–120 minutes resting depending on color and humidity, then a low, steady bake. Batter control is crucial to get pretty tops and defined feet.
- Set decoration stations for piping, scribing, and splattering.
- Keep toppings and fillings at the top of the tray for contrast in texture and flavor.
Ingredients & Tools You’ll Need for Making Macarons Like a Pro
Success starts at the prep table: accurate ingredients and the right gear give consistent shells. Gather the measured items and set your workspace before you begin.
For the shells: use finely ground blanched almond flour and powdered sugar. Pulse almond flour with powdered sugar for about one minute, then sift twice for an extra-fine texture. Swiss meringue shells depend on egg whites, granulated sugar, and a touch of vanilla for stability and shine.
Fillings include sweetened cream cheese frosting, black cocoa chocolate buttercream, and a cherry jam core for a dramatic reveal. Cream cheese filling mixes cream cheese, unsalted butter, powdered sugar, milk, and vanilla.
Coloring & decor: choose gel food coloring for vivid hues and powder colors for deep blacks and whites. Use food-grade pens and thin red gel with vodka for controlled splatter effects.
Essential equipment: a food scale, stand mixer and a clean bowl stand mixer, a reliable mixer whisk, a round tip (Ateco 808 or ~1/4″), a small tip (Wilton #1) for webs, piping bag with bag fitted to the correct tip, macaron templates, and an oven thermometer. Prepare extra piping bags for shells, rings, and filling to speed assembly.
Tip: Avoid almond meal to prevent gritty tops. Keep the stand mixer bowl spotless and grease-free so egg whites whip to stable peaks.
Step-by-Step: Swiss Meringue Method for Reliable Halloween Macarons
Start by warming the egg whites and granulated sugar in a clean, grease-free bowl set over a pot of simmering water. Whisk until the sugar fully dissolves and the mixture feels warm and slightly foamy.
Transfer the warm mixture to a stand mixer or bowl stand and beat to glossy stiff peaks. This meringue should stand tall without collapsing; add your gel coloring in the last minute to avoid overwhipping.
Sift almond flour and add powdered sugar twice to remove lumps. Add the dry mix to the meringue and begin briefly on the mixer, then finish with a spatula by folding.
Macaronage: reach the slow-lava batter
Fold with a spatula, sweeping the bowl and pressing batter against the sides. The batter should flow like slow lava and form a figure-8 ribbon when dropped back into the bowl.
Piping, resting, and baking
Fill a piping bag with a round tip and pipe ~1.5-inch rounds onto lined trays. Rap trays several times to release bubbles and pierce any stubborn ones with a scribe.
Rest 30–60 minutes (longer for dark colors) until a dry skin forms. Bake one tray at a time at about 290–300°F for the suggested minutes, rotating pans for even heat. Cool fully on the tray before removing to keep shells intact.
Spooky Designs: Jack-O’-Lanterns, Spider Webs, and Bloody Splatter
Give your shells a spooky personality with three easy decorating techniques that work on any batch. Each look uses simple tools—gel food coloring, a piping bag, and a small round tip—to turn baked tops into playful or dramatic designs.

Pumpkin faces with gel food coloring
Tint a portion of batter pumpkin orange; add a touch of brown if you need a more natural hue. Pipe rounds with a round tip and bake as usual.
After cooling, draw crisp faces with a black food-grade pen. Quick and forgiving, this method keeps lines sharp on set tops.
Spider web shells with a fine tip
Split batter into black and white before final macaronage. Pipe black discs, then add tight white concentric rings using a bag fitted with a very small tip (Wilton #1).
Drag a scribe from the center outward to form spokes. Tap trays gently as you work and expect longer resting minutes for dark shells—up to about two hours for full skins.
Bloody splatter finish
Thin red gel food coloring with a little vodka to a brushable mix. Over cooled shells, flick the loaded brush across your finger for controlled splatter.
Aim for fine droplets; larger blobs can stay tacky or soak into the shell. Let decorated tops dry fully before filling to protect the finish.
- Tip: Pop surface bubbles with a scribe and tap trays after piping to level the mixture.
- Pair designs with fitting fillings—black cocoa frosting for webs or cherry jam for bloody centers.
Filling Options: From Cream Cheese to Chocolate and Cherry “Blood” Centers
The right filling transforms a simple shell into a showstopper of flavor.
Sweetened cream cheese frosting is a classic choice. Beat cream cheese with unsalted butter until smooth in a clean bowl. Gradually add powdered sugar, a splash of milk, and vanilla until the frosting is fluffy and pipeable.
Use a star tip for swirls or an open round tip for neat dots. Aim for a consistency that holds shape between shells without squeezing out when bitten. If too loose, add powdered sugar; if too stiff, add a teaspoon of milk.
Black cocoa chocolate buttercream
For deep color and rich cocoa notes, make a buttercream with melted chocolate, unsalted butter, black cocoa (or regular cocoa plus black powder color), powdered sugar, milk, and vanilla. This filling pairs well with dark or webbed shells and resists staining better than heavy gel color.
Adjust texture so it pipes cleanly; add powdered sugar to thicken or a splash of milk to loosen.
Cherry jam “blood” core
Pipe a thin frosting dam with an open round tip on the base shell. Spoon or pipe a teaspoon of cherry jam into the center for a surprise core that oozes when bitten.
Pair cherry centers with moderate-sweet fillings so the sugar level balances the almond notes in the batter. Chill filled treats overnight to mature the flavors and improve texture before serving.
- Tip: Match cream cheese to pumpkin faces; use black cocoa for spider web shells; and add cherry jam under splatter designs.
- Keep fillings moderately sweet and test consistency by sandwiching a sample and biting to confirm no squeeze-out.
Pro Tips, Troubleshooting, and Timing for Flawless Shells
Timing, temperature, and a clean bowl are the quiet heroes of reliable macaron results. Use these practical troubleshooting tips to protect your batter and finish with even, glossy shells.

Humidity, drying time, and resting
Plan around weather. High humidity slows drying and can stop a skin from forming. Extend resting time or run a fan or dehumidifier when air feels damp.
For deep or black shells, expect close to two hours of rest before baking. Longer rest reduces cracking and helps feet develop.
Coloring smart without overmixing
Use concentrated gel or powder coloring to avoid adding moisture. Split the batter after you hit the “dry ingredients just gone” stage, then finish each portion separately.
This method preserves the lava-like flow and keeps the batter from becoming loose from extra liquids.
Oven accuracy, rotation, and feet development
Verify your oven with a thermometer. Small temperature shifts cause wrinkling, hollows, or weak feet.
Bake one sheet at a time on the center rack. If your oven has hot spots, rotate the tray 180° mid-bake. Lower temps (about 290–310°F) and a bit more time encourage even feet.
- Tap trays after piping and pop surface bubbles with a scribe to avoid craters.
- Watch meringue cues over minutes: glossy, stiff peaks beat a timer every time.
- Keep the bowl spotless; any fat ruins volume from your egg whites and meringue.
- Track time from mixing to baking so you can repeat what worked next session.
Storage, Make-Ahead, and Serving in the United States
Keeping shells crisp and fillings stable is mostly about timing, temperature, and airtight storage. Store assembled macarons in an airtight container in the refrigerator to protect texture and flavor.
Short-term: Layer macarons with parchment between rows to protect the top and prevent sticking. Do not use wax paper; it can adhere to delicate tops.
Make-ahead: Bake shells one to two days before your event and fill the day prior. Let filled treats mature in the fridge overnight — this improves texture and melds vanilla and filling flavors.
- Freezing: Chill filled macarons 24 minutes? — chill 24 hours first, then wrap and place in a freezer-safe bag for up to one month. (Note: thaw in the refrigerator.)
- Bring refrigerated macarons to cool room temperature before serving so the interior softens and flavors open.
- When transporting, pack in parchment-lined containers and keep away from strong-smelling food in the fridge. For outdoor service in hot U.S. climates, keep platters shaded and rotate small trays often.
- Follow food-safety rules for dairy fillings made with unsalted butter or cream cheese; limit time at room temperature during service.
Conclusion
Nail the basics—precise weights, a glossy meringue, and a proper macaronage—and the rest follows.
Measure and warm the egg and sugar for a stable meringue. Sift almond flour with powdered sugar and fold until the batter flows like slow lava.
Respect resting minutes so a skin forms, then bake low and steady to build feet and avoid hollows. Trust the feel of the mixture over the clock.
Decorate with gel food coloring, pens, or vodka‑thinned splatter. Fill with cream cheese frosting, black cocoa buttercream, or a cherry teaspoon for drama.
Weigh ingredients, take notes on your oven and mixer, and let filled treats mature overnight. With this method, your halloween macarons will be the top treat at any fun table.