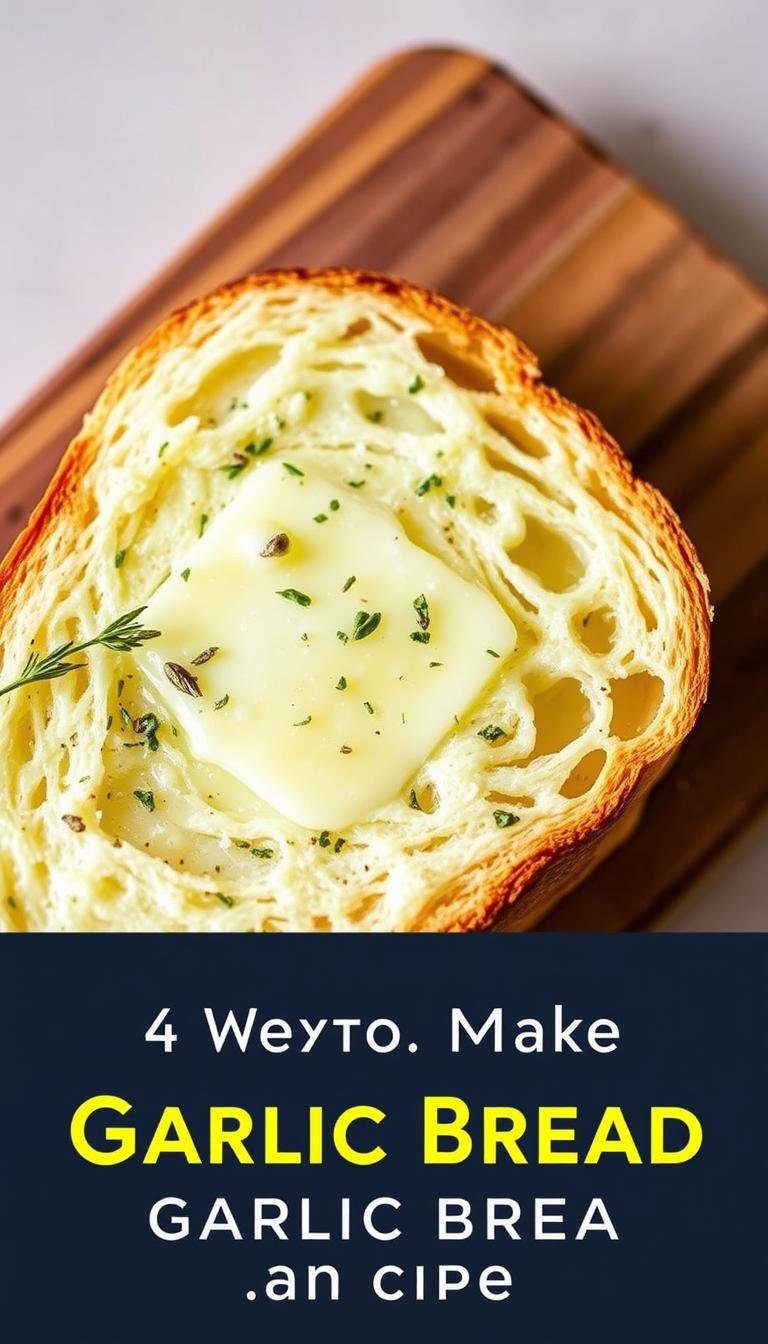
4 Ways to Make Garlic Bread Using Sliced Bread
Garlic bread, a staple in many cuisines, is surprisingly easy to make at home. With the simple use of sliced bread, you can create a delicious side dish or appetizer that’s sure to please. Did you know that garlic bread originated as a convenient snack in the 1950s? Today, making homemade garlic bread is easier than ever, and using regular sliced bread makes it accessible to everyone.
This Website contains affiliate links. That means I may earn a small commission if you purchase through my links, at no extra cost to you.
This article will guide you through four simple methods to make garlic bread with regular bread. Whether you’re a seasoned cook or a beginner, you’ll find that making easy garlic bread is a straightforward process that requires minimal ingredients and equipment.
Key Takeaways
- Learn how to make delicious garlic bread using sliced bread.
- Discover four different methods to suit your taste and preference.
- Understand the simplicity of using regular bread for garlic bread.
- Find out how to make homemade garlic bread with minimal ingredients.
- Get tips on customizing your garlic bread to your liking.
The Versatility of Sliced Bread for Garlic Bread
The convenience of sliced bread cannot be overstated, especially when it comes to preparing delicious garlic bread. Sliced bread offers a consistent thickness and is widely available, making it an ideal choice for this popular snack.
Why Sliced Bread Makes an Excellent Base
Sliced bread is a great base for garlic bread due to its uniform thickness, which ensures even cooking and a consistent texture. This uniformity is particularly important when aiming for a crispy crust and a soft interior. Moreover, sliced bread is easily accessible and affordable, making it a practical choice for home cooks.
Using sliced bread also allows for a wide range of creativity in terms of the type of bread you can use, from classic white bread to more robust whole grain options. This versatility means you can experiment with different flavors and textures to find your perfect garlic bread.
Best Types of Sliced Bread to Use
When it comes to choosing the best sliced bread for garlic bread, there are several options to consider. The type of bread you choose can significantly affect the flavor and texture of your garlic bread.
White Bread Options
White bread is a classic choice for garlic bread, offering a light and airy texture that pairs well with the richness of garlic butter. Some popular white bread options include:
- Italian white bread, known for its slightly crispy crust and soft interior.
- Sourdough, which adds a tangy flavor to your garlic bread.
- Basic sandwich bread, a straightforward and familiar choice.
Whole Grain Alternatives
For those looking for a healthier or more robust option, whole grain bread can be an excellent choice. Whole grain varieties like whole wheat, multigrain, or seeded bread offer a nuttier flavor and a denser texture that can add depth to your garlic bread.
| Bread Type | Texture | Flavor Profile |
|---|---|---|
| White Bread | Soft, Light | Mild, Slightly Sweet |
| Whole Wheat | Dense, Hearty | Nuttier, Earthier |
| Sourdough | Chewy, Slightly Crusty | Tangy, Slightly Sour |
Essential Ingredients for Perfect Garlic Bread
Apart from the bread, the essential ingredients for perfect garlic bread include high-quality butter, fresh or roasted garlic for the best flavor, and optional herbs and seasonings to elevate the taste. The quality of these ingredients can significantly impact the final result, so choosing the best you can find is crucial.
4 Ways to Make Garlic Bread Using Sliced Bread
Sliced bread provides an excellent base for garlic bread, which can be prepared using various techniques. The methods differ in terms of cooking time, equipment required, and the final texture of the garlic bread. Understanding these differences is crucial for choosing the most appropriate method for any given situation.
Overview of Each Method
There are four primary methods for making garlic bread using sliced bread: oven-baked, stovetop, air fryer, and toaster. The oven-baked method involves baking the garlic bread in a preheated oven, resulting in a crispy crust and a soft interior. The stovetop method cooks the garlic bread in a skillet on the stovetop, offering a quick way to achieve a crispy exterior and a soft inside. The air fryer method uses an air fryer to produce garlic bread with a crispy exterior and a tender interior, with minimal oil. Lastly, the toaster method is ideal for making individual servings quickly.
Each method has its unique characteristics and advantages. For instance, the oven-baked method is great for serving a crowd, while the toaster method is perfect for a single serving.
When to Choose Each Method
The choice of method depends on several factors, including available time, desired texture, available equipment, and the occasion. For example, if you’re serving a large group, the oven-baked method might be the most suitable. On the other hand, if you’re short on time and need a quick snack, the toaster or stovetop method could be more appropriate.
| Method | Cooking Time | Texture | Best For |
|---|---|---|---|
| Oven-Baked | 10-15 minutes | Crispy outside, soft inside | Serving a crowd |
| Stovetop | 2-4 minutes per side | Crispy outside, soft inside | Quick servings |
| Air Fryer | 5-7 minutes | Crispy outside, tender inside | Healthier option with less oil |
| Toaster | 2-3 minutes | Toasted garlic bread | Individual servings |
Basic Garlic Butter Recipe
A fundamental component of garlic bread is the garlic butter. A basic recipe involves mixing softened butter with minced garlic, salt, and optional herbs like parsley or thyme.
Ingredient Proportions
For a basic garlic butter, use a ratio of 3 parts butter to 1 part garlic. For instance, you can mix 3 tablespoons of softened butter with 1 tablespoon of minced garlic. Add a pinch of salt and a sprinkle of chopped herbs if desired.
Mixing Techniques
The garlic butter can be mixed using various techniques. You can mix it by hand using a fork, use a food processor for a more uniform blend, or even a mortar and pestle for a more rustic texture. Regardless of the method, ensure that the garlic is evenly distributed throughout the butter.

Preparing garlic butter ahead of time and storing it in the refrigerator allows for spontaneous garlic bread any day of the week. Simply spread the garlic butter on your sliced bread and choose your preferred cooking method.
Method 1: Classic Oven-Baked Garlic Bread
Oven-baked garlic bread stands out for its crispy crust and soft interior. This classic method is a staple for garlic bread enthusiasts, offering a straightforward yet deliciously aromatic result.
Ingredients You’ll Need
To make classic oven-baked garlic bread, you’ll need a few simple ingredients. The foundation is a good quality sliced bread, preferably a rustic or Italian loaf. You’ll also need butter, garlic, salt, and optional ingredients like parsley or parmesan cheese for added flavor.
- 1 loaf of sliced bread (Italian or rustic)
- 1/2 cup (1 stick) unsalted butter, softened
- 3 cloves garlic, minced
- 1/2 teaspoon salt
- Optional: 1/4 cup chopped parsley, 1/2 cup grated parmesan cheese
Step-by-Step Preparation
Preparing oven-baked garlic bread involves three key stages: preparing the garlic spread, applying it to the bread, and baking to perfection.
Preparing the Garlic Spread
The garlic spread is the heart of garlic bread. Start by mincing the garlic cloves using a press or a microplane grater to release their oils and flavor. Mix the minced garlic with softened butter, salt, and any optional ingredients you’re using. Ensure the butter is at room temperature for easy mixing.
Applying to Bread
Once your garlic spread is ready, it’s time to apply it to the bread. You can spread it on one side or both, depending on your preference. For an edge-to-edge coverage, place the slices on a baking sheet. If you prefer a more subtle garlic flavor, you can apply the spread to just the center of the slices.
Baking Process
Preheat your oven to 375°F (190°C). Place the baking sheet with the garlic bread slices on the middle rack. Bake for 10-12 minutes or until the bread is toasted and the edges are golden brown. For an extra crispy top, broil for an additional 1-2 minutes, watching closely to avoid burning.
Baking Tips for Crispy Results
Achieving the perfect balance of a crispy exterior and a soft interior requires some finesse. Here are a few tips:
| Tip | Description |
|---|---|
| Use the right bread | A rustic or Italian loaf works best for its texture and flavor. |
| Don’t overbutter | Too much butter can make the bread soggy. Use just enough to coat. |
| Monitor the baking time | Keep an eye on the bread as it bakes. The edges should be golden. |
| Broil for crispiness | A short broil can add a nice crunch, but watch closely. |
Variations to Try
While classic oven-baked garlic bread is delicious on its own, there are several variations you can try. Consider making pull-apart garlic bread by cutting the loaf into a grid pattern before applying the garlic spread. Alternatively, you can create a garlic bread loaf by spreading the garlic butter between slices before baking the loaf whole.

Method 2: Quick Stovetop Garlic Bread
If you’re looking for a fast and easy way to make garlic bread without heating up your oven, the stovetop method is the way to go. This approach is perfect for when you’re short on time or when your oven is otherwise occupied.
Ingredients You’ll Need
Making stovetop garlic bread requires a few simple ingredients. You’ll need:
- Sliced bread (a crusty bread works well)
- Butter (high-quality, salted butter is recommended for its flavor)
- Garlic (minced or crushed)
- Optional: herbs, cheese, or other seasonings of your choice
It’s worth noting that using a higher fat content butter can help prevent burning on the stovetop.

Step-by-Step Preparation
Preparing the Pan
Start by preheating a heavy-bottomed skillet or griddle over medium heat. A cast-iron pan is ideal due to its even heat distribution.
Cooking Technique
Butter one side of each slice of bread, then place the buttered side down in the pan. Butter the unbuttered side, then cook until the bread is golden brown on the bottom. Flip and cook the other side until it’s equally golden.
Timing Considerations
Cooking time will vary based on the heat and the bread’s thickness, but generally, it takes about 2-3 minutes per side. Keep an eye on the bread to prevent burning.
Tips for Perfect Stovetop Results
To achieve perfect stovetop garlic bread, consider the following tips:
- Use a thermometer to ensure the pan is at the right temperature (around 325°F).
- Don’t overcrowd the pan; cook in batches if necessary.
- Keep the heat at medium to prevent burning.
Flavor Enhancements
To take your stovetop garlic bread to the next level, try adding a touch of olive oil to the pan before cooking or sprinkling some grated cheese on top during the last minute of cooking.
Method 3: Air Fryer Garlic Bread
Air fryer garlic bread is a game-changer for anyone who loves crispy garlic bread without the hassle of using the oven. This method offers a quick, efficient, and delicious way to enjoy garlic bread with minimal effort.
Ingredients You’ll Need
To make air fryer garlic bread, you’ll need the following ingredients:
- 4-6 slices of bread (preferably a crusty bread or Italian bread)
- 3-4 cloves of garlic, minced
- 2 tablespoons of butter, softened
- Salt and pepper to taste
- Optional: parsley, oregano, or other herbs for added flavor
It’s worth noting that using slightly less butter than you would for oven-baked garlic bread can help prevent dripping in the air fryer.
Step-by-Step Preparation
Preparing the Bread
Start by preparing your bread slices. You can use the bread straight from the package or pre-toast it lightly for a crisper texture. Spread a thin layer of garlic butter on each slice, making sure to cover the entire surface.
Air Fryer Arrangement
Arrange the bread slices in a single layer in the air fryer basket. You may need to cook them in batches depending on the size of your air fryer. Ensure there’s enough space between slices for air to circulate.

Cook the garlic bread in the air fryer at the recommended temperature (usually around 375°F). Cooking time will vary based on the thickness of the bread and your desired level of crispiness. Typically, it takes about 3-5 minutes. You may need to flip the bread halfway through the cooking time to achieve even browning.
Air Fryer Settings and Timing
The ideal temperature and cooking time may vary depending on your air fryer model. Here are some general guidelines:
- Temperature: 375°F (190°C)
- Cooking time: 3-5 minutes
- Thickness adjustment: Thicker bread may require an additional minute or two
Keep an eye on your garlic bread during the cooking process, as air fryers can vary in performance.
Advantages of the Air Fryer Method
The air fryer method offers several advantages, including reduced oil usage, exceptional crispiness, and energy efficiency. It’s a quick and easy way to make delicious garlic bread without heating up your entire oven.
As the popularity of air fryers continues to grow, this method is becoming increasingly appealing to those looking for a convenient and tasty garlic bread solution.
Method 4: Toaster Garlic Bread
For those looking for a quick and easy way to make garlic bread, using a toaster is an excellent option. This method is perfect for single servings and requires minimal equipment, making it ideal for small households or individuals.
Ingredients You’ll Need
To make toaster garlic bread, you’ll need the following ingredients:
- 2 slices of bread (preferably a day-old bread)
- 1-2 cloves of garlic, minced
- 1-2 tablespoons of butter, softened
- Salt and pepper to taste
- Optional: dried herbs like oregano or thyme
It’s essential to use softened butter to ensure it spreads evenly and doesn’t tear the bread. For garlic, adjust the amount according to your taste preferences.
Step-by-Step Preparation
Preparing toaster garlic bread involves three main steps: pre-toasting, applying garlic butter, and final toasting.
Pre-toasting Technique
Start by lightly toasting the bread in the toaster until it’s slightly firm. This step helps prevent the bread from becoming too soggy when you apply the garlic butter.
Applying Garlic Butter
Mix the softened butter with minced garlic and a pinch of salt. Spread this garlic butter mixture evenly onto the pre-toasted bread slices. Be cautious not to overload the bread, as this can make it soggy.
Final Toasting
Place the bread slices back in the toaster and toast until they reach your desired level of crispiness. Keep an eye on the toaster to avoid burning the bread.
Tips for Toaster Safety
When making toaster garlic bread, safety is paramount. Here are some tips to keep in mind:
| Safety Tip | Description |
|---|---|
| Monitor the toaster | Always keep an eye on the toaster when it’s in use, especially when toasting garlic bread. |
| Clean the toaster | Regularly clean the toaster to prevent crumbs from accumulating and potentially causing a fire. |
| Use toaster ovens | Consider using a toaster oven instead of a traditional toaster for safer preparation, especially when dealing with butter. |
Quick Serving Ideas
Toaster garlic bread can be served in various ways:
- Top with a fried egg for a quick breakfast
- Add tomato slices and mozzarella cheese for a pizza toast
- Serve alongside soups or salads for a satisfying meal
Common Mistakes to Avoid
The art of making perfect garlic bread lies in avoiding a handful of common pitfalls that can ruin the experience. Despite its simplicity, garlic bread can be a culinary minefield if certain mistakes are not sidestepped.
Butter Temperature Issues
One of the most common mistakes is using butter that’s either too cold or too melted. Butter that’s too cold can lead to uneven spreading and even tear the bread, while butter that’s too melted can soak through the bread, resulting in an uneven flavor distribution. The ideal is to use butter at room temperature, softened to a spreadable consistency but not melted.
Garlic Proportion Problems
Using too much or too little garlic can significantly impact the flavor. Too much garlic can overwhelm the dish with bitterness, while too little can result in a bland taste. A general guideline is to use about 3-4 cloves of garlic per loaf of bread, minced finely to distribute the flavor evenly.
| Loaf Size | Garlic Cloves | Minced Garlic |
|---|---|---|
| Small Loaf | 2-3 | 1-2 tbsp |
| Medium Loaf | 3-4 | 2-3 tbsp |
| Large Loaf | 5-6 | 3-4 tbsp |
Cooking Time Errors
Cooking time is crucial, as undercooking can result in a soggy, doughy texture, while overcooking can lead to a burnt, dry product. The key is to find the perfect balance, typically achieved by baking until the bread is golden brown and crispy on the outside, and soft on the inside.
Bread Selection Mistakes
Not all bread is created equal when it comes to garlic bread. Bread that’s too thin or has too many holes can fall apart or become too crispy, while bread that’s too dense may not absorb the garlic butter well. Ideal bread types include Italian or French bread, which have a good balance of texture and structure.
By avoiding these common mistakes, you can ensure that your garlic bread turns out perfectly every time, enhancing your meals with a delicious and aromatic side dish.
Garlic Butter Variations
Elevate your garlic bread game with these creative garlic butter variations. By incorporating different ingredients into your garlic butter, you can create a wide range of flavors to suit any taste.
Herb-Infused Garlic Butter
Add a sprinkle of freshness to your garlic bread with herb-infused garlic butter. Mix in chopped fresh herbs like parsley, basil, or rosemary into your garlic butter for added depth. For a more subtle flavor, use dried herbs like thyme or oregano. A general rule of thumb is to use 1 tablespoon of fresh herbs or 1 teaspoon of dried herbs per 2 cloves of garlic.
- Parsley and garlic butter pairs well with Italian bread
- Basil and garlic butter complements focaccia nicely
- Rosemary and garlic butter is a great match for rustic bread
Cheesy Garlic Butter
Indulge in the richness of cheesy garlic butter by incorporating grated cheese into your garlic butter mixture. Parmesan, cheddar, and mozzarella are popular cheese options that melt beautifully. You can also sprinkle cheese on top of your garlic bread before baking for an extra-crispy topping.
Spicy Garlic Butter
Add a kick to your garlic bread with spicy garlic butter. Mix in red pepper flakes, cayenne pepper, or hot sauce to give your garlic bread a spicy boost. For a more intense heat, use fresh chilis or jalapenos in your garlic butter.
- Start with a small amount of heat (1/4 teaspoon) and adjust to taste
- Combine spicy garlic butter with herb-infused garlic butter for a balanced flavor
Sweet Garlic Butter
Balance out the savory flavors of garlic with sweet garlic butter. Mix in honey or maple syrup into your garlic butter to create a sweet-savory combination. This pairs particularly well with whole grain breads or breads with a hint of sweetness.
By experimenting with these garlic butter variations, you can create a wide range of flavors to suit any occasion or taste preference.
Serving Suggestions and Pairings
From casual gatherings to formal events, garlic bread can be a star or a supporting actor on your dining table. Its versatility makes it an excellent accompaniment to a wide range of dishes.
Classic Pasta Pairings
Garlic bread is a classic Italian-American staple that pairs perfectly with various pasta dishes. For tomato-based sauces, a lightly garlic-infused bread complements the bright acidity of tomatoes. With cream-based sauces, a more subtle garlic flavor in the bread avoids overpowering the dish. For oil-based pasta, such as those with pesto or aglio e olio, garlic bread can be a flavorful match if seasoned appropriately to enhance the herbal notes.
Soup and Stew Accompaniments
Garlic bread isn’t just for pasta; it also makes an excellent accompaniment to soups and stews. For chunky vegetable soups, a crusty garlic bread can provide a satisfying textural contrast. With creamy bisques, a more delicate garlic bread can complement the richness without overpowering it. The key is to balance the flavors and textures, allowing the garlic bread to enhance the soup without overwhelming it.
Creating a Garlic Bread Appetizer Platter
Transforming garlic bread into an appetizer platter can be a hit at any gathering. Start with a variety of garlic breads, such as classic butter, herb-infused, or cheesy. Pair these with complementary dips like marinara sauce, herb oil, or flavored butters. Add other items like olives, cured meats, and roasted vegetables to create a diverse and appealing spread. For a more formal event, consider arranging the items on a decorative platter or board, garnished with fresh herbs. For casual gatherings, a rustic wooden board or a simple tray can add to the informal charm.
To elevate your garlic bread appetizer platter, consider the occasion and adjust the presentation accordingly. For a casual gathering, a simple yet inviting arrangement will suffice. For more formal events, pay attention to the aesthetics, using garnishes and decorative elements to create a visually appealing display.
Storing and Reheating Leftover Garlic Bread
Leftover garlic bread doesn’t have to go to waste; with the correct storage and reheating techniques, it can be just as delicious as when it was first made. Proper handling ensures that your garlic bread remains fresh and safe to eat.
Proper Storage Methods
To maintain the quality of your garlic bread, it’s crucial to store it correctly. First, allow the bread to cool completely on a wire rack to prevent moisture buildup. Once cooled, you can wrap it in aluminum foil or place it in an airtight container. For longer storage, consider freezing the bread, wrapped tightly in foil or plastic wrap, and labeled with the date.
- Cool the bread completely before storing.
- Use aluminum foil or airtight containers for storage.
- Freeze for longer-term storage, ensuring it’s wrapped tightly and labeled.
When refrigerating, garlic bread can typically last for up to 3 days. For freezing, it’s best consumed within 2 months for optimal flavor and texture.
Reheating Techniques
Reheating garlic bread can be done in several ways, each with its own benefits. The key is to restore the bread’s original crispiness and flavor.
Oven Reheating
Preheat your oven to 350°F (175°C). Wrap the garlic bread in foil to prevent drying out and heat for 10-15 minutes, or until warmed through. For a crisper crust, remove the foil for the last 2-3 minutes.
Microwave Method
Wrap the garlic bread in a damp paper towel to maintain moisture. Heat on medium power for 20-30 seconds at a time, checking until it’s warmed through. Be cautious to avoid overheating, which can make the bread soggy.
Air Fryer Refreshing
Place the garlic bread in the air fryer basket, setting the temperature to 320°F (160°C). Heat for 3-5 minutes, or until crispy and warmed through. This method is excellent for restoring the bread’s crunchiness.
Regardless of the reheating method, ensure the garlic bread is heated to an internal temperature of at least 165°F (74°C) to ensure food safety. By following these storage and reheating tips, you can enjoy your leftover garlic bread with minimal loss of quality.
Conclusion
With the four easy garlic bread methods outlined in this article, you can create mouth-watering homemade garlic bread using regular sliced bread recipes. Whether you prefer the classic oven-baked method, the quick stovetop approach, the crispy air fryer technique, or the convenient toaster method, each technique offers a unique advantage.
By mastering these easy garlic bread methods, you can elevate simple ingredients into delicious accompaniments for various meals or enjoyable standalone snacks. Experiment with different variations, such as herb-infused garlic butter or cheesy garlic bread, to add your personal touch.
The key to success lies in understanding the fundamental principles behind each method and choosing the best approach for your needs. With practice, you’ll become proficient in making homemade garlic bread that’s sure to impress family and friends. So, get creative with your sliced bread recipes and start enjoying the rich flavors of garlic bread in the comfort of your own home.