Delightful Halloween Cake Recipes to Try
Surprising fact: hosts serving seasonal desserts report a 42% jump in guest compliments when they pick one standout showstopper for the party.
This roundup gathers the top seasonal recipes and decorating tips, from speedy traybakes to multi-layer showstoppers that slice cleanly for a crowd.
Expect pumpkin-forward classics, deep chocolate layer delights, apple cider and salted caramel treats, plus playful cupcakes and themed designs like graveyards and black cats.
We’ll list flavors, finishes (buttercream, ganache, or cream cheese), decorations, and time-saving shortcuts so you can choose a bake-and-go recipe or a two-day project.
Pro techniques include freezing layers for neat stacking, using black cocoa for dramatic color, and pulling melted marshmallow for spiderwebs. Family-friendly builds sit beside advanced designs, and each recipe notes room-temperature tips and oven checks to keep results reliable.
Key Takeaways
- Wide mix of desserts: pumpkin, chocolate, apple, cupcakes, and traybakes.
- Options for quick bakes and two-day showpieces to match your available time.
- Each recipe lists flavor, finish, decoration, and shortcuts for busy hosts.
- Pro tips: freeze layers, use black cocoa, and manage room-temperature ingredients.
- Family-friendly and advanced projects are both included for every skill level.
Set the Scene for a Spooky Bake: What Makes a Perfect Halloween Cake
Great party desserts begin at the batter: select a flavor that plays well with textures and theatrical garnishes. Start bold—a chocolate sponge for drama, pumpkin for warm spice, or an apple-cider–style loaf for nostalgia. Keep the final service in mind so the design matches how you will slice and share.
Flavor and structure matter first. Use black cocoa for deep color without staining, and add a dash of espresso to lift chocolate notes. Trim and freeze layers for neat stacking, and use an oven thermometer plus fresh baking powder to control temperature and rise.
Decoration that delights
- Plan textures: meringue ghosts, marshmallow webs, cookie “dirt,” and berry syrup “blood” for contrast.
- Choose a finish that suits climate—buttercream holds shape; cream cheese adds tang for pumpkin sponges.
- Stage from sturdy to delicate: place large elements first, then add softer details.
halloween cake ideas
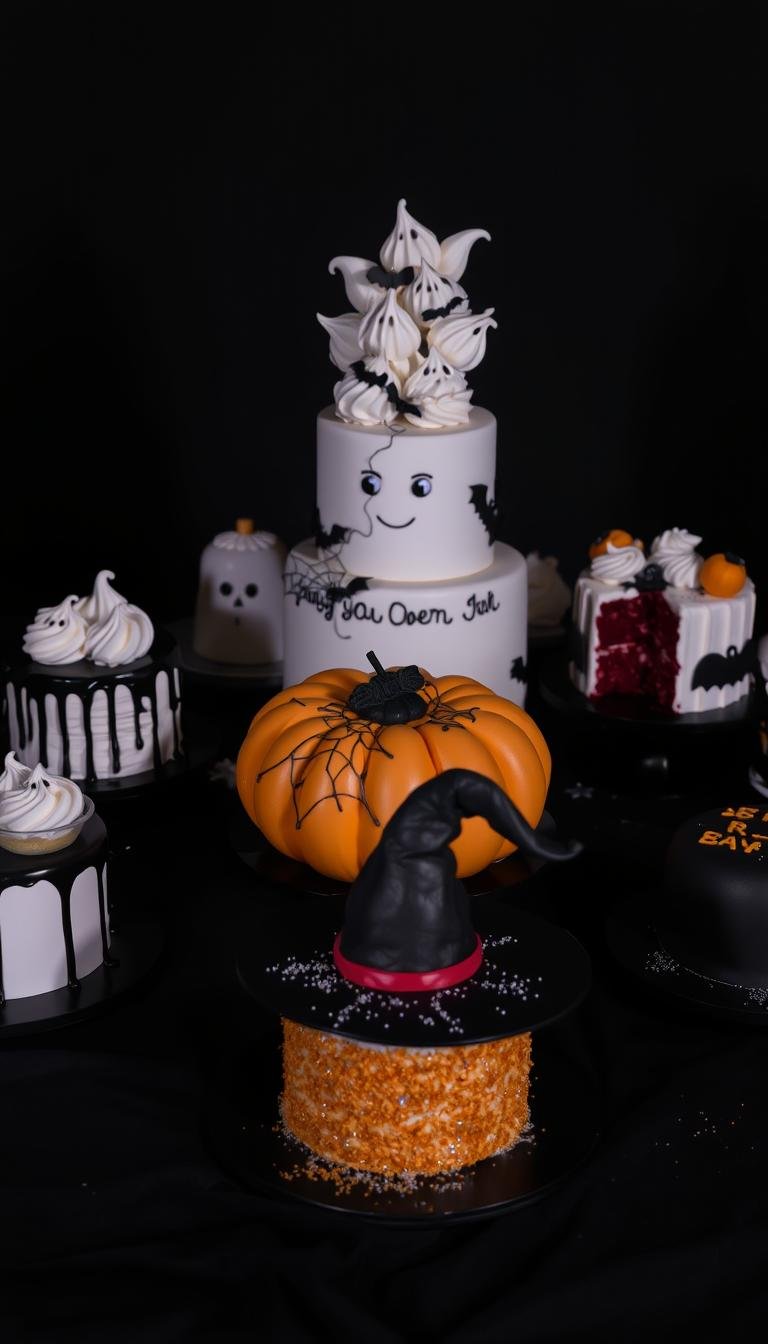
Serve a trio of showstoppers that blend spooky visuals with simple, reliable technique.
Vampire Poke Cake: an almond buttermilk base bakes tender, then channels are poked and filled with tart cherry “blood.” Finish with clouds of whipped cream for contrast. This recipe reads dramatic but is very approachable for home bakers.
Halloween Layer Cake: stack a classic layer cake and top it with Ghost Peeps and Milano cookie tombstones marked “RIP” to build a playful graveyard. Use cookie crumbs as “dirt” and a small board to stage the scene.
Spiderweb Black Cocoa Layer Cake: use black cocoa in sponge and buttercream for a deep color. Bake in three straight-sided 6×2-inch pans, cool, trim if needed, then freeze layers overnight to reduce crumbs before assembly.
- Add a splash of espresso to boost chocolate without coffee flavor.
- Bring ingredients to room temperature for a smoother batter and tender crumb.
- Pull melted marshmallow into webs, rewarming in short microwave bursts to keep stretch.
- Use an offset spatula and icing smoother for clean sides before adding webbing and meringue ghosts.
“Small steps—trim, freeze, and smooth—give dramatic, clean results every time.”
Pumpkin-Forward Cakes that Own the Season
These pumpkin-forward treats focus on silky fillings, sturdy crusts, and neat presentation for serving guests. Each recipe highlights spice balance so pumpkin flavor stays front and center.
Rich Pumpkin Cheesecake with crunchy crust
This showstopper pairs a thick, crunchy crust with an ultra-creamy, pumpkin-rich filling. Bake low and slow, cool gently, then refrigerate overnight for the cleanest slices.
Brownie Bottom Pumpkin Cheesecake mashup
A fudgy chocolate base supports a spiced pumpkin cheesecake layer. The contrast of dense chocolate and silky filling delivers bold texture and clear flavor lines.
Pumpkin Cheesecake Roll with cream cheese swirls
Roll a flexible pumpkin sponge around tangy cream cheese swirls for a dramatic spiral. Use parchment and a dusting of powdered sugar to prevent sticking and chill before slicing.
Classic Pumpkin Cake with cream cheese or buttercream frosting
For a versatile layer dessert, top with cream cheese frosting for tang or buttercream with a pinch of pumpkin pie spice for warmth. Keep sugar measured so the pumpkin remains dominant.
- Balance spices: cinnamon, nutmeg, and clove—use pumpkin pie spice as shorthand.
- Mix gently; scrape bowl sides to avoid streaks and overworked batter.
- For cheesecakes: run a thin knife around the pan after baking to prevent cracks as it cools.
| Recipe | Texture | Best Finish |
|---|---|---|
| Rich Pumpkin Cheesecake | Ultra-creamy filling, crunchy crust | Light whipped cream, toasted pecans |
| Brownie Bottom Mashup | Fudgy base, silky pumpkin layer | Chocolate drizzle, sea salt |
| Pumpkin Cheesecake Roll | Soft rolled sponge, cream swirls | Powdered sugar dust, caramel drizzle |
| Classic Pumpkin Layer | Moist crumb | Cream cheese or spiced buttercream |
“Refrigerate cheesecakes overnight and warm a sharp knife before slicing for the cleanest layers.”
Chocolate-Lovers’ Treats for a Dark and Decadent Halloween
Dark chocolate treats can feel both luxurious and playful when you pair fudgy bases with bright fillings. This short selection focuses on two reliable, crowd-pleasing bakes that deliver big flavor with minimal fuss.
Moist Chocolate Polka Dot Sheet Cake with cheesecake “dots”
Why it works: A fudgy chocolate sheet cake punctuated by creamy cheesecake circles gives texture and nostalgia. Stir in crunchy chocolate chips for contrast and a slight snap.
Use a sturdy pan so the tray bakes hold shape for serving and transport this year. Double the batter for a larger pan and watch the center for doneness.
Easy Spook Cake with dark chocolate buttercream
The Easy Spook version is a tender chocolate layer build sandwiched with dark chocolate buttercream. Top with shop-bought mini meringues and a berry syrup drizzle for theatrical “blood.”
Chill briefly to set the frosting, then wipe your knife between cuts for clean slices. To keep sweetness balanced, bloom cocoa with hot coffee or water in the batter so you use less sugar without losing depth.
- Quick finish: Pipe or place mini meringues and drizzle berry syrup.
- Transport tip: Sheet-style bakes in a lined pan are easier to carry and portion.
- Flavor twist: Add orange zest or a pinch of cinnamon for seasonal lift.
| Recipe | Format | Best Finish |
|---|---|---|
| Chocolate Polka Dot Sheet Cake | Sheet pan, single layer | Cheesecake dots, chocolate chips |
| Easy Spook Cake | Two-layer or three-layer | Dark buttercream, meringues, berry drizzle |
| Scaling & Tips | Double for larger pans | Chill to set frosting, wipe knife between slices |
“Blooming cocoa with hot liquid deepens chocolate notes while keeping sugar in check.”
Cupcakes and Mini Desserts for a Halloween Party
Handheld treats simplify serving and let you showcase playful, spooky decorations without slicing a large cake.
Vampire Cupcakes: Moist chocolate bases hold a surprise strawberry jelly “blood” center. Top with a glossy, pillowy marshmallow frosting for a dramatic bite that stays soft.
Vampire Cupcakes with strawberry jelly centers and marshmallow frosting
Use a small tool to core each cupcake and spoon in jelly. Pipe marshmallow-y frosting and torch lightly for a shiny crown. These cupcakes are a fun center-filled option for a busy event.
Hocus Pocus Cupcakes with white chocolate “hair” toppers
Pipe tinted white chocolate into wispy hair shapes on parchment, chill until firm, and nestle pieces into swirled icing. The toppers set quickly and add a crafty, colorful accent that pairs well with simple buttercream.
Zombie Brains Cupcakes for ghoulish fun
Build brain-like ridges with a small star tip. Finish with a light red glaze for a creepy sheen. This approach keeps the look bold while staying easy enough for a big batch.
Mini Cookie Cheesecakes for bite-size treats
Press sugar cookie dough into mini pans for a crisp base, then fill with a quick cream cheese filling and bake until just set. Chill before serving so each mini slice keeps clean lines and a cool mouthfeel.
- Batch tips: Use a scoop to portion batter and rotate pans halfway through baking.
- Prep: Make candy and chocolate toppers ahead so assembly is fast on the day.
- Flavor tweaks: Try orange extract in chocolate cupcakes or a pinch of cinnamon in the mini cheesecake filling.
- Serve: Chill cheesecakes until set and bring cupcakes slightly toward room temperature so the cream elements taste richer.
| Treat | Key Feature | Best Finish |
|---|---|---|
| Vampire Cupcakes | Center-filled with strawberry “blood” | Marshmallow frosting, glossy top |
| Hocus Pocus Cupcakes | Colored white chocolate toppers | Swirled buttercream, chocolate hair pieces |
| Zombie Brains Cupcakes | Brain-like frosting ridges | Red glaze, light candy accents |
| Mini Cookie Cheesecakes | Sugar cookie crusts, creamy filling | Chilled, dusted with cookie crumbs |
Apple Cider Cakes That Taste Like Fall
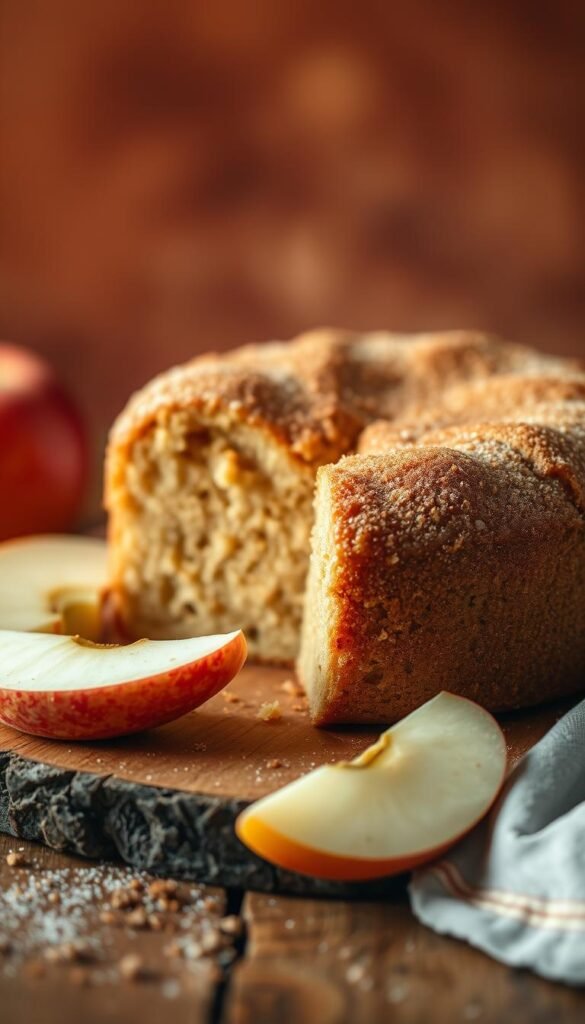
Apple cider brings warm, tart depth to autumn bakes without extra fuss. These three takes capture donut-shop charm, a dense pound loaf, and a layered showstopper perfect for potlucks throughout the year.
Apple Cider Donut Cake — no frying, big flavor
Spotlight: a tender crumb brushed or tossed with cinnamon sugar for classic donut taste without a fryer. It’s quick to make and slices cleanly for gatherings.
Apple Cider Donut Pound Cake with cinnamon sugar coating
Choose this when you want a denser, bakery-style slice. Roll the warm loaf in cinnamon sugar for nostalgia and keep it wrapped for transport so it stays moist over time.
Salted Caramel Apple Crumble Cake with layers and drizzle
For showy presentation, stack spiced apple cider layers with apple pie filling and pockets of buttery crumble. Finish with a slow salted caramel drizzle and a light chocolate accent if you want contrast.
- Oven tip: preheat thoroughly and use an internal thermometer for longer bakes to confirm temperature stability.
- Moisture: reduce fresh cider slightly on the stove to concentrate apple flavor without thinning the batter.
- Balance: keep the base modestly sweet; rely on cinnamon sugar and salted caramel for finishing notes.
“These cakes slice cleanly and travel well, making them perfect for fall gatherings any time of the year.”
Graveyards, Ouija Boards, and Other Spooky Showstoppers
A dramatic top makes a simple sponge feel like a centerpiece. These three builds use texture and tidy assembly so you can serve something memorable without stress.
Haunted Graveyard
Frost a dense chocolate base, then scatter cookie crumb “dirt” for texture.
Plant chocolate biscuit headstones upright and dot the surface with glossy mini meringue ghosts for height.
Balance sweetness with a dark chocolate ganache drip so the sugary toppers do not overwhelm the crumb.
Ouija Board
Smooth a level layer cake surface and arrange DIY edible toppers to spell messages across the board.
Shape letters and the planchette in fondant or tempered chocolate, then place them cleanly so the design reads like a real board.
Chill briefly so toppers sit without sliding and use small dabs of buttercream to secure pieces.
Black Cat
Bake a straightforward sponge for this kid-friendly build and invite small hands to help decorate.
Use candy for eyes and whiskers, tinted buttercream for the base, and marshmallows to form playful ears or small cobweb accents.
Keep the layout simple so children can add favorites without overcrowding the top.
- Use mini meringue ghosts or mini marshmallows around edges for extra dimension.
- Place showstoppers on a sturdy serving board and secure decorations with a dab of frosting.
- Scatter a few broken cookies and candy around the base for presentation and contrast.
| Showstopper | Key Toppers | Best Finish |
|---|---|---|
| Haunted Graveyard | Mini meringue ghosts, chocolate biscuit headstones, cookie crumb “dirt” | Dark chocolate ganache drip, glossy meringues |
| Ouija Board | Fondant letters, chocolate planchette, tidy lettering | Smooth buttercream base, chilled to set toppers |
| Black Cat | Candy eyes, marshmallow ears, tinted buttercream | Simple frosted base, kid-decorated accents |
Simple Traybakes and Quick Wins When You’re Short on Time
When minutes are tight, a single traybake can feed a crowd and still look polished on the table. These sheet-style options save hands-on prep and help you free up the oven for other dishes.
Keep it practical: line your pan, preheat the oven, and cool completely before icing to avoid a runny finish. A tray solution can be an easy make for parties and delivers tidy slices every time.
Halloween Pumpkin Traybake with smooth cream cheese icing
This zesty spiced sponge uses canned pumpkin for consistent moisture and spice. Spread a smooth cream cheese icing that sets firm for clean slicing and neat presentation.
Why pick it: it bakes fast, portions easily, and is ideal when you need a crowd-pleasing dessert without fuss.
Pumpkin & Caramel Shortcut Cake with dulce de leche
For a showy finish with less effort, layer or fill a sheet sponge with jarred dulce de leche. The glossy caramel provides instant richness and an impressive gloss.
Time savers: use pantry boosts like canned pumpkin and jarred caramel, cut into squares, or portion into liners if cupcakes are preferred.
- Quick checklist: preheat the oven, line the pan, cool fully before icing.
- Pantry boosts: canned pumpkin and jarred caramel cut prep time and keep flavor reliable.
- Finish tips: dust with cinnamon sugar, add chocolate shavings, or drizzle for a polished look.
- Portioning: traybakes are easier to cut into uniform squares and serve—much easier than multi-tier builds.
“Use a lined pan and cool fully before icing to keep slices clean and frosting steady.”
Frosting, Buttercream, and Cream Cheese: Choosing the Right Finish
Pick a finish that matches your flavor profile, handling needs, and serving window. The right frosting affects look, mouthfeel, and how cleanly you slice a layered dessert. Think about warmth, transport, and who will eat it when you choose the top finish.
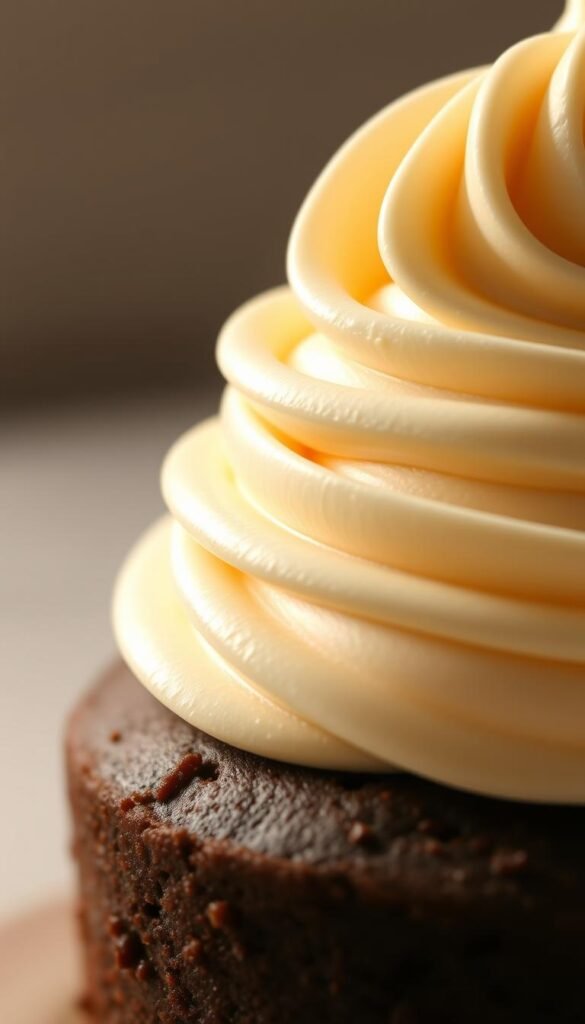
When to use cream cheese frosting vs. buttercream
Choose cream cheese frosting for tangy, soft finishes that pair especially well with pumpkin and spice. It stays tender and tastes bright, so it suits moist sponges and autumn flavors.
Reserve classic buttercream when you need sharp edges, sturdy piping, or a finish that holds in warmer rooms. Use less sugar if you want a less sweet finish and to let other flavors shine through.
Black cocoa buttercream for dramatic effect
For a bold, inky finish try black cocoa buttercream. Barley & Sage style uses unsalted butter, powdered sugar, and black cocoa beaten 4–5 minutes until light and fluffy. That aeration helps it spread and pipe cleanly.
Black cocoa gives a deep color without staining hands like some gels. Add cocoa gradually and scrape the bowl to avoid streaks for a uniform, dramatic top.
Room temperature tips for butter, cream, and cheese
Start with butter at room temperature for a smooth emulsion. Too cold gives lumps; too warm and the structure will collapse. Aim for a soft but still cool block before beating.
Stabilize cream cheese frosting by beating butter first, then adding the cheese. Sift powdered sugar to avoid grit and add a tablespoon of heavy cream if you need a looser spread without extra sugar.
“Make frosting ahead and re-beat briefly to restore texture before spreading on a cooled cake top.”
Decoration Techniques: Marshmallows, Meringue, Cookies, and Candy
Focus on contrast—soft, glossy marshmallow strands and crunchy crumbs make the design pop. Small details add drama without complicating assembly or slicing the cake.
Marshmallow spiderwebs: Melt store-bought marshmallows in a microwave-safe bowl for 10–20 seconds, stir until smooth, then cool 1–2 minutes until thick and stringy. Pull with forks or gloved fingers into thin strands and drape over the top for a wispy web effect.
Make sure to test the temperature before handling—marshmallow can be very hot right out of the microwave. Use short bursts to control heat and avoid sticky messes.
Meringue ghosts: whipping, baking, and placing
Create meringue by whipping egg whites with sugar to stiff peaks. Pipe small ghosts and bake low and slow until set; cool completely before moving. Dot eyes with melted chocolate or an edible marker after they cool.
Cookies, candy, and edible “blood”: Press cookie crumbs into frosting to simulate soil and anchor toppers. Build edible blood with berry syrup or cherry sauce and apply sparingly so it clings without pooling. Add small fondant or molded chocolate accents—bones, spiders, tiny pumpkins—for layered detail.
- Stage decorations large to small: cookies and toppers first, then marshmallow webs, finish with meringue ghosts.
- Store decorated desserts in a cool room; avoid humidity that softens marshmallows and meringue.
| Technique | Key Step | Finish Tip |
|---|---|---|
| Marshmallow Spiderwebs | Melt 10–20s, cool 1–2m, pull strands | Wear gloves; drape gently to avoid tearing |
| Meringue Ghosts | Whip to stiff peaks; bake low and slow | Dot eyes with melted chocolate after cooling |
| Cookie Crumbs & Candy | Press crumbs into frosting; add candy accents | Use berry syrup for realistic blood drips |
“Stage from sturdy to delicate: place the big pieces first, then add webs and ghosts for height and movement.”
Pro Baking Tips: From Batter to Layers
A reliable process — from measuring to chilling — keeps each layer neat and uniform. These steps protect texture, streamline assembly, and help you finish with sharp edges every time.
Room-temperature ingredients and measurement
Make sure dairy and eggs reach room temperature so the batter emulsifies and bakes into a tender crumb with even rise.
Measure flour and cocoa by weight when possible. If you spoon-and-level, you avoid dense results. Sift cocoa to remove lumps and confirm fresh baking powder for reliable lift.
Oven, pan prep, and handling layers
Use three 6×2-inch straight-sided pans for even layers. Spray with an oil-based pan spray; avoid butter for greasing to prevent sticking from milk solids.
Employ an oven thermometer to verify true temperature. Small variances can lengthen baking time and affect how layers set.
Trimming, freezing, and building the layer
Cool completely, then level domes with a long serrated knife. Wrap each trimmed layer and freeze overnight for crumb-free assembly.
Build on a rotating cake stand. Apply a thin crumb coat, chill briefly, then use an offset spatula and an icing smoother for sharp sides. A tidy workspace and a cool room make the final smoothing much easier.
| Step | Why it matters | Quick tip |
|---|---|---|
| Room temp ingredients | Better emulsion, even rise | Soften butter and warm eggs 30–60 min |
| Measure precisely | Prevents dense or dry batter | Weigh flour or spoon-and-level |
| Pan prep & oven | Clean release; true heat | Oil-based spray; use oven thermometer |
| Freeze & assemble | Crumb-free, neat finish | Wrap layers; chill before final coat |
“Small, consistent steps in prep and temperature control deliver professional results at home.”
Conclusion
Finish strong: choose one reliable recipe, prep smart, and let a few bold decorations carry the look.
These top selections span skill levels — from speedy sheet and pound cakes to layered showpieces and playful minis. Pick a base you love (pumpkin, chocolate, or apple cider) and match the finish and decor to your timeline.
For party-ready results: sheet pans and pound-style bakes slice neatly, while cupcakes and minis are perfect grab-and-go treats for a halloween party. Use spiderwebs, graveyards, or an Ouija-style board when you want dramatic impact with simple steps.
Small pro moves make the difference: room-temp ingredients, precise measuring, a calibrated oven, and chilled layers before final assembly. Bake layers the day before, decorate the morning of, and allow flavors to settle so your perfect halloween layer dessert steals the show this year.
