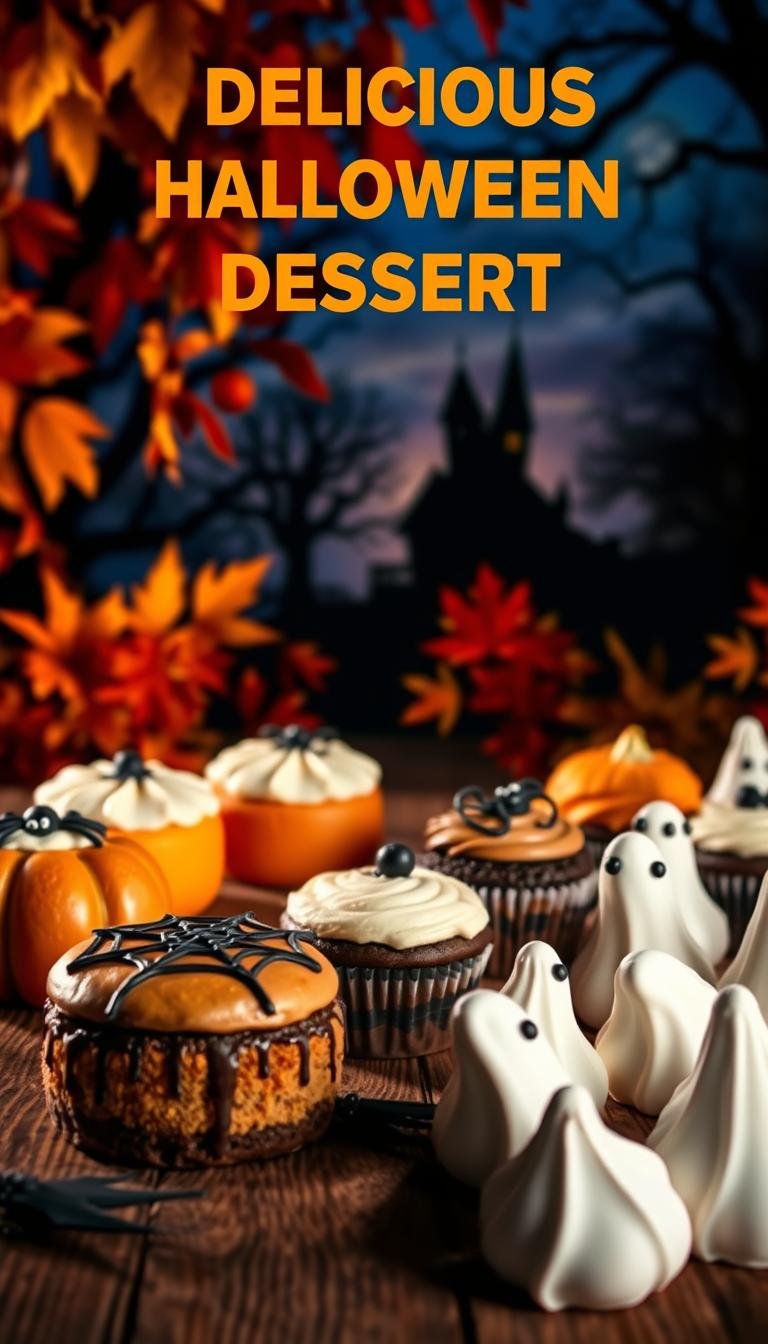
Delicious Halloween Desserts: 10 Easy Recipes
Surprising fact: nearly one-third of party hosts say seasonal sweets shape their entire menu, so a few simple treats can make a big impact.
This Website contains affiliate links. That means I may earn a small commission if you purchase through my links, at no extra cost to you.
This list will give you a curated lineup of quick, crowd-pleasing recipes for spooky season that any home baker can tackle.
Expect classics and fresh twists: Boo Bark made with real baking chocolate, glossy candy apples, vampire cupcakes with jelly “blood,” spiced pumpkin bars, Rice Krispies monsters, and no-bake cheesecake bars. Each recipe focuses on minimal steps, short ingredient lists, or clever shortcuts so you get reliable results fast.
You’ll also find time-saving tips, substitution notes, and decorating ideas using tools like Ghirardelli melting wafers, AmeriColor gel pastes, and silicone mats. Storage guidance and make-ahead tricks will help you scale for a party or school event.
Follow simple technique cues—temperatures, setting times, and swirl methods—so texture, shine, and snap come out right. Pick two or three favorites to build a cohesive table and repurpose leftover candy into clever treats.
Key Takeaways
- Recipes are short, approachable, and party-ready for spooky season.
- Includes no-bake options and easy box-mix upgrades for busy cooks.
- Real brands and tools (Ghirardelli, AmeriColor) streamline baking.
- Storage, make-ahead, and repurposing tips keep treats fresh.
- Technique cues help first-time bakers nail results every time.
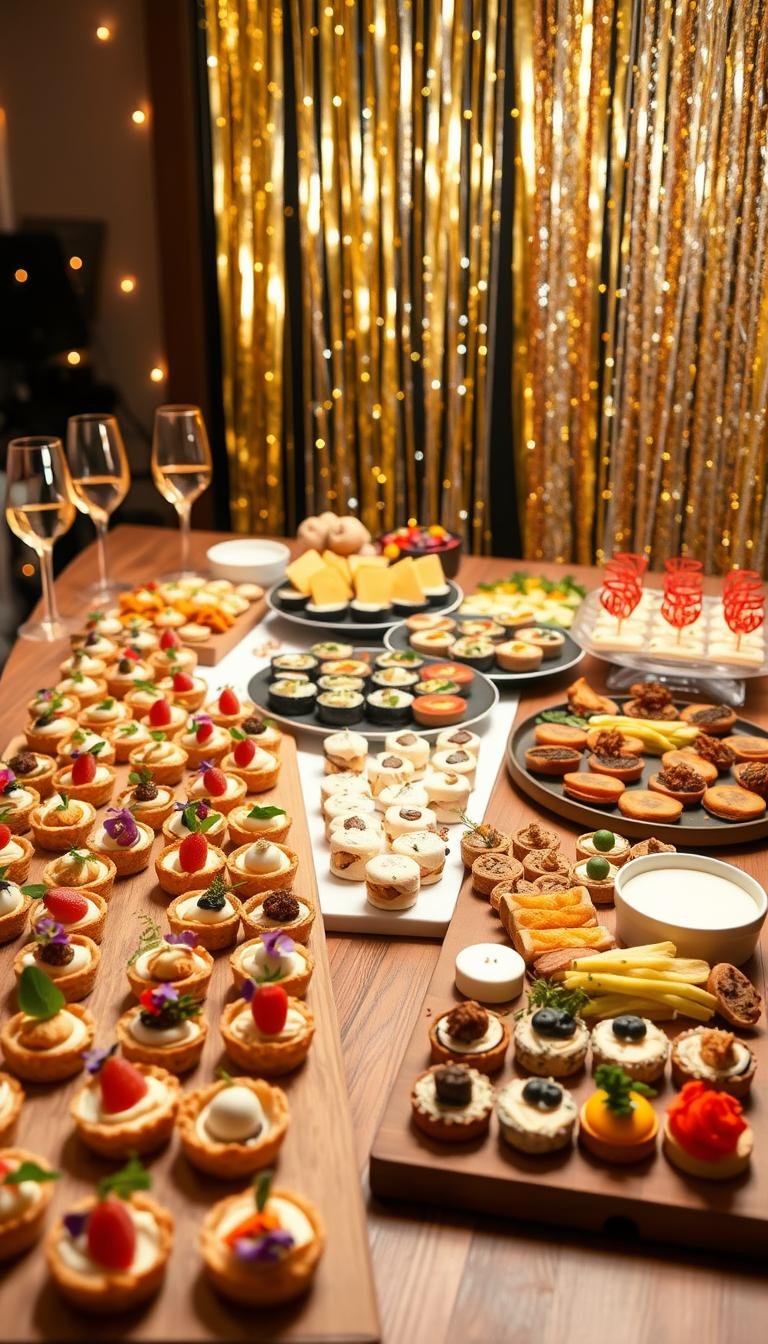
Welcome to spooky season: quick, festive sweets for your Halloween party
Make spooky season simple: fast, festive treats that turn pantry staples into party hits. Pick a mix of no-bake bars and one or two oven bakes to keep prep manageable and stress low.
Quick decorating wins—pre-colored sprinkles, Edible Royal Icing Eyes, and M&M’s Ghoul Mix can turn basic cookies or boxed mixes into standout halloween treats in minutes.
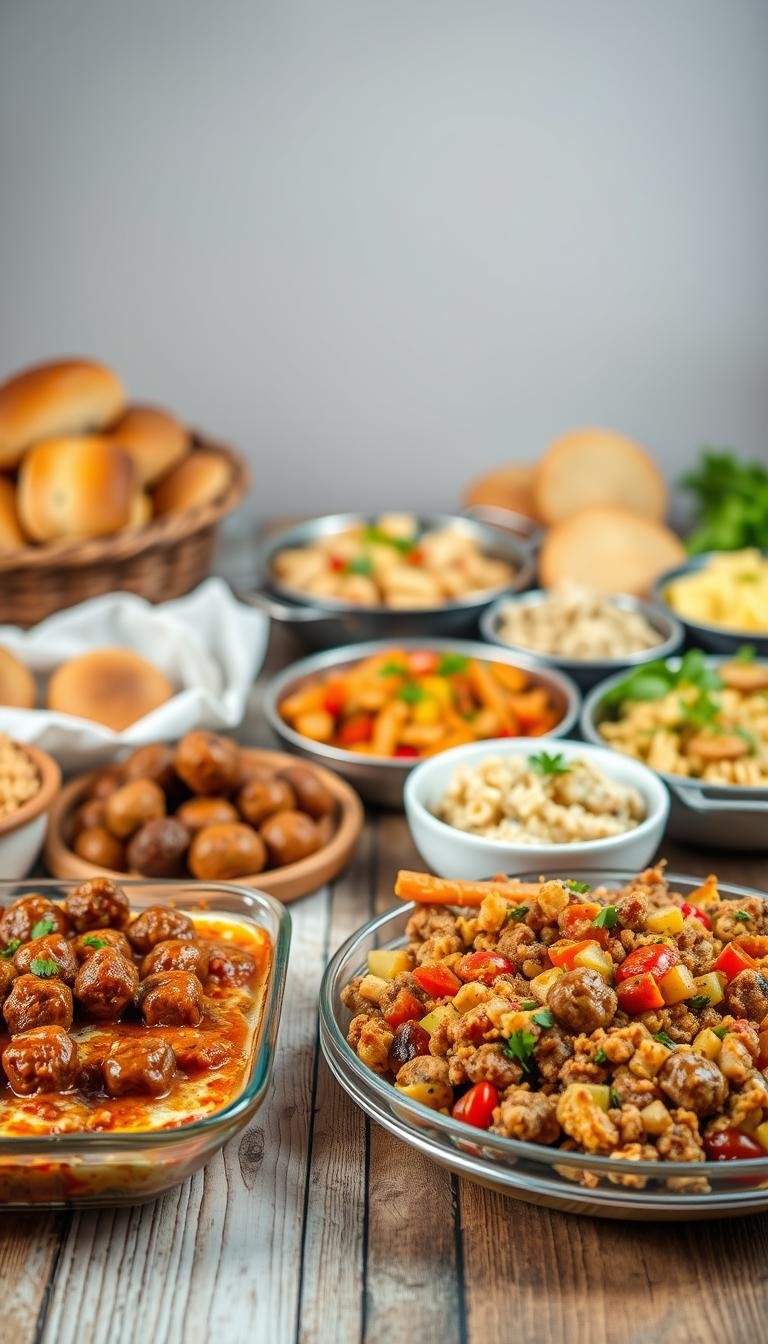
Build a balanced spread by choosing three anchor desserts: a chocolate-forward bake, a pumpkin option, and a fruity or marshmallow-based bite. Include handheld choices like bars and cookies to keep lines moving at your party.
- Scale recipes easily—double mixes for larger crowds.
- Use disposable piping bags for neat finishes even if you’re new to decorating.
- Dress up sandwich cookies, candy corn, or boxed mixes for a custom look.
Color palette tip: black, orange, neon green, and purple unify the table. Grab sprinkles, eyeball candies, food color gels, and themed wrappers from your shopping list and you’re set for fast decorating.
What makes an easy halloween dessert for busy October nights
Fast, simple recipes let you join the party instead of hiding in the kitchen. Pick options with under 30 minutes active time, short ingredient lists, and flexible assembly so swaps don’t ruin the result.
Time-saving shortcuts
Box-mix glow-ups are a go-to: add espresso powder, an extra egg yolk, or a dollop of sour cream to turn a plain mix into a bakery-level cake. For no-bake wins, try cereal bars, refrigerator fudge, or quick bark using baking bars instead of chocolate chips for smooth coating.
Kid-friendly steps and minimal tools
Assign kids stirring, pressing, and sprinkling jobs. Use lined pans, silicone mats, and pre-cut parchment to cut cleanup and speed cooling.
“Keep a simple pantry: sugar, butter, powdered sugar, cocoa, and vanilla—then add seasonal sprinkles for instant flair.”
- Batch cookies once, divide dough, then decorate in themes.
- Most bars and cookies hold well covered overnight; frost just before serving.
- Swap toppings like eyeball sprinkles or crushed cookies for quick showstoppers.
| Shortcut | Why it works | When to use |
|---|---|---|
| Box-mix + add-ins | Boosts flavor and texture with one step | Quick cakes and cupcakes |
| No-bake bars | Fast, no oven, family-friendly | Weeknight or no-oven days |
| Baking bars vs. chips | Smoother melt and glossy finish | Coatings, bark, candy apples |
Boo Bark: two-chocolate Halloween candy bark
Two bars and a few toppings are all you need to make striking candy bark at home. Line a sheet pan with parchment or a silicone baking mat for easy release and crisp edges.
Use pure baking chocolate—Ghirardelli, Baker’s, Lindt, or Trader Joe’s Pound Plus work best. Bars melt smooth and give shine and snap that chocolate chips often cannot match.
Swirl technique
Spread semi‑sweet to about an 8×12 inch slab. Drizzle melted white chocolate over the top and feather with a toothpick to create a marbled look. Stop once you see contrast—overmixing mutes the pattern.
Toppings and flavor twists
- M&M’s Ghoul Mix, candy corn, and eyeball sprinkles for classic holiday flair.
- Try crushed pretzels for crunch, a pinch of sea salt, or a dusting of black cocoa to deepen chocolate taste.
Setting, storage, and portions
Let set uncovered at room temperature or chill about 45 minutes until firm. Break into varied shard sizes so guests can sample or take larger pieces.
Store airtight up to 1 week at room temp, 2 weeks refrigerated, or freeze up to 2 months; thaw in the fridge before serving.
Classic candy apples with a glossy finish
A perfectly glossy candy apple starts with precise temperatures and a clean fruit surface. The hallmark shine and cling come from heating the sugar syrup to the soft-ball stage—aim for 235–240°F on a candy thermometer.
Soft-ball stage 235-240°F: dialing in that perfect coat
At 235°F (113°C) caramel textures form; closer to 240°F (116°C) the coating adheres better and yields a firmer, glossier shell. Use a candy thermometer and remove from heat as soon as you hit the range.
Flavor twists: cinnamon red, caramel-dipped, or black cocoa shell
Choose firm, tart apples and wipe them with a hot, damp cloth to remove wax so the coating sticks evenly. Plan about 30 minutes from boil to dip to set—this is a doable weeknight recipe with dramatic results.
- Variations: bright cinnamon-red sugar shells, classic caramel-dipped apples, or a bold black cocoa or gel‑tinted coating.
- Decor: roll while tacky in crushed Oreos, chopped peanuts, or halloween sprinkles; pair with a small bowl of candy corn and nuts for a festive board.
- Safety & tips: use sturdy skewers, tilt the pot for easy dipping, rotate to avoid pooling, and set on a silicone mat or buttered parchment to prevent sticking.
- Portions & storage: slice coated apples just before serving for party-friendly wedges. Enjoy within 24–48 hours; store cool and dry to avoid weeping.
Vampire cupcakes or poke cake: gooey “blood” centers that wow
Choose between filled chocolate cupcakes or an almond poke cake for a striking party centerpiece. Both options deliver dramatic red “blood” centers with easy assembly and big visual payoff.
Chocolate cupcake vs. almond poke cake—choose your crowd-pleaser
Cupcakes: Bake moist chocolate cupcakes in sturdy liners. Core each, then spoon in seedless strawberry or cherry preserves for a jammy center. Scale the recipe for minis but reduce filling to avoid overflow.
Decorating: marshmallow frosting peaks, red gel, and cookie crumb “hair”
Whip a marshmallow-style frosting to soft peaks for a fluffy top. For the poke cake, use lightly sweetened whipped cream for a cloudlike finish.
Sculpt frosting peaks, add a swipe of red gel to mimic a fresh wound, and sprinkle crushed chocolate cookie crumbs at the edge to suggest Dracula’s hairline. Finish with a drizzle of extra cherry sauce for serving.
- Bake cupcakes in two pans for even rises, or use a 9×13 pan for the poke cake to simplify transport.
- Make ahead: bake a day early, then fill and frost closer to serving to keep texture fresh.
- Use a parchment sling for the cake and sturdy liners for cupcakes to ease release and slicing.
Pumpkin bakes: moist pumpkin cupcakes and frosted pumpkin bars
Start with a spiced pumpkin base that stays moist through careful balance of wet and dry ingredients.
What makes these bakes succeed: use canned or homemade pumpkin puree for consistent moisture. Measure flour and leaveners precisely. Mix just until combined to keep crumbs tender.
Pumpkin spice balance and frosting tips
Blend cinnamon, ginger, nutmeg, and cloves lightly, then taste with the batter. Adjust so the spice lifts the pumpkin without overpowering it.
Cream cheese frosting should be tangy and smooth. Beat until soft and spreadable for even swirls. Use softened butter if creaming, or melted butter for denser bars.
- Add-ins: mini chocolate chips, chopped pecans, or a cinnamon-sugar ribbon.
- Pan choice: a 9×13 pan gives uniform thickness for neat squares and easy serving.
- Storage: refrigerate frosted bars and bring to room temperature before serving. Freeze unfrosted bars; thaw then frost.
| Item | Tip | Best use |
|---|---|---|
| Pumpkin puree ratio | Use specified amount; avoid thinning with excess liquid | Cupcakes and bars |
| Spice blend | Start small, add to taste | Balanced pumpkin spice profile |
| Butter temp | Softened for creaming; melted for dense bars | Texture control |
| Frosting | Tangy cream cheese, beat smooth | Clean swirls or even spread |
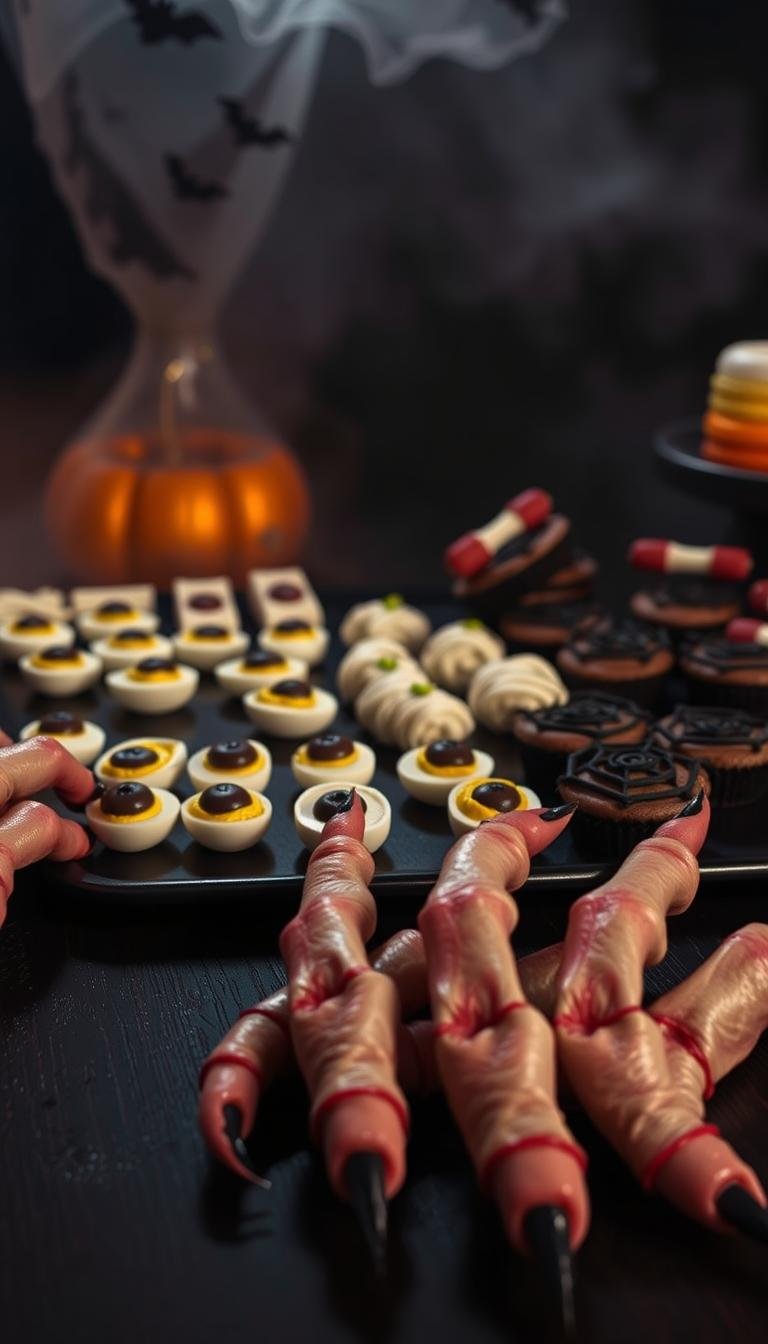
Witch finger cookies: buttery shortbread with almond “nails”
Make eerie, photo-ready finger cookies from a tender, buttery shortbread base. The dough is firm enough to hold ridges and knuckle lines yet soft enough to press and score by hand.
Coloring, shaping, and finishing touches
Mix a drop of green gel for witchy tones or add a teaspoon of cocoa for an aged, gray look. Roll the dough into uniform logs, press knuckle joints, and score creases with a knife for realistic detail.
Chill the shaped fingers briefly in the fridge so they keep form and avoid spreading. Bake until edges are just turning golden—overbaking dries the shortbread and dulls color.
“A short chill before baking keeps the shape crisp and the lines defined.”
- Nails: press whole almonds or almond slices in place, secure with a dab of red jam after baking to read as “blood.”
- Nut-free: use pumpkin seeds instead of almonds for an allergy-friendly option.
- Finish: sugar sanding adds sparkle; a light cocoa dusting highlights knuckles.
| Feature | Why it matters | Serving tip |
|---|---|---|
| Short fridge rest | Prevents spread, sharp details | Chill 15–20 minutes |
| Baking cue | Edges just golden keeps texture | Check at 10–12 minutes |
| Storage | Stays crisp in airtight tin | Keep up to 5 days for parties |
Presentation idea: arrange fingers on a black platter with extra jam “smears” and a few candy accents for a dramatic table display that travels well to school events.
Mummy & monster Rice Krispies: spooky wrappers for a classic treat
Give Rice Krispie bars a playful makeover with bandage wraps and candy eyes. Start with the classic marshmallow-cereal base, pressed into a parchment-lined pan for tidy edges. Cool briefly, then cut into bars or shapes ready for decorating.

White chocolate drizzle bandages and royal icing eyes
Melt white coating gently over low heat, stirring to avoid scorching. Drizzle in overlapping lines to mimic bandages, then press on royal icing eyes while the coating is tacky.
Monster variants: Frankenstein squares, ghost pops, and brains
Tint portions of the mix with green gel for Frankenstein, adding a chocolate hairline and bolt details. For ghosts, insert popsicle sticks and dip edges in white coating; add two black icing dots for faces.
- Pipe pink squiggles to make “brains” on small rounds.
- Dip edges or sticks in colored sprinkles for crunch and color.
- Use nonstick spray on hands or a spatula when pressing the mix to prevent sticking.
- These treats keep well in airtight containers for several days and are great for classroom packs.
| Step | Why it matters | Tip |
|---|---|---|
| Press into parchment-lined pan | Ensures even thickness and easy lifting | Use a buttered spatula or sprayed hands |
| Melt coating slowly | Prevents grainy texture and scorching | Low heat, stir often, microwave in short bursts |
| Decorate while tacky | Adhesion for eyes and sprinkles | Work in small batches for best results |
No-bake cheesecake bars: peanut butter buckeye or Halloween swirl
Keep it simple: crumb crust plus a whipped, chilled topping makes a reliable, sliceable treat you can finish the day before a party.
Foundation: press a firm graham or chocolate cookie crust into a pan and pre-chill so slices hold neat edges. Fold whipped cream into full‑fat room‑temperature cream cheese for a light, stable filling that sets cleanly in the fridge.
Buckeye twist and colorful swirl
For a buckeye version, blend smooth peanut butter into the cheesecake base and top with a thin ganache or chocolate drizzle for that classic peanut‑chocolate pairing.
For a spooky swirl, tint small portions orange, purple, and black, dollop over the surface, then swirl once with a skewer to create a marbled top.
Mix-ins, portioning, and swaps
Stir in chopped peanut butter cups or M&M’s Ghoul Mix for texture and color. Serve in small squares—these bars are rich, so bite-size pieces work best.
Nut-free option: swap cookie butter for peanut butter to keep that warm, spiced flavor without peanuts.
- Chill at least 4 hours or overnight for best set.
- Press crust firmly and pre-chill to avoid crumbling when slicing.
- Transport chilled and use a cold knife wiped clean between cuts for crisp edges.
Pumpkin patch brownies: boxed mix glow-up
You can transform store-bought brownies into a playful pumpkin patch in under an hour. Bake the mix in a 9×13 pan for maximum surface area, then cool completely so the toppings hold their shape.
Layer and decorate: spread a thin base frosting, press a generous layer of crushed Oreo cookies for “dirt,” and then pipe green grass tufts with a star tip.
Finishing touches and party tips
Nestle Brach’s mellowcreme pumpkins into the grass and secure each pumpkin with a dot of frosting so they stay upright during transport.
Add a pretzel stick or chocolate Pocky fence around the edge to frame the scene. For speed, use canned frosting tinted green; for better flavor, whip a quick butter-based frosting.
- Slice into squares so each piece features one pumpkin — easy portioning for a party or halloween party tray.
- Label allergens (wheat, dairy, nuts) on the serving table.
- Try a cake-style variation: bake a thicker layer and adjust time for fudgy vs. cakey brownies.
- Serve alongside apple slices or popcorn for a sweet-and-salty contrast.
Quick note: this simple recipe turns boxed brownies into a themed centerpiece using candy pumpkins, crushed Oreos, and piped grass — a fast, playful treat for fall gatherings.
Ghost s’mores dip: shareable skillet dessert
A speedy, shareable s’mores skillet is perfect for last-minute party moments. Build it in a small cast-iron or oven-safe skillet with a base of chopped chocolate and a top layer of marshmallows shaped as tiny ghosts.
Make marshmallow “ghosts” by piping soft marshmallow cream into small mounds on parchment. Add two tiny chocolate dots for eyes, then place them over the chocolate and broil briefly until toasted.
Dipper board ideas: graham crackers remain classic, while apple slices, pretzels, and potato chips give sweet-and-salty contrast. Arrange small piles so guests can choose a favorite scoop or slice.
Quick tips for serving
- Line the skillet with a parchment round for easier cleanup without losing heat transfer.
- Serve immediately for the best pull; use oven mitts and a trivet to handle the hot pan at a party.
- Add a pinch of flaky salt or a light caramel drizzle to elevate the familiar s’mores profile.
- For outdoor or fireside fun, assemble in a foil pan and heat on a grill to mimic a campfire vibe.
- Encourage kids to help layer chocolate and place marshmallows under close supervision—simple tasks they enjoy.
| Feature | Why it helps | Serving tip |
|---|---|---|
| Paraffin-free chocolate | Melts smooth for dipping | Chop into even pieces for quick melt |
| Marshmallow ghosts | Fun look and easy to toast | Pipe on parchment, transfer gently |
| Dipper variety | Caters to sweet and salty preferences | Include graham, apple, pretzel, chips |
| Portion control | Prevents crowding and waste | Offer small plates and spoons |
Pairing idea: this treat complements coffee, mulled cider, or hot chocolate for a cozy gathering. Keep it warm and watch as guests dig in for a fun, shareable finale.
Monster mash: chocolate bark and Chex mix for a snackable spread
Set up a two-part spread: crisp chocolate shards next to bowls of seasoned Chex mix for easy grazing. This gives guests a choice of crunchy clusters or glossy pieces to sample.
Sweet-salty balance with peanuts, pretzels, and white chocolate
Start with a base: toss cereals, pretzels, and roasted peanuts together. Fold in monster sprinkles, candy eyes, and M&M’s for color and fun.
Binding method: melt white chocolate in a slow cooker on low or short microwave bursts, then drizzle over the dry mix and stir to form clusters. For chocolate bark, spread melted white chocolate, scatter mix-ins, and cool until firm—break into irregular shards for a playful look.
- Offer two batches: one white chocolate and one dark or semi-sweet for contrast.
- Swap peanuts for sunflower seeds or pumpkin seeds to make a peanut-free option.
- Add a pinch of pumpkin pie spice or cayenne for a subtle, surprising taste twist.
- Serve in portion cups to keep lines moving; store mix airtight and chill bark if your kitchen runs warm.
Scaling tip: these recipes scale easily—double or triple quantities to feed a crowd with minimal active time and big flavor payoff.
halloween dessert cookie ideas to round out your platter
Finish the spread with cookies that contrast color and bite: tender sugar rounds, snappy roll slices, and cream‑filled minis.
Curate a lineup that mixes soft sugar cookies, slice‑and‑bake pinwheels, and sandwich or linzer styles. Pick shapes—black cat silhouettes, spider rounds, and jack‑o’‑lantern cutouts—to add instant theme and charm.
Dough strategy: make one master sugar dough, divide and tint with gel pastes, then roll or shape for multiple designs. This saves time and keeps texture consistent.
- Include a mini assortment so guests can sample multiple cookies without filling up.
- Add a tangy cheesecake filling or a cheesecake swirl on bar‑style cookies for creamy contrast.
- Create a candy corn colorway by rolling tri‑color dough or pressing candy corn on tops right after baking.
- Slip a crisp chocolate bark shard onto the platter for height and mixed‑medium appeal.
Prep tips: keep dough thickness and sheet spacing consistent for even bake times. Pack treats in cellophane bags as favors and label flavors to help with portion control.
Decorating ideas: spiderwebs, eyeballs, and haunted color palettes
Smart accents—true black, neon pops, and a couple of well-placed eyes—turn plain cookies into showstoppers. Focus on contrast, texture, and simple moves that scale across cookies, cupcakes, and bars.
Black cocoa, neon gels, and sprinkles to set the spooky tone
Build your palette with black cocoa for deep bases and AmeriColor Electric or Super Black gel pastes for consistent, camera-ready color. Add neon gels in small amounts so accents stay bright without bitter taste.
- Mix jimmies, nonpareils, and metallic dragees to add texture and shine.
- Keep edible royal icing eyes on hand; cluster three for monsters or place two off-center for quirky ghosts.
- Use Ghirardelli melting wafers for reliable finish and melt-in shine.
Easy piping: spiderwebs, stitches, and ghost faces
Pipe concentric circles, then drag a toothpick outward to form clean spiderwebs. Melt white chocolate for drizzle bands and to glue sprinkles or eyes with minimal mess.
For fine lines, melt a few chocolate chips and pipe tiny stitches, fangs, or pupils. Practice on parchment, then move to your bake.
“Start simple and add one bold accent per item.”
Quick color guide: black, orange, lime green, and purple read unmistakably for halloween. Balance frosting and toppings so flavor still shines through in every halloween treat.
Tools & pantry essentials for foolproof Halloween treats
Stock the right tools and pantry staples now so baking day runs smoothly and stress-free. A small kit saves time and helps you hit texture and set targets every time.
Basics for reliable bakes
Must-haves: rimmed baking sheets, silicone mats or parchment, cooling racks, and a reliable candy thermometer for precise sugar stages.
Include a heavy-bottomed saucepan or a double boiler setup (or microwave-safe bowls) to melt coatings without scorching.
Melting mediums and portioning gear
Bars and quality wafers melt smoother than most chocolate chips, which often contain stabilizers that limit flow.
Keep an OXO small cookie scoop or a Zeroll disher for uniform cookies and truffles, plus a jelly roll pan for bark and sheet cakes and a 9×13 glass dish for no-bake bars and layered pie-style treats.
Pantry & safety
Stock sugar, brown sugar, butter, eggs, vanilla, cocoa powder, assorted sprinkles, and white chocolate wafers for quick fixes and finishing touches.
Add AmeriColor Super Black and Electric gels, edible eyes, sturdy skewers for apples, heat-resistant spatulas, oven mitts, and a digital scale.
- Tip: keep items in a labeled “Halloween” bin so annual projects start faster.
Smart ways to use leftover Halloween candy
Got extras? Spend a little time and turn that stash into new, crowd-pleasing bites. Chopping and folding candy into batter gives baked goods a purposeful, bakery-style look.

Mix‑ins that boost bars, cookies, and cheesecake bars
Chop candy bars and fold them into blondie or brownie batter for an upgraded batch of bars that feel intentional.
Stir M&M’s or peanut butter cups into monster cookies and press edible eyes on top for playful presentation. Use a cookie jar strategy: sprinkle chopped pieces on dough so they sit on the surface.
For no‑bake cheesecake bars, fold chopped candies into the filling for color and crunch that slices cleanly.
Snacks, storage, and family remix ideas
Make a sweet‑salty trail mix or puppy chow with cereal, melted coating, candy corn, and a pinch of pumpkin spice for a seasonal twist.
Freeze sorted candies by type and label them (peanut vs. nut‑free) to streamline future recipes. Portion mixed nuts, pretzels, and a few candies into lunchbox treat packs for controlled indulgence.
- Melt caramels with cream to drizzle over apple slices or brownie sundaes.
- Turn candy corn into a pretzel bark with dark chocolate to balance sweetness.
- Host a family remix night where everyone customizes a small pan of bars or cookies.
“A little planning turns leftovers into new recipes that taste fresh and festive.”
Conclusion
Finish strong: choose a glossy Boo Bark made with pure baking chocolate, a spiced pumpkin patch brownie, and one shareable skillet or snack mix to cover every craving at your next party.
These recipes balance speed, simplicity, and show-stopping looks so even first-time bakers can deliver standout treats. Make-ahead and storage tips let you bake earlier in the week and decorate the day of for fresher results.
Callbacks: use a candy thermometer for candy apples, rely on pure bars for smooth bark, and add a dollop of red jam for those striking vampire “blood” centers. A boxed mix becomes a theme-ready pumpkin patch with crushed Oreos and mellowcreme pumpkins.
Repurpose leftover candy into blondies, cookies, or no-bake cheesecake bars to cut waste. Mix textures—crisp bark, chewy bars, fluffy frosting—and share photos of what you make next to keep the halloween dessert tradition going.