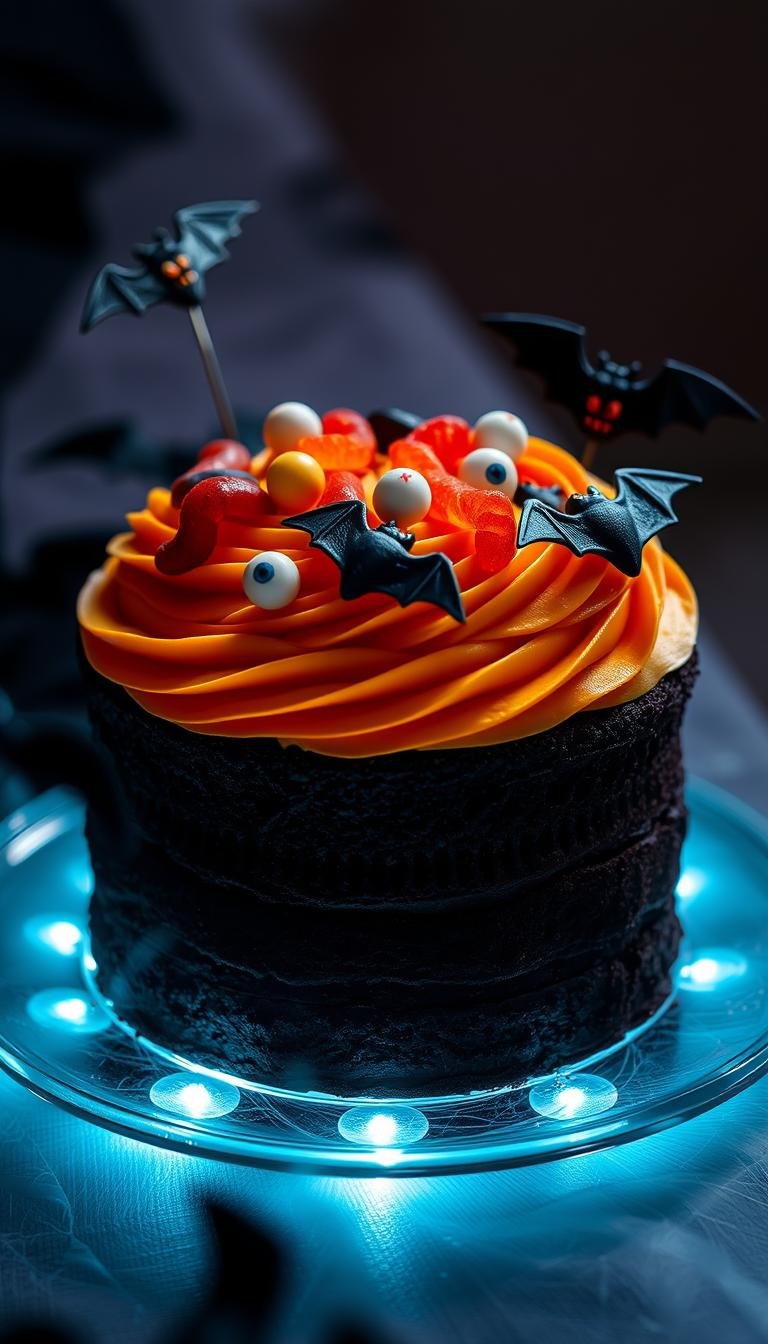
Tasty Halloween Snacks for Your Festive Party
Surprising fact: hosts who plan make-ahead items spend up to 60% less time in the kitchen during their event, leaving far more moments to enjoy with friends and family.
This Website contains affiliate links. That means I may earn a small commission if you purchase through my links, at no extra cost to you.
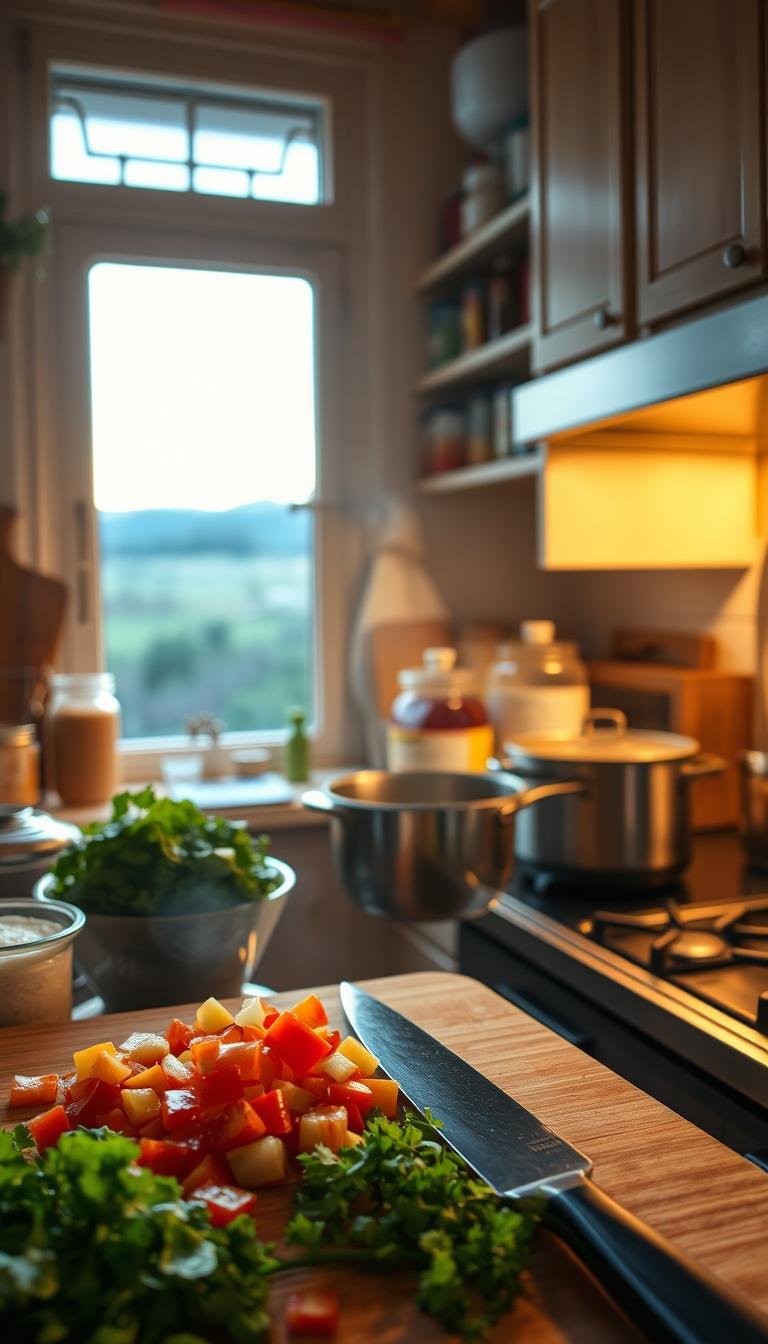
This guide focuses on easy, crowd-pleasing recipe choices you can prep ahead so you greet guests instead of rushing at the oven.
Pick a balance of hot, cold, no-bake, and oven-baked food to keep the table lively through the evening. Simple wins like mummy hot dogs—made with an 8 oz crescent dough sheet, 10 hot dogs, candy eyes, cut into 1/4-inch strips and baked at 375°F for about 12 minutes—offer big visual appeal and fast turnaround.
Sweet-and-salty Chex mix takes five minutes to prep and five to bake and appeals to kids and adults alike. Plan quantities per guest, chill dips ahead (pumpkin cheese balls 60 minutes, brain-shaped dip 2 hours), and hold back a few trays to refresh the buffet.
Key Takeaways
- Choose make-ahead recipe items to reduce kitchen time and increase guest time.
- Mix hot, cold, no-bake, and oven-baked dishes for variety.
- Use quick anchors like mummy hot dogs and Chex mix for big impact.
- Prep dips and chilled treats in advance to save time during the event.
- Stagger serving trays to keep the spread fresh and inviting.
Kick off spooky season: what makes Halloween party snacks a hit
Start the season with bite-sized treats that pair bold visuals with real flavor.
Instantly recognizable shapes—think bats, pumpkins, and mini spiders—grab attention. Bright orange and black accents signal the theme, while craveable taste keeps guests coming back for more.
Keep flow steady with small appetizers and finger foods. These let people mingle and avoid a single buffet traffic jam. Mix hot and cold recipes so trays can be swapped without wasting time.
- Balance salty, sweet, tangy, and creamy; add a few mildly spicy bites and clear labels for kids and sensitive eaters.
- Use easy base foods—tortillas, eggs, bagel bites, apples—and dress them up into themed hits with little effort.
- Offer familiar dips and chips beside themed items to comfort picky guests.
Map the table visually: anchor a centerpiece board and surround it with mini treats. Pack travel-friendly items like deviled eggs and apple monsters when you’re on the move.
halloween snacks for party: quick, no-bake ideas to start your spread
Start your spread with quick no-bake hits that deliver color and crunch in minutes.
Sweet-and-salty Chex mix cauldrons are a must. This easy make recipe takes about five minutes to prep and five minutes to cook. The balance of crispy cereal, pretzels, and chocolate bits keeps hands coming back. Offer a nut-free version and label allergens so parents and adults can choose safely.
Candy “jarcuterie” cups swap meats for fun-size bars, yogurt-covered pretzels, lollipops, and gummies. Place sturdy items at the bottom to support skewers and soft items on top to build height. Pre-fill jars the day before, then add fragile candies just before guests arrive to keep texture fresh.
| Item | Prep time | Best for |
|---|---|---|
| Chex mix cauldron | 10 minutes | Drop-in guests, kids & adults |
| Candy jarcuterie cup | 15 minutes (pre-fill) | Grab-and-go, travel-friendly |
| Cookie & popcorn clusters | 5-10 minutes | Crunchy variety, mini treats |
Small touches—color blocking (orange, black, purple, green), single-serve lids, and mini cauldrons at kids’ height—make self-serve tidy and fun. Add one or two no-bake recipe cards so guests can recreate a favorite treat at home.
Savory showstoppers your guests will devour
Serve bold, savory hits that cut through sweetness and give guests a reason to circle the table.
Mummy hot dogs with crescent dough and candy eyes
Step-by-step: Cut crescent dough into ¼-inch strips, wrap snugly around hot dogs, and bake at 375°F for about 12 minutes until golden. Add candy eyes using a dab of ketchup or mustard. Serve skewered in a foam base for a fun display.
Jalapeño popper mummies with cream cheese
Fill halved peppers with cream cheese, wrap in crescent dough, and bake. Offer marinara, ranch, or sweet-and-sour sauce. Swap mild peppers to welcome guests who avoid heat.
Cheesy spider balls and spiced bat wings
Form cheese-filled balls, roll in breadcrumbs for a crisp “fur,” and press chow mein noodles in as legs. Prep in 10 minutes, cook 5 minutes.
For a heartier bite, bake whole chicken wings with a sweet-and-sour glaze. Prep 10 minutes, bake 40 minutes—great when adults want a dinner-adjacent option.
Chicken monster fingers
Breadcrumb chicken fingers, add red pepper “nails,” bake until crisp. Prep 45 minutes, cook 15 minutes. Brush wrapped items with butter or oil before baking to boost browning.
| Item | Prep time | Cook time | Best served with |
|---|---|---|---|
| Mummy hot dogs | 10 min | 12 min | Ketchup or mustard |
| Jalapeño popper mummies | 15 min | 15 min | Marinara or ranch |
| Cheesy spider balls | 10 min | 5 min | Sweet chili dip |
| Bat wings & monster fingers | 10–45 min | 15–40 min | Sweet-and-sour or BBQ sauce |
Make-ahead tip: Form mummies and spider balls earlier, chill, then bake in small waves so each tray is hot and crisp when served.
Devilishly good eggs: from classic to creepy
One basic deviled egg recipe is all you need to create three themed variations that look elaborate but finish fast. Use a smooth yolk filling with a splash of cream or mayo so piping is clean and textures stay consistent.
Spider deviled eggs with black olive “legs”
Prep hard-cooked eggs, halve, and remove yolks. Mix yolks with mayo, a pinch of salt, and pipe into whites.
Slice black olives into bodies and thin legs. Set olives on each filled egg just before serving to keep edges neat. Some versions add a drop of food coloring to the yolk mix for drama.
Pumpkin-look deviled eggs with chive “stems”
Tint the yolk filling a deeper orange and use a star tip to pipe vertical ridges that mimic pumpkin grooves.
Insert short chive stems as handles. Prep time: 15 minutes, cook time: 20 minutes (egg boiling and cooling).
Green “eyeball” deviled eggs for a ghoulish twist
Dye the filling pale green, pipe a round pupil, and top with thin olive rings to create realistic eyeballs.
Prep time about 20 minutes, cook about 10 minutes active after boiling. Garnish lightly with paprika or micro chives so flavor stays balanced.
Make-ahead tips: Cook and peel eggs up to 24 hours ahead. Store whites and filling separately, then assemble near serving time. Use egg holders, lettuce leaves, or parchment strips to stabilize trays during transit.
- Label spicy vs. mild fillings so guests know what to expect.
- Include a pumpkin-forward plate to match the theme and offer variety.
Dips, spreads, and boards that feed a crowd
Anchor your spread with a dramatic molded dip and then layer bowls, cheeses, and crisp dippers around it. A clear centerpiece helps guests move through the table and keeps refills simple.
Brain-shaped party dip that chills, thrills, and serves a crowd
Make a showpiece with minimal fuss. Use a basic recipe—cream cheese, shredded cheese, green onion, and a splash of ranch—press it into a brain mold and chill for 2 hours. This feeds a crowd and acts as a stable centerpiece when trays start to fill.
Guacamole spider web dip piped with sour cream
Spread guacamole in a shallow dish and pipe a sour cream web from the center outward using a squeeze bottle or small bag. Add an olive spider to one side for a playful finish that still tastes fresh.
Spooky snack board with bat chips, mummies, pizzas, and more
Build a board that serves 10+ in about 20 minutes of prep. Surround dips with bat tortilla chips, sliced veggies, pretzels, and toasted breads. Include a mini pumpkin cheese ball to add color and texture without extra oven time.
- Keep warm bites in small batches so the board stays dynamic.
- Use ramekins to separate bold flavors and protect chips from getting soggy.
- Print a mini recipe card for the brain dip so guests can recreate the centerpiece at home.
| Item | Feeds | Prep time |
|---|---|---|
| Brain-shaped dip | 10–15 | 2 hours chill |
| Guacamole spider web | 8–12 | 10 minutes |
| Spooky snack board | 10+ | 20 minutes |
Pizza, breads, and cheesy bakes with a spooky twist
Transform everyday dough and cheese into shareable, spooky-themed bites in under an hour. These bakes are easy to prep, dramatic to serve, and built to hold up during service.
“Serve each item hot and finish with quick, neat toppings for the best texture and presentation.”
Mini spider pizzas: Bake frozen mini pizza bagels until bubbly. Slice olives into halves for bodies and thin slivers for legs. Top just after baking so the cheese stays melty and the olive spiders sit cleanly on the surface.
Pumpkin-shaped pull-apart cheese bread: Stuff soft cheese into dough sections, score or tie to form ridges, then bake ~20 minutes (prep ~10). Brush with butter before baking for shine and deeper browning.
Baked brie mummy: Wrap a wheel of brie with chilled puff pastry strips, add olive eyes, and bake 20 minutes until golden and oozing. Use pastry straight from the fridge to keep the wrap crisp.
Pizza potato skins: Make gluten-free, vegetarian potato skins and decorate as mummies, ghosts, or webs. Total time ~27 minutes. Keep toppings prepped (olive halves for bodies, slivers for legs) so assembly is quick on hot skins.
- Use mise en place for fast assembly and tidy results.
- Top hot items right before serving to keep textures crisp.
- Reheat leftovers briefly in the oven to restore crunch; avoid microwaving when possible.
Serving tip: Pair these rich bakes with a bright salad or tangy dip and offer printable recipe cards so guests can recreate a favorite bread or pizza recipe at home.
Veg-forward bites that still scream Halloween
Lean into seasonal vegetables to make playful, savory plates that read like fall without heavy sugar or frosting.
Roasted vegetable motifs—sweet potato jack-o’-lanterns, beet witch hats, and potato ghosts—take about 20 minutes prep and 35 minutes roast. Par-cook firmer roots so cookie cutters slide through, then finish at high heat for color and crisp edges.
Wild rice-stuffed mini pumpkins
These handheld bites are hearty and kid-friendly. Prep 5 minutes; bake about 55 minutes. They travel well and reheat cleanly on low oven holds.
“Use toasted seeds and leafy herbs to add crunch and contrast without masking natural flavors.”
- Map roasting times: beets—longer; potatoes—medium; sweet potatoes—shorter.
- Offer bright vinaigrettes, yogurt dips, or light cheese gratings at the side.
- Par-roast earlier and finish just before serving to keep edges crisp.
| Item | Prep | Cook | Serve tip |
|---|---|---|---|
| Jack-o’-lantern sweet potato | 20 min | 35 min | Finish high heat |
| Beet witch hats | 20 min | 35 min | Brush with oil |
| Wild rice mini pumpkin | 5 min | 55 min | Top with herbs & seeds |
Seasonal tip: Mix orange, deep red, and pale white vegetables to sell the halloween theme while keeping the focus on real, tasty foods and smart recipes.
Kid-friendly snacks that are cute, not scary
Create playful handheld treats that kids can pick up and enjoy without slowing the fun. These easy bites use familiar flavors and simple assembly so children feel included and parents relax.

Apple peanut butter monsters: Quarter firm Granny Smith apples and carve small crescent mouths. Spoon thicker peanut butter into the cutout; press pine nuts along the edge as teeth. Add a small cheese or mango triangle as a tongue and finish with a single candy eye.
Quick mozzarella mummies
Wrap small mozzarella sticks with thin tortilla or prosciutto strips to mimic mummy wrappings. Top with a sliced olive dot for an eye and place on a kid-height platter for easy reach.
Orange cheddar with black olive accents
Cut cheddar blocks into fun shapes and press in olive slices as eyes or buttons. These hold well at room temperature and pair nicely with apple monsters.
- Use thicker peanut butter brands for clean assembly and better hold.
- Offer a nut-free swap: seed butter or cream cheese works great.
- Turn bites into true finger foods with cocktail picks or mini forks.
- Pack apple monsters snugly when traveling so eyes and teeth stay put.
- Encourage kids to help assemble these as a pre-event activity.
Make it simple: print a small recipe card so families can recreate the treats at home. Place platters low and visible to keep flow smooth and mess minimal.
Adults-only spooky vibes: elevated flavors and pairings
Design a grown-up spread that balances theatrical plating with sophisticated flavors. Build a moody board centered on eyeball bruschetta to give adults a refined yet playful bite. Keep portions modest and presentation cinematic with dark linens and candlelight.
Eyeball bruschetta is vegetarian-friendly, quick to assemble (prep ~20 minutes, cook ~3 minutes), and ideal as an adults-focused appetizer. Toast small slices of bread briefly, spread a seasoned ricotta or whipped goat cheese, and top with an olive “pupil” set in a roasted cherry tomato ring.
Assembly and pairing tips
- Toast bread in small batches so each slice stays crisp throughout the evening.
- Add a twist—a splash of chili oil, lemon zest, or thyme—to lift the base flavor without masking it.
- Serve with thoughtful sauces and relishes: bright herb oil, balsamic glaze, or a preserved pepper sauce.
- Include one or two cheese elements and marinated olives to balance creamy and briny notes.
- Match wines or cocktails that bring acidity to cut richness—think dry white, light red, or a citrus-forward cocktail.
| Item | Prep time | Cook time |
|---|---|---|
| Eyeball bruschetta | 20 minutes | 3 minutes |
| Herby oil & balsamic drizzle | 5 minutes | — |
| Toast batches (recommend) | 5–10 minutes | — |
Make it dinner-worthy: plate the board with small forks and napkins, and offer a short recipe card so guests can recreate the concept at home. This keeps the focus on taste and texture while giving adults a memorable, elevated experience.
Crunchy dippers and chips with Halloween flair
Make simple tortillas into dramatic shapes that stay crunchy and travel easily.
Bat tortilla chips: Punch bat shapes from flour tortillas using small cookie cutters. Brush lightly with oil, sprinkle a chili-lime mix or Tajín, and bake until crisp. Serve these with a bright tomato salsa and a citrus wedge to balance heat.
Jack-o’-lantern crisps: Cut pumpkin-faced slices from larger tortillas, season, and bake to golden. These pair beautifully with a smoky hot sauce and a quick crema drizzle to tame spice.
- Mix in corn tortilla variants for gluten-friendly crunch and color contrast.
- Plate chips upright in tumblers or fan them on trays to add height and easy grab access.
- Offer mild and hot sauces plus a squeeze of lime so guests control heat.
- Provide bake-time windows (8–12 minutes at medium-high) and a short cool period so dippers stay crisp during service.
- Pack chips and salsa when traveling; they hold up and won’t wilt or weep.
- Include a compact recipe card with two seasoning blends: classic chili-lime and a Tajín-forward mix.
Quick tip: add sliced veggies on the side for lighter dipping, and assemble olive “spiders” on pizzas at the host’s home to keep toppings perfect at serve time.
Party-friendly sauces, dips, and spreads to round it out
Round out your spread with approachable sauces and bowls that invite guests to graze and share. These two showstopper dips add color, texture, and a touch of theater without extra fuss.
Pumpkin cheese ball with crackers and veggie dippers
Pumpkin cheese ball: Mix cream cheese, shredded sharp cheese, warm spices, and a touch of maple. Shape into a pumpkin and chill about 60 minutes so flavors meld and the exterior firms for cleaner slicing.
Plate with crackers, pretzels, and crisp vegetables so guests pick their preferred richness. Garnish with chives, scallions, and a sprinkle of smoked paprika for color that doesn’t alter flavor.
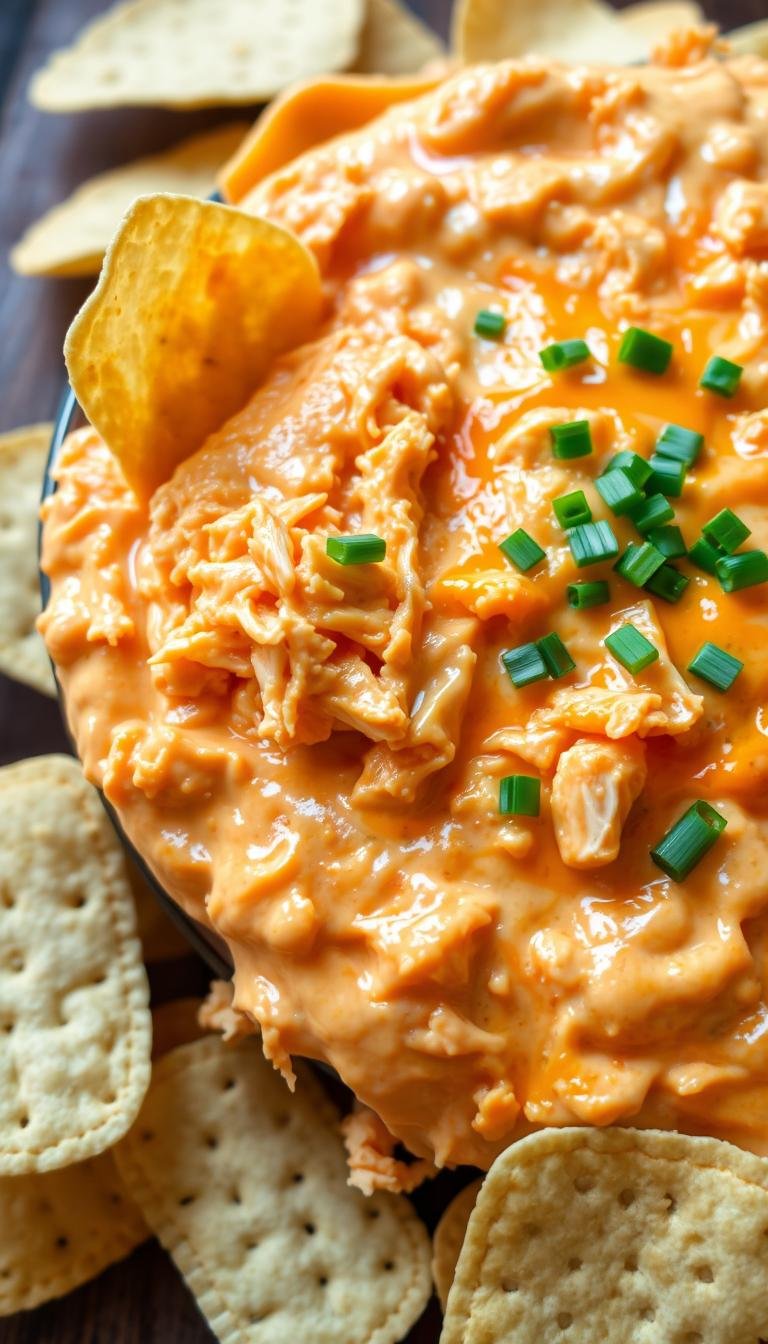
Pumpkin “puking” nacho cheese with chips and shredded chicken
Carve a small real pumpkin bowl and fill with hot nacho cheese so it flows over shredded chicken and tortilla chips. Prep ~15 minutes; cook ~30 minutes. This is dramatic and functional.
- Use a mild cheese base with optional heat add-ins to keep the table inclusive.
- Serve with sturdy corn tortilla chips and keep backups warm in the oven for quick refills.
- Offer warming guidance and food-safety cues: hold hot dips at safe temps or use a slow cooker.
- Ladle from the pumpkin center to control flow and prevent soggy chips.
- Print short recipe cards with bacon-free, vegetarian, and extra-spicy variations.
“A chilled cheese ball and a warm dipping pumpkin give guests two reliable anchors for the buffet.”
| Item | Prep | Cook/Chill |
|---|---|---|
| Pumpkin cheese ball | 10 minutes | Chill 60 minutes |
| Pumpkin nacho cheese bowl | 15 minutes | Cook 30 minutes |
| Slow cooker warm dip | 10–15 minutes | Keep warm |
Make-ahead, travel, and reheat tips for stress-free hosting
Stack your to-do list into two-day, one-day, and day-of steps so work fits into small chunks of time and you stay calm.
Two days ahead: shop, make sauces, and organize supplies. One day ahead: chill dips, precut toppings, and pack stable items like pumpkin deviled eggs and apple monsters.

Day‑of: bake waves of hot items and assemble fragile toppings at the host’s kitchen. Mini spider pizzas should be finished on site—bake bagels there, then add olive spiders.
“Cool baked items fully before sealing to prevent condensation and soggy crusts.”
- Use airtight, shallow containers with parchment layers to protect candy eyes and olive spiders.
- Pack sauces separately and assemble finishers on arrival for the cleanest results.
- Reheat in short bursts; keep moisture-sensitive items uncovered to preserve crunch.
- Label containers by course and serving order so helpers can assist quickly.
- Bring a small emergency kit: tongs, skewers, tape, parchment, and extra garnish.
Pick travel-proof recipes—bat tortilla chips with salsa, deviled eggs, and apple monsters travel well—and build buffer time so the table looks staged before guests arrive.
Vegetarian, gluten-free, and kid/all-ages swaps
Choose simple swaps so every guest can graze without worry or extra fuss.
Non-spicy popper option: Replace jalapeños with mini sweet peppers, keep the creamy cheese filling, and wrap in the same dough. This keeps the look and texture but removes heat, making it ideal for kids and adults who want milder bites.
Gluten-friendly bat chips: Use corn tortillas seasoned and baked the same way you would flour versions. The process and timing are unchanged, but corn makes these chips safe for guests avoiding gluten.
- Vegetarian swaps: roasted veggie “ghosts,” loaded potato skins, and cheese-forward fingers replace wings or meat-based bites.
- Nut-free apple monsters: use seed butter or cream cheese instead of peanut butter.
- Label platters and separate utensils to prevent cross-contact with gluten or nuts.
- Offer dairy alternatives—yogurt-based dips or cashew-free spreads—so more guests can enjoy dips.
| Swap | Simple note | Prep tip |
|---|---|---|
| Jalapeño → mini sweet pepper | Mild, same filling | Trim tops and stuff as usual |
| Flour chips → corn chips | Gluten-friendly | Bake 8–12 min, season after oil |
| Apple peanut butter → seed butter/cream cheese | Nut-free | Use thicker spreads for hold |
Plan tip: Create small tent cards with symbols (GF, V, NF, mild) and place a kid-focused board at eye level so children can find safe, non-spicy picks. Include a one-line recipe note on each card so helpers can prep confidently.
Color, texture, and plating ideas to wow your guests
Let color and texture lead your plating—bright cheddar and glossy olives tell the story at a glance.
Start simple: place orange cheddar slices and dark olive accents across boards to telegraph the theme quickly. Add a few candy eyes to transform crackers, crostini, or cheese rounds into instant characters without extra cooking.
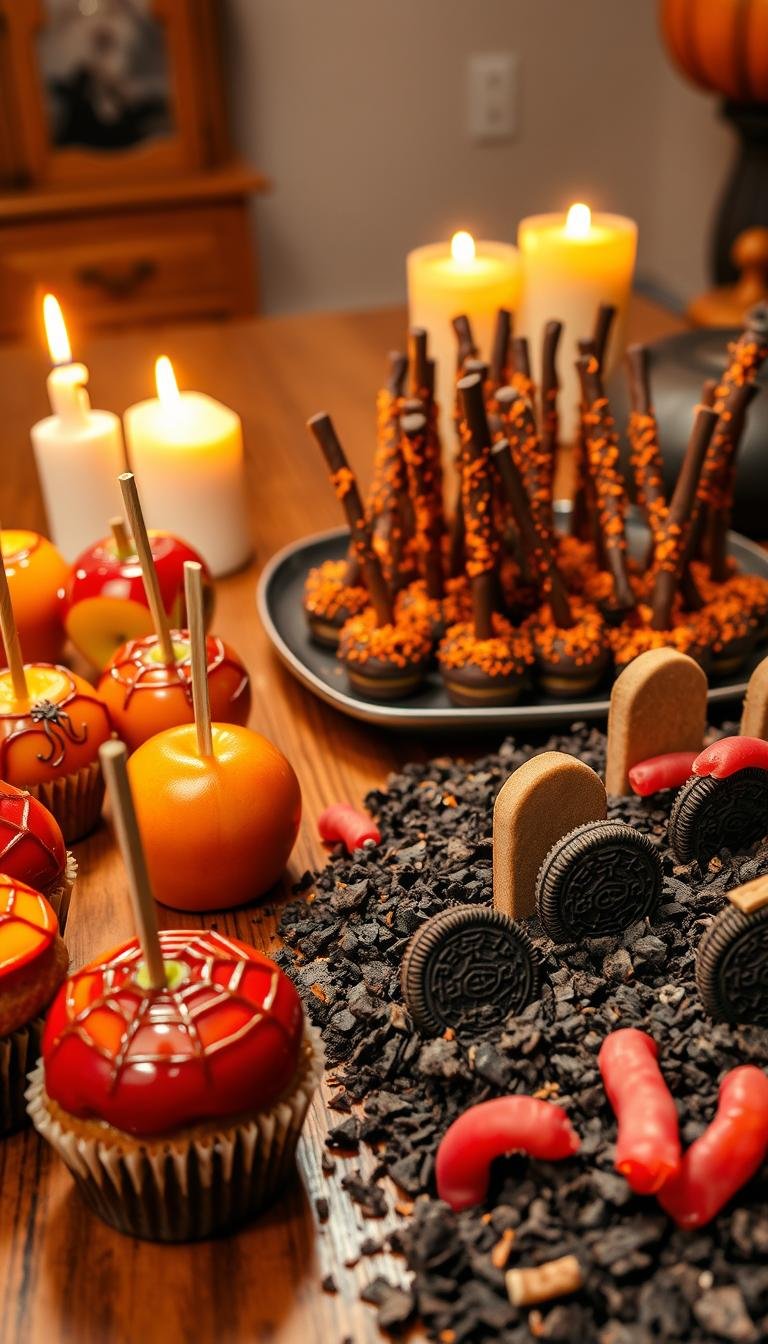
Use small potato ghost toppers on savory bites to repeat the motif across the table. Olive “spiders” are fast to make—slice an olive in half for the body and cut thin slivers for legs; nestle them on mini pizzas or deviled eggs for motion and scale.
- Layer colors: orange cheddar, black olives, and white elements create an immediate visual cue.
- Cut shapes—pumpkin or tombstone slices from cheddar make fast, sharable toppers.
- Mix textures: matte crumbs, glossy glazes, and crisp edges add freshness and contrast.
- Use height: risers and overturned bowls under linens build a dynamic landscape for 10+ guests.
- Keep a garnish box with herbs, seeds, extra eyes, and a mini recipe card to top and refresh plates in about 20 minutes of prep.
“Small details—cheddar slices cut into shapes, olive spiders, and a scatter of candy eyes—deliver big visual returns with tiny effort.”
Timing your menu: prep, chill, bake, and serve while fresh
Build a clear timeline that groups chill-first recipes, oven batches, and quick finishes to keep everything tasting fresh.
Start by staging chilled anchors: press the brain dip into its mold and chill 2 hours, and set the pumpkin cheese ball to firm for 60 minutes. These should be finished well before oven waves so they rest while you bake.
Batch oven items by temperature and sequence. Slot wings early (about 40 minutes bake) and run potato skins (27 minutes total) in a later wave. Reserve quick bakes—mini spider pizzas and pastry mummies—to finish just before guests arrive, then add delicate toppings immediately.
Cool wrapped items fully before lidding to avoid condensation and soggy crusts. Label trays with written timers so helpers can check and rotate without guesswork.
- Batch by temp to save preheat time.
- Plan small, frequent refills to keep the table abundant.
- Keep dips rotating between fridge and table to hold safe temperatures.
“Add a 15–30 minute buffer to the plan to handle oven crowding or last-minute shifts.”
Conclusion
Conclusion: Close your spread by leaning on a few bold anchors and easy complements. Feature one or two centerpiece hits—like a pumpkin cheese ball or brain dip—and surround them with quick, refillable bites such as mummy hot dogs, Chex mix, guacamole spider webs, and apple monsters.
Plan to pack travel‑friendly food carefully and finish delicate toppings on arrival. Use make-ahead and no-bake recipe options to cut day-of work. Keep labels, serving tools, and a small garnish kit handy so helpers can stage the table fast.
Mix and match these ideas to fit your space and budget. With vivid colors, varied textures, and steady replenishment, your halloween snacks for party will look spectacular and taste even better.