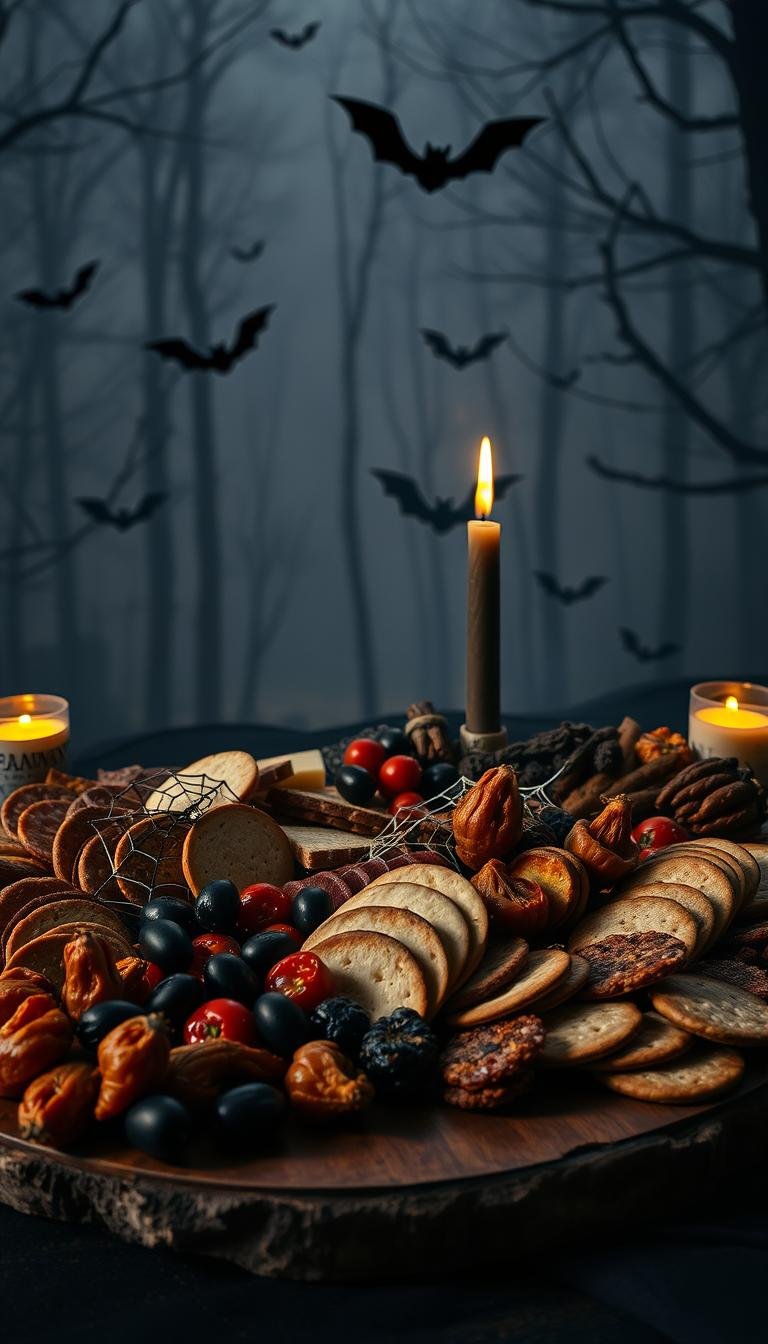
Halloween Charcuterie Board: Spooky & Delicious
Surprising fact: Nearly 60% of hosts say themed spreads make guests talk longer at parties, so a well-planned platter can shape the whole night.
This Website contains affiliate links. That means I may earn a small commission if you purchase through my links, at no extra cost to you.
This guide shows how to build an eye-catching spread that pairs sweet and savory elements—cheeses, cured meats, crackers, fruit, nuts, and playful decorations—to please kids and adults alike.
Start with a medium serving surface or scale up using a large pizza plank, slate, or even a baking sheet. Place the largest items first: bowls and big wedges of cheese. Then layer meats and fruits, and fill gaps with crackers, nuts, and chocolate-covered bites.
Prep tips: Chill soft cheese like brie before cutting for cleaner shapes, serve cheeses at room temperature, and assemble 30–60 minutes before guests arrive. Decorate around the food—plastic spiders and cobwebs add flair without touching items.
Key Takeaways
- Balance sweet and savory for a crowd-pleasing spread.
- Scale the display to your party size using household surfaces.
- Assemble large-to-small to save time and ensure a full look.
- Chill soft cheese before shaping and serve at room temp.
- Keep decorative props off edible items for safety.
- Assemble shortly before serving and wrap for transport if needed.
Why Make a Halloween Charcuterie Board for Your Party
A themed platter adds flavor variety and visual punch with little effort. Guests can graze while they mingle, which keeps conversation flowing and plates light.
Sweet-meets-savory snacks everyone will love
Offer something for everyone: combine salty meats, creamy cheese, and sweet fruit so guests naturally keep grazing.
Use items like cheddar, brie, pepper jack, mozzarella balls, prosciutto, and genoa salami. Add crackers of varied shapes and seasonal fruit — grapes, blackberries, apples, dried apricots — for contrast.
Photo-worthy vibes with minimal effort
Small décor goes a long way. Plastic spiders, skeleton hands, and cobwebs placed around—not on—food create instant ambiance.
Assemble 30–60 minutes ahead, keep the spread wrapped, then unwrap and serve at room temperature so flavors peak.
- Balance salty, creamy, and sweet to suit diverse tastes.
- Anchor the layout with cheeses and bowls, then tuck in meats and fruit.
- Turn cheese scraps into cubes to add height and avoid waste.
| Element | Examples | Why it works |
|---|---|---|
| Cheese | Cheddar, brie, pepper jack | Varied textures and colors for pairing and photos |
| Meats | Prosciutto, genoa salami | Salty, foldable pieces add shape and richness |
| Produce & crackers | Grapes, blackberries, apples; mixed crackers | Sweet notes and crunch that round out the snack board |
Choose the Right Board and Tools
The right surface and a few simple tools make assembly fast and stress-free.
Pick a surface that fits your crowd: use cutting boards, round or square wooden pizza boards, a slate or stone slab, a serving platter, or a large baking sheet. A medium board suits most gatherings; extra-large boards give room for more textures and bowls.
Anchor the layout first. Place a few ramekins for olives, jams, or chocolate-covered cranberries. These contain runny items and help shape the final look.
- Keep brie cold before cutting so small cookie cutters and molds create clean shapes.
- Use spreaders and sharp cheese knives so guests serve themselves easily.
- Reserve an offset spatula or paring knife for detailed carving and shaping.
“Choose traction and contrast—wood, slate, or stone keep items from sliding and make light cheese pop.”
Final tips: consider a handled board for easier transport, add parchment under table layouts, and place plastic spiders and other plastic decor around the edge so they never touch food. Keep extra bowls nearby to swap in replenishments without rebuilding the platter.
Plan Your Ingredients: Cheeses, Meats, Produce, and Crunch
Choose a focused set of ingredients so each flavor shines and the layout stays tidy. Start with a trio of cheese styles, then layer meats, fruit, and crunchy snacks for contrast.
Cheese picks to mix and match
Pick firm, creamy, and spicy options. Firm cheddar gives a bold orange pop. Chill brie before shaping for clean cuts. Add pepper jack cubes and mozzarella pearls for height and playful “eyes.” Include blue or manchego to widen flavor.
Meats and seasonal produce
Use prosciutto, genoa salami, capicola, or a spicy salami to vary texture. Pair with seasonal fruit: clusters of grapes, blackberries, fig halves, apple slices, and dried apricots for color and sweetness.
Crackers, snacks, and finishing touches
Offer water crackers, crisps, and bruschettini alongside playful items like Cheez-Its, caramel corn, and trail mix. Finish with olives, nuts, chocolate-covered bites, jams, honey, or hummus in small bowls.
- Balance textures: firm cheese, creamy brie, chewy fruit, and crunchy crackers.
- Chill brie for cutter shapes and save scraps as cubes.
- Use one or two standout items in ramekins so items stay neat.
| Category | Examples | Why it works |
|---|---|---|
| Cheese | Cheddar, brie, goat cheese, manchego | Color, texture, and pairing options |
| Meat | Prosciutto, genoa salami, capicola | Silky folds and stackable slices add depth |
| Produce & Snacks | Grapes, blackberries, apple slices, crackers | Freshness, color contrast, and crunch |
“A small, well-chosen list of items keeps assembly quick and flavors memorable.”
How to Make a halloween charcuterie board
Lay out your serving zones first so each flavor has a clear place to shine. Begin by placing bowls for jams, olives, or chocolate-covered cranberries and adding large cheeses to anchor the display.
Start large-to-small
Fan genoa salami or fold prosciutto near cheeses to create easy grab zones. Tuck fruit—grapes on the stem and blackberries—in clusters for organic color and texture. Work in triangles and arcs so the eye moves naturally across the board.
Create spooky highlights
Use chilled brie for clean cookie-cutter cuts and form simple ghosts or skull shapes. Dot mozzarella pearls with candy eyeballs for playful eyes. These small shapes give instant character without extra fuss.
Fill gaps naturally
Backfill with mixed crackers, nuts, and a few sweets like candy corn for bright pops of orange and white. Keep elements in small repeated piles so items look full and are easy to refresh.
- Assemble about 30–60 minutes ahead so cheeses come to room temperature.
- Cover tightly during that time to prevent drying and save time on last-minute fixes.
- Step back before serving to check color balance and redistribute a few pieces for flow.
“Anchor first, layer next, and fill gaps last for a quick, photo-ready spread.”
Build the Skeleton: Brie Skull, Manchego Ribs, and Salami “Innards”
Create a clever edible skeleton by shaping brie, lining manchego ribs, and tucking folded salami between them.
Chill and carve the brie skull. Freeze a 16‑ounce brie wheel for 15–20 minutes so cuts stay crisp. Cut wedges from the bottom third to form a rounded base. Round the top edges and remove a thin top slice to make space for jam.
Fill and detail: Spread blueberry jam on the bottom piece so the filling peeks through carved eyes and mouth. Use a small round cookie cutters or paring knife for eye holes. Add small manchego squares as teeth in the rectangular mouth.
Assemble ribs, sternum, and innards
Place a string cheese down the center as a sternum and lay yogurt‑covered pretzels as a simple spine. Alternate manchego triangles along both sides to form tidy ribs. Fold salami into quarters and tuck these “innards” between ribs for texture and savory flavor.
- Frame the skeleton with clusters of grapes and cubes of cheddar.
- Add small ramekins of olives and chocolate‑covered cranberries to anchor the scene.
- Garnish with dried orange slices and keep the skull slightly off‑center for balance.
| Step | Item | Tip |
|---|---|---|
| Skull base | 16‑oz brie wheel | Freeze 15–20 min, cut bottom third, round edges |
| Facial details | Blueberry jam, manchego squares | Spread jam, use small cutters for eyes, add manchego “teeth” |
| Rib assembly | Manchego triangles, string cheese, pretzels | Alternate triangles on both sides, use pretzels as spine |
| Innards & garnish | Folded salami, grapes, olives | Tuck salami between ribs; frame with grapes and ramekins of olives |
Styling Tips for Maximum Spook and Balance
Let color guide your placement: cluster deep purple grapes and blackberries with green grapes and bright orange cheddar to build mood and contrast. Place a whole brie or a small pumpkin as a focal height, then work outward with smaller items.

Color and shape
Build a moody palette using green grapes, deep purple fruit, dried apricots, and orange cheddar. Group similar colors in two or three spots so the platter reads as intentional and abundant.
Texture and height
Mix cubes, wedges, and whole rounds for dimension. Stack cheese cubes, fan crackers between clusters, and leave one round brie whole or cut into themed shapes for height differences.
Decor safely
Place plastic spiders and mini skeleton hands around the edge of the board or on the surface around the platter—not on food. Use a few mini pumpkins to frame corners and keep sticky items in ramekins to avoid cross-flavoring.
- Balance soft cheese and spreads with crunchy crackers and bruschettini.
- Step back and adjust spacing so no area looks overloaded.
- Finish with herb sprigs or dark napkins to tie the tablescape together.
“Cluster colors, mix heights, and keep decorations off food for a safe, photo-ready spread.”
Party-Ready Variations and Kid-Friendly Swaps
Mix small, grab-and-go trays with a large showpiece to suit both kids and adults. Offer tiny snack board setups for little hands, and keep one big centerpiece for a buffet-style table.
Mini snack boards work great for kids. Fill them with cookies, mini pumpkins, caramel corn, trail mix, and a few bright candy pieces. Use small ramekins to hold sticky items and keep portions tidy.
Savory-first versions lean adult: include olives, pickles, hummus, goat cheese, and spicy salami alongside mild crackers. Add varied cheeses and folded meats to make the larger charcuterie display feel complete.
- Choose size: mini for portability, showstopper for photos and variety.
- Balance sweetness (candy corn, dried fruit) with fresh fruit to refresh palates.
- Keep crackers mild so they pair with both candy and savory items.
| Style | Kid-Friendly Mini | Showstopper Centerpiece |
|---|---|---|
| Focus | Cookies, mini pumpkin, candy, trail mix | Multiple cheeses, meats, olives, hummus |
| Portability | High — easy to pass around | Low — best for buffet table |
| Best tip | Use small ramekins to cut waste | Repeat color cues—orange, dark grapes, small pumpkins |
Serving, Timing, Transport, and Storage
Decide when to assemble and how you’ll move the platter so cheeses and fruit arrive in peak condition. Good timing keeps flavors bright and prevents a greasy fat bloom on soft pieces.

When to assemble and serve at room temp
Assemble 30–60 minutes before guests arrive so the cheese can bloom and aromas develop. Keep the spread wrapped until the last minute to stop drying.
Transporting your board level and wrapped
Keep the board level during travel. Use a handled surface when possible and wrap tightly with plastic to lock items in place. Nestle messy spreads and olives in ramekins so they don’t roll.
Leftovers and make-ahead components
Store meats and cheese separately in airtight containers after the party. Refresh delicate produce like grapes or apple slices instead of reusing wilted pieces.
- Pre-cut cheese and portion crackers ahead to save time.
- For large events, prepare two boards of different size so you can swap quickly.
- Pack an emergency kit: extra crackers, napkins, and a spare ramekin of jam.
| Need | Tip | Why it helps |
|---|---|---|
| Transport | Handled surface + tight wrap | Prevents shifting and keeps layout intact |
| Heat management | Shade and cooler packs | Limits fat bloom on soft cheese |
| Leftovers | Separate airtight containers | Preserves texture and flavor for next use |
Conclusion
Finish with a final pass: step back, check color and texture, and top up any gaps so the platter looks full and balanced.
Keep key items practical: a chilled brie skull, manchego ribs, and folded salami create the focal skeleton, while grapes, blackberries, figs, and dried apricots add fresh contrast.
Use small cookie cutters for clean shapes, nest spreads in ramekins, and place plastic spiders and props around the rim—not on food. Assemble 30–60 minutes before guests and keep the layout wrapped until showtime to manage fat and temperature.
This recipe-style roadmap gives you a repeatable approach to a festive cheese board that’s easy to scale and easy to love.