Easy Chicken Thigh Recipes Baked in the Oven
Nearly 80% of home cooks say a hot oven is the secret to crisp skin and juicy meat — and it only takes the right method to make weeknight dinners shine.
This Website contains affiliate links. That means I may earn a small commission if you purchase through my links, at no extra cost to you.
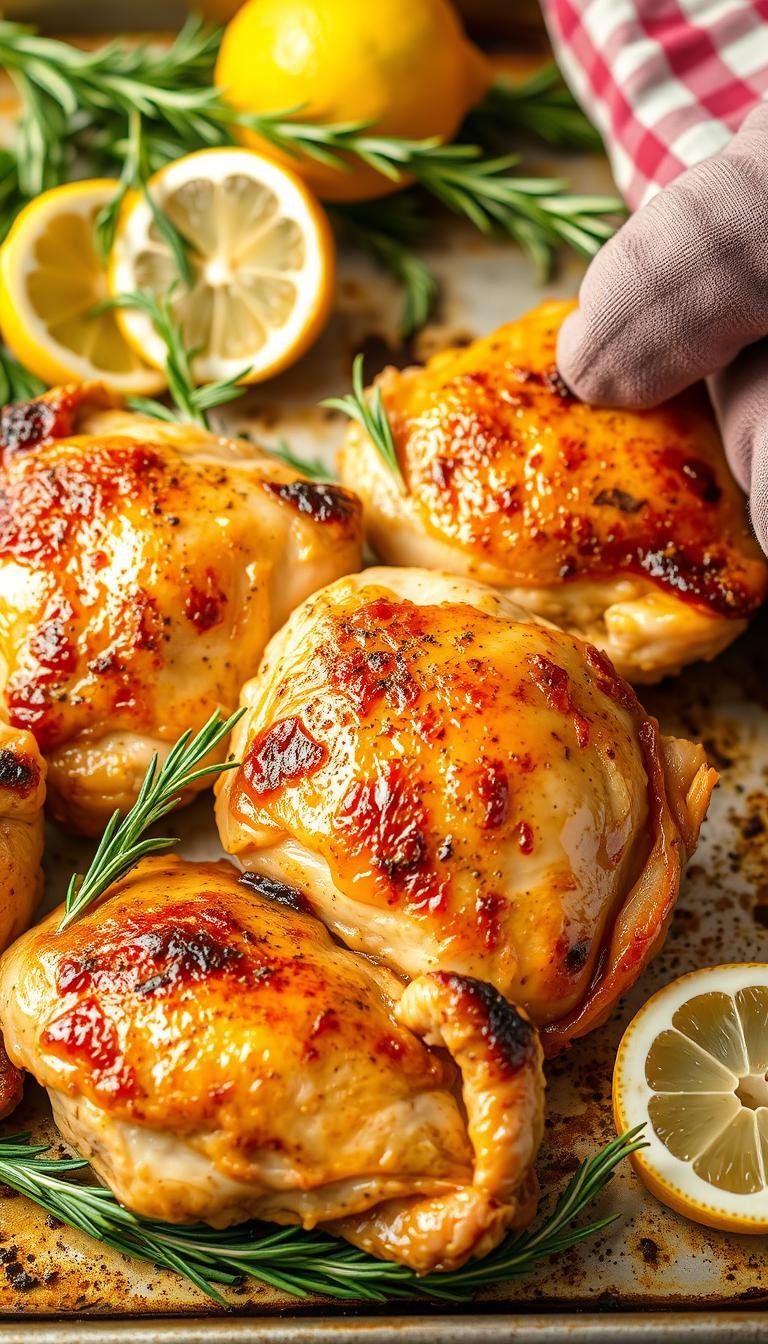
This guide shows a simple high-heat approach that yields golden, crisp results in about 35–40 minutes at 425°F for ~6 oz portions. Use a wire rack over foil or parchment to promote airflow and even browning.
Dry the pieces, oil lightly, and season under the skin to lock flavor. Finish under the broiler for 2–3 minutes to crisp the exterior, then rest 5 minutes so juices settle.
Practical tips include timing variations by size, how to test doneness without a thermometer, and quick reheating methods to re-crisp leftovers in an air fryer or oven.
Key Takeaways
- High heat (425°F) gives crisp skin and tender meat in ~35–40 minutes.
- Use a wire rack for airflow and even baking.
- Broil briefly and rest 5 minutes to lock juices.
- Season under the skin for deeper flavor.
- Reheat at 350°F or use an air fryer to restore crispness.
Why Oven-Baked Chicken Thighs Are a Weeknight Win
Oven roasting puts juicy, flavorful dark meat within reach on busy weeknights. A short, focused bake at 425°F with a quick broil gives the best balance of tender interior and crisp exterior.
Juicy dark meat with minimal prep
Juicy dark meat with minimal prep
Dark cuts have more fat and connective tissue, so they stay moist even if the oven runs long. Drying and seasoning are the main tasks, which saves time when you serve the family.
Crispy skin without deep-frying
High-heat baking renders fat under the skin, then a short broil makes the surface shatteringly crisp. Using a wire rack improves airflow and promotes even browning with less oil and less mess than pan frying.
- Forgiving cook window keeps the meat juicy.
- Fat-rich cuts deliver strong flavor for leftovers.
- Simple spice blends work well and are pantry-friendly.
| Advantage | Why it matters | Quick tip | Result |
|---|---|---|---|
| Minimal prep | Dry, oil, season | Use a wire rack | Even crisping |
| High-heat method | 425°F + broil | Watch last 2–3 minutes | Crispy skin, juicy meat |
| Family friendly | Holds up for leftovers | Reheat in oven or air fryer | Consistent texture |
Ingredients for Flavorful, Crispy Skin
For the deepest flavor and a craggy crust, favor skin-on, bone-in cuts. These pieces render fat as they cook, which keeps meat juicy and gives a superior exterior.
Cut choices
Bone-in chicken thighs are the recommended option for texture and taste. Boneless or skinless chicken works, but expect less crunchy surface and adjust cook times.
Oil and fat
Drizzle a light coat of olive oil before seasoning to help spices stick and encourage browning. Olive oil pairs well with paprika and garlic and helps render the fat under the skin.
Seasoning essentials
Build a simple mix: salt, black pepper, paprika, garlic powder, onion powder, and dried oregano or thyme. Italian seasoning is a handy substitute if you want an all-in-one blend.
Optional boost
For extra crunch, whisk a small amount of baking powder into the dry mix. Taste any store-bought blend first so you don’t over-salt.
- Measure spices: use about one teaspoon per large piece so seasoning distributes evenly.
- Keep it simple: olive oil plus pantry staples gives reliable results every time.
- Switch if needed: neutral oils like avocado work if you prefer a milder flavor.
Preheat the Oven and Prep the Pan
A fully preheated oven gives the best chance for golden, crackly skin. Set the temperature to 425°F so the surface heats quickly and fat begins to render the moment the pieces hit the rack.
Line a rimmed baking sheet with foil or parchment and place a wire rack on top. Elevating the pieces lets hot air circulate and prevents the underside from steaming.
Pat skin-on chicken dry with a dry paper towel before seasoning. Removing surface moisture makes a big difference in browning and helps rubs stick.
- Preheat oven to 425°F before you begin to ensure consistent temperature.
- Use a heavy-duty sheet and sturdy rack to avoid warping at high temperature.
- When you don’t have a rack, leave space between thighs so air moves freely.
Confirm the oven reaches 425°F before placing the tray inside. Keep foil or paper edges tucked to avoid contact with heating elements and to prevent scorching.
| Step | Why it matters | Quick tip |
|---|---|---|
| Preheat to 425°F | Promotes rapid fat rendering and crisp skin | Wait until oven signal or use an oven thermometer |
| Line baking sheet + rack | Improves airflow; simplifies cleanup | Tuck foil edges away from elements |
| Pat dry with paper | Removes moisture that blocks browning | Use separate towels for each piece |
Step-by-Step: Bake Chicken Thighs Like a Pro
Begin with a hot oven and dry skin — that combination gives the best chance for a golden, crackly surface.
Preheat oven to 425°F. Pat chicken completely dry with paper towels to remove surface moisture so seasonings stick and skin crisps instead of steaming.
Drizzle a thin coat of olive oil and apply your seasoning. Gently lift the skin and rub spices underneath for deeper flavor in every bite.
Place chicken thighs skin-side up on a wire rack set over a foil- or parchment-lined baking sheet. Leave space between pieces so hot air circulates and browning is even.
- Bake 35–45 minutes until the thickest part reaches 165°F.
- Switch to broil for 2–3 minutes to blister and crisp the surface—watch closely to avoid burning.
- Remove from the oven and rest about 5 minutes so juices redistribute before serving.
Quick tips: Use an instant-read thermometer and avoid flipping; keep skin-side up so fat renders and the crust develops uniformly.
Time and Internal Temperature Guide
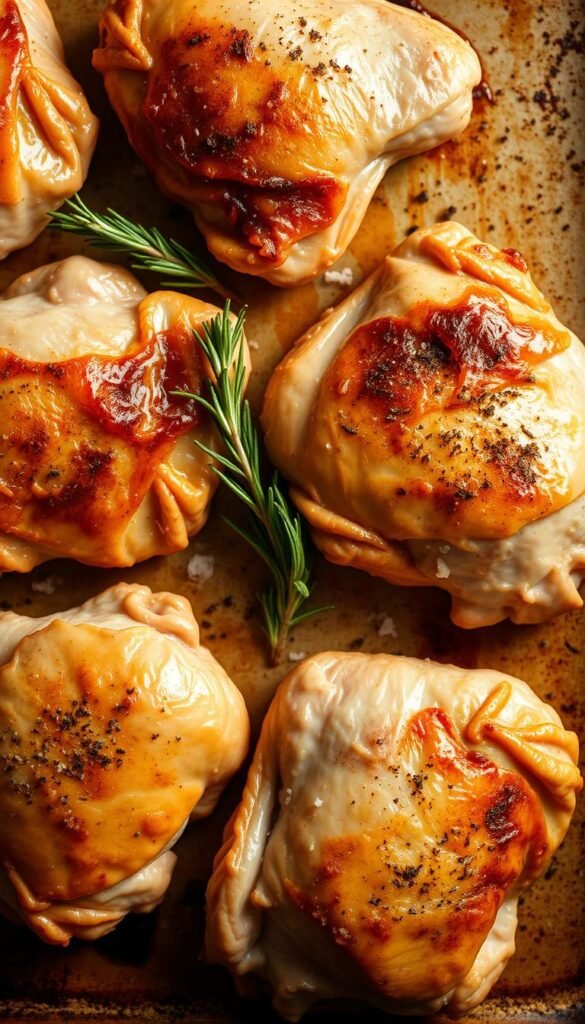
Timing and a spot-check with a thermometer are the simplest ways to guarantee safe, tender meat. At 425°F, most bone-in, skin-on pieces finish in about 35–45 minutes. Six-ounce portions often reach doneness around 35–40 minutes.
Always verify with an instant-read thermometer in the thickest part, avoiding the bone. The USDA minimum is 165°F, but many cooks aim for ~170°F to soften connective tissue and improve tenderness.
Size matters: larger 8–10 oz pieces need extra minutes. If you bake multiple trays or crowd the pan, add time because airflow and heat recovery slow down browning.
- Test the largest piece first; smaller ones can be removed earlier.
- Pull the pan as soon as your target temperature is reached; carryover heat will rise slightly during rest.
- Using a reliable thermometer increases safety and consistency every time.
| Condition | Oven Temp | Typical Minutes | Target Internal Temp |
|---|---|---|---|
| Average 6 oz pieces | 425°F | 35–40 minutes | 165–170°F |
| Larger 8–10 oz pieces | 425°F | 40–50 minutes | 170°F |
| Crowded pan / multiple trays | 425°F | +5–10 minutes | 165–170°F |
How to Tell When Baked Chicken Thighs Are Done
The easiest way to confirm doneness is a quick probe into the thickest meat. Use simple checks so you serve safe, tender results every time.
With a thermometer: insert an instant-read into the thickest part of the piece without touching bone. Aim for at least 165°F; many cooks prefer ~170°F for extra tenderness. If a reading seems odd, reinsert in a second spot before you decide.
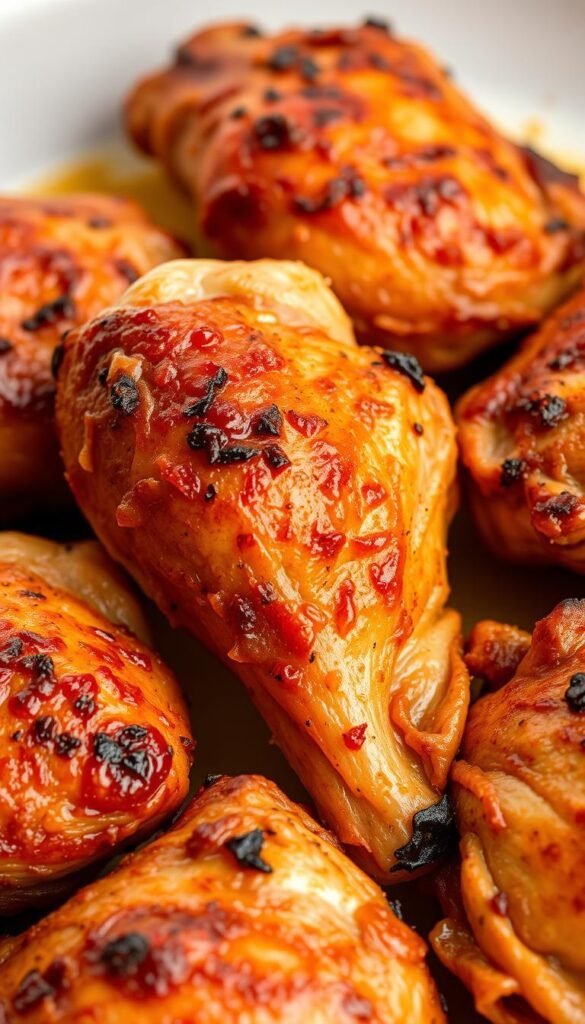
Without a thermometer: split the largest piece near the bone. The meat fibers should look fully opaque, not wet or pink. Juices must run clear with no red or bloody areas. A loose bone is a good sign the connective tissue has broken down.
- The most reliable method is the instant-read probe at the thickest part, avoiding bone.
- Start checking a few minutes before the earliest estimated time to prevent overcooking.
- If one piece lags, remove the done pieces and return the underdone item to finish alone.
- Look for crispy, golden-brown skin as an added visual cue of proper baking.
- Rest cooked pieces briefly so juices redistribute and final doneness evens out.
Tips for Extra-Crispy, Flavor-Packed Results
A few small tweaks at the finish line turn good oven results into truly crisp, flavorful plates. These steps focus on moisture control, airflow, and seasoning balance so your pieces brown evenly and stay juicy.
Remove surface moisture for better browning
Pat the surface dry with paper towels before adding any oil or rub. Removing dampness prevents steaming and helps develop golden, crisp skin.
Use a rack for airflow and even crisping
Elevate pieces on a wire rack over foil or parchment. Space them so hot air circulates beneath and around each item to avoid soggy undersides.
“A quick 2–3 minute broil at the end can make the surface blister and deepen color.”
Mind salt in premade blends and rest to retain juices
Taste premade seasoning before adding more salt. A light sheen of oil helps spices, including a touch of baking powder in the dry mix can boost crispness. Rest cooked pieces about five minutes so meat juices redistribute before slicing.
- Avoid overcrowding the pan.
- Keep skin-side up throughout baking.
- Use consistent-sized pieces so they finish together.
Chicken Thigh Recipes Baked: Seasoning Variations and Swaps
Small swaps in herbs and heat can transform a simple rub into a signature flavor. Start with a base mix and adjust salt, acid, or heat to suit the meal.
Italian and garlic-forward blends work well when you want bright, savory notes. Try Italian seasoning with garlic powder, onion powder, and a little lemon zest for balance.
Smoky, spicy, or herb-heavy options
For smoky depth, combine sweet and smoked paprika with black pepper and a pinch of cayenne. That mix plays nicely with richer cuts.
Herb-forward blends use oregano, thyme, and basil. Add olive oil and lemon for a Mediterranean lift.
Baking powder vs. spice-only rubs
Whisk a small amount of baking powder into the dry mix to boost crispness at 425°F. Use no more than 1/2 teaspoon per pound of meat.
Prefer a simpler crust? Skip the powder and rely on high heat plus a quick broil for a classic, even-browned finish.
“Taste premade mixes first — salt levels vary and fine-tuning preserves balance.”
| Style | Core ingredients | When to use | Result |
|---|---|---|---|
| Classic | paprika, garlic powder, onion powder, salt, pepper | Everyday dinners | Balanced, familiar flavor |
| Garlic-forward | garlic, Italian seasoning, oregano | Garlic lovers | Savory, aromatic |
| Smoky heat | sweet + smoked paprika, cayenne, black pepper | Bold plates | Smoky, slightly spicy |
| Crisp boost | Same spice mix + baking powder | When extra crunch matters | Shatteringly crisp skin |
Cut and Cooking Alternatives
Different skin-on pieces demand slight timing and temperature tweaks to hit the perfect balance of crust and juice.
Drumsticks and other skin-on cuts at 425°F
The same high-heat method works well for legs. Plan about 40–45 minutes at 425°F for drumsticks to render fat and crisp the surface. Check the thickest part with a thermometer and remove when it reaches your target.
Because legs and thighs have more fat, they tolerate a wider window of minutes and stay succulent even if timing shifts. Keep pieces spaced so air flows and the skin browns evenly.
Bone-in vs. boneless, and when to lower oven temp for breasts
For lean cuts, tighten the heat control. Bone-in chicken breasts do best at 375°F for roughly 35–45 minutes to avoid drying the meat.
If you use boneless, skin-on chicken breasts, raise the heat to 400°F and aim for 20–30 minutes, checking early to prevent overcooking.
| Cut | Oven Temp | Typical Minutes |
|---|---|---|
| Drumsticks / legs | 425°F | 40–45 minutes |
| Chicken thighs | 425°F | 35–45 minutes |
| Bone-in breasts | 375°F | 35–45 minutes |
| Boneless breasts | 400°F | 20–30 minutes |
Practical note: For mixed trays, stagger start times or use separate pans. A light olive coat and a sprinkle of pepper keep flavor consistent across cuts. Always measure internal temp at the thickest spot for safe, juicy results.
Serving, Storing, and Reheating
Pair hot, golden pieces with bright, easy sides for a balanced weeknight plate. Simple accoutrements cut through richness and make the meal feel complete.
Simple sides: roasted veggies, mashed potatoes, greens
Round the plate with roasted Brussels sprouts, creamy mashed potatoes, or sautéed spinach with a hit of garlic. Steamed broccoli or green beans tossed with shallots and lemon add fresh brightness.
Fridge and freezer tips for leftovers
Cool pieces completely on a sheet of paper before packing. Refrigerate in airtight containers for 3–4 days, or freeze well-wrapped for 2–3 months. Wrap tightly, place in a freezer bag, and label with the date for best quality.
Reheating for crispy skin in the oven or air fryer
To restore crunch, warm on a baking sheet at 350°F for about 15–20 minutes. In an air fryer, reheat at 350°F for 3–4 minutes to revive texture quickly.
Quick tips: Drizzle a touch of olive oil if the surface looks dry. Avoid the microwave when crisp skin is a priority; use short bursts only if you must, then finish in the oven or air fryer.
| Action | Method | Time | Notes |
|---|---|---|---|
| Refrigerate | Airtight container | 3–4 days | Cool completely on paper first |
| Freeze | Tightly wrap + bag | 2–3 months | Label with date to track time |
| Reheat (oven) | Baking sheet at 350°F | 15–20 minutes | Drizzle oil if dry; rest before serving |
| Reheat (air fryer) | Air fryer at 350°F | 3–4 minutes | Quick crisp without drying interior |
Conclusion
A few simple steps at high temperature make weeknight meals reliably crisp and juicy.
, Dry thoroughly, season under the skin, bake at 425°F, and finish with a short broil to build a golden crust and tender interior.
Use a wire rack and space pieces so hot air circulates for even browning. Rest for five minutes to keep juices where they belong.
These straightforward methods are forgiving, flavorful, and ideal for busy home cooks. Reheat at 350°F or in an air fryer to restore crispness and serve the whole family with confidence.
Make the approach your own by swapping herbs and spices to keep these go-to recipes fresh and satisfying.
