Ready for quick wins and showstoppers? This short guide collects tested methods so you can pick one that fits your tools and time. Expect simple swaps like funfetti batter, sprinkles, and a candy-colored drip alongside advanced finishes such as mirror glaze and patterned fondant.
We organize the list by technique—drips, piping, color work, chocolate decor, fondant characters, rainbow motifs, and budget upgrades—so you can jump to what matches your skill level. Each entry shows practical steps, from pourable ganache consistency to baking rainbow layers in two batches.
Whether you want a unicorn centerpiece or a KitKat-ring showstopper, the guide highlights ingredient tips and photo-friendly layouts. Expect actionable notes, easy upgrades like sparklers or cookie cutouts, and ways to scale a recipe for rounds, sheets, or Bundts.
Key Takeaways
- Find quick wins and advanced techniques in one practical guide.
- Techniques are grouped so you can jump by tools and confidence.
- Every idea includes actionable steps or recipe tips for reliable results.
- Budget-friendly upgrades deliver big visual impact with minimal gear.
- Mix-and-match approaches let you create unique designs fast.
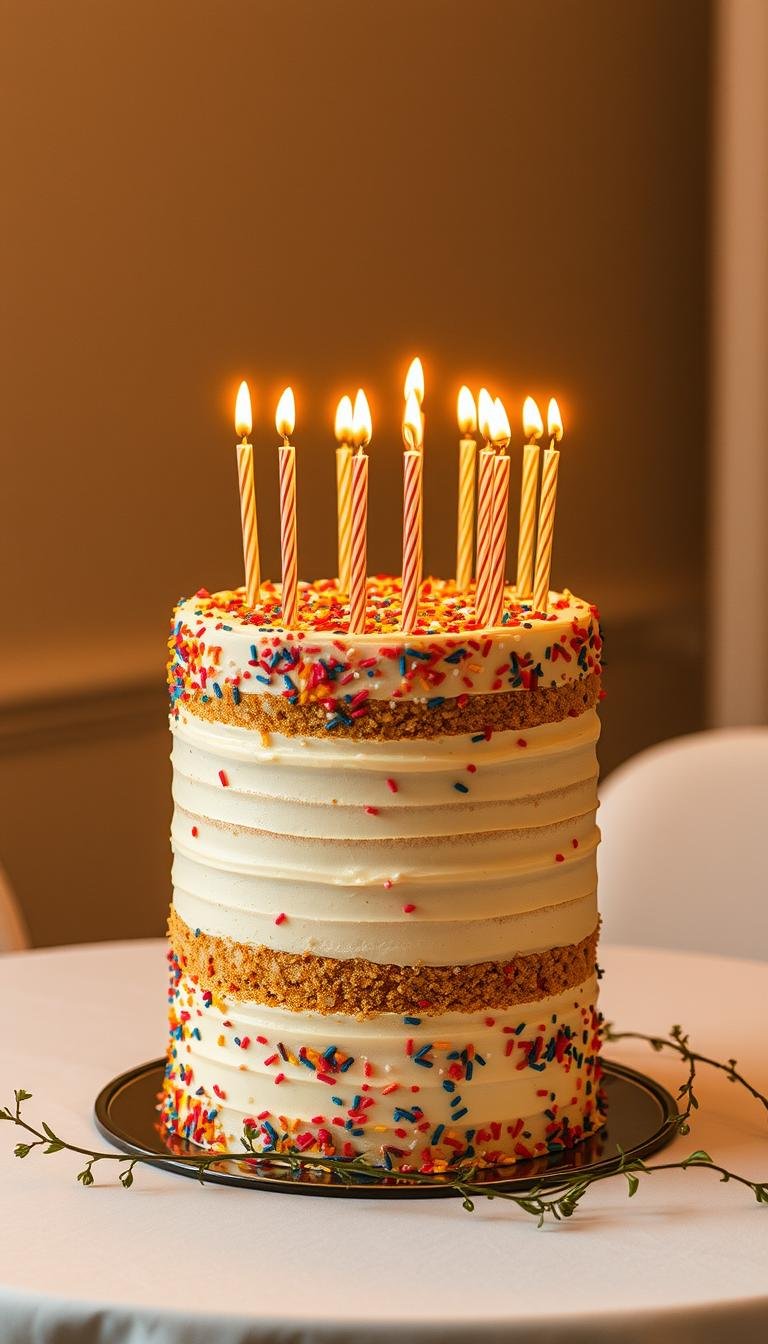
Quick-start guide to funfetti, sprinkles, and confetti drip looks
Quick swaps—sprinkles folded in batter, a controlled drip, and pressed-on sides—deliver big impact with little fuss.
Confetti drip cake: Bake a sturdy vanilla base with rainbow jimmies folded into the batter so they don’t bleed. Stack layers, add a thin crumb coat, then finish with a candy-colored drip and extra sprinkles on top and the side for a party-ready finish.
All-over sprinkles
Choose your coverage: scatter sprinkles on the top, press them onto the sides for a banded look, or swirl small jimmies into buttercream for speckled texture.
School-days sprinkle sponge
For a true easy birthday cake, bake a sheet sponge, spread icing edge to edge, and pour on sprinkles. Chill briefly so pieces stick, slice, and serve for instant nostalgia.
“Use pourable but not runny icing for drip control; test at the back and apply with a spoon to avoid flooding.”
- Chill frosted layers so sprinkles adhere cleanly.
- Use a tray to catch fall-off and press gently for full coverage.
- Add thin chocolate accents if you want depth without losing the playful look.
Pro tip: Bake layers ahead and freeze wrapped; decorate the day of the party to keep colors bright and sprinkles crisp.
Showstopping drips and glossy finishes: ganache and mirror glaze
Glossy drips and glassy glazes lift a simple layer into a showstopper quickly. Start with temperature and flow—those two things make or break the finish.
Chocolate ganache drip: consistency, spoon technique, and edge control
Make a 1:1 chocolate-to-cream ganache and cool until pourable, not runny. Spoon a little at the back to practice drip length, then nudge drips over the chilled edge. Work in short bursts for consistent spacing and cleaner edges.
Troubleshooting: If drips run too far, the ganache is too warm. If they stall, gently warm the bowl. Ripples mean the edge needs smoothing; chill and retry.
Triple chocolate & peanut butter layer centerpiece
Stack layer sponges with peanut butter icing, add a glossy ganache drip, and finish the top with pretzel bark for sweet-salty crunch and a dramatic silhouette.
Mirror glaze marbling and toffee apple caramel drip
Bloom gelatin, boil sugar with water and condensed milk, pour over white chocolate, then emulsify. Divide into bowls and tint with gel food coloring for marbling. Pour over a frozen, smooth cake on a rack set over parchment to catch excess.
For an autumn touch, dip dried apple balls in caramel and pull straight up to form long, set drips. Press white chocolate stars piped on parchment as final accents.
“Glaze at 90–94°F and ganache on a well-chilled cake for the cleanest results.”
- Give yourself time to chill between steps.
- Practice drips at the back and rotate the cake as you go.
Piping party: swirls, rosettes, and texture you can master
A single batch of buttercream can produce dozens of looks when you swap tips, pressure, and color placement.
Load one batch of buttercream into multiple piping bags fitted with open star, closed star, French, and round tips. Mix sizes so the surface reads as a cohesive pattern with varied texture.
All-over piping with mixed tips and techniques
Practice first on a board to build piping skills: pipe lines, shells, stars, and rosettes until pressure and start/stop points feel consistent.
- Use a chilled crumb coat so frosting grips on contact and side patterns hold their shape.
- For rosette coverage, pipe 1.5-inch spirals edge to edge, alternating pressure to match sizes and hide seams on the side of the cake.
Rosettes and rainbow swirls for floral texture
Create rainbow swirls two ways: stripe colors inside one bag for streaked swirls or make cling-film pods of color and insert them together for cleaner multicolor piping.
| Technique | Tip | Best for |
|---|---|---|
| Open star | Short bursts, rotate turntable | Swirls & shells |
| Large star | 1.5″ spirals, steady pressure | Full rosette coverage |
| Round tip | Dots and outlines | Detail & anchors |
Cleanup & workflow: keep a damp towel to wipe tips between colors and rotate the cake as you pipe. Mix piped elements with sprinkles or a few molded chocolates to add focal points and save time and budget for a memorable birthday decoration.
birthday cake decorating ideas
Quick index for inspiration and planning:
- Sprinkles & confetti: Kid-friendly and fast; best on sheet or round pans. Pair with vanilla or funfetti for bright flavor.
- Drips & mirror glaze: Glossy finishes for grown-up celebrations; pair with chocolate or peanut-butter bases.
- Ombre, fault-line & naked looks: Chic milestone styling; use citrus or berry fillings to balance rich frostings.
- Piping & rosettes: Texture-forward; tools: basic tips, bags, offset spatula, and turntable.
- Fondant figures & themed builds: Unicorns, sharks, and pop-culture toppers for party focal points.
- Chocolate accents & natural toppings: Curls, leaves, edible flowers, and fruit for elegant finishes.
- Shape-driven options: Bundts, vertical layers, and KitKat rings travel well for off-site events.
Tools at a glance: piping tips, offset spatula, bench scraper, candy thermometer, and a Bundt or ring mold cover most builds.
Quick upgrades: sparklers, fancy candles, balloon toppers, or a cookie border add instant impact without extra skill.
Save or print this list as a planning sheet. Combine a guide-driven method—like a fault-line—with candy or cookies to personalize a design without complex technique. Plenty of approaches work on sheet pans as well as rounds, so you can scale for small or large parties and still arrive photo-ready.
On-trend color work: ombre, fault-line, and clean frosting finishes
A thoughtful color plan and a few smoothing tricks make on-trend finishes easy to achieve. Start by choosing a palette that suits the event mood—soft ombre for polished looks, a sprinkle fault-line for playful texture, or a naked style to highlight fillings.
Ombre frosting bands and smooth blending
Tint three bowls of frosting from dark to light and pipe wide horizontal bands around the layer stack. Use a bench scraper or wide spatula to blend the transitions. Chill briefly between coats to reduce smudging and scrape lightly to avoid crumbs.
Sprinkle “fault-line” effect with buttercream
Press sprinkles into a central band of icing, then add buttercream above and below. Build the upper and lower edges out slightly so the sprinkle seam peeks through like a geode. Use sprinkles sparingly on top to avoid visual overload.
Naked cake to showcase layers and fillings
Apply a thin icing layer to the side to seal crumbs while exposing interior fillings. This style reads rustic and relaxed and works well when colorful layers or fruit are part of the visual story. Quick time-savers: pre-make tinted icing and have a turntable, scraper, and warm water ready for fast, clean smoothing.
Chocolate-forward decorations for the chocoholic
For chocoholics, texture and shine turn a simple layer into an irresistible centerpiece. These techniques focus on sculptural movement and lifelike detail while staying doable on a modest timeline.
Chocolate curls and ribbons on chocolate cake
How to pull curls: Spread melted chocolate thinly on a cool sheet and let it set until matte. Hold a bench scraper at a shallow angle and scrape to form ribbons and curls.
Tip: Pile curls on the top so the sculptural mass reads dramatic without obscuring smooth sides. Pair with a silky chocolate frosting for a clean, focused display.
Chocolate leaves with real-leaf texture
Pick sturdy, veined leaves such as rose or lemon. Wash and dry them thoroughly, then brush the back with melted chocolate and chill until set.
Peel the leaf away to reveal detailed veins. Arrange leaves and curls together, alternating sizes and angles to build a layered, woodland look.
- Use a glossy ganache drip under the mound for shine and depth without hiding details.
- For flavor, stack a multi-layer base with chocolate filling and a touch of espresso to intensify notes without extra sweetness.
- Tempering isn’t required if serving soon; temper for extra snap and sheen when storing longer.
- Add a little cream to the frosting for smoother spreadability and better support of fragile decorations.
- Pre-make accents and store in a cool, dry place for fast assembly on the big day.
Reuse note: These chocolate techniques work as standalone recipes for cupcakes, petite cakes, or plated desserts—versatile finishes that stretch across projects.
Fondant fun: unicorns, sharks, and playful shapes
Fondant opens a fast route to bold shapes and playful characters that photograph well.
Unicorn horn, ears, and buttercream mane
Shape a white fondant horn and small ears, then paint the horn with gold luster dust for shine. Pipe colorful rosettes and dots in a flowing band down one side to form the mane.
Position the horn toward the front top quadrant so the unicorn reads clearly in photos and the horn sits centered and upright.
Baby Shark shortcut with premade fondant
Fast-track character work by using premade fondant for fins and smiles. Cut simple shapes, press them to a smooth iced surface, and add buttercream waves for motion.
Wacky argyle and patterned fondant
Roll two or more colors, cut repeating diamonds, and apply in a crisp argyle grid. Keep edges straight for a graphic result and press candy pearls or sprinkles into bands for extra sparkle.
- Knead fondant until smooth and dust lightly with cornstarch to prevent sticking.
- Cover unused fondant airtight; decorations can be made days ahead for easier birthday cake assembly.
- Limit your palette to three or four hues to keep shapes cohesive—use a single tall tier as a simplifying idea for height and focus.
Rainbow moments inside and out
Split the work into clear steps so vibrant layers and bright piping come together without stress.
Rainbow cake layers and timing tips
Weigh batter and divide it evenly into six bowls (seventh optional). Tint each portion with gel food coloring for intense hues without thinning the mix.
Bake two layers at a time to keep oven time manageable and ensure even doneness. Cool fully, level gently, and chill layers before stacking.
Buttercream motifs: clouds and sun rays
Start with a smooth, light base coat so colors pop. Use a small round tip to pipe arched stripes for rainbows and a white icing to add fluffy clouds.
Finish with short rays in warm tones radiating from the rainbow; use buttercream for texture and quick repair if needed.
Rainbow Bundt for an easy party twist
For less fuss, stripe tinted batters into a Bundt pan. It bakes into a hidden rainbow that slices beautifully and needs minimal outside finishing.
| Step | Why it matters | Quick tip |
|---|---|---|
| Divide & weigh batter | Ensures even layer height | Use a kitchen scale |
| Bake in pairs | Even oven heat and timing | Swap racks between batches |
| Chill & use dowels | Stability for transport | Trim tops before stacking |
| Smooth base coat | Color contrast for piping | Chill before piping motifs |
Timing cues: allow full cool, quick chill between steps, and set motifs on a chilled surface to avoid smearing. Pair bright layers with classic vanilla for clean flavor, or add a thin chocolate drizzle for contrast without hiding the rainbow.
Final flourish: top with a small rainbow topper or number candle that matches the buttercream palette for a festive finish that ties the whole party look together.
Simple add-ons that wow: candles, sparklers, and toppers
The right candle or topper can create a photo-ready finish with almost no extra work.

Fancy candles and number sparklers
Tall tapers, metallic candles, and number sparklers lift a plain cake into a focal moment. Use trick candles for laughs and shaped sparklers for milestones.
Safety: Light sparklers only at serving, keep a tray or damp paper towel nearby, and avoid placing them under low toppers or streamers.
Balloon toppers and custom name toppers
Mini balloon arches or picks match a palette and add instant height. Anchor them with a food-safe pick so they travel well from bakery to venue.
Custom name toppers in wood or acrylic make a keepsake that personalizes any style in seconds.
Quick pairings, balance, and a small checklist
Pair metallic candles with a light confetti sprinkle or candy accents around the base for coordinated shine without extra piping.
| Topper Type | Impact | Best Use |
|---|---|---|
| Number sparkler | High drama in photos | Milestones, outdoor or well-vented spaces |
| Balloon arch pick | Big visual, low effort | Small rounds or 13×9 pans |
| Custom name topper | Personal keepsake | Formal parties and photo ops |
| Metallic tapers & confetti | Quick sparkle | Last-minute flair |
- Choose toppers proportionate to the cake so the top doesn’t look crowded.
- Prep a small kit: lighter, candles, topper, and a safe spot for lighting.
- Decorations travel well—add them at the venue for the cleanest look.
Fruit, florals, and greenery for natural decoration
Natural elements—fresh fruit, seasonal blooms, and leafy sprigs—give a dessert a relaxed, elegant finish. Use edible pansies, rose petals, and other food-safe blooms to add color and scent.
Simple layouts work best: place a crescent of blooms on one side of the top or tuck a small cluster at the base for high impact with little fuss.
Edible blooms and safety
Choose pesticide-free flowers and rinse gently. Dry stems and leaves, and wire or tape stems when you must avoid sap contact from non-edible stems.
Fruit pairings and a quick recipe tweak
Pair citrus wheels, berries, and mint leaves against a thin coat of frosting so colors pop. Brush citrus slices with warm simple syrup to make them glossy and pliable.
- Limit your palette—three hues keeps the look cohesive.
- For a rustic finish, use a naked approach with thin sides and a floral topper.
- Add fruit and flowers near serving to preserve freshness.
“Natural decoration is fragrant and evocative, complementing flavors while keeping the dessert approachable.”
Cookies, candy, and KitKats: sweet and easy decorations
Edible shortcuts like store-bought cookies and chocolate bars create bold looks fast. They save time and turn a simple base into a playful centerpiece.
Cookie-covered sides: Smooth the icing on the sides, then press themed cookie cutouts into the frosting so they stick. Use two cookie types—soft sugar and crunchy sandwich—for contrast and an extra snack-worthy detail.
KitKat ring with a candy-filled top: Stand KitKats upright around the outside and tie with a ribbon if you want extra hold. Fill the top with M&M’s or Reese’s Pieces for a colorful reveal that slices dramatically.
Candy crumbles for texture: Scatter crushed bars, gummies, and sprinkles across the top for bold color and crunch. Pair a light vanilla base and simple icing to keep flavors balanced and avoid overload.
Quick workflow: Chill the iced layer until slightly firm before attaching pieces. Use a small offset spatula to nudge candies into place and choose a sturdy sponge plus ganache or American icing as “glue” for heavy loads.
| Technique | Speed | Best finish |
|---|---|---|
| Cookie-covered side | Fast (store-bought) | Graphic, snackable side |
| KitKat ring + candy top | Very fast | Colorful, dramatic top |
| Candy crumble mix | Quick assembly | Textured, playful surface |
Tip: Pick peanut-free chocolate options and outline a number or initial with candies to personalize the shape while keeping assembly simple.
Creative builds: vertical layers, bundts, and upside-down twists
Try playful structural twists—vertical rolls, Bundt molds, and retro upside-down layouts—to make each slice a reveal.

Vertical layer: roll-and-wrap technique
Bake a thin sheet, spread a firm filling, then roll it tight like a jelly roll. Chill the roll, slice it lengthwise, and wrap the strips into standing coils to form a dramatic vertical layer when cut.
Stability tip: chill the sheet before rolling and use a dense filling so pieces hold shape while you assemble. This saves time during finishing and transport.
Decorative Bundt finishes
Bundt pans give instant shape and pattern with no extra carving. Keep decoration minimal: a thin glaze or light buttercream drizzle highlights ridges and keeps the pan’s shape the star.
For deeper color and shine, use a warm chocolate glaze that flows into the grooves. It reads elegant and requires little extra skill.
Remixed pineapple upside-down patterns
Halve pineapple rings to form overlapping scallops across the top. Tuck cherries beneath each arc for a polished retro look that slices beautifully and shows a fun interior pattern.
- Test recipes in decorative pans to avoid air bubbles and ensure even baking.
- Grease and flour thoroughly for clean release and crisp details.
- For an easy cake route, bake a favorite batter in a Bundt, glaze, and sprinkle for a quick, weeknight-friendly finish.
Finish note: these builds reveal playful patterns when sliced. Keep add-ons light so shape and fruit patterns stay the star. Bundts can be baked a day ahead and glazed just before serving to keep finishes fresh.
Theme cakes for any birthday party: games, pets, and pop culture
Themed builds work best when one bold element tells the story at a glance.
Translate family favorites like Candy Land, Catan, or Trivial Pursuit into clear surface designs.
Use fondant or buttercream blocks and color zones to map board layouts. Keep the center clear for lettering so the theme reads in photos.
Game-inspired layouts
Build simple hexes, wedges, or squares with tinted fondant or piped bands. Add a small chocolate figurine or themed candy to reinforce the story.
Puppy face with character piping
Lightly sketch the face, then pipe fur texture with star tips. Layer two shades for depth and finish with tiny round dots for eyes and nose.
Hagrid-style Harry Potter nostalgia
Go intentionally rustic: bold color, uneven lettering, and chunky fondant emblems for instant recognition. Small edible logos read best when made from premade fondant.
- Rule: choose one focal design—board, face, or logo—to avoid clutter and make slicing easier during the party.
- Match 3–4 main hues to other party decorations for a cohesive look.
- Transport tip: box with supports, keep cool, and add fragile toppers on site.
Beginner-to-pro roadmap: tools, time-savers, and skill-builders
Start with a compact toolkit and a clear plan so your projects grow from simple skills to confident finishes. This short guide outlines tools, swaps, and practice steps that save time while building control.
Essential tools
Keep a lean kit: rotating turntable, offset spatulas, bench scraper, piping bags and tips, and parchment templates. These let you work faster and keep lines steady for clean results.
Time-saving swaps
Use store-bought meringue kisses, premade fondant accents, or tasteful faux florals to add polish without extra work. These simple swaps free up minutes for practice or assembly.
Practice skills and workflow
Work methodically: stack and level layers, apply a thin crumb coat, then smooth frosting with a scraper for sharp edges. Practice basic piping motifs—shells, rosettes, and bead lines—before mixing tips for texture.
- Weekend plan: day one bake and chill; day two frost and finish. Allow buffer time for fixes.
- Use parchment templates to trace letters or shapes, then place as a guide to pipe or cut fondant cleanly.
- Maintenance: keep tips clean with a damp towel and control temperature so buttercream stays workable.
- Transport: non-slip mats, dowels for tall stacks, and chilled frosting help cakes arrive intact.
Small practice recipes—a simple border, a two-color rosette, and a bead line—teach pressure control and rhythm. Repeat them until muscle memory forms, then scale to full projects.
Confidence builds quickly when you pair short practice sessions with good tools and proven swaps. Use palettes and textures for inspiration, pick techniques that match your gear, and turn fundamentals into a relaxed, repeatable workflow.
Conclusion
Treat the guide as a menu: mix a texture, a color trend, and one showpiece to build a look that feels custom without extra fuss.
You now have a toolbox of birthday cake ideas—from sprinkle-forward styles to glossy drips, piped texture, fondant figures, and theme builds. Step-by-step tips for mirror glaze, ganache, and vertical layers remove guesswork so even first-timers can achieve polished results.
Mix techniques—a soft ombre base with rosette accents or a candy-colored drip over a sprinkle band—to make unique finishes without added complexity. Quick add-ons like toppers, candles, cookies, or a KitKat ring turn an easy cake into a photo-ready centerpiece fast.
Plan ahead: bake, chill, and prep components. Keep a little cream and extra icing for touch-ups. Pick one new technique to try next and build confidence with every bake.