7 Easy Focaccia Bread Hacks That Will Make You Bake Like a Pro
Did you know that the art of baking focaccia bread has been a cornerstone of Italian cuisine for centuries? With its characteristic dimples and soft, airy texture, focaccia has become a staple in many bakeries and home kitchens around the world.
This Website contains affiliate links. That means I may earn a small commission if you purchase through my links, at no extra cost to you.
Baking the perfect focaccia can be a challenge, but with the right techniques, anyone can become a skilled baker. This article will guide you through simple yet effective hacks to elevate your homemade focaccia to a professional level, covering aspects from dough preparation to achieving that perfect crust.
Key Takeaways
- Mastering hydration ratios for perfect dough
- Techniques for creating Instagram-worthy toppings
- Simplifying the focaccia baking process
- Tips for achieving a crispy crust
- Understanding the basics of artisan bread techniques
The Art and Science of Perfect Focaccia Bread
Traditional focaccia, originating from Italy, is renowned for its distinctive texture and flavorful profile. This classic Italian flatbread has gained popularity worldwide for its airy interior, crispy crust, and signature dimples, typically infused with olive oil and various herbs.
What Makes Focaccia Special
Focaccia’s uniqueness lies in its hydration levels and the method of preparation. Unlike other bread types, focaccia is characterized by its high water content, which contributes to its tender crumb and chewy texture. The process of dimpling the dough not only creates its signature appearance but also allows for the retention of olive oil and toppings, enhancing its flavor profile.
The history of focaccia dates back to ancient Italy, where it was baked in hearths or on stones. Over time, it has evolved, incorporating various regional ingredients and techniques. Today, focaccia remains a staple in Italian cuisine, appreciated for its versatility and rich flavor.
Common Challenges in Focaccia Baking
Despite its popularity, baking focaccia can be challenging. One of the primary issues is achieving the right hydration balance. Too little water results in a dense loaf, while too much can make the dough unmanageably sticky. Another challenge is developing the appropriate gluten structure to support the dough’s rise and maintain its texture.
Other common difficulties include creating even air pockets and achieving a perfect crust. The dimpling process, while characteristic, can also be a challenge, as it requires a delicate touch to create uniform dimples without tearing the dough. Understanding these challenges is crucial for bakers looking to master the art of focaccia baking.
By acknowledging these common issues, bakers can better prepare themselves for the challenges of creating perfect focaccia. The subsequent sections will provide practical hacks to overcome these challenges, guiding readers toward achieving professional-quality focaccia.
Hack #1: Master the Perfect Hydration Ratio
Hydration is the foundation upon which great focaccia is built, influencing both texture and flavor. The hydration percentage, calculated as the ratio of water to flour weight, is particularly crucial for focaccia, which typically requires a higher hydration level than many other breads.
Why Hydration Is the Foundation of Great Focaccia
The characteristic open, airy crumb structure of focaccia is directly related to its hydration level. A higher hydration dough leads to a more tender crumb and better texture. Typically, focaccia recipes call for a hydration percentage between 75% and 85%, significantly higher than many other types of bread.
High-hydration dough is more challenging to work with but yields a superior product. The key is to gradually increase hydration as your skills improve, starting from a more manageable level.
“The quality of the bread is directly related to the quality of the dough, and hydration is the most critical factor in dough quality.” –
Finding Your Ideal Hydration Percentage
To calculate your dough’s hydration percentage, divide the weight of water by the weight of flour and multiply by 100. Beginners can start with a hydration percentage around 70-75%, while more advanced bakers can aim for 80-85%.
For example, if you’re using 1000 grams of flour and 800 grams of water, your hydration percentage is 80%. Adjusting this ratio based on flour type and environmental conditions is crucial.
| Flour Type | Typical Protein Content | Recommended Hydration Adjustment |
|---|---|---|
| All-Purpose Flour | 10-12% | Baseline |
| Bread Flour | 12-14% | +5% |
| 00 Flour | 9-11% | -5% |
Adjusting for Different Flour Types
Different types of flour absorb water differently due to variations in protein content. For instance, bread flour, with its higher protein content, can handle more water than all-purpose flour. Conversely, 00 flour, having a lower protein content, may require less hydration.
Seasonal Humidity Considerations
Environmental humidity significantly affects dough hydration. In dry conditions, such as during winter, you may need to increase hydration, while in humid conditions, you may need to decrease it. Understanding these adjustments is key to maintaining consistent results.
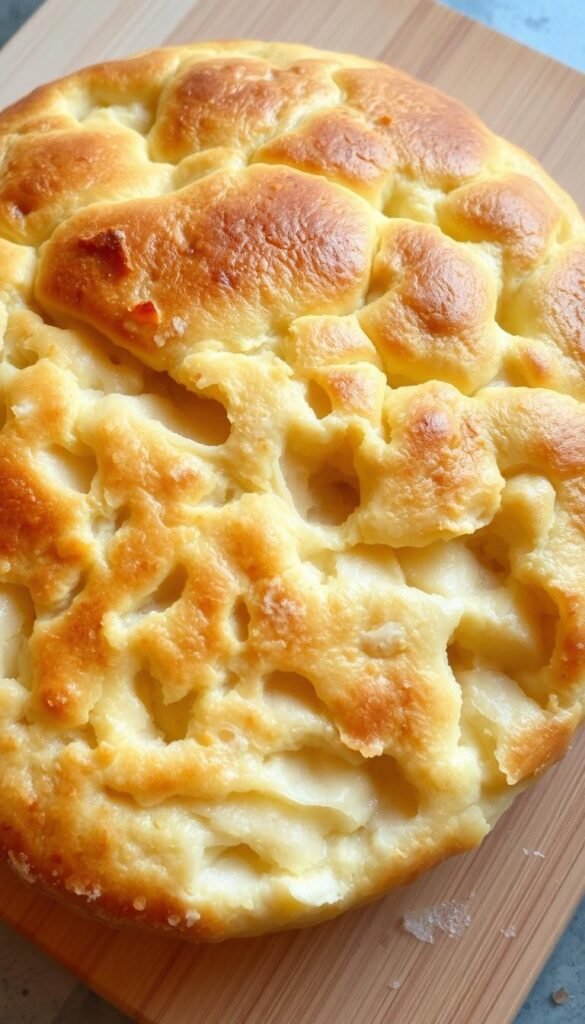
By mastering the perfect hydration ratio, you’ll be well on your way to baking exceptional focaccia. Remember, practice makes perfect, and adjusting your hydration levels based on flour type and environmental conditions will help you achieve consistent results.
Hack #2: Implement the Autolyse Method for Superior Texture
Unlocking the secret to superior focaccia texture begins with understanding the autolyse method. This technique, though simple, can significantly enhance the quality of your bread by improving gluten development and dough texture.
The Science Behind Autolyse and Gluten Development
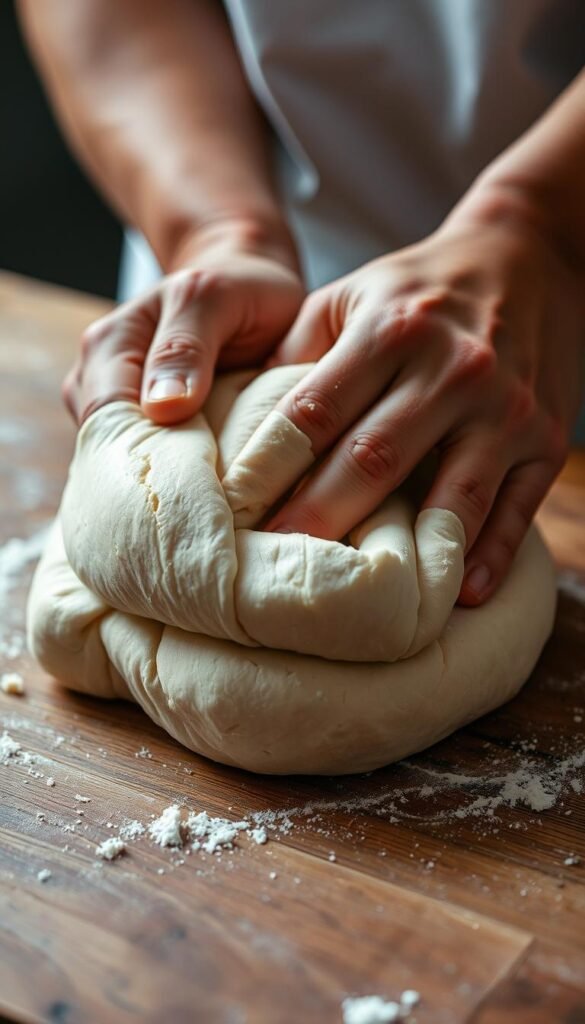
The autolyse method involves an initial resting period where flour and water are mixed together before adding other ingredients. This resting period activates enzymes that start breaking down the flour, beginning the gluten development process naturally. As a result, the dough becomes more extensible and easier to handle, leading to a better-structured final product.
Gluten development is crucial for achieving the right texture in focaccia. Proper gluten development allows the dough to hold its shape and gives the bread its characteristic chewiness. The autolyse method facilitates this process by allowing the flour to absorb water fully, leading to a more evenly developed gluten network.
Step-by-Step Autolyse Implementation
Implementing the autolyse method into your focaccia recipe is straightforward. First, mix your flour and water until just combined. Then, let the mixture rest for a specified period, typically between 20 to 30 minutes. After the autolyse, add the remaining ingredients, such as salt and yeast, and proceed with your recipe as usual.
| Step | Action | Notes |
|---|---|---|
| 1 | Mix flour and water | Until just combined |
| 2 | Rest the mixture | 20-30 minutes |
| 3 | Add remaining ingredients | Salt, yeast, etc. |
Timing Your Autolyse for Maximum Benefit
The duration of the autolyse can vary depending on your schedule and the specific characteristics you want to achieve in your focaccia. A longer autolyse period, such as overnight, can lead to a more complex flavor and better texture. However, even a short autolyse of 20 minutes can make a significant difference in the dough’s handleability and final texture.
Experimenting with different autolyse times will help you find the optimal duration for your specific recipe and baking schedule. Whether you’re looking for a quick solution or a more complex flavor profile, the autolyse method can be adapted to suit your needs.
Hack #3: Utilize Cold Fermentation for Complex Flavor
The secret to professional-quality focaccia lies in cold fermentation, a simple yet powerful method that transforms your dough into a complex, flavorful masterpiece. By slowing down the yeast fermentation process, cold fermentation allows for a more nuanced development of flavors and a more tender crumb.
How Cold Fermentation Transforms Your Dough
Cold fermentation works by retarding yeast activity while allowing bacterial fermentation to continue, resulting in a more complex flavor profile. This slow process breaks down the starches in the dough more efficiently, creating a more tender and easily digestible crumb. The slower fermentation also allows for a more even distribution of flavors, making your focaccia more aromatic and appealing.
Overnight Refrigeration Technique
To implement cold fermentation, you’ll need to adjust your dough preparation schedule. After mixing your dough, allow it to rest at room temperature for about an hour before refrigerating it. This initial rest, known as “bulk fermentation,” allows the yeast to start activating. Then, place the dough in the refrigerator at a temperature between 38°F and 42°F (3°C and 6°C). The dough will continue to ferment slowly in the fridge, developing complex flavors overnight.
Here are the key steps for overnight refrigeration:
- Mix your dough ingredients and let it rest at room temperature for 1 hour.
- Shape the dough into a ball and place it in a lightly oiled bowl, turning it to coat evenly.
- Cover the bowl with plastic wrap or a damp towel to prevent drying.
- Refrigerate the dough at 38°F – 42°F (3°C – 6°C) for 12-24 hours.
Planning Your Baking Schedule Around Fermentation
To incorporate cold fermentation into your baking routine, you’ll need to plan ahead. Here’s a sample schedule:
| Day | Time | Action |
|---|---|---|
| Monday | 8 PM | Mix dough, let it rest for 1 hour, then refrigerate |
| Tuesday | 8 AM | Remove dough from fridge, shape into focaccia, let it rise at room temperature |
| Tuesday | 12 PM | Bake focaccia |
By planning your baking schedule around cold fermentation, you can enjoy freshly baked focaccia at your convenience, whether you’re baking on a weeknight or preparing for a weekend gathering.
Hack #4: Perfect the Dimpling Technique for Authentic Texture
Dimpling is more than just a decorative step in focaccia making; it’s a technique that significantly impacts the final product’s texture and overall character. The process of creating dimples in the dough serves multiple purposes, from releasing trapped gas to forming reservoirs for olive oil and various toppings.
The Art and Purpose of Proper Dimpling
Proper dimpling is both an art and a science. It requires a gentle yet firm touch to create the right depth and spacing across the dough surface. The primary purpose of dimpling is to control the way the dough rises and to create a texture that is characteristic of authentic focaccia. By releasing trapped air, dimpling helps prevent uneven bubbling and ensures a more consistent crumb.
Key benefits of proper dimpling include:
- Improved texture through controlled air release
- Enhanced flavor distribution via olive oil reservoirs
- A more authentic appearance with characteristic dimples
Tools and Methods for Consistent Dimples
While traditional finger dimpling is the most common method, various tools can be used to achieve consistent dimples. These include specialized dimpling boards and modified rolling pins. The choice of tool often depends on the desired dimple depth and the baker’s personal preference.
Finger Techniques for Different Results
The technique used for dimpling can significantly affect the outcome. Varying the pressure, angle, and position of the fingers can create different dimple profiles. For instance, applying more pressure can result in deeper dimples, while a lighter touch creates more subtle depressions.
Tips for effective finger dimpling:
- Use a gentle pressing motion rather than poking hard
- Keep fingers slightly wet to prevent dough from sticking
- Dimple in a systematic pattern to ensure even coverage
Creating Flavor Reservoirs with Strategic Dimpling
Strategic dimpling involves creating deeper dimples in areas where olive oil and toppings will be placed. This technique not only enhances flavor distribution but also helps in achieving a more visually appealing final product.
Considerations for strategic dimpling:
- Identify areas for topping placement
- Create deeper dimples for olive oil reservoirs
- Balance dimple depth with the risk of dough tearing
By mastering the dimpling technique, bakers can significantly improve the texture, flavor, and appearance of their focaccia, making it a more authentic and enjoyable product.
Hack #5: Create Custom Infused Oils for Signature Flavors
Transform your baking with infused oils, a simple yet powerful technique for adding depth to your focaccia. Infused oils can elevate your bread from good to memorable by introducing complex flavors that complement various ingredients. The key to successful infused oils lies in understanding how to combine quality olive oil with herbs, garlic, and other aromatics effectively.

Herb and Garlic Infusion Methods
Creating infused oils involves selecting the right ingredients and using the appropriate methods to extract their flavors. For herb infusions, choose fresh, fragrant herbs like basil, rosemary, or thyme. For garlic infusions, use high-quality garlic cloves. There are two primary methods for infusion: quick and slow.
The quick infusion method involves heating the oil gently with the herbs or garlic for about 30 minutes. This method is ideal for when you need infused oil quickly. To do this, combine olive oil with your chosen herbs or garlic in a saucepan over low heat. Monitor the temperature to prevent it from exceeding 150°F (65°C), as high heat can damage the oil.
The slow infusion method, on the other hand, allows for a more complex flavor development over several days. This method involves combining olive oil with herbs or garlic in a clean glass jar and storing it in a cool, dark place. The slow infusion process can take anywhere from a few days to a week, allowing the flavors to meld together beautifully.
Strategic Oil Application Timing
The timing of when you apply infused oil to your focaccia dough can significantly impact the final flavor and texture. There are three strategic times to apply infused oil: before proofing, before dimpling, and after baking.
Applying infused oil before proofing helps to enhance the dough’s flavor from within. A light brushing of infused oil on the dough’s surface before it proofs can also help create a more complex crust flavor.
Before dimpling, a gentle brushing of infused oil on the dough ensures that the dimples retain their flavor. This step is crucial for maintaining the integrity of the infused oil’s flavor profile.
After baking, brushing the focaccia with infused oil adds a final layer of flavor and gives the bread a glossy finish. This step is particularly effective for showcasing the infused oil’s aroma and flavor.
Complementary Flavor Combinations for Every Season
Different seasons offer various fresh ingredients that can be used to create unique infused oil flavor combinations. For spring, consider a lemon-thyme infusion, which pairs beautifully with fresh asparagus or spring vegetables. In summer, a basil-garlic infused oil complements the warm weather’s fresh tomatoes and herbs.
For fall, a rosemary-sage infused oil is perfect for accompanying hearty stews and roasted vegetables. In winter, a chili-orange infused oil adds a spicy kick to your focaccia, pairing well with soups and stews.
By experimenting with different herb and garlic combinations and adjusting your infusion methods according to the season, you can create a variety of signature focaccia flavors that will keep your baking fresh and exciting throughout the year.
Hack #6: Implement Steam Baking for Professional-Quality Crust
For those seeking to replicate the crusty texture of artisan focaccia at home, mastering steam baking is essential. Steam baking is a technique that professional bakers use to achieve that perfect crust. It involves creating a steamy environment in the oven during the initial baking phase, which significantly impacts the final texture and appearance of the focaccia.
The Role of Steam in Crust Development
Steam plays a crucial role in developing the crust of focaccia bread. When steam is present in the oven, it keeps the surface of the dough moist and flexible, allowing for maximum expansion during the initial rise. This results in a crust that is crispy on the outside and tender on the inside, a hallmark of well-made focaccia. Moreover, steam helps create the characteristic sheen on artisan breads, making them visually appealing.
The science behind steam’s effect on bread crust is fascinating. As the dough bakes, the steam condenses on its surface, delaying the formation of a dry crust. This delay allows the dough to expand fully, creating a more open crumb structure. Once the crust begins to dry, it sets into the characteristic crispy texture that bakers strive for.
Home Oven Steam Methods That Actually Work
While professional bakeries have the advantage of steam-injected ovens, home bakers can achieve similar results using a few simple techniques. Two effective methods for creating steam in a home oven are the water pan method and the ice cube technique.
The Water Pan Method
The water pan method involves placing a pan of water on the bottom rack of your oven as it preheats. As the oven heats up, the water evaporates, creating steam. To implement this method effectively, use a metal pan, as it heats up faster than ceramic or glass. Place the pan on the bottom rack to maximize steam circulation around your focaccia. For best results, preheat your oven to its highest temperature setting with the pan inside. Once your focaccia is placed in the oven, quickly pour hot water into the preheated pan to generate instant steam.
The Ice Cube Technique
Another simple method is the ice cube technique, where ice cubes are placed in a preheated pan or directly on the oven floor. As the ice melts, it turns into steam, creating the desired steamy environment. For this method, use 2-3 ice cubes for a standard-sized oven. Place them in a hot pan or on the oven floor just before baking your focaccia. This technique provides a burst of steam at the beginning of the baking process, which is crucial for crust development.
Both methods require some practice to perfect, but they can significantly improve the quality of your focaccia crust. Remember to always handle hot pans and steam with care to avoid burns.
Hack #7: Create Focaccia Garden Art for Stunning Presentation
Elevate your focaccia game by transforming it into a stunning edible canvas with the art of focaccia garden art. This creative technique not only makes your bread visually appealing but also enhances the overall baking experience.
Artistic Topping Arrangements for Instagram-Worthy Bread
Creating artistic topping arrangements is an art that combines composition, color theory, and creativity. To start, choose a theme or design for your focaccia garden art. This could be anything from a simple herb pattern to a complex botanical design.
- Select toppings that are not only flavorful but also visually appealing.
- Consider the color palette and how different ingredients will look after baking.
- Use a variety of textures to add depth to your design.
For a realistic botanical design, consider using vegetables like cherry tomatoes, bell peppers, and olives to create the desired patterns. Quick-blanching vegetables before placing them on the dough can help preserve their color during baking.
Seasonal Ingredient Combinations
Using seasonal ingredients not only ensures freshness but also allows you to create designs that are relevant to the current season. Here are some combinations to try:
- Spring: Asparagus, cherry tomatoes, and fresh herbs like basil or rosemary.
- Summer: Bell peppers, zucchini, and sun-dried tomatoes for a vibrant look.
- Autumn: Roasted butternut squash, sage, and caramelized onions.
- Winter: Brussels sprouts, cranberries, and rosemary for a festive touch.
Complement your seasonal ingredients with appropriate herbs and spices to enhance the flavor profile of your focaccia.
Techniques for Securing Toppings During the Baking Process
One of the challenges of creating focaccia garden art is keeping the toppings in place during baking. Here are some techniques to secure your toppings:
- Pressing Technique: Gently press vegetables into the dough to secure them.
- Strategic Placement: Place toppings in areas where they are less likely to shift during baking.
- Partial Embedding: Partially embed toppings into the dough for a more secure hold.
- Protective Oil Application: Brush toppings with a protective layer of oil to prevent burning.
By combining these techniques with creative topping arrangements and seasonal ingredients, you can create stunning focaccia garden art that is both delicious and visually appealing.
Troubleshooting Common Focaccia Problems
From dense loaves to uneven baking, common focaccia issues can be resolved with the right techniques and a bit of practice. Mastering the art of troubleshooting is crucial for achieving perfect focaccia every time.
Dense or Flat Focaccia Fixes
A dense or flat focaccia can be disappointing, but there are several potential causes and solutions. Common issues include inadequate proofing time, improper dough handling, and temperature fluctuations. To address these, bakers can adjust their proofing times, handle the dough more gently, and ensure consistent temperatures during fermentation.
| Cause | Symptoms | Solution |
|---|---|---|
| Insufficient Proofing | Dense, flat bread | Increase proofing time |
| Overworking Dough | Tough, dense crumb | Minimize dough handling |
| Temperature Issues | Poor rise, uneven texture | Maintain consistent temperature |
Resolving Uneven Baking Issues
Uneven baking can result from several factors, including hotspots in the oven, inadequate preheating, and improper pan selection. To achieve more even baking, bakers can use a preheated baking stone or steel, rotate their focaccia during baking, and ensure their oven is accurately preheated.
Salvaging Under or Over-Proofed Dough
Under or over-proofed dough can significantly impact the final quality of the focaccia. For under-proofed dough, bakers can extend the proofing time or gently reshape the dough to allow for more even fermentation. For over-proofed dough, carefully degassing and reshaping can help salvage the batch.
By understanding and addressing these common issues, bakers can significantly improve their focaccia baking results, turning potential failures into successful loaves.
Conclusion: Your Journey to Focaccia Mastery
Mastering focaccia baking is a journey that combines art and science. By implementing the seven hacks outlined, you’ve gained the skills to create exceptional homemade Italian bread. Proper hydration provides the foundation, while autolyse develops structure and cold fermentation builds complex flavors. Dimpling creates the signature texture, infused oils add personality, steam baking perfects the crust, and artistic toppings elevate presentation.
These focaccia techniques collectively transform your baking outcomes. Start by mastering one hack at a time, then combine approaches to achieve professional-level results. As you continue to refine your artisan bread skills, experiment with variations like whole grain additions or alternative flours to develop your unique style.
The journey to focaccia baking mastery is both a culinary skill development and a mindfulness practice. With these techniques, you’re equipped to create stunning homemade Italian bread that showcases your creativity. Continue to hone your craft, share your creations, and enjoy the process of mastering this classic bread.


