6 Easy Ways to Make Restaurant-Style Garlic Bread at Home
Garlic bread, a staple in many restaurants, can be just as easily made at home with a few simple techniques and ingredients. The aroma of freshly baked bread infused with garlic and herbs is irresistible, making it a favorite among diners. With the right guidance, anyone can create restaurant-quality garlic bread in their own kitchen.
This Website contains affiliate links. That means I may earn a small commission if you purchase through my links, at no extra cost to you.
By mastering various cooking techniques and using the right ingredients, home cooks can achieve that perfect combination of a crispy exterior and a soft, flavorful interior. This guide will walk you through six professional methods to elevate your homemade garlic bread to the next level.
Key Takeaways
- Learn how to select the right ingredients for homemade garlic bread.
- Master various cooking techniques to achieve a crispy exterior and soft interior.
- Discover the secrets to making restaurant-quality garlic bread at home.
- Explore different methods to elevate your garlic bread recipe.
- Understand the importance of ingredient quality in garlic bread making.
The Magic of Restaurant-Style Garlic Bread
The allure of restaurant-style garlic bread lies in its perfect balance of flavors and textures. Restaurant garlic bread has become a staple in many cuisines, and its popularity can be attributed to the harmonious blend of garlic intensity, buttery richness, and textural contrast.
What Makes Restaurant Garlic Bread So Special
Several factors contribute to the distinctive quality of restaurant garlic bread. First, the type of bread used is crucial. Restaurants often opt for high-quality bread that can hold its texture when baked again. The garlic butter spread is another critical element, typically made with a mix of softened butter, minced garlic, and sometimes herbs. The way this spread is applied and the bread is baked to achieve a crispy exterior and a soft interior is a key technique.
- High-quality bread selection
- Perfect garlic butter spread
- Precise baking techniques
Benefits of Making Garlic Bread at Home
Making garlic bread at home offers several advantages. One of the primary benefits is cost savings; buying ingredients in bulk and making bread from scratch can be more economical than purchasing pre-made garlic bread. Additionally, homemade garlic bread allows for customization to suit personal tastes, whether that’s adjusting the amount of garlic or adding different herbs.
- Cost-effective
- Customizable to personal taste
- Freshness guaranteed
By making garlic bread at home, individuals can experiment with various ingredients and techniques to create a product that rivals, or even surpasses, restaurant quality.
Essential Ingredients for Perfect Garlic Bread
Elevating garlic bread from good to great begins with understanding its fundamental ingredients. The quality and type of ingredients used can significantly impact the final product, making it a culinary delight or a disappointing experience.
Choosing the Right Bread
The foundation of great garlic bread is, of course, the bread itself. Different types of bread can dramatically alter the flavor and texture of garlic bread. Popular options include French baguettes, Italian loaves, ciabatta, and sourdough. Each of these bread types has its unique characteristics that can enhance or detract from the garlic bread experience.
| Bread Type | Crust Characteristics | Crumb Texture | Flavor Profile |
|---|---|---|---|
| French Baguette | Crisp, golden crust | Soft, airy crumb | Mild, slightly sweet |
| Italian Loaf | Thick, crunchy crust | Dense, chewy crumb | More pronounced yeast flavor |
| Ciabatta | Light, airy crust | Soft, with large holes | Slightly wheaty, rustic |
| Sourdough | Thick, tangy crust | Dense, chewy crumb | Tangy, sour flavor |
When selecting bread, consider the crust’s crunchiness and the crumb’s texture. A good garlic bread should have a balance between a crispy exterior and a soft interior. Bakery-fresh bread typically produces superior results due to its freshness and texture.
Garlic Selection and Preparation
Garlic is the star of garlic bread, and its preparation can make or break the dish. Fresh garlic cloves are preferred for their vibrant flavor, but pre-minced garlic can be a convenient alternative. The method of garlic preparation, whether roasted or raw, also affects the flavor profile.
“The way you mince garlic can significantly impact its flavor. Proper mincing techniques can release the maximum flavor without bitterness.”
For those who prefer a milder garlic flavor, roasting garlic before mincing can add a depth of flavor. Garlic powder is another option, though it’s generally used to supplement fresh garlic rather than replace it entirely.
Butter, Oils, and Herbs
The final key components are the butter, oils, and herbs that complement the garlic and bread. High-quality butter, such as European-style with higher fat content, can enrich the flavor. Olive oil adds a richness and helps in achieving a crispy crust. Herbs like parsley, oregano, basil, and thyme can enhance the classic garlic bread profile.
- European-style butter for richness
- Olive oil for added depth
- Fresh herbs for aromatic flavor
For variations, cheese can be added to create a cheesy garlic bread. The choice of ingredients and their preparation can elevate garlic bread to a new level, making it a perfect accompaniment to various meals.
Tools and Equipment You’ll Need
Having the right kitchen tools is crucial for creating delicious garlic bread at home. The quality of your garlic bread can be significantly influenced by the tools you use, from preparation to baking.
Basic Kitchen Essentials
To start making garlic bread, you’ll need some basic kitchen essentials. A sharp bread knife is necessary for cleanly slicing the bread, which is crucial for even butter distribution and texture. Mixing bowls are required for preparing the compound butter or garlic spread. Measuring spoons ensure that you add the precise amount of seasonings, which is vital for achieving the right flavor.
For baking, you’ll need baking sheets and parchment paper to prevent the bread from sticking and to make cleanup easier. Aluminum foil can be used for wrapping garlic bread during baking or for grilling, helping to retain moisture and heat.
Optional Specialized Equipment
While basic kitchen essentials can get you started, there are several optional specialized tools that can elevate your garlic bread-making process. A garlic press is highly recommended for efficiently mincing garlic cloves, saving time and effort. A microplane can be used to create a fine garlic paste, enhancing the flavor distribution.
A pastry brush is useful for applying butter or garlic spread evenly onto the bread. For those who make large batches or complex garlic bread recipes, a food processor can be invaluable for mixing compound butters or garlic spreads. Additionally, a specialized bread slicer can help achieve consistent slices, which is particularly useful for commercial or large-scale garlic bread production.
6 Easy Ways to Make Restaurant-Style Garlic Bread at Home
Whether you’re short on time or looking to experiment, our six garlic bread methods cater to different needs and preferences. Making restaurant-style garlic bread at home is now more accessible than ever, thanks to these versatile cooking techniques.
Overview of Different Methods
The world of garlic bread is rich with options, offering a range of textures and flavors to suit any occasion. Let’s explore the six distinct methods: oven-baked, stovetop, grilled, air fryer, stuffed, and make-ahead freezer garlic bread. Each technique has its unique advantages and signature characteristics.
The oven-baked method is a classic approach, producing a crispy crust and a soft interior. It’s a favorite among many restaurants for its reliability and scalability. The stovetop technique offers a quick alternative, ideal for those short on time, while still delivering a satisfying crunch. For outdoor gatherings, grilled garlic bread adds a smoky flavor that’s hard to replicate indoors.

The air fryer method has gained popularity for its ability to produce crispy garlic bread with minimal oil. For those looking to elevate their garlic bread game, the stuffed garlic bread option allows for creative fillings and added flavor. Lastly, the make-ahead freezer method is perfect for busy households, enabling you to prepare garlic bread in advance and bake it when needed.
Choosing the Right Method for Your Needs
With so many options available, selecting the right garlic bread method depends on several factors. Consider your available time: the stovetop and air fryer methods are quick, taking around 10-15 minutes, while the oven-baked and make-ahead freezer methods require more preparation time.
Think about your equipment: if you have an air fryer or grill, use it to achieve unique textures. For a soft and chewy texture, the oven-baked or stuffed methods might be preferable. If you’re serving a large group, consider the scalability of your chosen method.
For a casual weeknight dinner, a simple stovetop or air fryer garlic bread might be perfect. For special occasions, you might opt for the more elaborate stuffed garlic bread or grilled option. If you need to prepare in advance, the make-ahead freezer method is an excellent choice.
By considering these factors and understanding the strengths of each method, you can choose the perfect garlic bread technique to suit your needs and impress your family and friends.
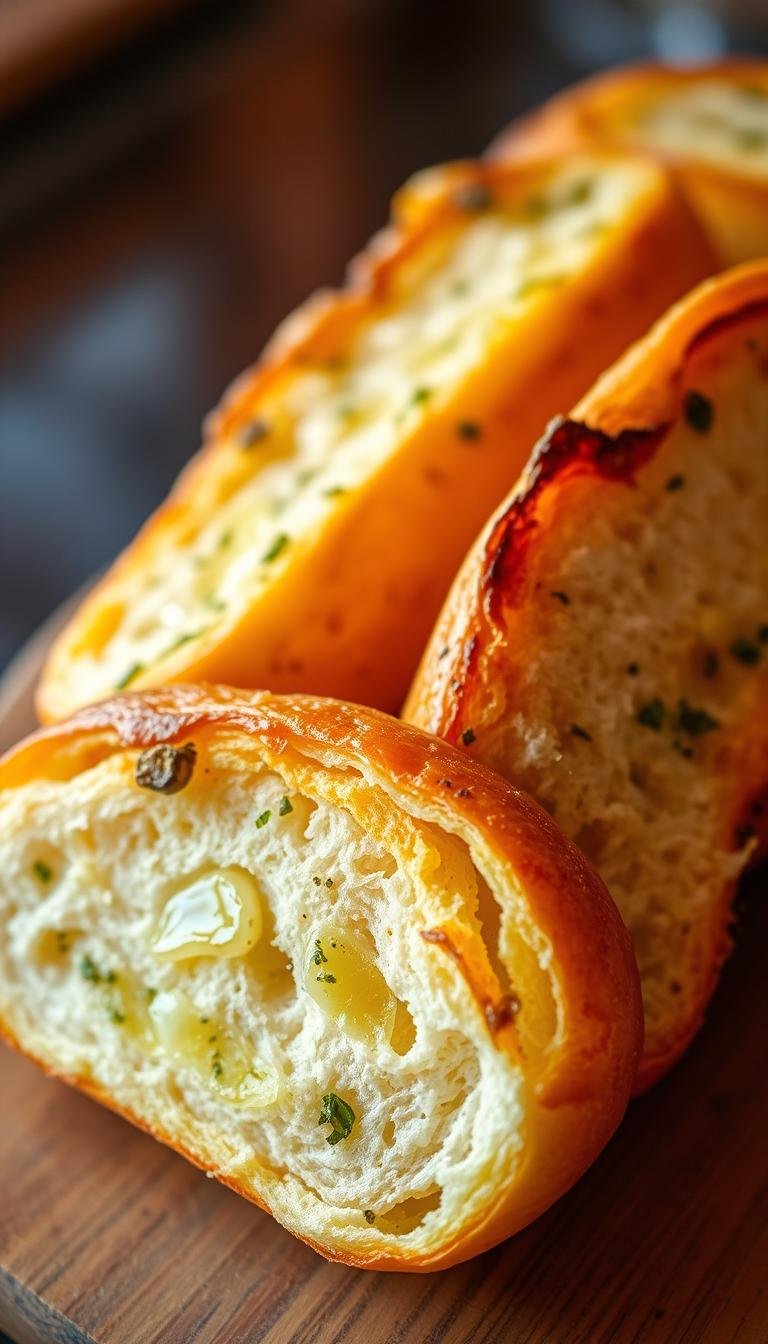
Method 1: Classic Oven-Baked Garlic Bread
There’s something special about the aroma of garlic bread fresh from the oven. This classic method remains a staple for garlic bread enthusiasts worldwide, offering a deliciously straightforward way to achieve that perfect blend of crispy crust and soft interior.
Ingredients and Preparation
To make a classic oven-baked garlic bread, you’ll need a few simple ingredients. Start with a 1-pound loaf of French bread, preferably day-old bread for better texture. For the garlic butter, mix 1/2 cup (1 stick) of softened unsalted butter with 3 cloves of minced garlic. Add 1 teaspoon of dried parsley and a pinch of salt to enhance the flavor. If you prefer a cheesy garlic bread, sprinkle 1/2 cup of grated Parmesan cheese on top.
Preparation involves softening the butter to the right consistency – not too hard, not too melted. Mince the garlic efficiently by using a press or microplane grater. Combine the softened butter, minced garlic, parsley, and salt in a bowl, mixing until you achieve a smooth compound butter.
Step-by-Step Baking Process
Preheat your oven to 375°F (190°C), positioning the rack in the middle for even heating. Slice the French bread loaf lengthwise, being careful not to cut all the way through. Spread the garlic butter mixture evenly on the cut sides of the bread, making sure to reach the edges.
Wrap the loaf in aluminum foil and bake for 10-12 minutes. Remove the foil and continue baking for an additional 2-5 minutes, or until the bread is golden brown and crispy. Keep an eye on the bread during this final stage to prevent over-browning.
Variations and Flavor Enhancements
To add a twist to your classic oven-baked garlic bread, consider these variations:
- Cheese-Crusted Garlic Bread: Sprinkle mozzarella or cheddar cheese on top before the final baking stage for an extra-crispy, cheesy crust.
- Extra-Crispy Garlic Bread: Bake the bread for a few minutes longer, watching closely to avoid burning.
- Softer Pull-Apart Garlic Bread: Slice the bread into individual portions before baking, making it easier to pull apart.
- Herb-Forward Garlic Bread: Increase the amount of parsley or add other herbs like thyme or rosemary to the garlic butter.
- Spicy Garlic Bread: Add a pinch of red pepper flakes to the garlic butter for a spicy kick.
These variations allow you to customize your garlic bread to suit any occasion or taste preference, making the classic oven-baked method a versatile foundation for numerous delicious adaptations.
Method 2: Stovetop Garlic Bread in Minutes
Stovetop garlic bread is an ideal option for a rapid, mouth-watering treat. This method is perfect for those who need a quick garlic bread fix without compromising on flavor or quality. It’s a versatile technique that can be adapted to various types of bread and garlic preparations.
Ingredients and Preparation
To make stovetop garlic bread, you’ll need a few simple ingredients: bread, garlic, butter, and salt. It’s essential to have room-temperature butter for easier spreading. You can either mix minced garlic with softened butter or use garlic-infused oil for a quicker flavor penetration. Slice the bread into appropriate thickness for stovetop cooking, typically around 1/2 inch thick.
Pre-mixing garlic with butter or using garlic-infused oil not only speeds up the preparation but also ensures an even distribution of flavor. This step is crucial for achieving that perfect balance of garlic and butter in every bite.
Quick Stovetop Technique
Heat a heavy skillet or griddle pan over medium-low heat. Place the bread slices in the pan and cook for approximately 2-3 minutes per side, or until they achieve a golden-brown color. Apply gentle pressure or weight on top of the bread to ensure even toasting and crispiness.
The key to this technique is patience and monitoring the heat to prevent burning. Test for doneness by checking the color and crispiness of the bread. Adjust the cooking time as needed based on your stovetop’s heat and the bread’s thickness.

Tips for Perfect Crispiness
Achieving the perfect crispiness on stovetop garlic bread involves managing the heat and the garlic to prevent burning. Keep an eye on the garlic butter or garlic-infused oil to ensure it doesn’t scorch. Using a thermometer can help maintain the ideal temperature.
To avoid uneven browning, make sure the bread slices are of uniform thickness. Also, be mindful of the butter or oil used, as excessive amounts can lead to a greasy texture instead of crispiness. Experiment with different types of bread and garlic preparations to find your perfect combination.
Method 3: Grilled Garlic Bread for Outdoor Dining
Elevate your outdoor dining experience with the smoky flavor of grilled garlic bread. This method brings a new dimension to traditional garlic bread, perfect for barbecues and outdoor gatherings.
Ingredients and Preparation
To make exceptional grilled garlic bread, you’ll need to select the right ingredients and prepare them appropriately. Choose a firmer bread variety that can withstand the grill grates, such as a rustic Italian or French bread. The butter mixture should have a slightly higher fat content to prevent sticking. Consider pre-roasting garlic to prevent burning and to bring out its natural sweetness.
- Firmer bread varieties (e.g., rustic Italian or French bread)
- Garlic, pre-roasted for enhanced flavor
- Butter with higher fat content
- Optional: herbs like rosemary or thyme for added flavor
Grilling Techniques and Timing
Achieving perfectly grilled garlic bread requires attention to grilling techniques and timing. For both gas and charcoal grills, preheat to medium-high heat. Prepare the grill by brushing the grates with oil to prevent sticking. Place the garlic bread on the grill using a direct cooking method for 1-2 minutes per side, or until you achieve the desired grill marks and crispiness.
Key grilling tips:
- Preheat the grill to medium-high heat.
- Brush grill grates with oil to prevent sticking.
- Cook for 1-2 minutes per side, monitoring closely.
Smoky Flavor Enhancements
The unique smoky flavor of grilled garlic bread can be further enhanced with a few simple techniques. Consider adding wood chips to your grill for an extra smoky flavor. Brushing the bread with flavored oils during grilling can also add depth. Using grilled garlic in the butter mixture can intensify the garlic flavor, while incorporating herbs like rosemary can complement the smokiness.
- Add wood chips to the grill for enhanced smokiness.
- Brush with flavored oils during grilling.
- Use grilled garlic in the butter mixture.
- Incorporate complementary herbs like rosemary.
Method 4: Air Fryer Garlic Bread
Using an air fryer is a game-changer for making garlic bread, offering a quick and easy way to achieve crispy results. This modern cooking method allows for a delicious garlic bread experience with minimal effort.
Ingredients and Preparation
To make air fryer garlic bread, you’ll need a few simple ingredients. The type of bread is crucial; pre-sliced bread works particularly well in air fryers. For the garlic butter, use a mixture of softened butter, minced garlic, and a pinch of salt. The butter should be slightly firmer than for other methods to prevent it from becoming too runny during cooking.
Key Ingredients:
- Pre-sliced bread (such as Italian or French bread)
- Softened butter
- Minced garlic
- Salt
- Optional: herbs like parsley or thyme
Air Fryer Settings and Process
Preheating your air fryer is essential for achieving the perfect garlic bread. Set the temperature to between 350-370°F, depending on your air fryer model. Cooking time typically ranges from 3 to 5 minutes, depending on the bread’s thickness and your desired level of crispiness.
Air Fryer Settings Guide:
| Air Fryer Brand | Temperature (°F) | Cooking Time (minutes) |
|---|---|---|
| Phillips | 360 | 3-4 |
| Cosori | 370 | 3-5 |
| GoWISE USA | 350 | 4-5 |
To ensure even cooking, arrange the bread slices in a single layer, leaving some space between them for air circulation.
Achieving the Perfect Texture
One of the air fryer’s advantages is its ability to produce a crispy exterior while maintaining a soft interior. For an extra-crunchy result, cook the garlic bread for an additional minute. For a softer center, reduce the cooking time slightly.

To prevent common issues like excessive drying or uneven cooking, monitor the garlic bread during the cooking process. For reheating leftover garlic bread, the air fryer can restore its freshness; simply cook at a lower temperature (around 320°F) for a shorter duration (1-2 minutes).
Method 5: Stuffed Garlic Bread
Elevate your garlic bread game with the rich, cheesy goodness of stuffed garlic bread. This advanced technique creates an impressive, shareable dish perfect for gatherings and special occasions.
Ingredients and Preparation
To make stuffed garlic bread, you’ll need a few specialized ingredients. Start with a high-quality bread loaf, such as Italian or French boule, which provides a sturdy base for filling. The garlic butter mixture remains a crucial component, but you’ll also need a blend of cheeses and other fillings to create that restaurant-quality flavor.
Prepare your garlic butter by mixing softened butter with minced garlic, parsley, and a pinch of salt. For the filling, choose a combination of cheeses like mozzarella, provolone, and parmesan, which melt well and offer a rich flavor profile.
Cheese and Filling Options
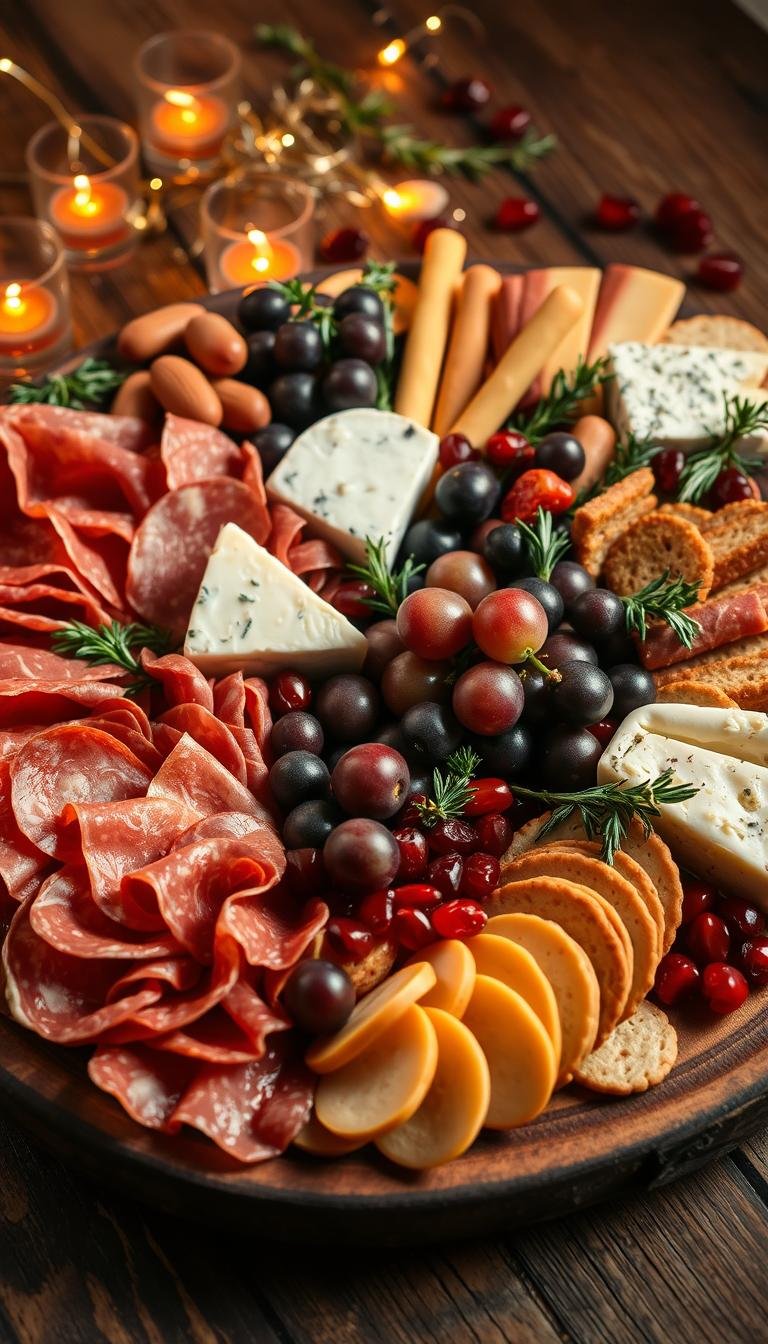
The cheese selection is critical for achieving that perfect, gooey stuffed garlic bread. Consider combining mozzarella for its melting properties, provolone for a smooth texture, and parmesan or asiago for added depth. You can also incorporate other ingredients to enhance the flavor, such as caramelized onions, sun-dried tomatoes, or chopped herbs.
For a more decadent version, add some cured meats like prosciutto or salami to the filling. The key is to balance the flavors so that the garlic bread remains the star, while the filling adds an exciting twist.
Assembly and Baking Techniques
To assemble the stuffed garlic bread, start by slicing the bread loaf in a crosshatch or accordion pattern, being careful not to cut all the way through. Then, generously spread the garlic butter mixture between the slices, followed by your chosen filling.
Wrap the bread in foil and bake at 375°F for 15-20 minutes. Remove the foil and continue baking for an additional 5-10 minutes, or until the top is golden brown and the cheese is melted and bubbly.
Serving Suggestions
Serve your stuffed garlic bread hot, straight from the oven, to maximize the melted cheese effect. Consider presenting it on a wooden board or a rustic serving platter to add to the ambiance. You can also offer a side of marinara sauce or a green salad to complement the dish.
For an extra touch, garnish with fresh herbs or a sprinkle of parmesan cheese. This will not only add to the visual appeal but also enhance the flavors, making your stuffed garlic bread a true showstopper.
Method 6: Make-Ahead Freezer Garlic Bread
For those who want to enjoy restaurant-style garlic bread at home without the hassle, Method 6: Make-Ahead Freezer Garlic Bread is a game-changer. This approach allows you to prepare delicious garlic bread in advance, storing it in the freezer until you’re ready to bake. It’s perfect for busy households or for those who like to meal prep.

Ingredients and Preparation
When preparing garlic bread for freezing, it’s essential to consider the ingredients and their performance in frozen conditions. Using a slightly higher fat content in the butter mixture can improve the bread’s texture after freezing and baking. Choose ingredients that freeze well, such as high-quality butter and robust herbs. Avoid ingredients that may not freeze well, like fresh tomatoes or high-water content vegetables.
Selecting the right bread is also crucial. Denser bread varieties tend to perform better when frozen and baked. Consider using a crusty Italian or French bread for the best results.
Proper Freezing Techniques
To freeze garlic bread effectively, follow these steps:
- Prepare the garlic bread as you normally would, up to the point of baking.
- Wrap the bread tightly, first with plastic wrap and then with aluminum foil to prevent freezer burn.
- Consider portioning the bread into individual servings before freezing for added convenience.
- Label the wrapped bread with the date and contents.
- Store the bread in the freezer, ideally at 0°F (-18°C) or below.
When stored properly, frozen garlic bread can last for 2-3 months. The quality may decrease slightly over time, so it’s best consumed within the first month for optimal flavor and texture.
| Storage Duration | Quality Expectation |
|---|---|
| 1 month | Optimal flavor and texture |
| 2 months | Very good quality, slight decrease in texture |
| 3 months | Good quality, noticeable decrease in texture and flavor |
Baking from Frozen
Baking garlic bread from frozen requires some adjustments to the cooking process. Preheat your oven to a temperature about 25°F lower than you would use for fresh garlic bread. Extend the baking time by 5-10 minutes, or until the bread is golden brown and crispy.
To achieve the perfect crispiness, remove the foil for the last few minutes of baking. Keep an eye on the bread to prevent over-browning.
“The key to great freezer garlic bread is in the details of preparation and baking. By following these steps, you can enjoy delicious, restaurant-quality garlic bread at home, even on the busiest days.”
Batch Preparation Tips
Preparing garlic bread in batches can be an efficient way to stock your freezer. Here are some tips:
- Prepare multiple loaves at once, varying the flavors to keep things interesting.
- Use a consistent wrapping and labeling process to keep track of different flavors and dates.
- Store the loaves in a way that maximizes freezer space, such as standing them upright or using freezer bags.
- Consider preparing a “garlic bread bar” with different toppings or fillings to mix things up.
By following these guidelines, you can enjoy the convenience of make-ahead freezer garlic bread without sacrificing quality or flavor.
Troubleshooting Common Garlic Bread Problems
Despite its simplicity, garlic bread can be tricky to get right. Common issues can arise from both ingredient choices and cooking techniques.
Ingredient Issues
One of the most common problems is bitter garlic flavor, often resulting from overcooking or using old garlic. To avoid this, use fresh garlic and monitor cooking time closely. Another issue is butter separation, which can occur if the butter is not softened enough or if it’s mixed with other ingredients too early. Ensuring that butter is at room temperature before mixing can help prevent this.
Using bread that’s too dry or too fresh can also lead to suboptimal results. Dry bread may become too crispy or burnt, while fresh bread might not have enough structure. Opting for bread a day or two old can provide a better texture.
| Issue | Solution |
|---|---|
| Bitter garlic flavor | Use fresh garlic and monitor cooking time |
| Butter separation | Soften butter to room temperature before mixing |
| Dry or too fresh bread | Use bread that’s a day or two old |
Cooking Errors and Solutions
Cooking errors, such as incorrect oven temperature or timing, can lead to issues like burnt exteriors with raw centers or dried-out bread. Ensuring the oven is at the correct temperature and using a thermometer can help. Timing mistakes can be mitigated by checking the bread frequently towards the end of the recommended baking time.
For methods like grilling or using an air fryer, specific issues such as flare-ups or overcrowding can occur. Being mindful of these potential pitfalls and adjusting cooking techniques accordingly can lead to better results.
Restaurant Secrets for Elevated Garlic Bread
To create truly exceptional garlic bread, home cooks can benefit from insider knowledge from professional kitchens. Restaurants often employ specific techniques that elevate their garlic bread from good to outstanding, and these can be replicated at home with a bit of know-how.
Professional Techniques You Can Use at Home
Professional chefs use several techniques to make their garlic bread stand out. One method is double-buttering, where butter is applied at different stages of preparation to create a richer flavor. Another technique is temperature cycling, starting with a high temperature to get a crispy crust, then reducing it to finish cooking the bread through. Specialized cutting techniques can also enhance butter absorption, making the garlic bread more flavorful. Additionally, many restaurants use a “rest period” before serving, allowing the flavors to meld together.
Special Ingredients and Finishing Touches
Besides techniques, certain ingredients and finishing touches can make a significant difference. Compound butters, aged to perfection, add depth to the garlic bread. Using clarified butter or roasted garlic oil can infuse a more complex flavor profile. Specialty salts for finishing add a burst of flavor, while unexpected ingredients like a touch of honey or aged balsamic can create a unique taste experience. Professional garnishing and presentation techniques, such as a sprinkle of parsley or a drizzle of olive oil, can also elevate the visual appeal of the garlic bread.
Pairing Your Homemade Garlic Bread
Now that you’ve mastered making restaurant-style garlic bread at home, it’s time to explore the perfect pairings to elevate your dining experience. Garlic bread is a versatile side dish that can complement a wide range of meals, from comforting pasta dishes to fresh salads and hearty main courses.
Classic Pairings
Some of the most beloved pairings for garlic bread are classics for a reason. Pasta dishes, particularly those featuring light, oily sauces like spaghetti aglio e olio or carbonara, are elevated by the rich flavor of garlic bread. It’s also a perfect match for tomato-based soups and minestrone, as the bread’s texture provides a satisfying contrast to the smooth soup.
| Dish | Why it pairs well with garlic bread |
|---|---|
| Spaghetti Aglio e Olio | The garlic bread complements the spicy and savory flavors of the pasta. |
| Tomato Soup | The bread’s texture and flavor enhance the soup’s simplicity. |
| Grilled Chicken | Garlic bread adds a comforting element to the meal. |
Creative Serving Ideas
Beyond traditional pairings, garlic bread can be used in creative ways to enhance your meals. Use it as a base for garlic bread appetizers by topping it with diced tomatoes, basil, and mozzarella cheese. You can also create garlic bread “boats” by hollowing out the bread and filling it with dips or soups.
For brunch, consider using garlic bread as a crust for elevated sandwiches or turning it into garlic bread croutons for salads. The key is to experiment and find your favorite combinations.
Conclusion
Mastering the art of garlic bread can elevate any meal, and with the techniques outlined, you can achieve restaurant-quality bread in the comfort of your own kitchen. The six methods covered offer flexibility, whether you’re looking for a quick stovetop solution or the satisfaction of a perfectly baked loaf.
By making garlic bread at home, you enjoy several homemade garlic bread benefits, including superior freshness, cost savings, and the ability to customize flavors to your liking. Experimenting with different garlic bread techniques allows you to find the perfect method for your needs, equipment, and time constraints.
As you begin your garlic bread-making journey, don’t be discouraged if the first attempts aren’t perfect. The troubleshooting tips provided will help you overcome common issues, and with practice, you’ll consistently produce high-quality results. Achieving restaurant-quality bread at home is within reach, and the satisfaction of serving delicious homemade garlic bread to family and guests is sure to impress.
Now it’s your turn to get creative and discover your personal perfect garlic bread. Try different methods and variations to find your favorite, and don’t be afraid to experiment and develop your own signature version that friends and family will request by name.