5 Warm Dip Recipes That Steal the Show
Imagine a gathering where everyone loves a crowd-pleasing dip at the center. Party dips are now key for any fun event.
This Website contains affiliate links. That means I may earn a small commission if you purchase through my links, at no extra cost to you.
Warm dips are especially loved for their comfort. They’re cheesy and just right when they’re warm. They’re perfect for any party, big or small.
This article will show you five amazing warm dip recipes. They’ll make your next party unforgettable.
Key Takeaways
- Discover the secret to making irresistible warm dips
- Learn how to elevate your next party with crowd-pleasing dips
- Explore five unique warm dip recipes perfect for any occasion
- Get tips on how to make your gatherings unforgettable
- Find out how to impress your guests with minimal effort
The Appeal of Warm Dips for Entertaining
Warm dips are more than a snack. They’re an experience that brings flavor, comfort, and people together. They create a special atmosphere that everyone loves.
Why Warm Dips Are Crowd Pleasers
Warm dips attract people with their amazing smell. This smell is very tempting. It makes everyone want to gather around.
They also make us feel cozy. Warm dips are perfect for cozy nights and family gatherings. They’re great for any party, big or small.
Key benefits of warm dips include:
- Communal dining experience
- Versatility for various occasions
- Comforting and inviting
Essential Equipment for Perfect Results
Choosing the right equipment is key for warm dips. The right baking dish matters a lot. Ceramic and cast iron dishes keep the heat in well.
| Equipment | Purpose | Benefits |
|---|---|---|
| Ceramic Baking Dishes | Even heating | Prevents hotspots, ensures consistent warmth |
| Slow Cookers | Keeping dips warm | Maintains temperature, convenient for serving |
| Warming Trays | Serving | Keeps dips warm for extended periods, visually appealing |
Good equipment makes serving warm dips easy. It makes hosting fun and stress-free.
5 Warm Dip Recipes That Steal the Show
Warm dips are more than tasty. They’re showstoppers. Here are five recipes that will wow your guests.
What Makes These Recipes Special
Each dip is unique. The Classic Spinach and Artichoke Dip is creamy and delicious. It’s a favorite for many.
The Smoky Bacon and Caramelized Onion Dip has a deep flavor. It’s great for BBQ fans. The Spicy Buffalo Chicken Dip adds heat with buffalo sauce and chicken.
The Cheesy Crab and Jalapeño Dip is perfect for seafood lovers. It’s full of crab and a bit spicy. The Loaded Baked Potato Dip tastes like a loaded potato in dip form. It’s comforting and indulgent.
“The key to a great dip is in the balance of flavors and textures. You want something that’s both creamy and chunky, with a flavor that’s both familiar and exciting.”
These dips are delicious and versatile. They’re great for any occasion. You can adjust them for different times of the year.

Ingredients and Equipment Overview
Let’s look at what you’ll need. These dips use cheeses, herbs, proteins, and spices. Using high-quality ingredients makes a big difference.
You’ll need a bowl, baking dish, and a stove or oven. Some dips might need a slow cooker or food processor. Knowing what you need helps with cooking.
Good ingredients and the right tools make great dips. These recipes are easy to follow. They’re perfect for any cook, from beginners to pros.
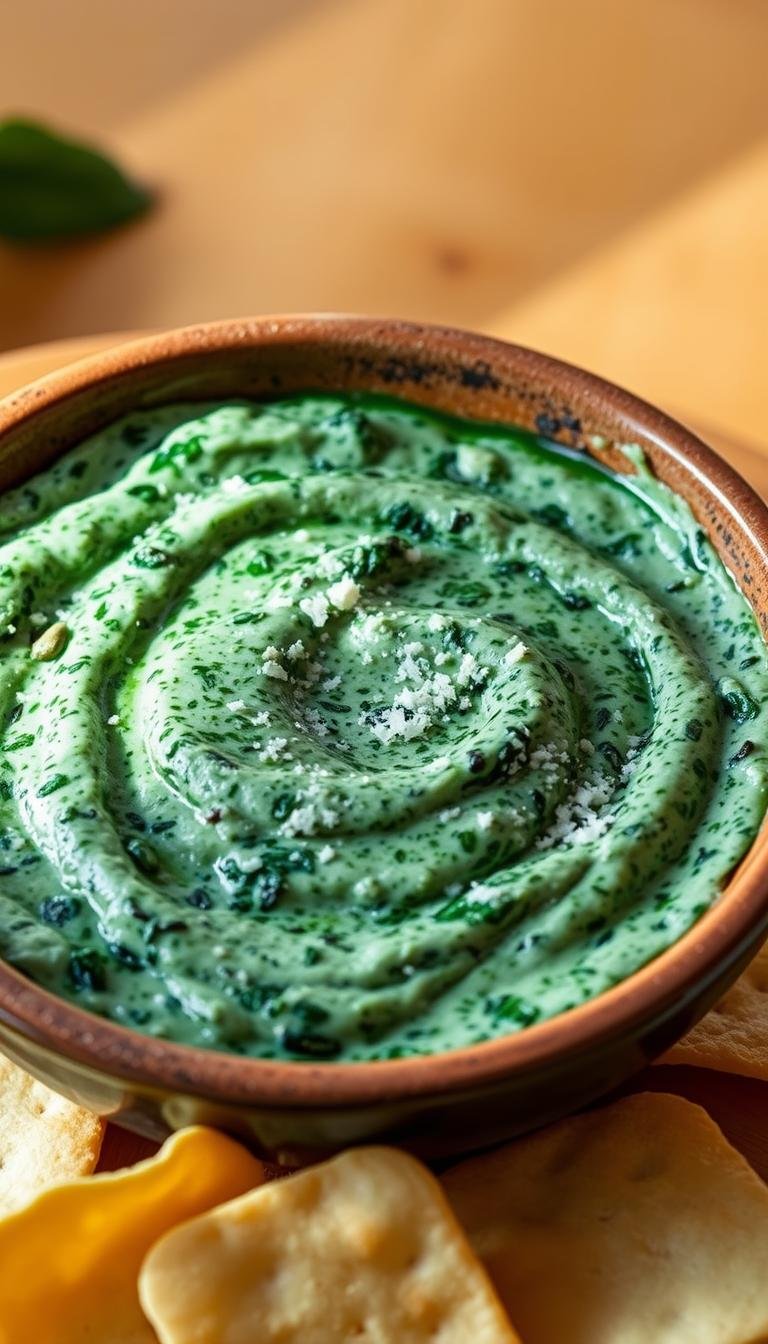
Classic Spinach and Artichoke Dip
The Classic Spinach and Artichoke Dip is loved at parties. It mixes cheese with spinach and artichoke hearts. This makes a tasty snack for any event.

Ingredients List
To make this dip, you need:
- 1 (14 oz) can artichoke hearts, drained and chopped
- 1 package frozen chopped spinach, thawed and drained
- 1 cup mayonnaise
- 1 cup sour cream
- 1/2 cup grated Parmesan cheese
- 1/2 cup shredded mozzarella cheese
- 1 clove garlic, minced
- 1/2 teaspoon lemon juice
- Salt and pepper to taste
Choose the best ingredients for great taste. Fresh Parmesan and mozzarella cheese are better than pre-shredded.
Preparation Method
Preheat your oven to 350°F (175°C). Mix chopped artichoke hearts, spinach, mayonnaise, sour cream, Parmesan, mozzarella, garlic, and lemon juice in a bowl. Mix well.
Put the mix in a baking dish. Bake for 20-25 minutes. It should be warm, bubbly, and golden brown on top.
Tips for Achieving the Perfect Texture: Make sure the spinach is dry to avoid a wet dip. For creamier dip, add more sour cream or mayonnaise.
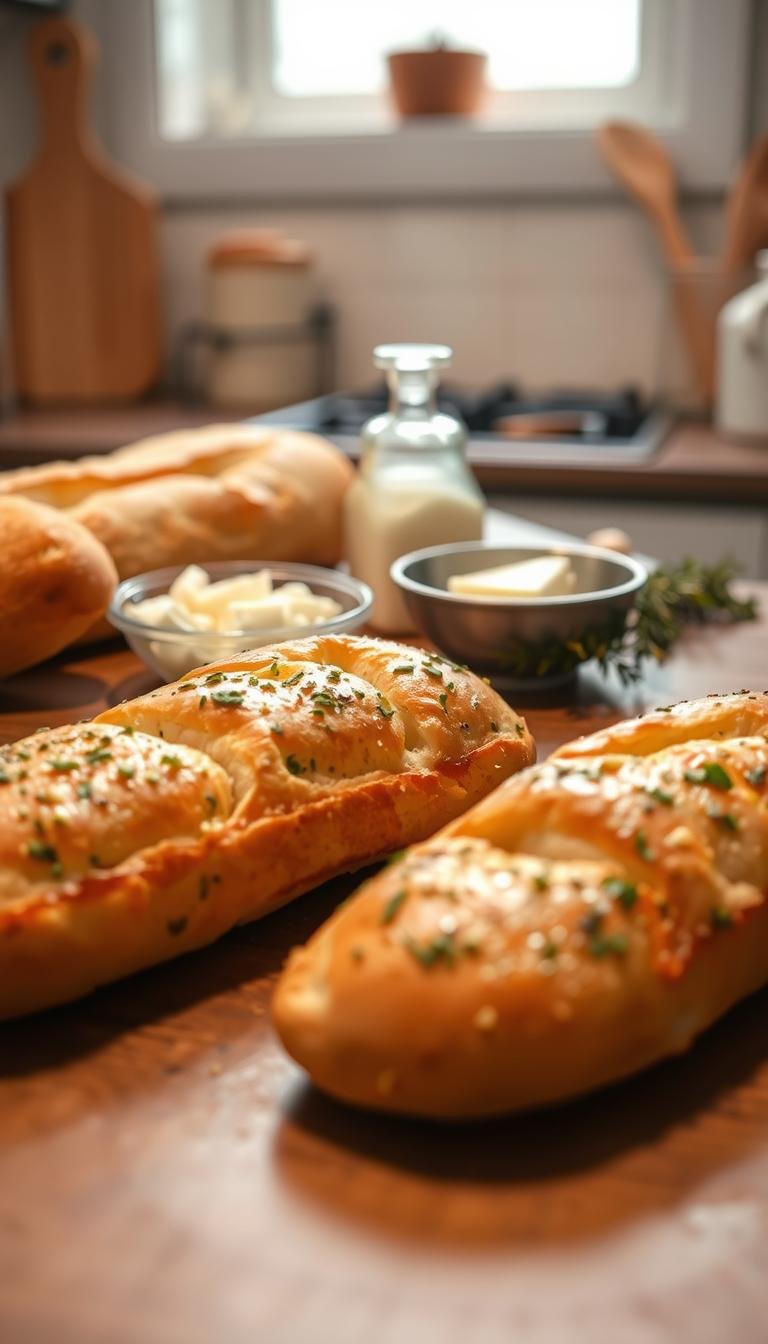
Serving Suggestions
This dip goes well with many dippers. Try these options:
- Pita chips or crackers for a crunchy snack
- Fresh vegetable sticks (carrots, cucumbers, bell peppers) for a healthier option
- Sliced baguette or crusty bread for a rustic feel
- Crackers or flatbread topped with cheese or herbs for extra flavor
Make-Ahead and Storage Tips
This dip is great for parties because you can make it ahead. Assemble it up to a day before. Then, bake it until warm and bubbly.
Store leftovers in an airtight container in the fridge. To reheat, cover with foil and warm at 325°F (165°C) until hot.
Smoky Bacon and Caramelized Onion Dip
Make your appetizers better with this Smoky Bacon and Caramelized Onion Dip. It’s a mix of sweet onions and crispy bacon. It’s a hit at any party, with its rich and interesting taste.

Ingredients List
Here’s what you need for this tasty dip:
- 6 slices of thick-cut, applewood-smoked bacon
- 1 large onion, preferably a sweet variety like Vidalia
- 1 cup of sour cream
- 1/2 cup of mayonnaise
- 1/2 cup of shredded cheddar cheese
- 1/4 cup of chopped fresh chives
- 1 tablespoon of Dijon mustard
- Salt and pepper to taste
Choose the best ingredients for the best taste. Applewood-smoked bacon adds a fruity and smoky flavor.
Preparation Method
Cooking the onions and bacon right is key.
- Cook the bacon in a skillet until crispy. Then, set it aside on a paper towel.
- Cook the onions in the same skillet until they’re golden brown. This takes about 30 minutes.
- Put the onions and bacon in a bowl with sour cream, mayonnaise, cheese, chives, and mustard. Mix well.
- Add salt and pepper to taste.
For more flavor, add smoked paprika or fresh herbs on top before serving.
Serving Suggestions
This dip goes well with strong dippers. Try it with:
- Hearty bread like baguette slices or rustic crackers
- Sturdy vegetable sticks like carrot or celery
- Grilled chicken strips or toasted prosciutto
This dip is great for any event, from casual to formal.
Make-Ahead and Storage Tips
Make it ahead of time for better flavors. Store it in an airtight container in the fridge for up to 24 hours.
Reheat it gently over low heat, stirring often. If it’s too thick, add a bit of sour cream or mayonnaise.
Spicy Buffalo Chicken Dip
This dip is a hit at parties. It’s creamy and spicy, like buffalo wings. It’s great for game days or any fun event.

Ingredients
To make this dip, you need the right stuff. Use rotisserie chicken for flavor. Hot sauce, like Frank’s RedHot, gives it that buffalo taste.
For cheese, mix cream cheese, cheddar, and blue cheese. This makes it creamy and tangy.
- 1 cup cooked chicken (rotisserie, poached, or canned)
- 1/2 cup Frank’s RedHot or similar buffalo-style hot sauce
- 1 (8 ounce) package cream cheese, softened
- 1 cup shredded cheddar cheese
- 1/4 cup crumbled blue cheese
- 1/4 cup ranch or blue cheese dressing
- Optional: chopped green onions, diced celery, or crumbled bacon for garnish
Preparation Method
To make the dip, start by heating your oven to 350°F (175°C). Mix softened cream cheese and hot sauce until smooth. Add cheddar and blue cheese, then chicken.
Put it in a baking dish and bake for 20-25 minutes. It should bubble and get a bit golden.
Tips for the Perfect Dip:
- Make sure the cream cheese is soft to avoid lumps.
- Change the hot sauce amount to your taste.
- Broil for 2-3 minutes for a crispy top.
Serving Suggestions
This dip goes well with many things. Try it with celery and carrot sticks for a classic touch. Or, use pretzel rolls, wonton chips, or as a potato topping.
- Celery and carrot sticks for a classic combo.
- Pretzel rolls or crusty bread for crunch.
- Wonton chips or crackers for a light choice.
Make-Ahead and Storage Tips
You can make this dip ahead of time. Mix everything but bake later. Cover and refrigerate for up to 24 hours.
Reheat as directed, maybe longer if it’s cold. Leftovers last 3 days in the fridge. Reheat in the oven or microwave.
Follow these tips for a delicious dip. It’s spicy, creamy, and savory. Your guests will love it.
Cheesy Crab and Jalapeño Dip
Make your appetizers special with our Cheesy Crab and Jalapeño Dip. It’s a mix of crab, spicy jalapeños, and melted cheese. It’s great for parties or when you want to wow your guests.
Ingredients List
Here’s what you need for this tasty dip:
- 1 (8 ounce) container of cream cheese, softened
- 1/2 cup of mayonnaise
- 1 cup of shredded cheddar cheese
- 1/2 cup of grated Parmesan cheese
- 1 tablespoon of freshly squeezed lemon juice
- 1 teaspoon of Worcestershire sauce
- 1/2 teaspoon of Old Bay seasoning
- 1/4 teaspoon of cayenne pepper
- 1/2 cup of jalapeños, diced
- 1 cup of lump crab meat
- Salt and pepper to taste
Choose from lump, claw, or imitation crab. Use fresh or canned jalapeños, depending on how spicy you like it.
| Ingredient | Quantity | Notes |
|---|---|---|
| Cream Cheese | 8 oz | Softened |
| Mayonnaise | 1/2 cup | |
| Cheddar Cheese | 1 cup | Shredded |
| Jalapeños | 1/2 cup | Diced |
| Crab Meat | 1 cup | Lump, claw, or imitation |
Preparation Method
To make the dip, follow these steps:
- Preheat your oven to 350°F (175°C).
- In a large bowl, mix softened cream cheese and mayonnaise until smooth.
- Add cheddar cheese, Parmesan cheese, lemon juice, Worcestershire sauce, Old Bay seasoning, and cayenne pepper. Mix well.
- Fold in diced jalapeños and crab meat gently. Be careful not to break the crab.
- Put the mix in a baking dish and bake for 20-25 minutes. The cheese should melt and bubble.
- Let it cool a bit before serving.
Serving Suggestions
Enjoy your dip with these dippers:
- Endive leaves
- Water crackers
- Crostini
- Seafood-friendly vegetable sticks (like carrot or cucumber)
For a nice look, add more diced jalapeños, chopped herbs, or paprika on top.
Make-Ahead and Storage Tips
Make this dip ahead and chill it for up to 24 hours. Cover it well in the fridge until baking time. When reheating, cover with foil to avoid over-browning. You can freeze it for 2 months; thaw it in the fridge before baking.
Loaded Baked Potato Dip
Loaded Baked Potato Dip is a shareable treat. It has the taste of a baked potato, with cheese, bacon, and sour cream. It’s perfect for parties.
Ingredients
You need a few things for this dip. Use Russet or Idaho potatoes for their fluffy inside. Mix cheddar and Monterey Jack cheese for flavor.
Thick-cut bacon adds a smoky taste. Sour cream makes it creamy. You can add chives or jalapeños for extra flavor.
- 2-3 large potatoes
- 1 cup shredded cheddar cheese
- 1/2 cup shredded Monterey Jack cheese
- 6 slices of bacon, cooked and crumbled
- 1 cup sour cream
- Optional: chives, jalapeños
Preparation Method
First, bake the potatoes until soft. Then, scoop out the inside and mix with other ingredients. Don’t overmix to avoid a gluey dip.
Mix the cheese, bacon, and sour cream gently. Put it in a dish and top with more cheese and bacon. Bake until it’s hot and bubbly.
Adding roasted garlic or jalapeños can make it taste better. Make sure all ingredients are spread out evenly.
Serving Suggestions
There are many ways to enjoy this dip. Try it with potato chips, pretzel rods, or pumpernickel bread. For a lighter option, use carrot sticks or cucumber slices.
Top it with bacon bits, chives, or sour cream. It makes the dip feel like a loaded baked potato.
Make-Ahead and Storage Tips
To keep the dip right, make the potato mix ahead. But add cheese and bacon just before baking. This keeps it creamy.
If it gets too thick, add a bit of sour cream or milk. Before serving, add fresh toppings like chives or bacon. It brings back the flavors.
Tips for Dip Success
Serving warm dips can be tricky. But with the right tips, you can make it a hit. Whether at a potluck or a party, focus on how you prepare and present your dip.
Transporting Warm Dips
Keeping dips warm while moving them is key. Use insulated containers or thermoses to keep them warm. Wrap them in towels or use a thermal bag to keep the heat in.
Place the container in a bigger box or bag for safety. A slow cooker with a locking lid is great for transport. It keeps the dip warm and is easy to carry. When you get there, heat it up if needed and serve right away.
Reheating Methods
Reheating dips needs care to avoid burning or uneven heat. The oven is good for this; use a low heat (around 350°F) and stir often until it’s warm.
The microwave is fast but watch it closely. Heat in short bursts (30 seconds to 1 minute), stirring each time, until it’s hot. A slow cooker is best for keeping dips warm for a long time. Just put the dip in the slow cooker and set it to “warm” or “low”.
Troubleshooting Common Issues
Issues with warm dips include separation, being too thick or thin, and uneven heat. To fix a separated dip, stir vigorously or add a bit more of the main ingredient.
If a dip is too thick, add a little liquid (like milk or broth) to thin it out. For a too-thin dip, simmer it to reduce the liquid or add more thickening ingredients.
Customizing for Dietary Needs
You can make warm dip recipes fit different diets without losing flavor. Whether it’s for dairy-free, gluten-free, or vegetarian and vegan guests, simple changes can be made. This way, everyone can enjoy the tasty warm dips.
Dairy-Free Alternatives
For dairy-free dips, swap cream cheese with vegan or cashew-based cream cheese. Brands like Tofutti and Kite Hill have great options. Make sure the dairy-free cheese melts well to keep the dip creamy.
- Use vegan sour cream or Greek yogurt alternatives.
- Choose dairy-free shredded cheese or nutritional yeast for a cheesy flavor.
Gluten-Free Options
To make gluten-free dips, watch out for hidden gluten in some ingredients. Always check the labels of what you buy. For dippers, offer gluten-free crackers or veggies like carrots and cucumbers.
- Replace traditional crackers with gluten-free alternatives.
- Be cautious with seasoning mixes that may contain gluten.
Vegetarian and Vegan Adaptations
For vegetarian and vegan dips, replace animal products. Use plant-based bacon alternatives or skip the bacon. For vegan dips, swap cheese with vegan cheese or nutritional yeast.
- Use vegan Worcestershire sauce or omit it.
- Opt for plant-based meat substitutes in recipes that call for meat.
Conclusion
Learning to make warm dips makes parties easier and more fun. The five recipes in this article are perfect for any party. They can be changed to fit any event or taste.
These warm dip recipes are great for any party. They impress guests without much work. Sharing appetizers helps everyone talk and connect, making parties better.
Try new things with these recipes. Add your favorite touches. Pair them with other foods for a great spread. With these tips, you’ll be a pro at hosting parties.