5 Air Fryer Garlic Bread Recipes You Can Make in Minutes
Imagine being able to satisfy your garlic bread cravings in just a few minutes without heating up your entire kitchen. With an air fryer, you can achieve that perfectly toasted, garlicky goodness in no time.
This Website contains affiliate links. That means I may earn a small commission if you purchase through my links, at no extra cost to you.
The convenience of using an air fryer for making garlic bread is a game-changer for busy home cooks. Not only does it save time, but it also produces consistently delicious results.
From classic buttery garlic bread to gluten-free options, there’s a recipe to suit every taste and dietary preference. Whether you’re looking for a quick snack or a side dish to complement your weeknight dinner, these quick garlic bread recipes are sure to become a staple in your kitchen.
Key Takeaways
- Quick and easy garlic bread recipes using an air fryer
- Variety of options to suit different tastes and dietary needs
- Perfect for busy home cooks looking for convenient meal solutions
- Consistently delicious results with minimal effort
- Homemade garlic bread that’s ready in just a few minutes
Why Air Fryer Garlic Bread Is a Game-Changer
The air fryer has revolutionized the way we make garlic bread, offering a quicker and healthier alternative to traditional methods. This kitchen appliance has become a staple for many home cooks, and for good reason. By utilizing rapid air circulation technology, the air fryer achieves a perfectly cooked garlic bread with a crispy exterior and a soft interior, often surpassing the results of conventional oven baking.
Benefits of Using an Air Fryer for Garlic Bread
One of the primary air fryer benefits is the significant reduction in cooking time. Typically, garlic bread can be ready in just 3-5 minutes, compared to the 10-15 minutes required when using a conventional oven. This time-saving cooking method is not only convenient but also energy-efficient, as the air fryer doesn’t require preheating. Moreover, the air fryer’s ability to circulate hot air around the bread ensures a consistently crispy garlic bread that’s hard to achieve with traditional baking methods.
Another advantage of using an air fryer for garlic bread is the reduced oil usage. Unlike deep-frying, which requires a substantial amount of oil, the air fryer achieves excellent results with minimal to no oil. This healthier cooking method doesn’t compromise on taste or texture, making it an attractive option for those looking to reduce their oil consumption.
“The air fryer is a game-changer for garlic bread lovers. It’s quick, easy, and produces a consistently delicious result.”
| Benefits | Air Fryer | Conventional Oven |
|---|---|---|
| Cooking Time | 3-5 minutes | 10-15 minutes |
| Energy Efficiency | High | Medium |
| Oil Usage | Minimal | Varies |
Essential Ingredients and Tools
To make delicious garlic bread using an air fryer, you’ll need a few essential ingredients and air fryer tools. The basic ingredients include various types of bread, butter, fresh garlic, and herbs. It’s crucial to select high-quality ingredients to achieve the best flavor. For bread, options like baguette, ciabatta, or Italian bread work well, as they have the right texture for air frying.
In terms of tools, a silicone brush is handy for applying butter evenly, while parchment paper liners can make cleanup easier. Tongs are also useful for safely handling the hot bread. Additionally, having a garlic press or microplane grater can help in preparing the garlic for the recipe.
- Silicone brush for butter application
- Parchment paper liners for easy cleanup
- Tongs for safe handling
- Garlic press or microplane grater for garlic preparation
By combining the right ingredients with the appropriate tools and the air fryer’s capabilities, you can create garlic bread that’s not only delicious but also visually appealing. Experimenting with different types of bread and ingredients can help you find your perfect garlic bread recipe.
5 Air Fryer Garlic Bread Recipes You Can Make in Minutes
Discover the ultimate collection of air fryer garlic bread recipes that can be prepared in just a few minutes. These recipes are designed to simplify your cooking process without compromising on flavor or quality. Whether you’re looking for a quick snack or a delicious side dish, these air fryer garlic bread recipes are sure to impress.

What Makes These Recipes Special
Each of the five recipes presented here has its own unique twist, making them stand out from traditional garlic bread. From the perfect butter-to-garlic ratio in the classic version to the innovative stuffed rolls and specialized gluten-free adaptation, there’s something for everyone. These recipes have been carefully tested and refined specifically for air fryer cooking to ensure optimal results every time.
The diversity in these recipes allows you to experiment with different flavors and textures, keeping your meals interesting and exciting. Whether you’re a fan of classic flavors or enjoy trying new combinations, these recipes cater to all tastes.
Basic Preparation Tips for All Recipes
To achieve the best results with your air fryer garlic bread, there are some basic preparation tips to keep in mind. First, it’s crucial to slice the bread evenly, with a recommended thickness of about half an inch. This ensures that the bread cooks uniformly and achieves the perfect crispiness.
Another important tip is to use the right butter temperature for spreading. Softened butter mixes better with garlic and spreads more evenly on the bread, enhancing the overall flavor. Additionally, mincing garlic properly is essential for the best flavor distribution. Using a press or microplane can help achieve a fine mince.
Finally, arranging the bread in a single layer in the air fryer basket is vital for even cooking. This allows the hot air to circulate around each piece of bread, cooking it consistently and preventing undercooked or overcooked areas.
Time-Saving Techniques
One of the biggest advantages of these air fryer garlic bread recipes is their quick preparation time. To save even more time, consider preparing garlic butter in bulk and freezing it in portions. This way, you can simply thaw and use it whenever you need it.
Another time-saving tip is to use pre-minced garlic when you’re in a hurry. While freshly minced garlic is ideal, pre-minced garlic is a convenient alternative that still delivers great flavor. Additionally, when entertaining, prep multiple batches efficiently by slicing several loaves at once and storing them in the refrigerator until you’re ready to cook.
A simple time-management guide can help you prepare these recipes in under 10 minutes from start to finish. By following these tips, you can enjoy delicious air fryer garlic bread without spending too much time in the kitchen.
Recipe 1: Classic Buttery Air Fryer Garlic Bread
For a mouth-watering side dish, try our classic buttery air fryer garlic bread recipe that’s ready in minutes. This recipe brings together the simplicity of garlic bread with the convenience of an air fryer, resulting in a deliciously crispy and buttery treat.
Ingredients List
To make this classic buttery air fryer garlic bread, you’ll need the following ingredients:
- 1 loaf of French or Italian bread (about 1 pound)
- 4-6 tablespoons of unsalted butter, softened
- 4-6 cloves of fresh garlic, minced (depending on size and preference)
- 1 tablespoon of chopped fresh parsley or oregano (optional)
- Salt to taste
| Ingredient | Quantity | Notes |
|---|---|---|
| Bread | 1 loaf (1 pound) | French or Italian bread |
| Unsalted Butter | 4-6 tablespoons | Softened |
| Fresh Garlic | 4-6 cloves | Minced |
The choice of bread is crucial; a crusty loaf like French or Italian bread works best. The unsalted butter should be softened to mix well with garlic. Fresh garlic cloves are minced to release their full flavor. Optional parsley or oregano adds a fresh twist, while salt enhances the overall taste.
Step-by-Step Instructions
Follow these steps to make your classic buttery air fryer garlic bread:
- Preheat your air fryer to 350°F (175°C).
- Mix the softened butter, minced garlic, and a pinch of salt in a bowl until well combined.
- Slice the bread into 1-inch thick slices, without cutting all the way through the loaf.
- Spread the garlic butter mixture evenly between the slices, making sure to get both sides of each slice.
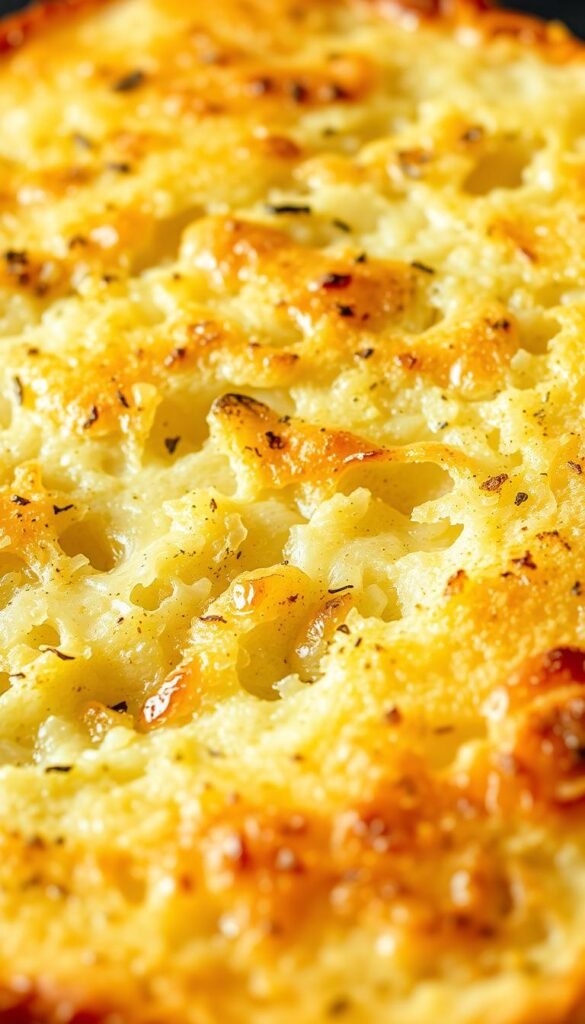
- Place the loaf in the air fryer basket, and cook for 3-4 minutes or until the bread is toasted to your liking.
- Check for doneness by looking for a golden-brown crust and crispy edges.
Tips for Perfect Results
To achieve the perfect classic buttery air fryer garlic bread, keep the following tips in mind:
- Monitor the bread closely during cooking to avoid burning.
- Adjust the cooking time based on your air fryer model and the bread’s thickness.
- For an extra crispy crust, cook for an additional 30 seconds to 1 minute.
Serving Suggestions
This classic buttery air fryer garlic bread is versatile and can be served with a variety of dishes. Try pairing it with:
- Pasta dishes like spaghetti or lasagna
- Soups such as tomato soup or creamy broths
- Salads for a crunchy contrast
For a special presentation, slice the bread into individual servings and garnish with fresh herbs.
Recipe 2: Cheesy Air Fryer Garlic Bread
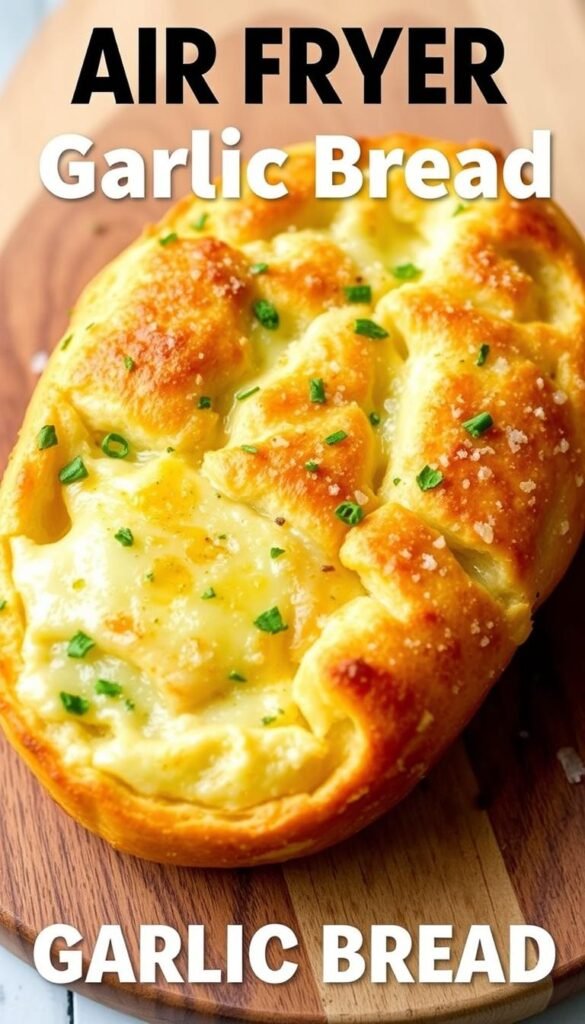
Elevate your garlic bread game with the rich, melty goodness of cheesy air fryer garlic bread. This variation is perfect for those who love a blend of flavors and textures in their garlic bread. The air fryer not only crisps the bread to perfection but also melts the cheese to a gooey, stretchy delight.
Ingredients You’ll Need
To make cheesy air fryer garlic bread, you’ll need a few key ingredients. Start with a crusty bread, preferably a baguette or Italian bread, sliced into thick pieces. For the garlic butter, mix softened butter with minced garlic, a pinch of salt, and a sprinkle of parsley. The cheese blend is crucial; a mix of mozzarella for its melting properties and parmesan for its sharp flavor works best. You’ll need about 1/2 cup of mozzarella and 1/4 cup of parmesan per 4 slices of bread.
Key Ingredients:
- Crusty bread (baguette or Italian bread)
- Softened butter
- Minced garlic
- Mozzarella cheese
- Parmesan cheese
- Parsley
- Salt
Preparation and Cooking Process
Begin by preparing the garlic butter by mixing the softened butter with minced garlic, salt, and parsley. Spread this mixture evenly onto each slice of bread. Preheat your air fryer to 320°F (160°C). Place the bread slices in the air fryer basket, leaving some space between them for even cooking. Cook for 4-5 minutes or until the bread is crispy and golden. Then, sprinkle the mozzarella and parmesan cheese on top of the bread and return it to the air fryer for an additional 1-2 minutes, or until the cheese is melted and bubbly.
Cheese Variations to Try
While mozzarella and parmesan make a great combination, you can experiment with other cheeses for different flavors. Cheddar adds a sharpness, while fontina provides a creamy texture. For a spicy kick, consider adding some pepper jack. If you’re looking for dairy-free alternatives, there are several vegan cheese options available that melt well.
Pairing Recommendations
Cheesy air fryer garlic bread is versatile and can be paired with a variety of dishes. It complements tomato-based pasta dishes nicely, adding a satisfying crunch. It also pairs well with chili or soups, serving as a comforting side. For a lighter meal, consider serving it alongside a fresh salad for a delightful contrast in textures.
Recipe 3: Herb and Butter Air Fryer Garlic Bread
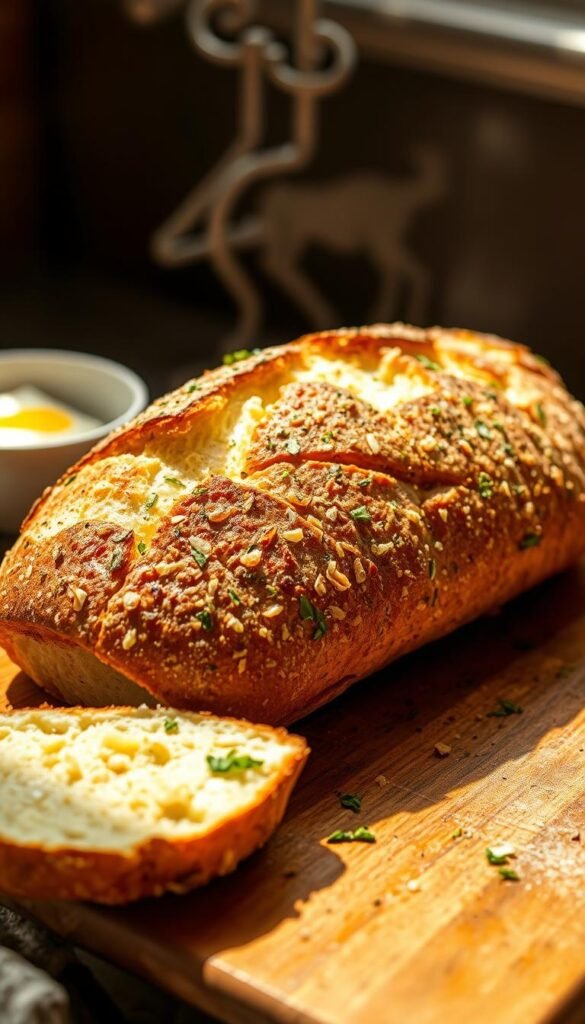
Elevate your garlic bread game with the aromatic flavors of fresh herbs and rich butter, perfectly cooked in an air fryer. This recipe combines the simplicity of garlic bread with the sophistication of fresh herbs, creating a deliciously complex flavor profile that’s sure to impress.
Fresh Herbs and Butter Blend
The key to this recipe lies in the selection and preparation of fresh herbs. Popular herbs for this dish include parsley, basil, chives, thyme, and rosemary. Each herb brings its unique flavor profile: parsley adds freshness, basil contributes a slightly sweet and spicy flavor, chives provide a mild onion taste, thyme offers earthiness, and rosemary gives a piney aroma.
To prepare the herbs, start by cleaning them under cold water, then gently pat them dry with a paper towel. It’s essential to remove excess moisture to ensure the herbs mix well with the butter. The optimal herb-to-butter ratio varies, but a good starting point is to use about 2 tablespoons of finely chopped fresh herbs per 1/2 cup of softened butter.
Making Your Herb Butter
Creating compound butter is a straightforward process that involves softening the butter and mixing it with your chosen herbs. To soften butter, leave it at room temperature for about 30 minutes or microwave it for a few seconds until it’s spreadable but not melted.
Once your butter is ready, mix in the chopped herbs until they’re evenly distributed. You can also add a pinch of salt and a squeeze of lemon juice to enhance the flavors. This herb butter can be made ahead and stored in the refrigerator for up to a week or frozen for longer storage.
Air Fryer Cooking Method
Cooking the herb and butter garlic bread in an air fryer is quick and easy. Preheat your air fryer to 340°F. Spread the herb butter evenly onto your garlic bread, ensuring that the herbs are distributed across the surface.
Place the bread in the air fryer basket, leaving some space between slices if cooking multiple pieces. Cook for 3-4 minutes or until the bread is toasted to your liking and the butter is melted. Keep an eye on the bread to prevent the herbs from burning.
Herb Combinations to Experiment With
One of the joys of this recipe is experimenting with different herb combinations. For an Italian-inspired flavor, mix basil, oregano, and thyme. For a French twist, try tarragon, chervil, and parsley. A Mediterranean blend could include rosemary, thyme, and oregano.
Feel free to get creative with your herb choices and adjust the proportions to suit your taste. The versatility of this recipe means you can enjoy a new flavor every time you make it.
Recipe 4: Stuffed Air Fryer Garlic Bread Rolls
Elevate your snack game with our Stuffed Air Fryer Garlic Bread Rolls recipe, a perfect blend of cheese, herbs, and garlic. This innovative twist on traditional garlic bread transforms a simple side dish into a satisfying main course or impressive appetizer.
Ingredients for Stuffed Rolls
To make these delectable stuffed garlic bread rolls, you’ll need the following ingredients:
- 1 package of pizza dough or crescent roll dough (homemade or store-bought)
- 1/2 cup of shredded mozzarella cheese
- 1/4 cup of grated Parmesan cheese
- 2 cloves of garlic, minced
- 1 tablespoon of chopped fresh parsley
- 1/4 teaspoon of salt
- 1/4 teaspoon of black pepper
- 1/4 cup of butter, melted
- Optional fillings: pepperoni, spinach, artichoke hearts
You can customize the filling to your liking, making it a versatile recipe for various tastes.
Preparing the Filling
The filling is the heart of these stuffed garlic bread rolls. For a basic cheese filling, mix together the mozzarella and Parmesan cheese. You can then add minced garlic, chopped parsley, salt, and pepper to taste. For variations, consider adding pepperoni for a spicy kick, spinach for a nutritious boost, or artichoke hearts for a unique flavor.
Tips for the perfect filling: Ensure the cheese is well combined with other ingredients, and avoid overfilling to prevent leakage during cooking.
Rolling and Air Frying Instructions
To assemble the rolls, roll out the dough to about 1/4 inch thickness. Cut into squares, approximately 3 inches on each side. Place a tablespoon of your chosen filling in the center of each square. Fold the dough over the filling, forming a triangle or square shape, and press the edges to seal. Brush the tops with melted butter and sprinkle with garlic.
Preheat your air fryer to 330°F. Arrange the rolls in a single layer, leaving space between each roll for even cooking. Cook for 6-8 minutes or until golden brown. Troubleshooting tip: If rolls leak during cooking, ensure the edges are sealed properly, and consider cooking at a slightly lower temperature.
Dipping Sauce Ideas
Enhance your stuffed garlic bread rolls with a variety of dipping sauces. Consider:
- Marinara sauce for a classic Italian taste
- Garlic aioli for an extra garlicky kick
- Herb-infused olive oil for a lighter, herby flavor
These dipping sauces not only complement the flavors of the rolls but also add an extra layer of enjoyment to your snack or meal.
Recipe 5: Gluten-Free Air Fryer Garlic Bread
Discover how to make mouth-watering gluten-free garlic bread using your air fryer. This recipe is perfect for those who have been missing out on garlic bread due to dietary restrictions. With the right gluten-free bread and a few simple adjustments, you can enjoy this delicious treat without compromising your dietary needs.
Best Gluten-Free Bread Options
When it comes to making gluten-free garlic bread, the type of bread you choose is crucial. Look for gluten-free bread that has a denser texture and is less crumbly. Some brands that work well include Udi’s and Caterpillar Foods. These breads hold up well to the air frying process and yield a crispy crust.
It’s also important to consider the ingredients in your gluten-free bread. Some may contain additives that affect the texture or flavor. Always check the ingredient list to ensure it meets your dietary requirements.
Adapting the Recipe for Dietary Needs
One of the benefits of this recipe is its adaptability to various dietary needs. For a dairy-free version, use a vegan butter substitute like Earth Balance. If you’re following a low-FODMAP diet, consider using garlic-infused oil instead of minced garlic to reduce the FODMAP content.
For those who are vegan, ensure that your gluten-free bread is free from animal products. Some brands offer vegan-friendly options. Also, be mindful of the cheese if you’re making a cheesy garlic bread; opt for a vegan cheese alternative.
Step-by-Step Cooking Instructions
Cooking gluten-free garlic bread in the air fryer requires some adjustments to temperature and cooking time. Preheat your air fryer to 330°F. Slice your gluten-free bread into appropriate thickness and spread garlic butter on each slice.
Cook for about 4-6 minutes or until the bread is golden brown and crispy. Keep an eye on it, as gluten-free bread can burn more easily than regular bread.
- Place the bread slices in a single layer in the air fryer basket.
- Cook in batches if necessary to avoid overcrowding.
- Shake the basket halfway through cooking for even browning.
Storage and Reheating Tips
To keep your gluten-free garlic bread fresh, store it in an airtight container once cooled. To reheat, place the bread back in the air fryer at 300°F for 2-3 minutes, or until crispy. Avoid microwaving as it can make the bread soggy.
For longer storage, consider freezing the bread after it has cooled. Wrap it tightly in plastic wrap or aluminum foil and freeze. To reheat, thaw at room temperature and then reheat in the air fryer.
Troubleshooting Your Air Fryer Garlic Bread
The key to delicious air fryer garlic bread lies in avoiding common mistakes and adjusting your technique. Making garlic bread in an air fryer can be a straightforward process, but like any cooking method, it requires some finesse and understanding of your equipment.
Common Mistakes to Avoid
Several common mistakes can lead to subpar air fryer garlic bread. Being aware of these pitfalls can help you achieve better results.
- Overcrowding the Basket: This prevents proper air circulation, leading to uneven cooking. Cook in batches if necessary.
- Using Too Much or Too Little Butter: Too little butter can result in dry bread, while too much can cause excessive dripping. Find the right balance.
- Incorrect Temperature Settings: Different air fryers have varying temperature controls. Understand your model’s settings to achieve the perfect toast.
- Improper Bread Selection: Not all bread types are suitable for air frying. Choose bread that is dense enough to hold up to the cooking process.
To further assist with troubleshooting, consider the following table for common issues and their solutions:
| Issue | Solution |
|---|---|
| Bread burning on the outside | Lower the temperature or cooking time |
| Excessive butter dripping | Reduce the amount of butter or use a lower temperature |
| Uneven cooking | Shake the basket halfway through cooking or cook in batches |
As America’s Test Kitchen notes, “The right temperature is crucial for achieving the perfect crispiness without burning the bread.”
“Paying attention to the temperature and adjusting as needed is key to making great garlic bread in an air fryer.”
Adjusting Recipes for Different Air Fryer Models
Different air fryer models can produce varying results due to differences in power, design, and temperature control. Understanding these differences is crucial for adapting recipes.
For instance, basket-style air fryers may require more frequent shaking of the basket, while oven-style air fryers might offer more even cooking without the need for stirring.
Here’s a guide to help adjust cooking times and temperatures for different air fryer models:
| Air Fryer Type | Temperature Adjustment | Cooking Time Adjustment |
|---|---|---|
| Basket-style | ± 25°F | ± 2 minutes |
| Oven-style | ± 10°F | ± 1 minute |
| Toaster oven combination | Use convection setting, ± 10°F | ± 1-2 minutes |
By understanding your air fryer model and making the necessary adjustments, you can achieve consistently delicious garlic bread.
Conclusion
Air fryer garlic bread has revolutionized the way we enjoy this classic comfort food. With the five recipes outlined in this article, you can create a variety of delicious garlic bread dishes in just minutes. Whether you’re looking for a quick snack or an easy dinner side, these air fryer recipes offer the perfect solution.
From classic buttery garlic bread to cheesy, herby, and stuffed variations, these recipes showcase the versatility of air fryer cooking. You can easily adapt these recipes to suit different tastes and dietary needs, making them perfect for family meals or special occasions.
By incorporating these air fryer garlic bread recipes into your meal prep, you can save time without sacrificing flavor. Experiment with different ingredients and seasonings to create your own unique variations. Share your favorite air fryer recipes and tips with fellow cooking enthusiasts to discover new ideas and inspiration.
Explore more air fryer recipes and techniques to expand your cooking repertoire and make the most of this versatile kitchen appliance. With these easy dinner sides and quick bread recipes, you’ll be well on your way to becoming an air fryer cooking expert, capable of whipping up delicious meals in no time using various versatile cooking methods.

