3 Secrets to Perfect Homemade Focaccia Bread Every Time
Making homemade focaccia that’s as perfect as the ones found in Italian bakeries can be a challenge for many home bakers. Despite its rustic appearance, achieving the signature dimpled crust and soft interior requires more than just a simple recipe.
This Website contains affiliate links. That means I may earn a small commission if you purchase through my links, at no extra cost to you.
Focaccia, a staple of Italian cuisine, has gained popularity worldwide for its versatility and flavor. However, replicating the perfect focaccia bread at home can be daunting due to factors like dough hydration and proofing times.
This article aims to guide you through the process by revealing the essential secrets to making authentic Italian bread at home. By mastering these techniques, you’ll be able to create a delicious focaccia recipe that rivals your favorite bakery’s.
Key Takeaways
- Understand the importance of dough hydration in making perfect focaccia.
- Learn the optimal proofing techniques for a lighter crust.
- Discover the secret to achieving the signature dimpled crust.
- Master the art of flavoring your homemade focaccia with herbs and spices.
- Tips for storing and reheating focaccia to maintain its freshness.
The Allure of Authentic Focaccia Bread
The irresistible charm of authentic Italian focaccia lies in its unique texture and rich flavor profile. Focaccia bread has become a beloved staple in many cuisines around the world, particularly in Italian cuisine. Its characteristic contrast between a crispy exterior and a soft, airy interior, along with its signature dimples and rich olive oil flavor, sets it apart from other types of bread.
What Makes Focaccia Special
Focaccia’s distinctiveness can be attributed to several factors. Firstly, its texture is a major draw, offering a delightful contrast between the crispy crust and the soft, airy interior. The signature dimples on its surface not only add to its visual appeal but also serve to hold olive oil and herbs, enhancing its flavor. The use of high-quality olive oil in its preparation gives focaccia its characteristic rich flavor, making it a quintessential olive oil bread.
| Characteristics | Description | Contribution to Focaccia’s Appeal |
|---|---|---|
| Texture | Crispy exterior, soft interior | Contrasting textures enhance eating experience |
| Dimples | Surface indentations | Hold olive oil and herbs, adding flavor |
| Olive Oil Flavor | Rich, fruity flavor from high-quality olive oil | Characteristic flavor profile, enhances overall taste |
Common Challenges in Homemade Focaccia
Despite its allure, making authentic focaccia at home can be challenging. Common issues include achieving the right hydration level for the dough, mastering the dimpling technique without deflating the bread, and determining the appropriate fermentation time. These challenges can lead to disappointing results, such as dense or flat focaccia. Understanding these common pitfalls is crucial for home bakers to overcome them and produce high-quality, authentic focaccia.
By acknowledging these challenges upfront, home bakers can better prepare themselves for the process of making authentic Italian focaccia, setting the stage for the solutions and tips that will follow in subsequent sections.
Understanding Focaccia: A Brief History
Understanding focaccia’s history is crucial to appreciating its significance in Italian culture. Focaccia, a staple in Italian cuisine, has evolved over time, influenced by various regions and traditions.
Focaccia’s roots trace back to ancient times, with evidence suggesting that flatbreads were consumed by the ancient Romans. The modern version of focaccia, however, is deeply rooted in Italian baking traditions, particularly in the Liguria region.
Origins in Italian Baking Tradition
Focaccia originated as a simple flatbread, often topped with olive oil, herbs, and sometimes cheese. The traditional Ligurian focaccia, known as Focaccia Genovese, is renowned for its thin crust and soft interior, typically flavored with olive oil and salt.
The significance of focaccia in Italian culture extends beyond its taste; it’s a symbol of hospitality and community. Traditionally, focaccia was baked in a wood-fired oven and served to guests as a sign of welcome.
| Region | Traditional Toppings | Baking Method |
|---|---|---|
| Liguria | Olive oil, salt, sometimes rosemary | Wood-fired oven |
| Puglia | Potatoes, cherry tomatoes, olives | Conventional oven with stone |
| Tuscany | Rosemary, olive oil, sea salt | Wood-fired oven |
Regional Variations Across Italy
As focaccia spread across Italy, regional variations emerged, reflecting local ingredients and culinary traditions. In Puglia, for instance, focaccia is often topped with potatoes, while in Tuscany, it’s flavored with rosemary and olive oil.
These regional differences not only showcase the versatility of focaccia but also highlight the importance of technique in achieving the desired texture and flavor. Understanding these variations can inspire home bakers to experiment with different ingredients and methods.
Quality Ingredients: The Foundation of Great Focaccia
Great focaccia starts with great ingredients, a foundation that cannot be compromised. The quality of each component directly impacts the final product’s flavor, texture, and overall appeal.
Selecting the Right Flour
The type of flour used is crucial in focaccia making. Bread flour, with its higher protein content, is often preferred for its ability to produce a chewier crumb and better structure. All-purpose flour can be used, but it may result in a slightly different texture.
Italian “00” flour is another option, known for its fine texture and lower protein content, which can lead to a more tender focaccia. The choice of flour depends on the desired texture and the baker’s personal preference.
The Importance of Quality Olive Oil
Extra virgin olive oil is a key ingredient in traditional focaccia recipes, providing a distinct flavor and aroma. The quality of the olive oil significantly affects the bread’s overall taste, so choosing a good, fresh oil is essential.
Some recipes differentiate between the oil used in the dough and that used for topping, allowing for a richer flavor profile. The choice of olive oil can elevate the focaccia from good to exceptional.
Salt, Yeast, and Water Considerations
The right amount and type of salt can enhance the flavor of the focaccia. Proper measurement is crucial, as too little salt can result in a bland taste, while too much can overpower the other flavors.
Yeast is another critical ingredient, with instant yeast and active dry yeast being the most common types. Understanding the differences and using the right type according to the recipe is vital for proper fermentation.
Finally, water quality affects the dough’s hydration and the final product’s texture. Using clean, fresh water is essential for achieving the best results.
Essential Equipment for Focaccia Success
Achieving perfect focaccia requires more than just the right ingredients; it demands the appropriate equipment. Having the correct tools can make a significant difference in the quality of your final product.
Baking Pans and Surfaces
The choice of baking pan or surface can significantly affect the crust of your focaccia. Traditional options include rimmed sheet pans, cast iron skillets, and specialized focaccia pans. Each has its pros and cons. For instance, cast iron skillets retain heat well, providing a crispy crust, while rimmed sheet pans offer ample space for the dough to spread. Specialized focaccia pans often have features like dimpled surfaces that help create the characteristic focaccia texture.

Tools for Perfect Dimpling and Shaping
Dimpling is a crucial step in focaccia preparation, creating the characteristic indentations that hold olive oil and toppings. While fingers are the most straightforward tool for dimpling, some bakers prefer using specialized dimpling tools for more uniform results. These tools can help prevent deflating the dough during the dimpling process, ensuring a lighter texture.
Temperature Monitoring Tools
Accurate temperature control is vital in focaccia baking, affecting both fermentation and the baking process. A dough thermometer helps ensure that the dough is at the right temperature for yeast activation. For the oven, an oven thermometer verifies that it has reached the correct temperature, crucial for even baking and proper crust development. Investing in a reliable thermometer can significantly improve your focaccia’s consistency and quality.
Secret #1: The Perfect Hydration Ratio
High hydration dough is the key to unlocking the true potential of focaccia bread. The hydration level of the dough plays a crucial role in determining the final texture and quality of the focaccia.
Why High Hydration Matters for Focaccia
Focaccia, unlike many other types of bread, requires a higher hydration level to achieve its characteristic open crumb structure and tender texture. The high water content in the dough allows for a more extensive gluten network to form, which is essential for creating the bread’s signature air pockets.
Benefits of High Hydration:
- Creates a tender, airy crumb
- Enhances flavor development
- Improves dough extensibility
The ideal hydration ratio for focaccia typically ranges between 75% to 85%. This means that for every 100 grams of flour, you should use 75 to 85 grams of water.
Finding Your Ideal Dough Consistency
Achieving the perfect dough consistency is crucial for making high-quality focaccia. The dough should be wet and sticky but still hold its shape to some extent.
Visual and Tactile Cues:
- The dough should stick to your fingers when touched
- It should have a shiny appearance
- When gently pulled, it should exhibit some resistance but still tear easily
| Dough Consistency | Characteristics |
|---|---|
| Too Dry | Dough is crumbly, lacks shine, and tears easily |
| Ideal | Dough is sticky, shiny, and has some resistance when pulled |
| Too Wet | Dough is extremely sticky, lacks structure, and doesn’t hold shape |
Adjusting the hydration level based on the type of flour used and environmental conditions is crucial. For instance, bread flour may require more water than all-purpose flour due to its higher protein content.
Techniques for Handling Wet Dough
Working with high hydration dough can be challenging, but there are several techniques to make it more manageable.
Stretch and Fold Method: This technique involves gently stretching the dough and then folding it back onto itself. It helps to develop the gluten network without overworking the dough.
Other techniques include using oil instead of flour to prevent sticking, allowing proper bench rest time, and being gentle when transferring the dough to prevent deflation.
Secret #2: The Long, Cold Fermentation
Long, cold fermentation is the unsung hero in the world of bread making, transforming simple dough into a culinary masterpiece. This technique is particularly crucial for creating authentic Italian focaccia, with its characteristic airy texture and rich flavor profile.

The Science Behind Slow Fermentation
Slow fermentation is a complex process that involves the breakdown of complex carbohydrates by enzymes, the production of flavor compounds by yeast, and the development of gluten without excessive kneading. During cold fermentation, the yeast’s activity slows down, allowing for a more gradual development of flavors and textures.
The enzymes naturally present in the flour, such as amylase, break down starches into simpler sugars, which are then consumed by the yeast. This process results in the production of carbon dioxide and various flavor compounds, including alcohols, esters, and acids, that contribute to the bread’s characteristic taste and aroma.
- The slow process allows for a more complex flavor profile to develop.
- Gluten develops gradually, resulting in a more tender crumb.
- The slower rise helps to create a more open texture.
Overnight Refrigeration Method
Implementing the overnight refrigeration method is a straightforward process that requires some planning. To start, after mixing your dough, let it rest at room temperature for a short period, typically 20-30 minutes, to allow the flour to hydrate. Then, shape the dough into a ball or rectangle, depending on your preference, and place it in a lightly oiled container.
Cover the container with plastic wrap or a damp towel to prevent drying out, and refrigerate. The cold environment will slow down the yeast’s activity, allowing for a prolonged fermentation period. Typically, this process takes between 8 to 24 hours, depending on factors like the amount of yeast used, the temperature of your refrigerator, and your desired level of fermentation.
Key considerations for overnight refrigeration:
- Use a large enough container to accommodate dough expansion.
- Keep the dough away from strong-smelling foods in the refrigerator.
- Monitor the dough’s progress to determine the optimal fermentation time.
Monitoring Fermentation Progress
Monitoring the fermentation progress is crucial to achieving the perfect focaccia. Visual and tactile cues can indicate whether the dough is fermenting correctly. Look for signs such as an increase in volume, the formation of bubbles on the surface or within the dough, and a slightly sour aroma.
The dough should feel softer and more relaxed after fermentation. If it’s too dense or hasn’t expanded much, it may need more time. Conversely, if it’s over-fermented, it might collapse or have a strong, unpleasant smell.
Adjusting Fermentation for Different Climates
The climate in which you’re baking can significantly affect the fermentation process. In humid environments, you may need to adjust your recipe to prevent the dough from becoming too wet. Conversely, in dry climates, you might need to increase the hydration level to prevent dryness.
Temperature also plays a crucial role. In warmer climates, the dough may ferment more quickly, requiring a shorter fermentation time or a cooler environment. In colder climates, the fermentation process will be slower, potentially necessitating a longer fermentation period or a warmer spot.
| Climate Condition | Adjustment Needed |
|---|---|
| Humid | Reduce water content |
| Dry | Increase water content |
| Warm | Shorten fermentation time |
| Cold | Lengthen fermentation time |
3 Secrets to Perfect Homemade Focaccia Bread Every Time
Now that we’ve covered the foundation of great focaccia, it’s time to explore the finishing techniques that elevate it to the next level. The third and final secret to perfect homemade focaccia lies in the precise finishing techniques that create the distinctive characteristics of exceptional focaccia.
The Art of Dimpling Without Deflating
Dimpling is a crucial step in creating the signature focaccia texture. To dimple without deflating the dough, use your fingertips to gently press into the dough at the right angle and depth. This technique creates wells that hold olive oil and toppings, enhancing the flavor and texture. Proper dimpling ensures that the dough remains intact, maintaining its airy structure.
The key to successful dimpling is to be gentle yet firm. Start by placing your fingertips on the dough, then gently press down, creating dimples about 1-2 inches apart. Avoid pressing too hard, as this can deflate the dough. Instead, focus on creating gentle wells that will hold the olive oil and toppings.
When and How to Apply Olive Oil
The application of olive oil is a critical step in creating the perfect focaccia. The optimal timing for oil application depends on the stage of preparation. Generally, olive oil is applied after dimpling, ensuring that the oil fills the wells and enhances the flavor. High-quality olive oil is essential, as it contributes significantly to the overall taste and texture.
To apply olive oil effectively, drizzle it over the dough, making sure to fill the dimples. Use a generous amount, but avoid overdoing it, as excess oil can make the focaccia greasy. The goal is to achieve an even distribution of oil, ensuring that each bite is flavorful.
- Drizzle olive oil over the dough after dimpling
- Use high-quality olive oil for the best flavor
- Avoid over-saturating the dough with oil
Salt Timing and Distribution
Salt plays a crucial role in enhancing the flavor of focaccia. The timing and distribution of salt are vital to achieving a balanced taste. It’s recommended to sprinkle salt over the dough after applying olive oil, ensuring that the salt adheres to the oil and is evenly distributed.
When it comes to the type of salt, flaky sea salt or coarse kosher salt works best. These types of salt have a coarser texture that adheres well to the olive oil, providing a balanced flavor. Sprinkle the salt evenly over the dough, making sure to cover the entire surface.
Creating the Signature Focaccia Texture
The signature focaccia texture is characterized by a crispy exterior and a tender, airy interior. Achieving this texture is a result of combining the right ingredients, proper fermentation, and precise finishing techniques. The dimpling, olive oil application, and salt distribution all contribute to creating this contrast in texture.
To achieve the perfect texture, it’s essential to monitor the focaccia during the baking process. A well-baked focaccia should have a golden-brown crust and a soft interior. By following the techniques outlined in this section, you’ll be able to create focaccia with the signature texture that defines great bread.
- Combine proper ingredients and fermentation techniques
- Apply precise finishing techniques, including dimpling and olive oil application
- Monitor the baking process to achieve the perfect texture
The Master Focaccia Recipe
The moment you’ve been waiting for: here’s our comprehensive master focaccia recipe that puts theory into practice. This recipe incorporates all three secrets to perfect homemade focaccia: the perfect hydration ratio, long cold fermentation, and the art of dimpling without deflating.
Ingredients and Measurements
To start, you’ll need the following ingredients:
- 1000g bread flour (Type 55 or All-Purpose flour with a high protein content)
- 650g water (approximately 65% hydration)
- 20g active dry yeast (or 10g instant yeast)
- 20g salt
- 50g extra-virgin olive oil (for dough)
- Additional olive oil for dimpling
| Ingredient | Baker’s Percentage | Weight (g) |
|---|---|---|
| Bread Flour | 100% | 1000 |
| Water | 65% | 650 |
| Yeast | 2% | 20 |
| Salt | 2% | 20 |
| Olive Oil (for dough) | 5% | 50 |
Step-by-Step Mixing and Kneading
- In a large mixing bowl, combine flour, water, and yeast. Mix until just incorporated, about 5 minutes.
- Add salt and mix for another minute.
- Gradually add olive oil while continuing to mix.
- Knead the dough for 10 minutes until it becomes smooth and elastic.

Fermentation Timeline
- Bulk fermentation: 4 hours at room temperature (around 75°F/24°C).
- Cold retardation: 12-24 hours in the refrigerator.
- Final proofing: 2-3 hours at room temperature after shaping.
Baking Temperature and Timing
Preheat your oven to 450°F (230°C) with a baking stone or baking steel inside. Bake the focaccia for 20-25 minutes, or until it’s golden brown and sounds hollow when tapped.
Troubleshooting Common Focaccia Problems
Even experienced bakers encounter issues with their focaccia, but with the right troubleshooting techniques, you can achieve perfect results. Focaccia, like any artisanal bread, can be finicky, and various factors can affect its quality. In this section, we’ll explore common problems bakers face and provide practical solutions to help you overcome these challenges.
Dense or Heavy Texture Issues
A dense or heavy focaccia texture is often a sign of underlying issues. Common causes include:
- Insufficient hydration: Dough that is too dry can lead to a dense final product.
- Improper fermentation: Under-fermentation or over-fermentation can affect texture.
- Overmixing: Overworking the dough can develop too much gluten, resulting in a tough focaccia.
To fix these issues, ensure you’re using the right hydration ratio, allow for proper fermentation time, and mix the dough just until ingredients are combined.
Crust Problems: Too Soft or Too Hard
Focaccia crust can be too soft or too hard, depending on several factors. A soft crust might result from:
- Insufficient baking time or temperature.
- Excessive olive oil application.
On the other hand, a crust that’s too hard might be due to overbaking or inadequate oil application. Adjusting your oven temperature, baking time, and oil application can help achieve the perfect crust.
Flavor Development Challenges
Focaccia can sometimes lack flavor, but there are several ways to enhance it:
- Adjust salt quantity: Too little salt can result in a bland focaccia.
- Optimize fermentation time: Longer fermentation can develop more complex flavors.
- Use high-quality olive oil: The type and quality of olive oil can significantly impact flavor.
Fixing Uneven Baking and Browning
Uneven baking and browning can be frustrating. To address this:
- Check for oven hot spots and rotate your baking pan accordingly.
- Ensure proper rack positioning in your oven.
- Consider using a baking stone to promote even heat distribution.
By implementing these troubleshooting techniques, you can significantly improve the quality of your focaccia and achieve consistent results.
Creative Focaccia Variations
From traditional Italian flavors to modern fusion ideas, focaccia is a canvas for culinary creativity. The versatility of this Italian bread allows for endless possibilities in toppings and flavors, making it a perfect canvas for both novice and experienced bakers to experiment with.
Traditional Toppings and Flavors
Classic Italian variations of focaccia often feature simple yet flavorful toppings. Rosemary and sea salt is a timeless combination that enhances the bread’s natural taste. Cherry tomatoes add a burst of juicy sweetness, while olives provide a salty, savory flavor. Caramelized onions bring a depth of sweetness and complexity to the bread.
When applying these toppings, timing is crucial. For instance, delicate herbs like rosemary are best added towards the end of baking to preserve their aroma, while robust ingredients like olives can be added earlier in the process.
| Traditional Topping | When to Apply | Flavor Profile |
|---|---|---|
| Rosemary and Sea Salt | End of baking | Piney, savory |
| Cherry Tomatoes | Before baking | Sweet, tangy |
| Olives | During dough shaping | Salty, savory |
Modern and Fusion Focaccia Ideas
Contemporary bakers are pushing the boundaries of traditional focaccia with innovative toppings. Roasted garlic and truffle oil create a rich, umami flavor profile, while potato and fontina cheese add a creamy, comforting element. Global fusion options like za’atar and labneh introduce exciting new flavors to the classic recipe.
These modern variations not only reflect current culinary trends but also demonstrate the adaptability of focaccia to different cultural influences.

Sweet Focaccia Variations
Focaccia’s versatility extends beyond savory applications. Sweet variations using fruits, honey, nuts, and sweet spices offer a delicious dessert or snack option. Fig and honey focaccia, for example, combines sweet and savory elements, while a cinnamon and sugar topping creates a delightful breakfast or brunch item.
Experimenting with sweet focaccia opens up new possibilities for using this Italian bread in various culinary contexts.
Serving and Storing Your Perfect Focaccia
Perfectly baked focaccia is just the beginning; discover how to complement, store, and reheat it for continued delight. Serving focaccia at its best involves more than just slicing it; it’s about creating an experience.
Pairing Suggestions
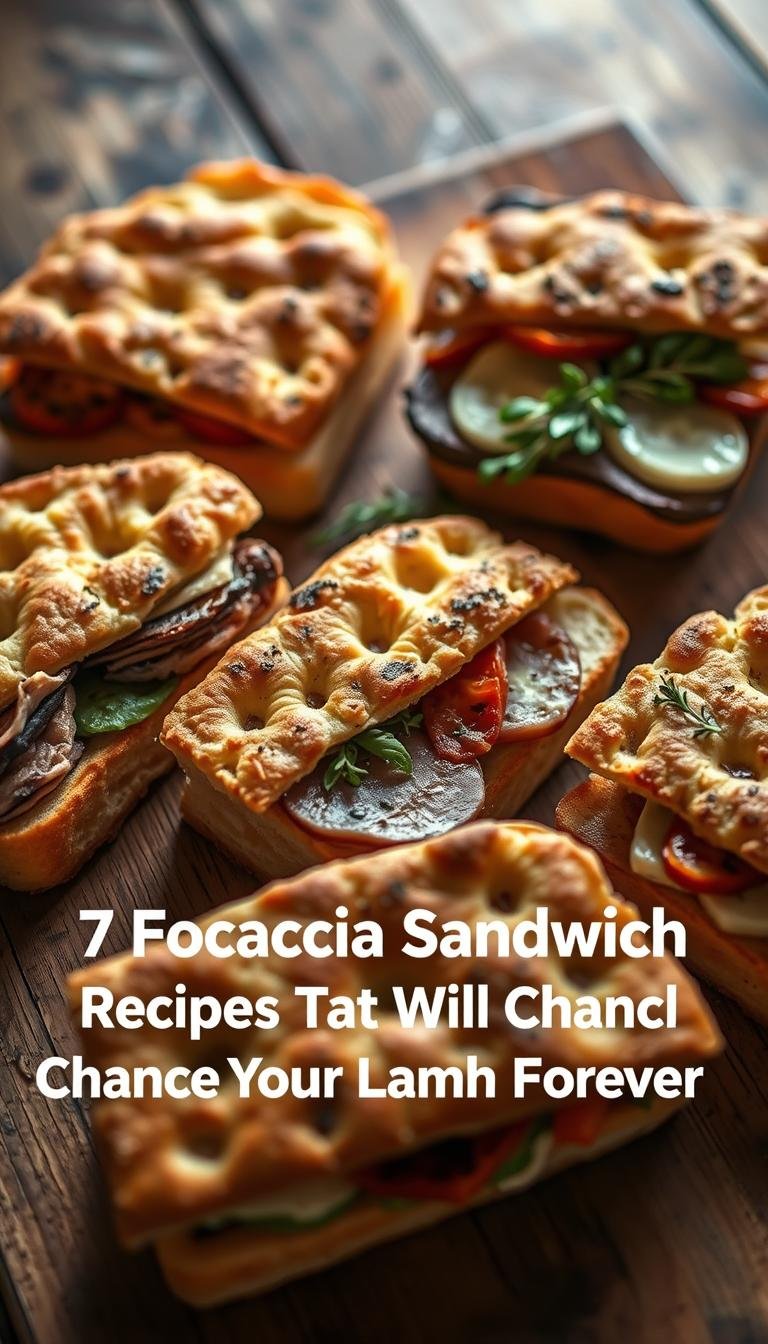
Focaccia is incredibly versatile and can be paired with a variety of dishes to enhance its flavors. Consider serving it alongside Italian antipasti platters, soups, or salads. For a more indulgent experience, try pairing it with olive oil and balsamic vinegar or using it as a base for sandwiches.
- Italian antipasti
- Soups like minestrone
- Salads with Italian dressing
- Olive oil and balsamic vinegar
Proper Storage Methods
To keep your focaccia fresh, it’s essential to store it properly. After it cools, wrap it tightly in plastic wrap or aluminum foil. For same-day consumption, you can store it at room temperature. For longer storage, consider refrigerating or freezing it.
- Cool the focaccia completely
- Wrap it tightly in plastic wrap or aluminum foil
- Store at room temperature, refrigerate, or freeze
Reheating Techniques
Reheating focaccia can restore its freshly baked qualities. Try reheating it in the oven wrapped in foil at 350°F (175°C) for 5-10 minutes. Alternatively, you can use a toaster or skillet for a crisper crust.
Conclusion
Creating perfect focaccia is a journey that combines science, tradition, and personal touch. By mastering the three essential secrets – optimal hydration, long cold fermentation, and proper finishing techniques – bakers can achieve focaccia mastery and consistently produce high-quality homemade Italian bread.
The art of artisan bread baking is about understanding the fundamentals and then experimenting with different flavors and techniques. As you continue to bake, you’ll find that even imperfect attempts can result in delicious homemade focaccia. The key is to keep practicing and enjoying the process.
Sharing your creations with others is a wonderful way to connect with family and friends, continuing a tradition that spans cultures and generations. Whether you’re a seasoned baker or just starting out, the satisfaction of creating delicious focaccia by hand is a rewarding experience that will keep you coming back to the kitchen.
With the knowledge gained from this article, you’re ready to begin your focaccia-making journey. Experiment with different toppings, flavor combinations, and techniques to make your homemade Italian bread truly unique. As you master the art of focaccia, you’ll discover the joy of artisan bread baking and the pleasure of sharing your creations with others.