20 Easy Dutch Oven Bread Recipes for Beginners
Baking homemade bread can seem scary. But, with the right tools and skills, anyone can make amazing bread at home. The Dutch oven is a favorite among bakers. It helps make bread just like a pro’s oven.
This Website contains affiliate links. That means I may earn a small commission if you purchase through my links, at no extra cost to you.
Beginners can make crispy crust and soft inside bread with a Dutch oven. It’s easy with simple ingredients and clear steps. This helps new bakers feel more confident.
Bread baking is more than just a recipe. It’s about learning and trying new things. It’s about making bread your own way.
Key Takeaways
- Learn the basics of Dutch oven bread baking
- Discover 20 foolproof recipes for beginners
- Understand the importance of ingredients and equipment
- Develop skills to create artisanal bread at home
- Achieve a crispy crust and soft interior with Dutch oven baking
The Magic of Dutch Oven Bread Baking
Dutch oven bread baking has changed how we make artisan bread at home. It’s simple yet gives us pro-quality results. The Dutch oven traps steam, making the crust crispy and the inside soft.
The Dutch oven’s cast iron keeps heat well and spreads it evenly. This makes the bread crust golden and the inside tender. Peter Reinhard, a famous bread expert, says, “The Dutch oven is a game-changer for home bakers, allowing for the creation of artisanal bread with ease.”
“The Dutch oven’s ability to trap steam and distribute heat evenly makes it an ideal vessel for bread baking.”
Dutch oven bread baking has many benefits. It’s not just for bread. You can use it for slow cooking and roasting too. It makes your kitchen better.
Dutch oven bread baking is fascinating and will keep attracting home bakers. It’s great for both new and experienced bakers. The Dutch oven opens up a world of possibilities for making delicious bread at home.
Essential Equipment and Ingredients for Dutch Oven Bread
The art of Dutch oven bread baking starts with the basics. You need the right Dutch oven and quality ingredients. To make delicious, crusty loaves, you must know what you need.
Choosing the Right Dutch Oven for Bread Baking
Choosing the right Dutch oven is key for great bread. Look for a size of 5-7 quarts. The material, handle types, and price are also important. Brands like Lodge, Le Creuset, and Staub are popular.
Features like tight-fitting lids and heat-resistant knobs help get the perfect crust.
| Brand | Material | Size (Quarts) | Price Range |
|---|---|---|---|
| Lodge | Bare Cast Iron | 5-7 | $20-$50 |
| Le Creuset | Enameled Cast Iron | 5-7 | $100-$200 |
| Staub | Enameled Cast Iron | 5-7 | $150-$300 |
Each brand has its own benefits. Lodge is affordable and durable. Le Creuset and Staub offer colors and enamel coatings that make baking better.
Basic Ingredients Every Bread Baker Needs
Knowing the basic ingredients is key for great bread. You need flour, yeast, salt, and water. The type of flour affects the bread’s texture.
Bread flour makes the bread chewy. All-purpose flour makes it tender. Whole wheat and specialty flours add flavor and texture.
Yeast makes the bread rise. Salt adds flavor and controls yeast. Water hydrates the ingredients and develops the dough’s texture. Oils, sweeteners, and add-ins can also improve flavor and texture.

By focusing on these basics, beginners can succeed in Dutch oven bread baking. The right Dutch oven and quality ingredients make a big difference. Knowing their roles is key to making delicious homemade bread.
Mastering the Fundamentals: Dutch Oven Bread Techniques
Learning Dutch oven bread techniques is key to making great loaves. Bakers need to know and use several important methods. These methods are the base of successful bread baking.
The No-Knead Method Explained
The no-knead bread method, made famous by Jim Lahey, changes how we make bread. It uses time instead of kneading. This way, the dough gets better over hours, making the bread taste great and feel soft.
This method starts with mixing flour and water, then resting. This step breaks down the flour, making the dough easier to handle. It’s great for beginners because it’s easy and still makes delicious bread.
Proper Preheating and Temperature Control
Heating the oven and Dutch oven right is key for a perfect crust. Heating the Dutch oven creates steam when the dough goes in. This is important for a good crust. For most bread, heat it to 450°F (230°C) or more. But, the best temperature depends on the bread type.
Keeping the temperature right while baking is also important. High heat first makes the crust crispy. Then, lowering the heat lets the bread cook fully without burning. Knowing how to control your oven’s temperature is crucial for consistent results.
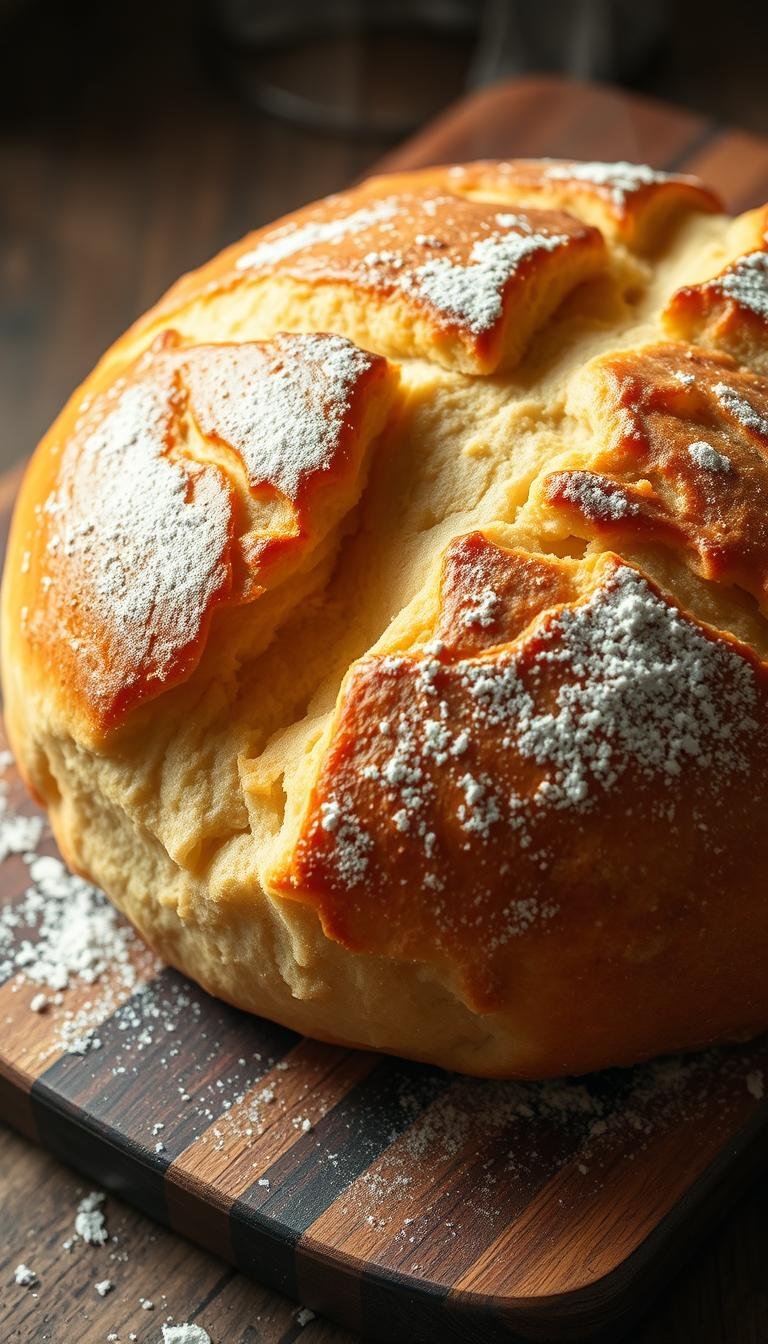
Scoring, Steaming, and Creating the Perfect Crust
Scoring the bread’s surface is both useful and pretty. It lets the bread expand in a controlled way, making the crust look nice. The depth and angle of the cuts affect how the bread looks and expands.
Steaming is also vital for a great crust. The Dutch oven traps steam, like a pro oven. This steam makes the crust crispy and well-colored. As the bread bakes, the steam goes away, making the crust dry and crunchy.
20 Easy Dutch Oven Bread Recipes for Beginners
Start a tasty adventure with these 20 easy Dutch oven bread recipes. They’re great for beginners wanting to get better at baking. You’ll learn many flavors and techniques.
1. Classic No-Knead White Bread – The Perfect Starting Point
This easy recipe is perfect for beginners. It needs just a few ingredients and effort. You get a tasty, crusty loaf with a soft inside.
Ingredients and Equipment
You need 1 cup of warm water, 1 tablespoon of sugar, 2 teaspoons of active dry yeast. Also, 3 cups of all-purpose flour, 1 teaspoon of salt, and a Dutch oven.
Step-by-Step Instructions
Mix warm water, sugar, and yeast until frothy. Then, mix flour and salt with the yeast mix. Stir until it’s shaggy. Let it rise, then bake at 450°F for 30 minutes.
2. Rustic Country Loaf with Crispy Crust
This recipe uses whole wheat flour for extra flavor and texture.
Ingredients and Equipment
You’ll need 1 cup of warm water, 1 tablespoon of sugar, 2 teaspoons of active dry yeast. Also, 2 cups of all-purpose flour, 1 cup of whole wheat flour, 1 teaspoon of salt, and a Dutch oven.
Step-by-Step Instructions
Follow the no-knead white bread steps but add whole wheat flour. Bake at 425°F for 35-40 minutes.
3. Simple Whole Wheat Bread for Beginners
This hearty whole wheat bread is great for sandwiches or toast.
Ingredients and Equipment
You need 1 cup of warm water, 2 teaspoons of active dry yeast, 3 cups of whole wheat flour, 1 teaspoon of salt, and a Dutch oven.
Step-by-Step Instructions
Mix yeast and water, then add flour and salt. Knead until it’s a dough. Let it rise, then bake at 375°F for 40-45 minutes.
4. Beginner-Friendly Sourdough Bread
Try sourdough with this easy recipe.
Ingredients and Equipment
You need 1 cup of sourdough starter, 3 cups of bread flour, 1 teaspoon of salt, and a Dutch oven.
Step-by-Step Instructions
Mix starter, flour, and salt to form a dough. Let it ferment, shape it, and bake at 450°F for 25-30 minutes.
5. Honey Oat Bread with Golden Crust
This sweet and nutty bread is perfect for breakfast or snacks.
Ingredients and Equipment
You need 1 cup of warm water, 2 teaspoons of yeast, 3 cups of all-purpose flour, 1/2 cup of rolled oats, 1 tablespoon of honey, 1 teaspoon of salt, and a Dutch oven.
Step-by-Step Instructions
Mix yeast and water, then add flour, oats, honey, and salt. Knead, let it rise, and bake at 375°F for 35-40 minutes.

Seasonal Variations for Your Dutch Oven Bread
As the seasons change, so do the flavors and ingredients for your Dutch oven bread. Using seasonal ingredients makes your bread fresh and exciting. It also matches the meals and flavors of each season.

Spring and Summer Bread Ideas
Spring and summer are great for adding fresh herbs like basil, dill, and chives to your bread. You can also add spring vegetables like garlic scapes and spring onions for more flavor. For summer, try fruit-studded breads with cherries or berries, perfect for brunch or dessert.
Herb breads are perfect for barbecues and outdoor gatherings. They go well with grilled meats and summer salads.
Fall and Winter Comfort Breads
In fall and winter, try heartier breads with warming spices like cinnamon, nutmeg, and cloves. Add root vegetables like pumpkin and sweet potato for moisture and flavor. Nuts and dried fruits make your bread great for the cold months.
Think about festive holiday breads like cranberry-orange loaves for Thanksgiving or chocolate-cherry bread for winter celebrations. They’re a tasty way to enjoy the season.
Troubleshooting Common Dutch Oven Bread Problems
Baking Dutch oven bread can sometimes go wrong. It doesn’t matter if you’re new or experienced. Problems like not rising, being too dense, or having a burnt crust can be tough. Knowing why and how to fix these issues can make your bread better.
Why Isn’t My Bread Rising Properly?
There are a few reasons why your bread might not rise. It could be because your yeast is dead, you didn’t proof it right, or it’s too cold. Make sure your yeast is alive by checking its date and mixing it with warm water and sugar. If it doesn’t foam, it’s time for new yeast. Also, let your dough rise in a warm, still place, as cold slows yeast down.
Key factors affecting rise:
- Yeast viability
- Water temperature
- Proofing time and environment
Fixing Dense or Gummy Bread Texture
A dense or gummy bread can come from wrong water, flour, or baking time. Make sure to measure right and use the correct flour. Don’t overmix, as it makes the bread dense. If it’s gummy, bake it a bit longer.

“The quality of the bread is directly related to the quality of the ingredients and the care taken during the baking process.”
, changing your recipe and how you make it can really help.
Preventing a Burnt Bottom Crust
Burnt crusts are common in Dutch oven baking. To stop this, put a baking sheet under your Dutch oven to block heat. Use cornmeal or parchment paper under your bread to protect it from heat. Also, make sure your oven and Dutch oven are hot enough for a great crust.
By knowing these common problems and how to fix them, you can get better at baking Dutch oven bread.
Storing and Serving Your Homemade Dutch Oven Bread
Baking bread is just the start. How you store and serve it matters a lot. The right way to store and reheat keeps your bread fresh and tasty.
Best Storage Methods for Maximum Freshness
Storing bread right is key to keeping it fresh. Different breads need different storage. For example, crispy crusts do well in paper bags.
Soft-crusted breads should be wrapped in plastic or cloth. Bread boxes are great for room temperature storage. Freezing is good for longer storage. Wrap it well in plastic or foil and put it in a freezer bag.
| Storage Method | Bread Type | Freshness Duration |
|---|---|---|
| Paper Bag | Crispy Crust | 1-2 days |
| Plastic Wrap | Soft Crust | 2-3 days |
| Bread Box | Various | 2-5 days |
| Freezer | Various | Up to 3 months |
Reheating Tips and Serving Suggestions
Reheating your bread can make it taste like new. Preheat your oven to 350°F (175°C). Wrap the bread in foil and heat for 10-15 minutes. You can also toast it or use a steamer.
Serving warm bread with butter or making bruschetta is delicious. You can also make French toast or bread pudding with leftover bread. This way, you enjoy every bit of your homemade bread.
Taking Your Dutch Oven Bread to the Next Level
Now that you know the basics of Dutch oven bread, it’s time to try new things. Mix different ingredients and methods to make unique breads. This shows off your skills.
Experimenting with Flavors and Techniques
Try adding chocolate and rosemary or blue cheese and pear to your bread. You can also add dried fruits, nuts, cheeses, and spices. Use beer or buttermilk instead of water, but adjust the dough’s moisture level.
Adapting Recipes as Your Skills Improve
As you get better, change basic recipes to make your own. Learn about poolish and biga pre-ferments. Or try sourdough methods.
Play with dough moisture, flour types, and flavors. Knowing bread science helps. Don’t be afraid to try new things.
| Technique | Description | Benefits |
|---|---|---|
| Pre-ferments | Using pre-ferments like poolish or biga to enhance flavor | Improved flavor complexity, better texture |
| Sourdough Methods | Creating a natural starter for unique bread flavor | Enhanced nutritional value, distinct flavor profile |
| Lamination Techniques | Folding dough to create layers, resulting in flaky texture | Crispy crust, airy interior |
Conclusion
Starting to make homemade bread is very rewarding. Dutch oven bread baking is easy and fun for beginners. It lets you make great bread with just a few tools.
As you try out the 20 easy Dutch oven bread recipes, you’ll learn a lot. Bread baking is both a science and an art. It needs precision and creativity.
Don’t worry if you make mistakes at first. Every loaf you make helps you learn. Soon, you’ll get better and try new things.
Joining a bread baking group is a good idea. You can share your bread, learn from others, and stay excited about baking.
To get even better, look for more resources like books and online forums. You can also take classes locally. These will help you improve and find new recipes. With this guide, you’re ready to make tasty bread at home. Happy baking!