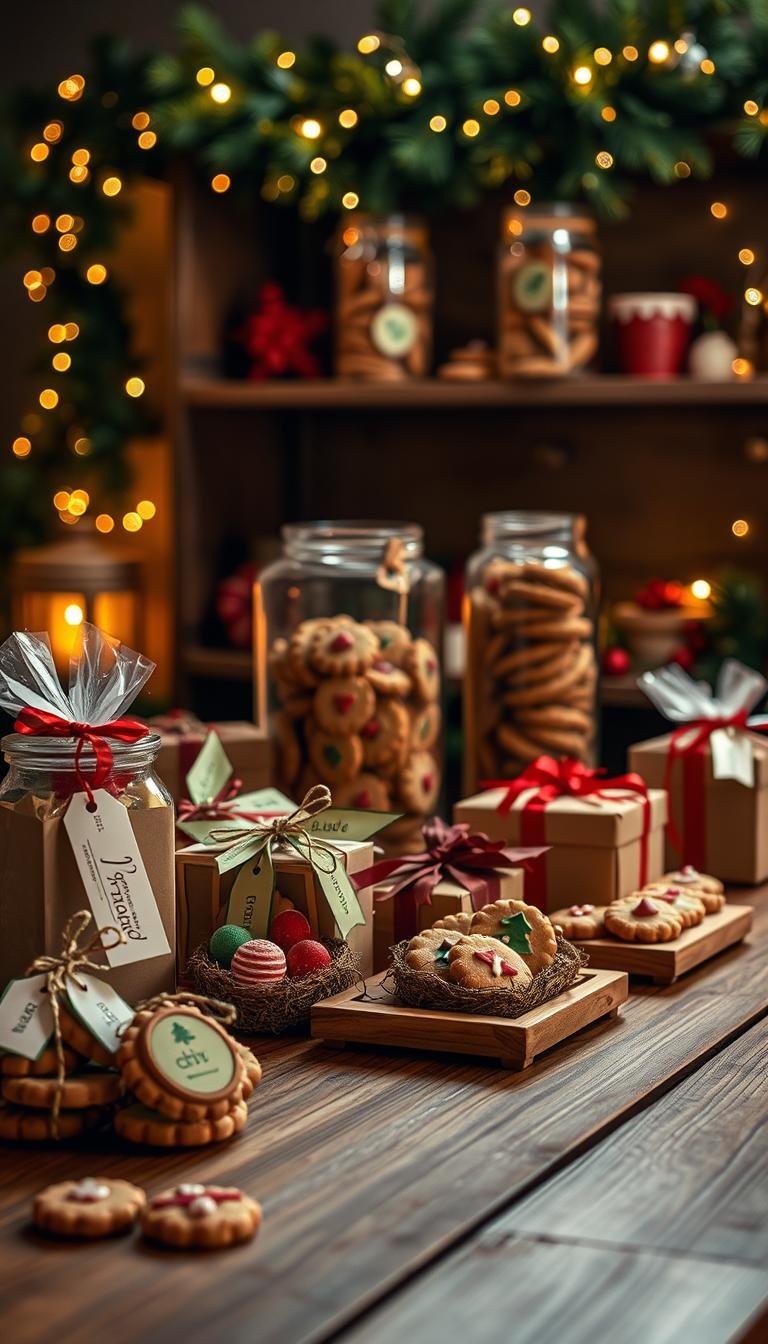
20 Creative Ways to Package Christmas Cookies for the Holidays
The holiday season is here, and it’s time to share homemade Christmas cookies with those we love. A well-packaged cookie gift is as special as the cookies inside. A beautifully wrapped tin or jar can become a treasured keepsake.
This Website contains affiliate links. That means I may earn a small commission if you purchase through my links, at no extra cost to you.
This guide will show you fun and festive ways to package your holiday cookie gifts. You’ll see both old and new ideas, and even eco-friendly options. You’ll find ways to make your cookie gifts look amazing.
Key Takeaways
- Discover unique and creative ways to wrap your holiday cookies
- Learn how to make your cookie gifts stand out with festive packaging
- Explore eco-friendly packaging solutions for your homemade treats
- Find inspiration for beautifully presenting your cookie gifts
- Get practical tips on materials and assembly for professional-looking cookie gifts
The Joy of Gifting Homemade Cookies During the Holiday Season
Baking and sharing homemade cookies is a big part of holiday traditions. It connects families and makes memories. Giving homemade cookies shows you care. The effort you put into baking and packaging makes them special.
Homemade cookies have been a holiday favorite for centuries. German Christmas cookies, or “Lebkuchen,” have been loved since the 13th century. In many places, cookies are a sign of welcome and warmth in winter.
Giving homemade cookies creates a special bond. It shows you were thinking of the person. A survey found 62% of Americans see baking cookies as a key holiday tradition. Sharing baked goods brings families and friends closer, making lasting memories.
Homemade cookie gifts are special because of:
- The personal touch in baking and packaging
- The variety of flavors and textures you can make
- The history and culture behind different cookies
- The love and care they show
How you package the cookies adds to the gift. It shows you put thought into it. The joy of giving homemade cookies is about the love and effort you put into it.
Traditional Packaging with a Twist
When it comes to packaging Christmas cookies, we can make old ways new again. Tins, boxes, and plates are classics. But, adding a modern twist makes them special for today’s gifts.
By mixing traditional cookie containers with modern decorative elements, we make gifts that are both old and new. You can decorate modern cookie tins with your own designs. Or, use festive wrapping on traditional boxes. Even plain cookie plates can get a makeover with ribbons.
- Use modern cookie tins with custom designs
- Update traditional cookie boxes with festive wrapping
- Add a personal touch to plain cookie plates
These updated cookie packaging ideas will make your gifts stand out. They’ll be beautiful and memorable during the holidays.
1. Decorated Cookie Tins
Turning metal cookie tins into special gifts is fun and creative. Custom cookie tins can match your holiday theme. They make great, unique gifts.
Materials Needed
To make your own decorated Christmas tins, you need a few things. These include:
- Plain metal tins in various sizes
- Decorative papers or holiday-themed napkins
- Ribbons or other embellishments
- Paint and stencils
- Decoupage medium
- Adhesives like glue or a hot glue gun
Assembly Instructions
To put together your personalized cookie containers, follow these steps:
- Clean and dry the metal tins well.
- Put decoupage medium on the tin and stick your paper or napkin on.
- Paint and use stencils for festive designs.
- Add ribbons or small ornaments for a 3D look.
Presentation Tips
To make your decorated cookie tins even more special, try these tips:
- Layer cookies with parchment paper to keep them fresh and prevent breakage.
- Add a personalized gift tag with the recipient’s name.
- Use sprigs of fresh greenery like rosemary or thyme for a fragrant and festive touch.
2. Mason Jar Cookie Stacks
Stacking cookies in mason jars is a fun art. It mixes looks and keeps cookies fresh. You can show off many cookies in one jar.
Materials Needed
To make a pretty mason jar cookie stack, you need:
- Clear mason jars in different sizes
- Decorative fabric or paper for the lid
- Ribbon or twine for decoration
- Gift tags or labels
- Parchment paper circles
- Optional: tiny cookie cutters or hot chocolate mix packets
Assembly Instructions
To put together your mason jar cookie stack, do this:
- Pick a mix of cookies that taste good together.
- Put cookies in the jar, starting with a parchment paper circle at the bottom.
- Press down on the cookies as you add more to fill the jar without breaking them.
- Make each layer look different with colors and textures.
Presentation Tips
To make your mason jar cookie stack look great:
- Decorate the lid with fabric or paper, tied with ribbon or twine.
- Add a gift tag or label with what cookies you used and your name.
- Include a recipe card or a packet of hot chocolate mix.
- Try different jar sizes and cookie mixes for a special gift.
By following these steps, you’ll make a tasty and lovely mason jar cookie gift. It will show off your baking talent and care.
3. Festive Paper Plate Packages
Turn simple paper plates into fun cookie gifts for the holidays. This idea is cheap and lets you pick your own theme.
Materials Needed
- Sturdy decorative paper plates (holiday-themed)
- Cellophane wrap
- Ribbon or decorative tape
- Cardstock for tags
- Hole punch
- Optional embellishments (bells, miniature ornaments)
Assembly Instructions
Put cookies in the middle of a plate. Then, put another plate on top to make a dome. Wrap the edges with cellophane and tie with ribbon or tape.
For more fun, use different plate sizes. Or, cut holes in the top plate and cover with clear wrap.
Presentation Tips
Make your packages look better with custom labels or decorations. You can stack plates for bigger gifts. Match the plate design with your cookie theme for a nice look.
With these easy steps, you can make paper plate cookie packages perfect for the holidays. They’re great as disposable cookie containers and easy cookie gift wrap.
4. Holiday Themed Cookie Tubes
Decorative cookie tubes are a fun way to share homemade treats. They keep cookies safe and add holiday cheer to your gift.
Materials Needed
To make holiday cookie tubes, you need:
- Cardboard mailing tubes or Pringles containers
- Decorative wrapping paper
- Food-safe tissue paper
- End caps or circle templates
- Ribbon or twine
- Adhesives like glue or tape
- Scissors
- Optional: bells, miniature ornaments, or custom stickers
Assembly Instructions
To make the cookie tubes, follow these steps:
- Clean and prepare the containers by removing any labels and washing them thoroughly.
- Line the tubes with food-safe tissue paper to prevent cookies from getting damaged.
- Carefully stack the cookies inside the tube, ensuring they are secure and not touching each other.
- Seal the ends of the tube with end caps or circle templates, securing them with adhesives.
- Wrap the exterior of the tube with decorative wrapping paper, using techniques for wrapping cylindrical objects neatly.
- Create a secure closure to prevent cookies from shifting during transport.
Presentation Tips
To make your cookie tubes look great, try these ideas:
- Turn the tubes into “crackers” by twisting the ends, adding a playful touch.
- Create thematic designs resembling candy canes or nutcrackers by using specific wrapping patterns or decorations.
- Add a hanging loop to the tube, allowing it to be displayed on the Christmas tree.
- Incorporate elements like jingle bells or tassels to add a festive touch.
As “The key to a great gift is in the presentation”, gift wrapping experts say. Decorative cookie tubes protect your cookies and make your gift special. By following these steps and tips, you can make beautiful cookie gift tubes for the holiday season.
“The art of gift wrapping is not just about covering a gift; it’s about creating an experience.”
Eco-Friendly Packaging Solutions
Eco-friendly packaging is more than a trend. It’s a caring way to share Christmas cookies. As people think more about the planet, they want to give gifts that are good for it. Traditional packaging can make a lot of waste. But, eco-friendly options let you give gifts that look great and are better for the earth.
Key Principles of Eco-Friendly Packaging:
- Reusable materials that can be used many times
- Recyclable materials that can be made into new things
- Biodegradable materials that break down naturally
Using these ideas in your cookie packaging helps reduce waste. It also makes your gifts more special. Here are some ways to pack your Christmas cookies in a way that’s good for the planet.
5. Upcycled Paper Bag Packages
Turning paper bags into cute cookie packages is a fun way to cut down on waste. It’s good for the planet and makes your gifts special.
Materials Needed
You’ll need these things to make your packages:
- Brown paper bags in different sizes
- Stamps and ink pads
- Decorative hole punches
- Twine or ribbon from natural stuff
- Wax paper for lining
- Evergreen sprigs, dried orange slices, and cinnamon sticks for decorations
- Optional: recycled gift tags or pressed leaves
Assembly Instructions
Here’s how to put your packages together:
- Fold the bag’s top to make a neat edge and tie it with a pretty bow.
- Turn flat bags into origami boxes with special folds.
- Make window cutouts and cover them with compostable cellophane for a peek at the cookies.
| Package Style | Materials Used | Embellishments |
|---|---|---|
| Folded Top Bag | Brown paper bag, twine | Dried orange slice, evergreen sprig |
| Origami Box | Flat brown paper bag, decorative hole punch | Cinnamon stick, recycled gift tag |
| Window Cutout Bag | Brown paper bag, compostable cellophane | Pressed leaf, simple twine bow |
Presentation Tips
Make your packages stand out with hand-stamped designs and botanical decorations. Write a personal message on the bag. Finish with a twine bow or an evergreen sprig.
By making cookie packages from paper bags, you’re helping the planet. You also get to give gifts that show off your creativity and care for the environment.
6. Vintage Handkerchief Wraps
Make your cookie gifts special with handkerchiefs. This old trick is good for the planet and adds a personal touch. Wrapping cookies in handkerchiefs gives a double gift: a treat and a piece of fabric.
Materials Needed
You’ll need these things to make these gifts:
- Vintage handkerchiefs (thrifted or family heirlooms)
- New cotton handkerchiefs
- Food-safe wax paper
- Ribbon or twine
- Decorative pins
- Small sprigs of dried herbs or flowers
- Optional: handwritten recipe cards or care instructions for the fabric
Assembly Instructions
Here’s how to make your handkerchief-wrapped cookies:
- Put wax paper on the handkerchief to keep it and the cookies safe.
- Put your cookies on the wax paper.
- Fold the handkerchief in a way that looks nice:
- Traditional bundle tie: Tie the corners with ribbon or twine.
- Envelope fold: Fold it into an envelope shape and pin it.
- Decorative pouch: Make a pouch by folding the top and pinning it.
- Make it look nicer with dried herbs, flowers, or a note.
Presentation Tips
Here’s how to make your gift even better:
- Pick handkerchiefs that match the person’s style or decor.
- Add a scent like lavender or cinnamon to the package.
- Write a note about the handkerchief’s history or how to use it.
- Use a ribbon or twine that fits the holiday or the person’s taste.
7. Festive Fabric Pouches
Add a touch of handmade charm to your holiday cookie gifting with festive fabric pouches. These reusable containers hold your delicious baked goods. They also make a beautiful and functional gift that lasts beyond the cookies.
Materials Needed
To create your festive fabric pouches, you will need:
- Holiday-themed cotton fabrics
- Food-safe liner fabrics
- Ribbon or cord for drawstrings
- Basic sewing supplies (or fabric glue for no-sew options)
- Decorative buttons or toggles
- Optional: iron-on transfers, embroidery supplies
Assembly Instructions
For sewn pouches, cut your fabric to the desired size. Make sure to leave room for seams. Add a food-safe liner and a drawstring closure. For no-sew versions, use fabric glue or iron-on hem tape.
| Cookie Quantity | Recommended Pouch Size |
|---|---|
| 6-8 cookies | 6×8 inches |
| 1 dozen cookies | 8×10 inches |
Presentation Tips
Personalize your fabric pouches with monogramming or fabric appliqués. Add seasonal elements like jingle bells or fabric holly leaves. Create coordinated sets in varying sizes for a beautiful gift presentation.
8. Repurposed Calendar Boxes
Give old calendars a new life as cookie boxes. This eco-friendly idea cuts down on waste. It also makes your holiday gifts special.
Materials Needed
To make your calendar boxes, you’ll need:
- Old wall calendars with nice pictures
- Cardboard for the box’s base
- Food-safe wax paper or parchment
- Glue or double-sided tape
- Scoring tool
- Ruler
- Scissors
- Hole punch
- Natural twine or ribbon
- Optional: clear acetate for windows, natural embellishments
Assembly Instructions
To put your boxes together, follow these steps:
- Pick a calendar page with a good image and cut it to fit.
- Make the box structure with cardboard, wrapping the calendar around it.
- Hold it together with glue or double-sided tape.
- Add wax paper or parchment inside the box.
- Close the box with natural twine or ribbon.
Presentation Tips
Make your calendar boxes stand out with these ideas:
| Cookie Type | Calendar Image | Embellishment |
|---|---|---|
| Tropical cookies | Beach scene | Seashells |
| Floral-flavored treats | Garden image | Dried flowers |
| Snowball cookies | Winter landscape | Snowflake decorations |
Showstopper Presentations
Creating an eye-catching cookie presentation can make a simple gift unforgettable. These elaborate packaging ideas are made to make memorable gifts. They start conversations and are perfect for special occasions.
Putting more time and creativity into the presentation makes cookie gifts special. These showstopper packages can be the highlight of any event. They add to the fun of holiday gatherings.
| Presentation Style | Key Features | Occasion |
|---|---|---|
| Cookie Towers | Multi-tiered, decorative | Large gatherings |
| Cookie Bouquets | Colorful, fragrant | Special occasions |
| Cookie Sleighs | Themed, festive | Holiday parties |
These impressive cookie packaging ideas are both beautiful and practical. They are great for many events.

9. Christmas Tree Cookie Boxes
Make your holiday cookie gifts stand out with a 3D Christmas tree cookie box. It’s not just packaging. It’s a festive centerpiece that shows off your cookies beautifully.
Materials Needed
You’ll need green cardstock or cardboard, templates, a scoring tool, and a craft knife. Also, a cutting mat, food-safe glue, and decorative papers. Don’t forget miniature ornaments, star toppers, ribbon, and mini lights.
- Heavy cardstock or lightweight cardboard (green)
- Template patterns for the tree structure
- Scoring tool and craft knife
- Cutting mat and food-safe glue
- Decorative papers and miniature ornaments
- Star topper materials and ribbon
- Battery-operated mini lights
Assembly Instructions
Start by cutting out the tree shape from your cardstock. Use a template. Score the folds to make it 3D. Then, put the tiers together, making sure they’re strong for heavy cookies.
- Cut out the tree structure from cardstock using the template.
- Score the folds to create a 3D shape.
- Assemble the tiers, securing with food-safe glue.
- Reinforce the structure for stability.
Presentation Tips
Decorate the tree with ornaments and garlands. Add lights for a wow effect. Make gift tags that match your box for a complete look.
“The art of packaging is not just about containing the product, it’s about creating an experience.” Follow these steps to make a stunning Christmas tree cookie box. It will wow your friends and family, making your gifts unforgettable.
10. Cookie Snow Globes
Create a whimsical holiday gift with cookie snow globes. They are a delightful dessert presentation that’s sure to enchant. These edible snow globes feature cookies in a transparent dome, making a miniature winter wonderland.
Materials Needed
To make your cookie snow globes, you’ll need:
- Clear plastic dome containers that are food-safe
- Sturdy bases from cardboard or wood discs
- Artificial snow like coconut flakes or white sprinkles
- Small figurines that are safe for food
- Special cookies that can stand upright
- Food-safe adhesive
- Decorative ribbon
- Optional: battery-operated mini lights
Assembly Instructions
To put together your cookie snow globes, follow these steps:
- Make a stable base with cardboard or wood discs.
- Use food-safe adhesive to hold standing cookies or structures in the dome.
- Add artificial snow and small figurines for a winter scene.
- Attach the clear plastic dome to the base for a secure structure.
Presentation Tips
To make your cookie snow globes look great, try these tips:
- Make scenes like winter wonderlands or Santa’s workshop.
- Use layering to add depth and dimension.
- Write personalized messages on the base for a special touch.
- Add interactive elements like music or lights for magic.
By following these steps and tips, you can make beautiful cookie snow globes. They will surely delight your loved ones during the holiday season.
11. Cellophane Wrapped Cookie Bouquets
Turn your cookies into a stunning bouquet. It’s perfect for gifts or holiday decor. Cellophane-wrapped cookie bouquets impress everyone.
Materials Needed
You’ll need these things to make your cookie bouquets:
- Food-safe lollipop sticks
- Special cookies that won’t break
- Floral foam or Styrofoam (wrapped for food safety)
- Decorative pots or containers
- Cellophane in different colors
- Ribbon
- Decorative shred or tissue paper
- Floral tape
- Wire cutters
- Optional: artificial greenery or baby’s breath
Assembly Instructions
Here’s how to make your cookie bouquet:
- Bake and cool your cookies. Make sure they’re strong.
- Stick the cookies to lollipop sticks with glue or a hole.
- Put the sticks in the foam base at different heights.
- Put the foam in a pot or container.
- Wrap it all in cellophane with ribbon or tape.
Tip: Try different shapes and sizes for a unique look.
Presentation Tips
Make your bouquet stand out with these tips:
- Choose a pot that fits your holiday theme.
- Match the cellophane and ribbon to your cookies or the event.
- Add things like candy canes or chocolate-dipped pretzels for fun.
- Use personalized picks or flags for a special touch.
- Put bigger cookies in the back for a layered look.
“The art of gifting is not just about the gift itself, but how it’s presented.”
12. Cookie Filled Ornaments
Make your Christmas tree sweet with cookie ornaments. They are tasty treats and add a personal touch. They also make great gifts for loved ones.
Materials Needed
To make these ornaments, you need:
- Clear plastic fillable ornaments (food-safe variety)
- Miniature cookies that fit inside ornaments
- Ribbon or ornament hooks
- Decorative elements like miniature sprigs of artificial greenery
- Personalized tags
- Fine-tipped markers for decoration
- Optional: colored sugar or sprinkles for filling around cookies
Assembly Instructions
Here’s how to make your ornaments:
- Clean the ornaments well to remove dust.
- Pick or bake cookies that match the ornament size.
- Put the cookies inside the ornament so they’re seen.
- Close the ornament halves tightly.
- Put a hanging element on the ornament.
You can also decorate the outside of ornaments with cookies. Or use clear ornaments to show off the cookies.
Presentation Tips
Here are ways to present your ornaments:
- Make a “12 Days of Christmas” set with different cookies.
- Match the ornaments with the tree’s decor.
- Write personal messages or dates on the ornaments.
- Pair edible ornaments with non-edible ones for a mix.
As Laura Ingalls Wilder said, “Home is the nicest word there is.” Make your home sweeter with these cookie ornaments.

Quick and Easy Packaging Ideas
For those short on time, simple cookie packaging can be just as impressive as elaborate designs. Use materials you have and simple techniques to make your cookies look great. Even with little time, you can make your cookie gifts special.
Last-minute cookie gifts don’t have to look generic. With a few simple steps, you can create beautiful and thoughtful packages. The next few sections will explore straightforward packaging ideas that are perfect for busy bakers.
13. Personalized Cookie Envelopes
Making personalized cookie envelopes is easy and fun. It adds a special touch to your holiday cookie gifts. You get the ease of envelopes and the charm of making them your own.
Materials Needed
You’ll need a few things to get started:
- Decorative paper or cardstock
- Envelope templates or measurements
- Scoring tool
- Adhesive
- Food-safe wax paper for lining
- Rubber stamps and ink
- Markers or colored pencils
- Stickers
- Washi tape
- Optional: custom stickers or embossing tools
Assembly Instructions
Here’s how to make the envelopes:
- Design Your Envelope: Pick your paper or cardstock. You can use a template or draw it yourself. Make sure it’s big enough for your cookies.
- Score and Fold: Use a scoring tool to make a crease line. This helps you fold it smoothly and accurately.
- Assemble the Envelope: Fold it along the crease line and glue it. Be careful not to get glue on the inside where the cookies will go.
- Line with Wax Paper: Put food-safe wax paper inside to keep the cookies safe from the paper.
Presentation Tips
To make your envelopes extra special:
- Hand-lettering: Write the person’s name on the envelope for a personal touch.
- Rubber Stamps: Use holiday stamps to decorate the envelope.
- Color-coding: Use different colors or washi tape to show which cookies are inside.
- Decorative Borders: Add washi tape around the edges for a festive look.
| Material | Purpose |
|---|---|
| Decorative Paper/Cardstock | Envelope Material |
| Envelope Template/Measurements | Design Guide |
| Scoring Tool | Creating Crease Lines |
| Food-safe Wax Paper | Protecting Cookies |
14. Cookie Gift Tags
Make your holiday cookie gifts special with custom tags. These tags are not just labels. They also add fun to your presents.
Materials Needed
| Material | Description |
|---|---|
| Rolled Cookie Dough | Suitable for cut-outs |
| Cookie Cutters | In tag shapes |
| Small Alphabet Stamps | Or embossing tools, food-safe |
| Edible Markers | For decoration |
| Royal Icing | For decoration |
| Small Hole Punch | Designed for cookies |
| Ribbon or Twine | For hanging |
Assembly Instructions
Begin by cutting out shapes from cookie dough. Use cookie cutters in tag shapes. Then, add messages with alphabet stamps or embossing tools.
Bake the cookies. Decorate them with royal icing and edible markers. Make a hole in each tag and tie with ribbon or twine.
Presentation Tips
Use these tags to show what kind of cookie is inside. You can also make tags with names for each person. Or, make tags that look like holiday shapes.
15. Festive Cookie Baskets
Making a cookie gift basket is a fun holiday activity. It can make your cookies a beautiful gift or a centerpiece. A basket full of different cookies looks amazing.
Preparing the Basket
You need a basket, filler like shredded paper, and wrapping for each cookie. You’ll also need picks, cellophane, ribbon, and tags.
Assembly Instructions
First, fill the basket with paper. Then, put the cookies in a pretty way. Use picks to keep them apart. Wrap it all up with cellophane, ribbon, and a tag.
| Material | Purpose |
|---|---|
| Basket | Base of the gift |
| Shredded Paper/Excelsior | Filler material |
| Decorative Picks/Dividers | Separate cookie types |
| Cellophane | Outer wrapping |
| Ribbon | Finishing touch |
Presentation Tips
Try color-coordinated or “cookies around the world” themes. Add height and non-edible items. Personal labels for each cookie make it special.

16. Holiday Themed Cookie Crates
For a rustic and charming way to gift your holiday cookies, use wooden cookie crates. These crates are unique and eco-friendly. They add warmth and homespun charm to your gifts. They’re perfect for the holiday season and can be customized for your theme.
Materials Needed
To make your holiday-themed cookie crates, you’ll need:
- Small wooden crates (available at most craft stores)
- Food-safe liner materials (such as parchment paper or decorative liners)
- Holiday-themed tissue paper
- Natural embellishments like pine cones, cinnamon sticks, or evergreen sprigs
- Rubber stamps and ink for decorating the wood
- Twine or raffia for securing the crate
- Miniature ornaments or other decorative items
- Optional: chalkboard paint for labeling sections
Assembly Instructions
To assemble your cookie crates, start by preparing the crates. Make sure they are clean and dry. If needed, apply a food-safe sealant to protect the wood. Line the crate with your chosen liner material, covering the bottom and sides.
Arrange your cookies in attractive layers. Use tissue paper or other materials to separate the layers and prevent breakage. Secure the cookies to prevent movement during transport.
Presentation Tips
To enhance your cookie crate presentation, consider these tips:
- Create a miniature “cookie pantry” by labeling sections with chalkboard paint or stickers.
- Add themed elements like toy nutcrackers, miniature trees, or festive figurines.
- Incorporate natural materials like evergreen branches, dried orange slices, or holly for a festive touch.
- Personalize the crate with stamped or painted messages on the wood.
By following these steps, you’ll create a beautifully packaged gift. It’s both impressive and reusable, making it a thoughtful present for the holiday season.
Unique and Unexpected Packaging
Thinking outside the box makes cookie gifts unforgettable. Creative cookie containers and unusual cookie packaging make gifts special during the holidays.
Using innovative cookie presentation shows off the giver’s creativity. For example, cookies in vintage tea cups or mason jars are charming and nostalgic.
| Packaging Idea | Description |
|---|---|
| Vintage Tea Cups | Fill vintage tea cups with cookies for a charming, nostalgic gift. |
| Mason Jars | Layer cookies and decorations in mason jars for a colorful presentation. |
“The way we package our gifts can be just as meaningful as the gifts themselves.”
These unique ideas surprise and delight people. They also keep cookies safe and fresh. Choosing the right packaging makes memories last.
17. Miniature Cookie Houses
Creating miniature cookie houses is a fun way to package Christmas cookies. It combines the joy of giving with the magic of the holiday. These tiny houses are not just containers but also treats in themselves.
Materials Needed
You’ll need a strong cookie dough recipe, like gingerbread or chocolate. You also need templates for house parts, rolling tools, and a sharp knife or cookie cutters. Royal icing for “glue” and candies for decoration are also needed.
Don’t forget a food-safe cardboard base and bags for storing cookies. You can also use mini lights or edible metallic paint for extra fun.
Assembly Instructions
Start by baking the house parts according to your template. Make sure they fit right and are the right shape. Use royal icing to stick the parts together, letting them dry well between steps.
Make sure the house has ways to get inside, like removable roofs or doors. Fill the house with cookies and make sure the inside is safe to eat.
Presentation Tips
Decorate your cookie houses with gingerbread designs or modern styles. Add personal touches like family names or special dates. You can even add lights or sounds to make it more special.
18. Stacked Cookie Towers
Building stacked cookie towers is like art. It mixes cooking with building. It’s great for the holidays, making gifts special.
Materials Needed
- Cookies in descending sizes
- Sturdy base plate or board
- Food-safe adhesive like royal icing
- Decorative elements for between layers
- Cellophane for wrapping
- Ribbon
- Sturdy box for transport
- Optional: edible metallic spray or decorative picks
Assembly Instructions
Begin with the biggest cookie on the base. Use royal icing to hold each layer. For tall towers, use dowels or straws for support.
Presentation Tips
Add color and themed decorations
Follow these steps for a stunning cookie tower. It will wow everyone. Perfect for gifts or holiday parties.
19. Cookie Sleighs
Make a fun holiday display with cookie sleighs. They are both containers and decorations. Use rectangular cookies, candy canes, and royal icing for a magical look.
Materials Needed
To make a cookie sleigh, you need:
| Material | Description |
|---|---|
| Rectangular cookies | For the sleigh base and sides |
| Candy canes or chocolate-covered cookie sticks | For the sleigh runners |
| Royal icing or melted chocolate | For “glue” |
| Miniature cookies | To fill the sleigh |
| Cellophane | For wrapping |
| Optional: tiny toy reindeer or Santa figures | For decoration |
Assembly Instructions
Begin by laying out rectangular cookies for the base and sides. Use royal icing or melted chocolate to hold them together. Then, add candy canes or chocolate sticks as runners.
Presentation Tips
Make your sleigh stand out with a “Santa’s delivery” theme. Use different cookie types and add personal touches like name flags. You can also include fun extras like candy “reins” or tiny gifts.
20. Cookie Advent Calendars
Make the holiday season special with a custom cookie advent calendar. It’s a fun way to enjoy Christmas and a great gift for friends and family.
Materials Needed
You’ll need a few things to make a cookie advent calendar. You’ll need a strong backing board, 24 small containers, and numbers. You’ll also need glue, decorations, and cookies that fit in the containers.
- Sturdy backing board or display structure
- 24 small containers (mini bags, boxes, or envelopes)
- Numbering materials (stickers, stamps, or markers)
- Adhesive (glue, tape, or a hot glue gun)
- Decorative elements (ribbons, bows, holly, etc.)
- Cookies (sized for small packages)
- Optional: ribbon hangers, battery-operated lights
Assembly Instructions
Building your cookie advent calendar is fun and creative. You can make it hang on a wall, stand on its own, or even look like a house. Here’s how to start:
- Prepare your backing board or display structure.
- Fill the 24 small containers with cookies, making sure they’re sealed to stay fresh.
- Number the containers from 1 to 24 and attach them to the backing board in your design.
- Decorate the calendar with your chosen decorative elements.
- If desired, add ribbon hangers or battery-operated lights to enhance the display.
Think about keeping the cookies fresh. Choose cookies that stay good for a long time. Or, use different kinds of cookies to keep things interesting.
Presentation Tips
How you present your cookie advent calendar is important. You can use Christmas themes, winter scenes, or tell a story as you open each door. Adding personal touches makes it even more special.
| Theme | Description | Decorative Elements |
|---|---|---|
| Traditional Christmas | Classic Christmas imagery and colors | Red and green ribbons, holly, Christmas trees |
| Winter Wonderland | Frosty, snowy scenes | Blue and white decorations, snowflakes, icicles |
| Progressive Story | A story unfolds with each door | Numbered doors, storyline elements, colorful characters |
By following these steps and tips, you can make a beautiful cookie advent calendar. It’s a fun way to count down to Christmas, making the holiday season special for everyone.
Conclusion: Spreading Holiday Cheer One Cookie Package at a Time
As the holiday season comes, making homemade cookies is a great way to share love. How you present these treats makes the gift even better. It shows care and creativity, making the gift special.
Think about what kind of cookies you have and who you’re giving them to. You might need to pack them fast or keep them safe. Mixing different ideas can make your gift unique.
Seeing cookie packaging as part of the gift makes your baking more special. Use pretty tins or fabric pouches to make it stand out. It’s a fun way to share joy and make the holidays brighter.