17th Birthday Cake: Top Picks for Teens
Surprising fact: Nearly 70% of teens say the dessert sets the mood for their party, making the centerpiece a social media moment people remember for years.
This Website contains affiliate links. That means I may earn a small commission if you purchase through my links, at no extra cost to you.
Seventeen sits between two big milestones, and a well-chosen dessert can make that in-between year feel purposeful and modern.
This short guide curates top picks that teens actually ask for today. Expect layered chocolate builds, light cheesecake blends, fandom themes, permit-inspired motifs, minimalist styling, and crowd-friendly sheet options.
Flavor-forward ideas focus on deep cocoa with a hint of coffee, bright vanilla with fresh berries, and cream-cheese fillings that taste rich yet airy.
We also cover on-trend finishes — glossy ganache, neat drip edges, and tidy buttercream lines — plus quick tips on personalization, lead times, delivery, and chilling so the centerpiece stays camera-ready.
Key Takeaways
- Choose designs teens will share: layered, themed, or minimalist.
- Prioritize flavors that photograph and satisfy guests.
- Use finishes like ganache or drip for a grown-up look.
- Personalize with colors, toppers, and textures to feel seen.
- Plan delivery and refrigeration to keep the centerpiece fresh.
Why Seventeen Still Deserves a Standout Cake
That in-between year deserves a dessert that tells the story of who they’ve become this past twelve months.
Seventeen is formative: it’s a bridge year that shows growing independence, new responsibilities, and rising confidence. A centerpiece can reflect that shift with a thoughtful, tasteful design.
Pick one highlight from the past year—falling for cooking, a big academic win, or a favorite book series—and let that idea guide colors, texture, and a single meaningful topper.
For teens getting a learner’s permit, small nods work best. A tiny fondant road sign or an edible permit plaque feels aspirational without turning the whole event into a theme party.
Keep designs mature with subtle motifs and tonal palettes. Choose flavors that match their tastes—bold chocolate, bright citrus, or vanilla with berries—so the dessert photographs as well as it tastes.
Quick gut-check: if the look reflects who they are now and what they want next, it will feel right. Include the teen in decisions and plan transport and storage so the design stays crisp on the big day.
Signature Pick: 5‑Layer Midnight Chocolate Cake with Cheesecake Filling
A towering five-layer midnight chocolate build makes an instant statement at any teen celebration. This version balances dramatic height with clean, bakery-style finishes so it photographs beautifully from every angle.
Flavor profile: Moist black cocoa layers—or regular cocoa boosted with black gel—are enriched with hot coffee, buttermilk, oil, and vanilla for a velvety crumb. The filling is a light cheesecake folded with whipped cream for a fluffy, airy lift that keeps every bite balanced.
Design details: Smooth pink buttercream wraps the stack for contrast. A glossy dark ganache made with butter and a touch of light corn syrup or honey creates controlled drips. Piped whipped-cream swirls and Oreo halves add playful texture and height.
Pro assembly moves
- Bake and cool; trim and halve layers so the stack reads neat and tall.
- Weigh batter for even layers; wrap layers before chilling to lock moisture.
- Crumb coat, chill, final coat, chill again, then add ganache drips and decorations.
- Use a narrow, tall turntable to stabilize the stack and keep edges sharp.
- Spoon small amounts of ganache at the edge for a restrained drip, and place Oreo halves after ganache sets slightly to prevent sliding.
Serving note: Tall layers give generous slices; serve slightly narrower wedges to stretch portions without losing presentation.
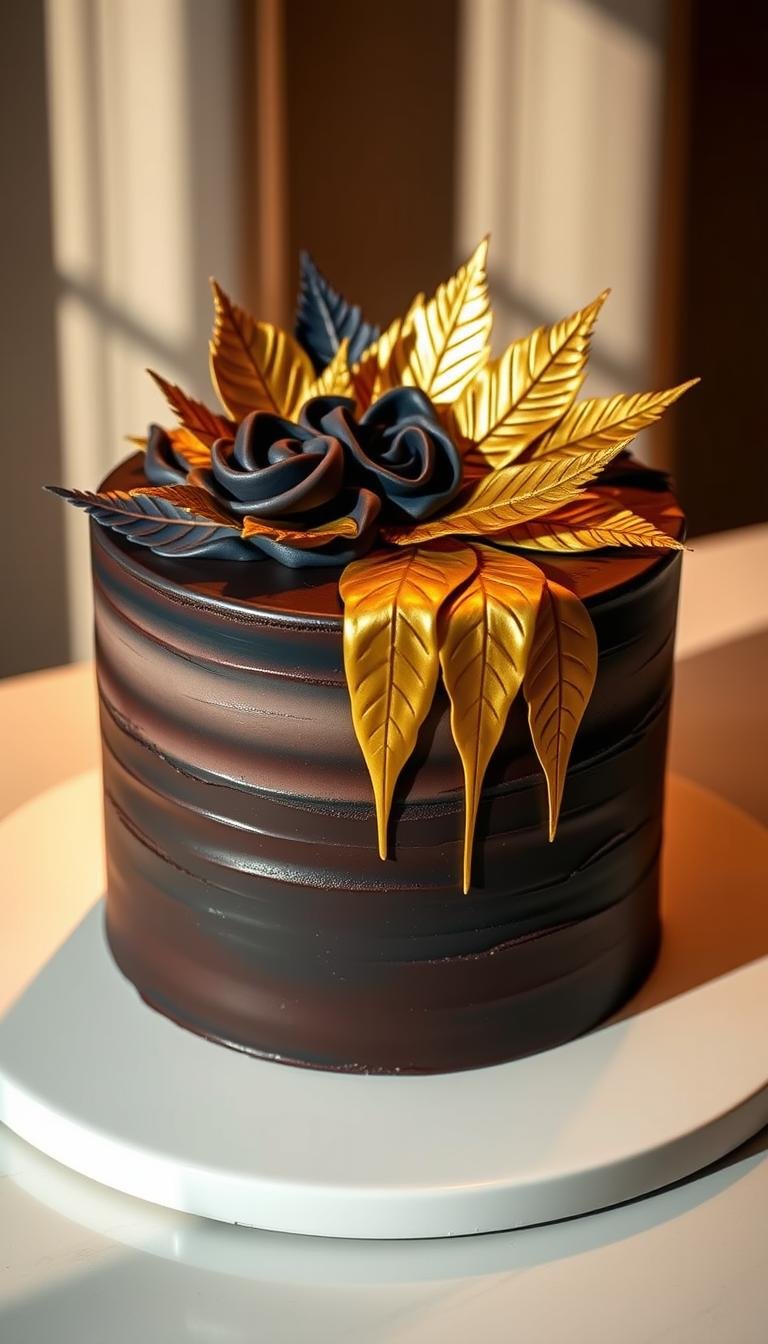
Classic Chocolate Reimagined for a 17th Birthday
A dark, dramatic chocolate build can make the year feel bold and photo-friendly.
Flavor and texture: Buttermilk adds a subtle tang and tender crumb while hot coffee deepens cocoa notes without extra sweetness. Use a dash of espresso powder if you want more aroma but not a coffee taste.
Color and drama: For a midnight crumb, choose black cocoa or mix regular cocoa with a touch of black gel. That creates a photo-ready, dramatic slice ideal for this milestone.
Practical finishing and assembly
- Pair with a light cream‑cheese or vanilla buttercream to keep the palate balanced.
- Finish ultra-smooth with sharp edges and minimal piping for a modern teen look.
- Accents: a single-number topper, metallic sprinkles, or an elegant ribbon keep it elevated.
- Prep pans and weigh batter for even layers; avoid overmixing to protect crumb structure.
- Try thin chocolate mousse or raspberry coulis as fillings for contrast without losing chocolate focus.
Cheesecake Twist Layers for Teens Who Love Cream Cheese
A cream-cheese twist gives each bite tang, while whipped cream keeps the texture light.
What it is: The filling blends softened cream cheese, a touch of butter, and sifted icing sugar. Freshly whipped cream is folded in last to make the mix airy and less buttery.
Lightened filling with whipped cream for an airy bite
The texture advantage is clear: cream cheese adds tang and body, and folded whipped cream keeps slices teen-friendly and fluffy.
- Chill the filling briefly before stacking to keep clean layers and limit sliding.
- Sift powdered sugar to avoid grit and to fine-tune sweetness precisely.
- Pairs best with deep cocoa layers to balance intense chocolate and airy creaminess.
- For transport, pipe a small buttercream dam at the edge to prevent bulge.
- Add vanilla bean, lemon zest, or a pinch of salt to sharpen flavor.
| Tip | Why it matters | When to apply |
|---|---|---|
| Room-temp dairy | Smoother mix, no lumps | Before folding in whipped cream |
| Thin filling layers | Prevents compression, keeps slices tidy | Between each tier |
| Refrigerate after crumb coat | Locks structure for final smoothing | Before final finish and transport |
Decor idea: Smooth white or pastel outer buttercream shows off the interior contrast when you slice the cake.
Pop‑Culture Fandom Cakes Teens Can’t Stop Sharing
A single recognizable topper can turn a party dessert into a social feed magnet.
Madonna’s huge Labubu-style centerpiece shows how a pop moment can drive buzz. Use one bold figure or logo as the visual anchor and avoid busy side patterns. That focus helps photos read clearly on phones and in stories.
Sides should stay calm: smooth, minimal buttercream lines let the topper command attention. Pull palette colors from the fandom art, then mute them slightly for a more editorial, teen-friendly look.
From viral characters to celeb moments: the Labubu‑size statement
Choose edible prints, wafer paper, or 3D fondant accents that photograph well. Blend the pop reference with personal touches—initials, a jersey number, or a quote—so the result feels unique rather than generic.
How to balance bold toppers with clean buttercream lines
Keep figurines sturdy and food-safe so kids can lean in for photos without breaking details. Place tall toppers after transport and secure them with skewers or supports. Finally, set a neutral backdrop and good lighting for the cake-cut moment to boost shareability.
- Anchor with one high-impact topper, not many small motifs.
- Use muted fandom colors for a grown-up finish.
- Add subtle aromatic cues like citrus-zested vanilla to complement photos without overpowering scents.
| Element | Why it matters | Practical tip |
|---|---|---|
| Single topper | Creates a clear focal point in photos | Choose a character or logo scaled to cake height |
| Minimal sides | Prevents visual clutter and sharpens images | Smooth buttercream with one tonal color |
| Figurine safety | Protects small guests and preserves detail | Use food-safe supports and attach after travel |
Driver’s Permit Cake: License to Celebrate
Marking a learner’s permit can be stylish — not childish — with restrained graphics and modern finishes.
Create a sleek centerpiece by featuring an edible permit plaque with the teen’s name and a clean, license-inspired layout. Keep typography sharp so names and numbers read well in photos.
Edible “permit” plaques and fondant road signs
Add small fondant or gumpaste road signs—stop, yield, speed limit—scaled for subtlety, not a toy look. Place them near the plaque or tuck one into piped buttercream for depth.
Photo‑worthy color palettes that feel grown‑up
Choose charcoal, white, and one accent (cobalt or blush) for a modern edge. Use thin metallic lines or edible silver leaf to mimic road striping in a refined way.
- Tier suggestion: minimal bottom tier, graphic top tier for balance during transport.
- Flavor pairing: dark chocolate with vanilla‑bean buttercream for a sophisticated profile.
- Styling tip: set the 17 topper at a diagonal for implied motion and stage with keys or a handbook.
“Designs that read mature in photos help the milestone feel like a grown-up step.”
| Element | Why it works | Practical tip |
|---|---|---|
| Permit plaque | Creates a clear, personal focal point | Print edible ink on sugar sheet or pipe crisp lettering |
| Scaled road signs | Suggests theme without clutter | Keep signs under 1.5 inches and matte-finish |
| Metallic striping | Elevates the look and reads well on camera | Apply thin edible paint lines after chilling |
Sports and Hobby Cakes That Spotlight Their Year
Turn last year’s standout interest—a sport, instrument, or gaming streak—into a single, refined emblem that tells the story.
Keep the surface calm: use tonal buttercream and add one focused topper, patch, or embossed emblem rather than an all-over pattern. This reads mature and photographs well.
Translate a defining hobby—soccer, guitar, baking, robotics—into one emblem. Small team numbers, initials, or a neat plaque add personalization without clutter.
For creative teens, try palette-knife textures or soft watercolor blends. Gaming or tech fans benefit from matte fondant icons or sleek controller silhouettes.
“A single motif keeps the design meaningful and grown-up.”
- Match flavor pairs to the interest: chocolate with cream-cheese filling or lemon‑vanilla for something lighter.
- Keep non-edible props removable and food-safe to protect guests and presentation.
- For mixed-age events, secure edges and choose durable decor to avoid smudges from kids at the table.
| Format | When to use | Practical tip |
|---|---|---|
| Single-tier tall | Small gatherings | Clean emblem on side or top |
| Two tiers | Team parties or big groups | Bottom minimal, top graphic |
| Props in scene | Photos and storytelling | Stage with ball, instrument, or book stack |
Elegant Minimalist Cakes for Teens Who Hate Themes
For teens who prefer subtlety, a single-color palette and satin finish make the dessert feel intentionally mature.
Tonal palettes, smooth finishes, and subtle textures
Favor one color family—ivory to blush or slate to black—and build depth with tone-on-tone piping or micro textures. Keep designs calm so photos read clearly.
Aiming for razor-sharp edges and a satin buttercream finish creates a boutique patisserie look. Use restrained accents: a slim ribbon, a simple “17” topper, or a tiny spray of edible pearls for polish.
Consider subtle surface treatments like sugar velvet, fine comb lines, or micro terrazzo for close-up dimension. Keep flavors refined: deep cocoa or vanilla bean with Swiss meringue or light cream-cheese filling.
Style the display on a pedestal with a neutral backdrop so the silhouette reads across the room. For tall single tiers, add a hidden support straw or dowel to protect structure during movement.
Plan cutting lines in advance to preserve minimalist faces for photography. Offer matching mini desserts—macarons or simple cupcakes—to echo the palette without adding visual noise.

“A calm design feels intentional and photographs like an editorial piece.”
Over‑the‑Top Oreo and Cookies‑and‑Cream Cakes
A cookies-and-cream silhouette reads instantly on camera, especially when dark crumbs meet a pastel finish.
Design note: Wrap the signature stack in pink buttercream, add a glossy ganache drip, and top with piped whipped cream swirls anchored by half‑Oreo toppers.
Fold finely crushed Oreos into a cream‑cheese or vanilla filling for texture and familiar flavor. For a speckled exterior, mix micro‑crumbs into buttercream for a tasteful stucco effect.
Reinforce crunch by pressing a thin cookie crumb layer under each tier. Chill the dessert before serving and slice with a hot, dry knife to cut through cookie bits cleanly.
- Balance sweetness with a pinch of salt in buttercream.
- Stabilize whipped cream with mascarpone or a stabilizer for long timelines.
- For photos, arrange Oreo halves symmetrically and use full cookies only at strong support points.
“Dark crumbs against pastel surfaces make cookies-and-cream reads immediate and shareable.”
Berry‑Forward Vanilla Cakes for Summer Birthdays
For summer gatherings, a vanilla base with fresh berries keeps the dessert fresh and festive.
Choose a vanilla bean sponge for aromatic lift that complements strawberries, raspberries, or blueberries without stealing the show.
Layer fruit with stabilized whipped cream or a light cream‑cheese frosting to hold structure on warm afternoons. Macerate berries lightly with a pinch of sugar and lemon zest to brighten flavor and control juices.
- Opt for a semi‑naked finish to signal freshness and a relaxed summer look.
- Use a simple ring of fruit on top; avoid tall piles that can sink into soft toppings.
- Brush cut fruit with a thin clear gel to keep colors vibrant in sunlight.
Keep tiers modest in height—two stable layers work best al fresco. Chill the dessert until shortly before slicing to preserve clean layers and food safety for the day.
“A light, fruit-forward approach reads fresh in photos and tastes bright on a hot afternoon.”
| Step | Why it helps | Practical tip |
|---|---|---|
| Macerate berries | Controls moisture, boosts flavor | Use 1 tsp sugar + 1/4 tsp lemon zest per cup |
| Stabilize cream | Keeps layers firm in heat | Add a touch of mascarpone or gelatin |
| Serve with coulis | Guests can add extra fruit flavor | Provide small pitcher on the table |
Styling note: Choose light linens and pale servingware to reflect heat and keep the dessert station inviting.
Offer slices promptly and keep leftovers refrigerated to maintain texture and safety for later guests. A well-made, berry-forward vanilla cake feels seasonal and effortless for outdoor celebrations.
17th birthday cake Ideas with Trendy Drips and Ganache
Controlled drips are a finishing move that makes a dessert feel intentional. Use them to add contrast, shine, or a playful edge while keeping the surface tidy.
Chocolate drips deliver classic gloss and pop against dark layers or cookies-and-cream builds. They add rich contrast and photograph well when the crumb is dramatic.
Colored ganache works best for monochrome or pastel palettes where a cocoa tone would disrupt the look. Match the hue to toppers—berries, Oreos, or minimalist number picks—to tie the whole table together.
Practical drip tips
- Make glossy chocolate ganache with dark chocolate, butter, and a small amount of light corn syrup or honey for extra sheen.
- Chill the frosted cake thoroughly before applying drips so each spill ends in a sharp line to the end of the drip.
- Test viscosity on the back side first; adjust thickness so drips stop where you want them.
- Use a squeeze bottle for uniform beads; spoon on for varied, artisanal drips.
- Keep top coverage thin to avoid pooling; let ganache set fully before boxing for transport.
| Choice | Best for | Quick tip |
|---|---|---|
| Chocolate drip | Dark builds, cookies-and-cream | Add a touch of corn syrup for shine, then chill |
| Colored ganache | Pastel or tonal palettes | Match topper color and test on a scrap |
| Application tool | Control vs style | Squeeze bottle for control; spoon for texture |
“Controlled asymmetry—slightly varied drip lengths—feels intentional and modern.”
Finish with a final visual check and secure toppers after the ganache sets to the end. Small choices at this stage make a big difference in photos and at the end of the night.
Custom Scent‑Forward Cakes: Aromas That Fill the Room
A thoughtfully scented dessert fills a room the moment it’s unboxed. Aroma is an underrated layer of design—batter, filling, and frosting all contribute to how guests recall the event.
Chocolatey scents come from high-quality cocoa and a touch of espresso; they read warm and familiar. Use real dark chocolate and a small amount of instant espresso to amplify cocoa without adding coffee flavor.
Citrus zests—lemon, orange, or grapefruit—brighten frostings and signal celebration as soon as someone enters the room. Zest the fruit fresh and fold it into buttercream or curd for a clean, lively perfume.
Warm vanilla notes come from pure vanilla bean or extract. They offer a bakery-like comfort that pairs well with minimalist designs and tonal palettes.

Practical tips to plan aroma
- Plan flavors that naturally project aroma: cocoa + espresso, or real vanilla bean.
- Balance intensity—too much extract overwhelms; fresh zest is subtler and cleaner.
- Test levels on a small batch before the event to confirm impact.
- Serve slightly warm (not room-temp) when appropriate so smells can bloom at the table.
- Consider complementary drinks—coffee or citrus mocktails—to amplify the scented moment.
“A distinctive, pleasant aroma becomes part of the party’s identity.”
Sweet‑Savory Surprises: Salted Caramel and a Touch of “Corn” Syrup Gloss
A whisper of salted caramel can lift a rich chocolate stack into something grown-up and memorable.
Layering tip: Add a thin salted caramel ribbon between tiers to introduce sweet‑savory depth without overloading sweetness.
A small dash of light corn syrup in chocolate ganache or caramel glaze increases shine and improves sliceability. It smooths the finish so drips look glossy and controlled.
Pairing advice: match salted caramel with deep chocolate and a lightly tangy cream‑cheese filling to balance richness and keep slices bright.
Practical cautions:
- Avoid heavy caramel on outer surfaces in warm rooms; keep most caramel inside layers for stability.
- Use piping dams at edges to contain fluid fillings and preserve crisp silhouettes during transport.
- Chill briefly after adding caramel layers so the filling sets before final coating.
Finish smart: scatter finishing salts very sparingly on top drips or caramel accents to telegraph flavor without overpowering the look. Consider a small nutty counterpoint—toasted pecans or hazelnuts—on a portion of the top for optional texture.
“Rinse and dry the knife between slices to keep caramel edges neat and presentable.”
Styling note: Keep decor neutral-toned so the caramel color photographs warm and sophisticated.
Cake for the Group: Easy‑Slice Sheet Cakes Teens Still Love
A sheet-format dessert simplifies serving while still showing off signature flavors and finishes.
Why choose a half- or full-sheet? They scale for teams, clubs, or backyard crowds and make uniform portions simple. The same fillings and finishes—cookies-and-cream, ganache edges, and whipped-cream accents—translate cleanly to a slab build.
End-of-day party serving tips for big crowds and kids at heart
Use a thinner frosting layer and targeted decor so each piece stays balanced and not overly sweet.
- Score the top lightly before cutting to guide even slices and protect the look during first cuts.
- Keep the slab chilled until 15–20 minutes before serving so buttercream softens for smooth slicing.
- If adding a drip, limit it to the perimeter and let it set fully to avoid messy end pieces.
- Offer disposable sturdy plates and extra napkins for fast, tidy service at the end of a long day.
- Provide a labeled allergen card near the dessert station and consider a second flavor tray—vanilla‑berry—for mixed preferences.
- Use a large, sharp chef’s knife and wipe between cuts to keep corners clean and prevent crumb drag.
| Need | Why it helps | Quick tip |
|---|---|---|
| Half- or full-sheet | Feeds many with uniform portions | Order or bake based on guest count + 10% buffer |
| Thin frosting | Keeps slices balanced and less sweet | Decorate with focused accents, not full coverage |
| Chill before serving | Simplifies slicing and preserves design | Remove 15–20 minutes prior to cutting |
| Perimeter drip | Adds polish without causing mess | Apply after chilling and let set fully |
Ordering and Timing in the United States
Timing makes or breaks a custom order — start the booking clock early to avoid last-minute stress.
Plan a clear timeline that covers the tasting, deposit, design sign-off, and a final 48-hour reconfirmation. Many bakeries require days to weeks for custom work; complex toppers or edible prints can add extra lead time.
Lead times, delivery windows, and keeping cakes fresh
Book custom designs 2–4 weeks ahead; allow more time for specialty toppers or printed elements. Confirm delivery windows early, especially for weekend birthday events, so setup and photos align.
- Refrigeration: Store cream‑cheese or whipped-cream components chilled in a sturdy cake box to protect structure and prevent odor transfer.
- Room rest: Bring the dessert out briefly before serving so textures soften and flavors bloom without risking melt.
- Stabilization: Ask about dowels, boards, and transport supports for multi-layer builds.
- DIY note: If baking at home, bake one day earlier, assemble and chill, then finish decor the morning of the event.
“Confirm delivery windows early to avoid timing conflicts on the day.”
| Step | When | Why it matters |
|---|---|---|
| Tasting & design | 4–6 weeks before | Lock flavors and visuals |
| Deposit & sign-off | 2–4 weeks before | Guarantees materials and slot |
| 48-hour reconfirm | 2 days before | Final logistics and delivery window |
Prepare a level staging area at home away from sunlight. Keep a small repair kit (offset spatula, piping bag with matching buttercream, paper towels) for quick touch-ups on arrival.
Conclusion
Cap the celebration with a centerpiece that balances personality, polish, and practical service needs.
Choose a look that reflects who they are this year—from midnight chocolate with light cheesecake filling to minimalist, fandom, or permit-inspired details. Match flavor structure so slices feel rich but airy: deep cocoa paired with whipped cream or bright vanilla with fresh berries.
Elevate the finish with controlled drips, smooth buttercream, and a single smart topper. Plan ordering, storage, and transport so the centerpiece arrives pristine and stays camera-ready.
Finally, add subtle aromatic cues—warm vanilla, citrus zest, or cocoa depth—so the centerpiece delights both sight and scents.