10 Homemade Garlic Bread Recipes Your Family Will Love
Garlic bread, a staple in many cuisines, has become a beloved accompaniment to meals worldwide. With over 70% of households in the United States enjoying some form of garlic bread at least once a week, it’s clear that this simple yet flavorful dish has captured the hearts of many. Whether you’re looking to elevate a weeknight dinner or impress your guests at a gathering, the right garlic bread recipe can make all the difference.
This comprehensive guide introduces you to ten mouth-watering homemade garlic bread recipes that are sure to become family favorites. From classic Italian-style to innovative variations, these recipes are designed to please everyone at your table.
Key Takeaways
- Discover 10 delicious homemade garlic bread recipes.
- Explore classic Italian-style and innovative garlic bread variations.
- Learn about essential ingredients and tools for making garlic bread.
- Understand the best storage methods for homemade garlic bread.
- Find perfect pairings to elevate your meal with garlic bread.
The Universal Appeal of Homemade Garlic Bread
There’s something undeniably special about the aroma and taste of freshly baked garlic bread made at home. The irresistible scent that fills the kitchen, the satisfying crunch of the crust, and the rich, buttery garlic flavor all combine to create a sensory experience that is hard to resist.
Homemade garlic bread has a universal appeal that transcends age and cultural boundaries. It’s a comfort food that evokes nostalgia and brings families together at the dinner table. The process of making garlic bread at home can be an enjoyable cooking activity that involves the whole family, creating both delicious food and meaningful memories.
Compared to store-bought alternatives, homemade garlic bread offers superior quality, flavor, and customization options. By making it at home, you can control the ingredients, adjust the garlic to your taste, and ensure that it’s freshly baked. This results in a more satisfying and enjoyable dining experience.
| Benefits of Homemade Garlic Bread | Store-bought Garlic Bread | Homemade Garlic Bread |
|---|---|---|
| Customization | Limited | High |
| Freshness | Often stale | Always fresh |
| Flavor | Preservative-rich | Rich, buttery garlic flavor |
In conclusion, the universal appeal of homemade garlic bread lies in its ability to bring people together, create lasting memories, and provide a delicious, comforting meal. Whether served as a side dish or a standalone treat, homemade garlic bread is sure to become a family favorite.
Essential Ingredients and Tools for Perfect Garlic Bread
The foundation of great garlic bread lies in the quality of its ingredients and the tools used to prepare it. To achieve that perfect blend of flavors and textures, it’s crucial to understand what makes garlic bread exceptional.
Basic Garlic Bread Ingredients
At its core, garlic bread requires a few simple yet high-quality ingredients. Fresh garlic is a must, offering a depth of flavor that garlic powder can’t match. However, garlic powder can be used as a substitute when fresh garlic isn’t available. The choice between salted and unsalted butter depends on personal preference, with salted butter adding a richer flavor. Olive oil can be used as an alternative to butter for a different twist. Herbs like parsley, oregano, and thyme add complexity, while salt and pepper enhance the overall flavor. Optional ingredients like cheese, chili flakes, or chopped nuts can elevate the basic recipe.
“The secret to great garlic bread is in the quality of its ingredients,” says a renowned chef. “Using fresh garlic and good quality butter makes all the difference.”
Kitchen Tools You’ll Need
Having the right kitchen tools is just as important as having the right ingredients. A serrated knife is essential for cutting the bread cleanly, while a garlic press or mincer ensures that garlic is evenly distributed. Mixing bowls are necessary for combining ingredients, and a pastry brush is used to apply butter or olive oil evenly. A baking sheet lined with aluminum foil makes cleanup easier and helps achieve a crispy crust.
- Serrated knife for cutting bread
- Garlic press or mincer for garlic preparation
- Mixing bowls for combining ingredients
- Pastry brush for applying butter or olive oil
- Baking sheet and aluminum foil for baking
Tips for Selecting the Best Bread
Choosing the right bread is critical for making great garlic bread. French or Italian bread are popular choices due to their texture and flavor. The bread should be fresh and have a crusty exterior with a soft interior. Sourdough is another excellent option, offering a tangy flavor that complements garlic well. Consider the crust thickness and the texture of the bread, as these factors affect how the garlic butter is absorbed and how the bread bakes.
10 Homemade Garlic Bread Recipes Your Family Will Love
Discover a world of flavors with our collection of 10 homemade garlic bread recipes that are sure to delight your family. These recipes offer a range of options, from traditional favorites to innovative variations, catering to different tastes and dietary needs.
Our selection includes classic Italian, cheesy pull-apart, herb-infused, and more. Each recipe has been carefully tested to ensure it’s approachable for home cooks of various skill levels.
| Recipe | Description | Key Ingredients |
|---|---|---|
| Classic Italian Garlic Bread | A traditional Italian-style garlic bread | Garlic, butter, Italian bread |
| Cheesy Pull-Apart Garlic Bread | A cheesy, pull-apart version of garlic bread | Mozzarella, parmesan, garlic |
| Herb-Infused Garlic Bread | Garlic bread infused with fresh herbs | Fresh herbs, garlic, olive oil |
These garlic bread variations are perfect for family meals and gatherings. With our homemade bread recipes, you can enjoy the perfect combination of flavors and textures.
1. Classic Italian Garlic Bread
Italian garlic bread, with its aromatic flavors and crispy crust, is a beloved accompaniment to pasta dishes and more. This classic recipe brings together the simplicity of Italian cuisine with the richness of garlic and butter.
Ingredients and Preparation
To create an authentic Italian garlic bread, you’ll need a few essential ingredients: a crusty Italian bread loaf, preferably day-old bread, fresh garlic cloves, high-quality butter, parsley, and optional Parmesan cheese. The key to a great garlic bread lies in the balance of its components. For a traditional flavor, use a ratio of about 3 cloves of garlic to 1/2 cup of softened butter.
Preparing the Garlic Butter: Mince the garlic and mix it with softened butter. Add chopped parsley for freshness and a sprinkle of Parmesan for an extra layer of flavor. The garlic butter should be spread evenly onto the bread, ensuring every bite has a rich, garlicky taste.
| Ingredient | Quantity | Purpose |
|---|---|---|
| Italian Bread Loaf | 1 loaf | Base of the garlic bread |
| Garlic Cloves | 3 cloves | Flavor component |
| Butter | 1/2 cup | Richness and moisture |
| Parsley | Chopped, to taste | Freshness |
| Parmesan Cheese | Optional, to taste | Additional flavor |
Step-by-Step Baking Instructions
Preheat your oven to 350°F (175°C). Slice the Italian bread loaf in half lengthwise. Spread the garlic butter mixture evenly onto the cut sides of the bread. Wrap the bread in foil and bake for 10-15 minutes. For a crispy crust, remove the foil and bake for an additional 2-3 minutes.
Kid-Friendly Variations
To make this recipe more appealing to kids, consider reducing the amount of garlic or substituting some of the garlic with a milder ingredient like roasted garlic. Adding extra cheese can also make it more kid-friendly.
Make-Ahead Tips
The garlic butter can be prepared ahead of time and stored in the refrigerator for up to a week. Simply assemble and bake when needed. For busy nights, bake the garlic bread ahead of time and reheat it in the oven wrapped in foil to maintain its texture.
2. Cheesy Pull-Apart Garlic Bread
Elevate your garlic bread game with a cheesy pull-apart recipe that’s as fun to eat as it is delicious. This interactive bread is perfect for family gatherings, game days, or any occasion where you want to serve something special.
Ingredients and Preparation
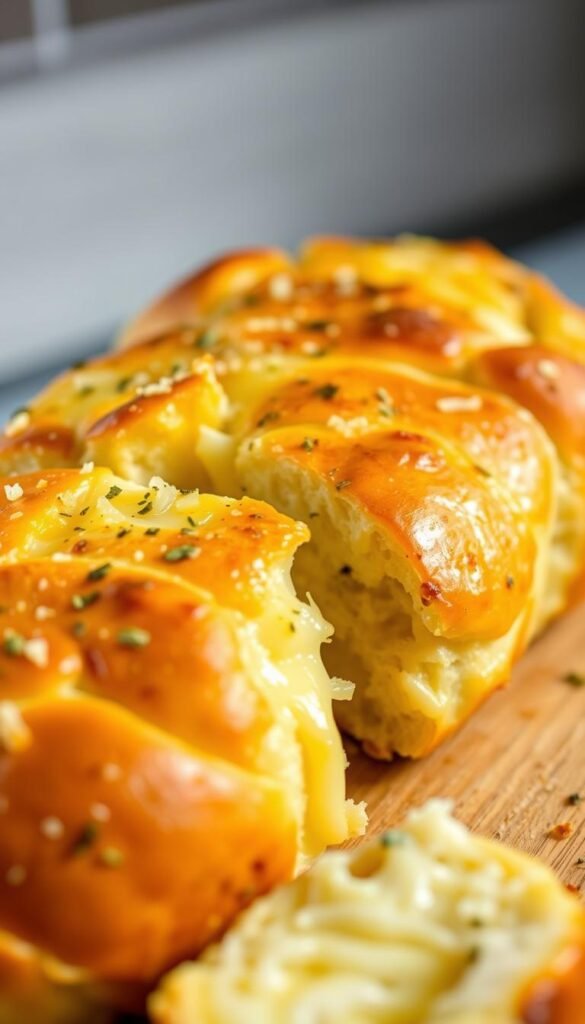
To make this mouth-watering cheesy pull-apart garlic bread, you’ll need a round loaf of Italian or sourdough bread, garlic butter, and a blend of cheeses such as mozzarella, cheddar, and Parmesan. Start by preparing the garlic butter by mixing softened butter with minced garlic and a pinch of salt. Then, make crosshatch cuts on the top of the bread, being careful not to cut all the way through.
The distinctive crosshatch cutting technique is what creates the pull-apart structure. This allows you to stuff the bread with cheese and garlic butter, making it ooze with flavor when baked.
Step-by-Step Baking Instructions
To bake your cheesy pull-apart garlic bread, start by stuffing the cuts with garlic butter and your chosen cheese blend. Wrap the bread in foil and bake at 350°F (175°C) for 15 minutes. Then, remove the foil and continue baking for an additional 5-10 minutes, or until the top is golden brown and the cheese is melted and bubbly.
Cheese Blend Recommendations
For the best flavor and texture, combine cheeses like mozzarella for its stretch, cheddar for a sharp taste, and Parmesan for a salty, umami depth. Experimenting with different cheese blends can help you find your perfect mix.
Serving Suggestions for Family Gatherings
This cheesy pull-apart garlic bread is a showstopper at any family gathering. Serve it alongside your favorite pasta dishes, soups, or as a snack on game day. For a festive touch, consider serving it on a wooden board or with a side of marinara sauce.
3. Herb-Infused Garlic Bread
Discover how incorporating fresh or dried herbs can transform your garlic bread into a gourmet treat. Herb-infused garlic bread is a versatile and flavorful variation that can be tailored to suit any taste or occasion. By combining the richness of garlic with the aromatic qualities of herbs, you can create a truly unforgettable culinary experience.
Ingredients and Preparation
To make herb-infused garlic bread, you’ll need a few key ingredients, including a crusty bread variety, quality butter or olive oil, garlic, and a selection of fresh or dried herbs. Choosing the right bread is crucial, as it will affect the overall texture and flavor of your garlic bread. Consider using a rustic Italian or French bread for its robust texture and mild flavor.
When it comes to herb selection, the possibilities are endless. Popular herb options include rosemary, thyme, basil, and oregano. You can use either fresh or dried herbs, depending on your preference and what’s available. To maximize flavor release, be sure to properly prepare your herbs by chopping or muddling them before mixing with garlic and butter or oil.
Step-by-Step Baking Instructions
To create your herb-infused garlic bread, start by mixing softened butter or olive oil with minced garlic and chopped herbs. Spread this mixture evenly onto your bread, making sure to cover the entire surface. Bake in a preheated oven until the bread is toasted and fragrant, typically between 10-15 minutes depending on your oven and bread type.
Best Herb Combinations
For a Mediterranean twist, try pairing rosemary and thyme. For an Italian-inspired flavor, combine basil and oregano. If you prefer a lighter, fresher taste, mix parsley and dill. These herb combinations will elevate your garlic bread to new heights and provide a deliciously aromatic experience.
Adapting for Picky Eaters
When introducing herbs to picky eaters, start with milder herbs like parsley or basil. You can also incorporate herbs more subtly by mixing them into the butter or oil before spreading on the bread. For a versatile option, create a partially herbed loaf, allowing everyone to choose their preferred level of herb flavor.
4. Sourdough Garlic Bread
For a truly artisanal garlic bread experience, consider using sourdough, with its distinctive tang and chewy texture. Sourdough garlic bread is a perfect blend of flavors, combining the richness of garlic with the complexity of sourdough’s natural yeast.
Ingredients and Preparation
To make sourdough garlic bread, you’ll need a high-quality sourdough loaf, either homemade or from a bakery. The key to a great sourdough garlic bread lies in balancing the tanginess of the sourdough with the richness of garlic butter. You’ll need ingredients like softened butter, minced garlic, and optionally, aged cheeses or roasted garlic to enhance the flavor.
Preparing sourdough for garlic bread involves understanding its unique texture. Unlike other breads, sourdough has a chewier interior and crustier exterior, requiring a slightly different approach to applying garlic butter and baking.
Step-by-Step Baking Instructions
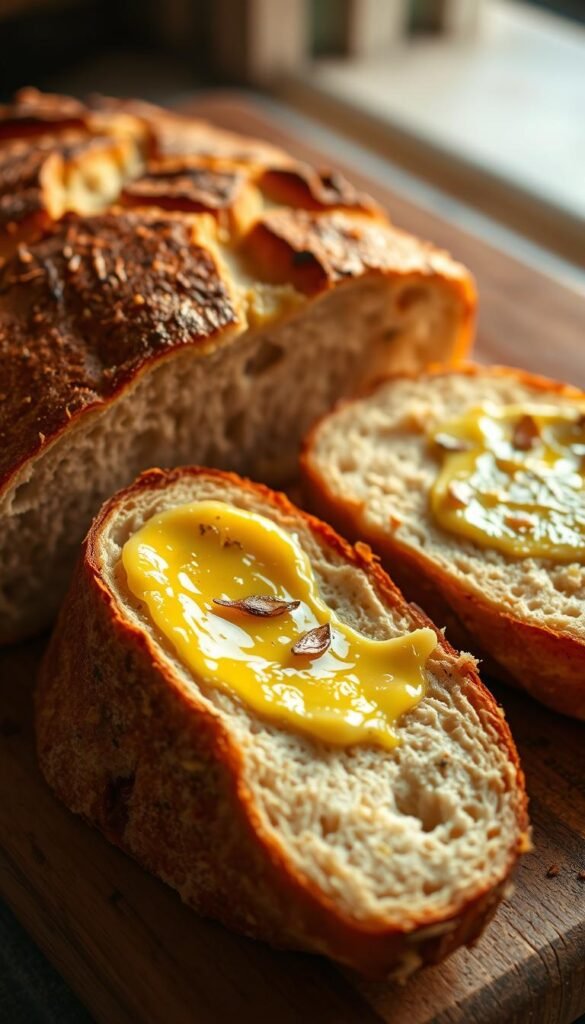
To bake sourdough garlic bread, start by preheating your oven to 375°F (190°C). Slice the sourdough loaf in a way that respects its irregular texture, typically cutting it in half lengthwise or into thick slices depending on the loaf’s shape.
Apply the garlic butter mixture evenly, making sure to get it into the cuts and onto the surface. Bake for 10-15 minutes, or until the bread is toasted and the butter is melted and bubbly.
Working with Sourdough Texture
Sourdough’s chewy interior and crusty exterior require a gentle touch when applying garlic butter. Use a generous amount of butter to ensure it penetrates the bread without making it soggy.
Family-Friendly Flavor Adjustments
To make sourdough garlic bread appealing to all family members, consider balancing its tanginess with sweeter elements like roasted garlic or a hint of honey in the butter mixture. This adjustment can make the bread more approachable and enjoyable for everyone.
| Ingredient | Quantity | Notes |
|---|---|---|
| Sourdough Loaf | 1 loaf | Homemade or bakery-bought |
| Softened Butter | 1/2 cup | Unsalted, at room temperature |
| Minced Garlic | 3 cloves | Adjust to taste |
5. Whole Wheat Garlic Bread
For a nutritious twist on a classic favorite, consider making whole wheat garlic bread, a healthier alternative that doesn’t compromise on flavor. This version retains the aromatic, savory goodness of traditional garlic bread while offering a boost of nutrients.
Ingredients and Preparation
To make whole wheat garlic bread, you’ll need 1 loaf of whole wheat bread (100% or a mix for a lighter texture), 3 cloves of garlic (minced), 1/2 cup of butter (softened), 1 teaspoon of dried herbs (such as parsley or oregano), and salt to taste. The key is to select a high-quality whole wheat bread that has a good balance of texture and flavor. When preparing the garlic butter, mix the minced garlic with softened butter, and consider adding a pinch of salt and some chopped fresh herbs to enhance the flavor.
Whole wheat bread can be denser and may absorb butter differently than white bread. To ensure even coverage, you might need to adjust the amount of garlic butter. Start by spreading the garlic butter mixture evenly across the bread, making sure to cover all surfaces.
Tips for Preparation:
- Choose a whole wheat bread with a good texture.
- Don’t overmix the garlic butter.
- Consider toasting the bread lightly before applying garlic butter for a crunchier texture.
Step-by-Step Baking Instructions
Preheat your oven to 350°F (175°C). Slice the whole wheat bread into appropriate portions, depending on your preference for serving size. Apply the garlic butter mixture evenly across the bread slices. Wrap the bread in foil and bake for 10-15 minutes. For a crisper crust, remove the foil and bake for an additional 2-3 minutes, or until the bread reaches your desired level of crispiness.
Baking Tips:
- Monitor the bread closely during the baking time to avoid overcooking.
- Adjust baking time based on the density of the bread and your oven’s performance.
Nutritional Benefits
Whole wheat garlic bread offers several nutritional benefits, including higher fiber content, additional nutrients like iron and B vitamins, and a lower glycemic impact compared to white bread. These benefits make whole wheat garlic bread a more wholesome option for family meals.
Making Whole Wheat Appealing to Kids
To make whole wheat garlic bread appealing to kids, consider gradual transitions from white to whole wheat, creative presentations, and flavor enhancements that highlight the bread’s natural sweetness. You can also involve kids in the preparation process, letting them help with spreading the garlic butter or choosing the herbs.
By incorporating whole wheat garlic bread into your meal routine, you’re not only serving a delicious meal but also contributing to a healthier diet for your family.
6. Garlic Bread Rolls
Transform your garlic bread game with these easy-to-make garlic bread rolls, perfect for individual servings and ideal for family meals or gatherings.
Ingredients and Preparation
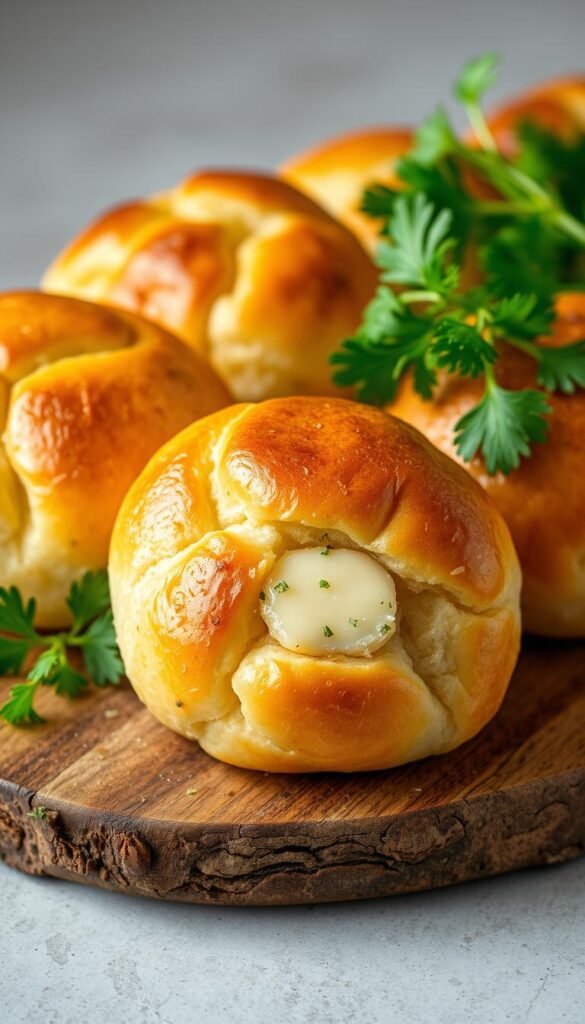
To make delicious garlic bread rolls, you’ll need soft, fresh dinner rolls or kaiser rolls. You can also use homemade dough for a more personalized touch. The key to flavorful rolls is in the garlic butter: mix softened butter with minced garlic, parsley, and a pinch of salt. For an extra layer of flavor, consider adding grated Parmesan or mozzarella cheese to the butter mixture.
The roll format allows for even distribution of the garlic butter and offers a fun twist on traditional garlic bread. You can choose to butterfly the rolls for a more generous filling or simply slice them partially and spread garlic butter in between.
Step-by-Step Baking Instructions
To bake your garlic bread rolls to perfection, preheat your oven to 375°F (190°C). Place the prepared rolls on a baking sheet lined with parchment paper, leaving a little space between each roll for even baking. Bake for 10-12 minutes, or until the rolls are golden brown and the butter is bubbly.
For an extra crispy top, you can broil the rolls for an additional 1-2 minutes. Keep a close eye to prevent burning.
Perfect for Lunchboxes
Garlic bread rolls are a fantastic addition to school or work lunches. To keep them fresh, wrap cooled rolls in plastic wrap or aluminum foil. You can also pack them in a lunchbox with a small ice pack to keep them cool. Consider pairing with a simple green salad or a piece of fruit for a well-rounded meal.
Freezing and Reheating Tips
To freeze, place baked and cooled garlic bread rolls in a single layer on a baking sheet and freeze until solid. Then, transfer them to a freezer-safe bag or container. To reheat, bake frozen rolls in a preheated oven at 350°F (175°C) for about 5-7 minutes, or until heated through. You can also reheat them in the microwave wrapped in a damp paper towel, though the texture might be softer.
As “The best way to get started is to quit talking and begin doing.” – Walt Disney, making garlic bread rolls is a simple yet rewarding process that can elevate your mealtime or snack time.
7. Gluten-Free Garlic Bread
Creating delicious gluten-free garlic bread requires some adjustments to traditional recipes, but the result is well worth the effort. Individuals with gluten intolerance or sensitivity can now enjoy this beloved side dish without compromising their dietary needs.
Ingredients and Preparation
The key to great gluten-free garlic bread starts with selecting the right gluten-free bread. Look for a bread that is not too dense and has a neutral flavor to absorb the garlic butter well. For the garlic butter, mix softened butter with minced garlic, salt, and your choice of herbs like parsley or thyme. Some gluten-free breads can be dry, so consider adding a bit more butter or using a higher ratio of butter to garlic for extra moisture.
Essential ingredients include: gluten-free bread, unsalted butter, garlic, salt, and herbs. Be sure to check the ingredient labels to ensure that all components are gluten-free.
Step-by-Step Baking Instructions
Preheat your oven to 375°F (190°C). Slice the gluten-free bread into appropriate portions, depending on whether you’re making slices or a loaf. Spread the garlic butter mixture evenly onto the bread, making sure to cover all surfaces to combat dryness. Place the bread on a baking sheet lined with parchment paper and bake for 10-12 minutes, or until the bread is toasted and the butter is melted.
Best Gluten-Free Bread Options
Some top recommendations for gluten-free bread include Udi’s Gluten-Free Bread and Canyon Bakehouse Gluten-Free Bread. These brands offer a good balance between texture and flavor neutrality, making them ideal for garlic bread.
Texture Improvements for Family Approval
To make gluten-free garlic bread appealing to everyone, consider adding extra cheese, such as mozzarella or parmesan, to the garlic butter for an extra layer of flavor. You can also experiment with different seasonings or add-ins like chopped nuts or dried herbs to enhance texture and taste.
8. Spicy Jalapeño Garlic Bread
For those who like a little excitement in their meals, Spicy Jalapeño Garlic Bread is a game-changer. This bold variation adds a spicy kick to the classic garlic bread, making it perfect for those who enjoy a bit of heat in their meals.

Ingredients and Preparation
To make Spicy Jalapeño Garlic Bread, you’ll need a few key ingredients, including fresh or pickled jalapeños, garlic, butter, and your choice of bread. The key to this recipe is balancing the heat from the jalapeños with the richness of garlic and butter.
When preparing the jalapeños, you can choose to use them fresh or pickled, seeded or unseeded, depending on your desired level of heat. Fresh jalapeños provide a more vibrant flavor, while pickled jalapeños add a tangy twist. Seeding the jalapeños reduces their heat, making them more palatable for those who prefer milder flavors.
Creating a balanced garlic-jalapeño butter is crucial. This involves mixing softened butter with minced garlic and jalapeños. You can adjust the amount of jalapeños to suit your family’s taste preferences.
| Ingredient | Quantity | Notes |
|---|---|---|
| Jalapeños | 2-3 | Fresh or pickled, seeded or unseeded |
| Garlic | 3 cloves | Minced |
| Butter | 1/2 cup | Softened |
| Bread | 1 loaf | French or Italian |
Step-by-Step Baking Instructions
Baking Spicy Jalapeño Garlic Bread involves a few simple steps. First, preheat your oven to 350°F (175°C). Then, spread the garlic-jalapeño butter evenly onto the bread, ensuring that the jalapeño pieces are distributed throughout.
To prevent moisture issues from fresh jalapeños, it’s essential to bake the bread until it’s crispy. This not only enhances the texture but also helps to mellow the heat slightly.
“The key to great garlic bread is in the balance of flavors and textures. Adding jalapeños introduces a thrilling dimension that elevates the entire dish.” – Food Enthusiast
Adjusting Spice Levels for Different Family Members
To accommodate different spice tolerances within your family, you can create a single batch of bread with varying heat zones. This can be achieved by applying the garlic-jalapeño butter in a gradient, with more or less jalapeño depending on the section.
Cooling Accompaniments
To temper the spiciness of the jalapeño garlic bread, consider serving it with cooling accompaniments like a refreshing salad, a dollop of sour cream, or a glass of cold milk. These help to balance the heat, making the dish more enjoyable for everyone.
9. Roasted Garlic Bread with Caramelized Flavors
Elevate your homemade garlic bread to the next level by incorporating roasted garlic for a caramelized flavor profile. This variation transforms the traditional recipe by using garlic that’s been roasted to perfection, bringing out its natural sweetness and depth.
Ingredients and Preparation
To make roasted garlic bread, you’ll need a few key ingredients, starting with a head of garlic suitable for roasting. The choice of oil is also crucial, as it complements the caramelized flavors of the roasted garlic. Additional seasonings can enhance the roasted notes, while the right bread variety can pair well with the complex flavor profile.
Key Ingredients:
- A head of garlic for roasting
- Olive oil or other complementary oils
- Additional seasonings (herbs, salt, etc.)
- Bread of your choice (e.g., baguette, ciabatta)
Roasting garlic mellows its flavor, creating a sweet and nutty taste that’s perfect for garlic bread. The process involves cutting the top off a whole head of garlic, drizzling it with olive oil, and roasting it in the oven until the cloves are soft and caramelized.
Step-by-Step Baking Instructions
Incorporating roasted garlic into your garlic bread can be done by mixing it into butter or directly into the bread dough. The key is achieving the right consistency and baking approach to highlight the caramelized flavors without burning the garlic.
- Mix roasted garlic with softened butter and spread it on your bread.
- Bake in a preheated oven at 350°F (175°C) for 10-12 minutes, or until golden brown.
Roasting Garlic to Perfection
To roast garlic to perfection, preheat your oven to 400°F (200°C). Cut the top off a whole head of garlic, drizzle with olive oil, and roast for about 30-40 minutes, or until the cloves are soft and caramelized.
Milder Flavor for the Whole Family
Roasted garlic bread is an excellent option for families because the roasting process mellows the garlic’s pungency, making it more approachable for children and those who prefer milder flavors. Serve it alongside pasta dishes or as a side to your favorite soups.
10. Parmesan Garlic Bread Sticks
For a fun and interactive twist on garlic bread, try making Parmesan garlic bread sticks. This format transforms the classic into convenient, dippable sticks perfect for family meals or gatherings. The combination of garlic and Parmesan creates a flavorful snack that’s hard to resist.
Ingredients and Preparation
To make Parmesan garlic bread sticks, you’ll need dough, garlic, Parmesan cheese, and olive oil. You can use store-bought pizza dough or bread dough for convenience, or make your own homemade dough for a more personalized touch. The key is to create a garlic-Parmesan coating that adheres well to the sticks. Mix minced garlic with melted butter, grated Parmesan, and a pinch of salt for a simple yet effective topping.
Preparing the dough involves rolling it out into a rectangle, about 1/4 inch thick. Brush the garlic-Parmesan mixture evenly over the dough, making sure to cover it completely for maximum flavor.
Step-by-Step Baking Instructions
Cut the dough into strips, about 1 inch wide. Twist each strip gently to create the bread sticks. Place them on a baking sheet lined with parchment paper, leaving a little space between each stick for even baking. Bake in a preheated oven at 375°F (190°C) for 12-15 minutes, or until golden brown. Keep an eye on them to ensure they don’t overcook.
Fun Shapes for Kids
To make garlic bread sticks more appealing to kids, consider shaping them into fun forms like twists, knots, or simple animal shapes. This adds an element of play to mealtime and can make the experience more enjoyable for children.
Dipping Sauce Pairings
Parmesan garlic bread sticks pair well with a variety of dipping sauces. Marinara, alfredo, and pesto are classic choices that complement the garlic-Parmesan flavors. For a lighter option, try an herb-infused olive oil. These pairings enhance the overall snacking experience and offer something for everyone.
Storing and Reheating Your Homemade Garlic Bread
Ensuring your homemade garlic bread remains delicious over time requires proper storage and reheating techniques. Whether you’ve made a classic Italian garlic bread or a more innovative version, the key to enjoying it over several days lies in how you store and reheat it.
Proper Storage Methods
To keep your garlic bread fresh, it’s essential to store it correctly. For short-term storage, you can keep it at room temperature or in the refrigerator. At room temperature, wrap the bread tightly in plastic wrap or aluminum foil to prevent moisture loss. If you plan to consume it within a day, this method is sufficient. For longer storage, refrigeration is recommended. When refrigerating, it’s crucial to wrap the bread properly to prevent it from drying out or becoming soggy.
For longer-term storage, freezing is an excellent option. Wrap the garlic bread tightly in plastic wrap or aluminum foil and then place it in a freezer-safe bag. When you’re ready to eat it, simply thaw it at room temperature or reheat it directly from frozen using one of the methods described below.
| Storage Method | Duration | Tips |
|---|---|---|
| Room Temperature | Up to 1 day | Wrap tightly in plastic wrap or aluminum foil |
| Refrigeration | Up to 3 days | Wrap properly to prevent drying out |
| Freezing | Up to 2 months | Wrap tightly and store in a freezer-safe bag |
Reheating Techniques That Maintain Texture
Reheating garlic bread can be done in several ways, each with its advantages. The oven method is ideal for restoring crispiness. Preheat your oven to 350°F (175°C), wrap the garlic bread in foil, and heat for 10-15 minutes. For a crisper crust, remove the foil for the last 2-3 minutes.
The toaster oven is another great option, especially for smaller portions. It allows for more controlled heating and can produce a crispy exterior and a warm interior. Microwave reheating is quick but can result in a soft or rubbery texture. To minimize this, wrap the bread in a damp paper towel to maintain moisture.
“The art of reheating garlic bread lies in balancing crispiness with warmth without drying it out.”
For an optimal reheating experience, consider using an air fryer. It can restore the bread’s crispiness without drying it out. Simply place the garlic bread in the air fryer basket and heat at 320°F (160°C) for a few minutes until warmed through.
Perfect Pairings: What to Serve with Your Garlic Bread
Elevate your garlic bread experience by pairing it with complementary dishes that enhance its flavor. Creating a well-rounded meal is not just about throwing a few items together; it’s about crafting a culinary experience that delights the palate.
Family-Friendly Main Dishes
When it comes to pairing garlic bread with main dishes, the options are vast and varied. For a classic Italian-inspired meal, consider serving your garlic bread alongside spaghetti Bolognese or chicken parmesan. These dishes complement the savory flavors of garlic bread while providing a satisfying and filling meal. For a heartier option, a warm, comforting bowl of minestrone soup or Italian wedding soup pairs beautifully with the crispy, garlicky goodness of freshly baked bread.
- Spaghetti with meatballs
- Grilled chicken or steak
- Vegetarian lasagna
Complementary Side Dishes and Dips
No meal is complete without a few well-chosen side dishes. To balance out the richness of garlic bread, consider adding some lighter options to your table. A simple green salad with a light vinaigrette or a medley of roasted vegetables can provide a refreshing contrast. For added flavor, dips like marinara sauce, white bean hummus, or a roasted red pepper dip can be served alongside your garlic bread for dipping.
- Marinara sauce for a classic Italian taste
- White bean hummus for a creamy, protein-rich option
- Roasted vegetable spread for a flavorful and healthy choice
By thoughtfully selecting main dishes and complementary sides, you can create a meal that’s both satisfying and delicious, with your homemade garlic bread at the center.
Conclusion
As we’ve explored the world of homemade garlic bread, it’s clear that this simple delight can bring numerous benefits to families. From the homemade garlic bread benefits like cost savings and control over ingredients, to the joy of creating lasting family cooking traditions, there’s much to be gained from baking your own garlic bread.
Developing bread baking skills not only enhances your culinary repertoire but also provides a sense of accomplishment and pride in your creations. Whether you’re a novice or an experienced baker, the variety of recipes presented offers something for everyone, accommodating different tastes, dietary needs, and skill levels.
As you begin your garlic bread-making journey, remember that perfection comes with practice. Start with simpler recipes and involve your family members in the process to create meaningful shared experiences. By doing so, you’ll not only refine your baking skills but also forge lasting memories around the dinner table.
We invite you to share your own garlic bread experiences and adaptations, fostering a sense of community around this beloved food. With every slice, you’ll be savoring the fruits of your labor and enjoying the simple pleasures of homemade garlic bread.


